Advertisement
Quick Links
Advertisement

Related Manuals for GENUV MG-08


Summary of Contents for GENUV MG-08
- Page 1 Manual Radiometer 8 GUVX-T1XGS8 20210310-V0.1-CH.LEE Genicom Co., Ltd Page 1...
- Page 2 MG-08 GUVX-T1XGS8-L(LA9.2) User Manual Genicom Co., Ltd Page 2...
- Page 3 1. Product Feature and Specifications Description : GUVX-T1XGS8-L series is portable instruments with LCD display. GUVX-T1XGS8-LA9.2 series is probe type portable instruments with LCD displa TOTAL UV Item UVC –LED Far UV Blue light UV INDEX (UVA+B) GUVV- GUVB- GUVC- GUVL- GFUV- GVBL-...
- Page 4 2. Relative Response Curve 1) GUVV-T10GS8-L(LA9.2) 2) GUVB-T11GS8-L(LA9.2) 3) GUVC-T10GS8-L(LA9.2) 7) GUVI-T11GS8-L(LA9.2) 6) GVBL-T12GS8- 4) GUVL-T11GS8-L(LA9.2) 5) GFUV-T10GS8-L(LA9.2) L(LA9.2) 3. Warning Wear protective gear when monitoring UV lamps. Allow lamps to warm-up prior to taking reading (at Least 5 minutes). Do not subject the meter to extremes in temperature, humidity, When the surface contamination of the product, wipe with a Keep sensor free of oil, dirt, etc.
-
Page 5: Part Names
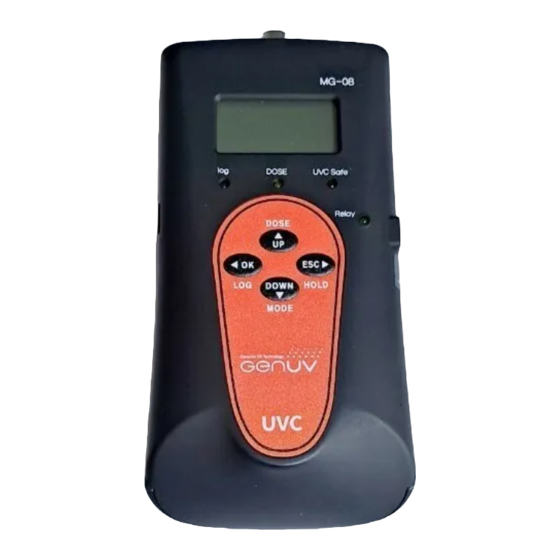
4. Part Names 4-1) Front side ① Light-receiving Unit ② LCD Diaplay ③ Function Display LED ④ Function Button ④ Function Button ④ Function Button ④ Function Button [UV Radiometer 8 front side] ① Light-receiving Unit ② LCD Display This is 4-digit LCD display. ③... - Page 6 4-2) Back side Model No. : GUVX-T1XS7.1-L ① Products Information Sticker Type : UV Index Meter Detection Range : XXX-XXX nm Power Range : 0~100.0 mW/㎠ NIST Traceable Made in KOREA by Genicom Co., Ltd. www.geni-uv.com ② Battery Cover S8-001 ③...
- Page 7 5. Product Operation Guide 5-1) Battery check Open the battery cover in the back of main unit and check for a 9V battery is or isn’t. 5-2) Warning for battery replacement Pulling the connector forcibly can cause it to break. Please hold the battery connector and detach the battery Genicom Co., Ltd Page 7...
- Page 8 5-3) Power ON and Off Press the ESC button shortly for power ON, Press 3 second for Power OFF. Press 3 SN:MG08201217001 Press shortly second (Power ON) (Power OFF) 5-4) Function Button Press OK button for 1 second to start logging. Press again for 1 second to exit at logging.
- Page 9 Press the DOWN button for 1 second to cycle into measurement mode, information mode, DOSE Graph mode, UVC Safer mode and measurement mode. 20/12/17 11:52:32 20/12/17 11:52:32 323.0 323.0 323.0 323.0 0.000 uW/Cm2 00:00:00 323 uW/Cm2 Press 1 second (Information Mode) Press 1 Press 1 second...
- Page 10 Press the ESC button shortly to pause the measured value. Press again shortly to displays the measured value. 20/12/17 11:52:32 20/12/17 11:52:32 323.0 323.0 Press shortly uW/Cm2 uW/Cm2 (HOLD ) HOLD Measurement Mode Press the ESC button for 1 second to resets DOSE, Min, Max, Avg, and measured values to 0.
- Page 11 5-5) Menu Setting Press the OK button for 3 seconds to display the setting menu. In the setting menu, you can set the date, time, set the network mode, adjust the backlight brightness, export the saved log, set the relay, set the sleep time, and check the serial number.
-
Page 12: Changing Network Mode
Changing Network Mode In the menu mode, select 2.Network Mode by using the UP and DOWN buttons. 1. Setup Date Time Current network Mode 2. Network Mode 3. Export Log None 4. LCD Backlight Update Network Mode 5. Relay Control 6.Sleep Time None AP BT... - Page 13 Changing a LCD backlight brightness In menu mode, select 4.LCD Backlight by using the UP and DOWN buttons and press the OK button. 1. Setup Date Time 2. Network Mode now brightness : 2 3. Export Log Update brightness : 0 4.
- Page 14 Changing a sleep time In the menu mode, select 6.Sleep Time by using the UP and DOWN buttons. 1. Setup Date Time Current sleep time 2. Network Mode 1 Minute 3. Export Log 4. LCD Backlight 5. Relay Control 1m 5m 10m30m 1h 6.Sleep Time Press OK Button Menu...
- Page 15 Exit from Menu Mode In the menu mode, select 8.exit by using the UP and DOWN buttons and press the OK button. 7. Serial number 20/12/17 11:52:32 8. exit 323.0 uW/Cm2 Press OK Button Measurement Mode Menu Mode Downloading a log file using a smartphone or laptop in AP mode.
- Page 16 5-6) Measuring the light power 90˚ The sensor is located on the top of the body. The measurement surface of the sensor is positioned perpendicular to the UV light source or solar light that you want to measure. 5-7) Notify when to replace the battery 20/12/17 11:52:32 323.0...
- Page 17 6. FAQ Error item Check list Press and hold the power button for more than 3 seconds. A short push will not power up. When power is Please make sure that 9V battery is installed. turned on Make sure that the battery power is at least 7 V. If it is below 7 V, the power is not turned on or low battery picture is output.
- Page 18 7. A/S request in case of product failure - Should any failure is found in product, please call the sales company or customer center for A/S. - Product warranty period is 1 year from the date of procurement with no charge. However, failure which is caused by user’s misuse or carelessness within warrant period or any failure after the warrant period shall be chargeable for it’s A/S.
- Page 19 MEMO Genicom Co., Ltd Page 19...
- Page 20 Genicom Co., Ltd Page 20...
Need help?
Do you have a question about the MG-08 and is the answer not in the manual?
Questions and answers