
Related Manuals for VWR M4


Summary of Contents for VWR M4
- Page 1 ® M4 Spectrophotometer Instruction Manual European Catalogue Number EU/UK/CH Plug: 634-1087 Version: 1.0.0 Issued: 24, June 2019...
- Page 2 Legal Address of Manufacturer Europe VWR International bvba Researchpark Haasrode 2020 Geldenaaksebaan 464 B-3001 Leuven + 32 16 385011 http://be.vwr.com Made in China...
-
Page 3: Table Of Contents
User replaceable accessories and spare parts Technical service Warranty Compliance with local laws and regulations Equipment disposal Functions Installation Install and Uninstall VWR Software Multi Wave Pro Run VWR Software Multi Wave Pro Introduction Main Interface Menus Bar and Tools Bar... - Page 4 General Operating Instructions Operation Quantitative Analysis Kinetics Analysis Spectrum Scan Multi-wavelength Analysis DNA/Protein Analysis Energy Scan Other Functions APPENDIX 1 APPENDIX 2...
-
Page 5: Warning
Do not use the device if it is damaged, especially if the main power cable way is in any damaged or defective. Repairs may only be carried out by the service technicians from your local VWR office and authorized contractual partners. The device must be connected to a power outlet that has a protective ground connection. -
Page 6: Package Contents
Unpacking Open the package, according to carefully check the packaging packing list items, if found inside the packaging are missing or damaged items please contact your local VWR office and authorized contractual partners. Installation Placement Place the instrument on the stable table carefully. -
Page 7: Overview
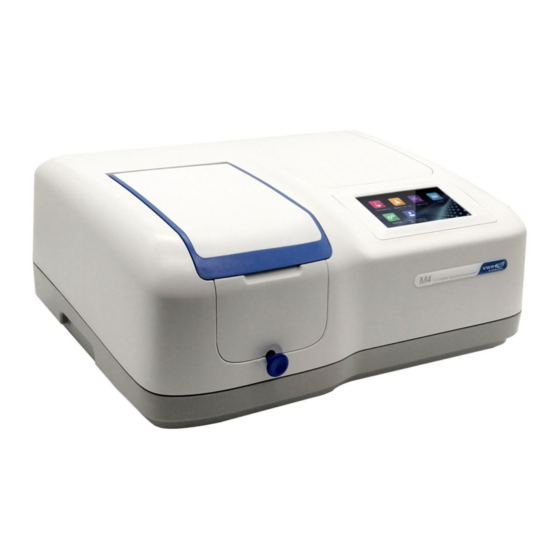
Electromagnetic compatibility 2014/30/EU. Restriction on use of Hazardous Substances RoHS 2011/65/EU and their amendments. Overview M4 Spectrophotometer used in Chemistry, Pharmaceuticals, Biochemical, Metallurgy, Light Industry, Textile, Material, Environments, Medical, Education and some other fields for Quality Control laboratories. Description Front View... -
Page 8: Getting Started
Fuse Seat Print Port USB Port Power (for PC) Socket Getting Started Turn On and Self-check Switch on the power. Self-check includes the following steps: Turn On Lamp → Locating Filter Disc → Locating Automatic Sample Holder (If Installed) → Get Dark Current → Locating Wavelength → Check Energy → Check System baseline. -
Page 9: Basic Operation
Photometry Measure the absorbance or transmittance of the sample. Quantitation Establish the standard curve and measure the concentration of the sample. Spectrum Scan the sample in a wavelength range. File Manage files stored in the instrument or USB disk. System System calibration and setup. Performance verification Verify the performance of the instrument. -
Page 10: Measurement Results Operation
Measurement Results Operation Open Open result(s) from internal/USB memory. Save Save result(s) to internal/USB memory. Print Print result(s). Delete Delete selected result(s). Rename, Print and Delete Results Rename a Sample: List interface, press the area Name, key in the sample name (Up to 8 characters). -
Page 11: Files Operation
Save Results Save: 1. List interface, press the icon Save. 2. Press the icon to select the Internal/USB memory which the file to save. 3. Type in the file name, press the button Save. Files Operation Internal Memory Internal memory of the spectrophotometer. USB Memory USB extended mass memory. -
Page 12: Calibration And System Settings
Copy File(s) From/To ress the Check Box, press the button File management interface, p Internal Memory/USB Memory: (Need USB disk). Export File(s) To *.csv ress the Check Box, press the button File management interface, p Format (Need USB disk). Export File(s) *.txt ress the Check Box, press the button... - Page 13 Edit Clock Accept Accept the new value. Select Tab Clock in the System interface. Press the value of year, month, date, hour, minute or second to change. Press the icon to accept new value. Memory Management Format Internal Memory Format the internal memory of the spectrophotometer. Format USB Memory Format the USB mass storage.
- Page 14 Language Selection Accept Accept the new language. Select Tab Language in the System interface. Select a language, press the icon to change. General Options Select Tab General Options in the System interface. Beep: Press the icon to turn on/off the beep. Brightness: Press the icon to decrease/increase the brightness of...
-
Page 15: Performance Verification
Restore Defaults Restore Restore the parameters to factory settings. Select Tab Restore defaults in the System interface. Select an item, press the icon to restore. Performance Verification Select the icon in the main interface. Display options to verify the performance of the instrument. - Page 16 Important information Before verifying the performance, the instrument needs to be preheated for 30 minutes, and then re-measure dark current. Verifying Wavelength Accuracy and Wavelength Repeatability Select Tab Wavelength accuracy in the Performance verification interface. Standard Sample: Holmium oxide solution or equivalent filter Measurement: 1.
-
Page 17: Operation
Standard Sample: 10g/L NaI solution or equivalent filter (220nm), 50g/L NaNo solution or equivalent filter (340 or 360nm) Measurement: 1. Remove something in the measurement channel, close the sample chamber cover, press the wavelength value, type in the wavelength of measurement;... - Page 18 Main interface, press the icon to start a Photometry application. Mode Switch measurement mode to %T, Abs or Energy. Wavelength Set measurement wavelength. Zero Do 0Abs/100%T. Read Measure sample and record the result. List View the result(s) list. Increase/Decrease Increase/Decrease the gain of signal. Only for Energy mode. Press the icon to switch to the measurement mode.
-
Page 19: Quantitation
Quantitation Quantitation mode is used to measure the concentration of the sample(s). Main interface, press the icon to start a Quantitation application. Establish Method Quantitation interface, press the button Establish method. A=A1: Absorbance is equal to the measured absorbance value of the Measurement measured wavelength 1... - Page 20 A=A1-m*A2: Absorbance is equal to the difference between the absorbance value of the measured absorbance at the wavelength 1 and the wavelength 2, m is the Coefficient A=A1/A2: Absorbance is equal to the ratio of the measured absorbance value of the measured wavelength 1 and 2 Wavelength 1 Measurement wavelength 1 Wavelength 2...
- Page 21 (2) Put the 1# standard sample in the measurement channel, press the button Read to measure. (3) Repeat step 3.3 to measure other of the standard samples. (4) Press the item to input concentration of standard samples, press the button Next. 2.3.3 Input standard sample to establish standard curve (1) Press the item Abs and Conc to input absorbance and concentration of standard samples, press the button Next.
- Page 22 Measure Sample Quantitation interface, press the button Measure sample. Method Select measurement method. Zero Do 0Abs/100%T. Read Measure the sample and record the result. List View the result(s) list. Press the icon to select method.
-
Page 23: Spectrum
Press the button Open to load measurement method stored in the internal memory/USB disk. Press the button Measure to accept the new measurement method and back to measurement interface. Put the reference in the measurement channel, press the icon to do zero. Put the sample in the measurement channel, press the icon to measure a sample and record the result. - Page 24 Method Set the measurement parameters. Zero Scan baseline. Read Scan the sample and draw curve. Stop Stop scanning. List View the result(s) list. Press the icon to setup the measurement parameters. Start wavelength Scan start wavelength End wavelength Scan end wavelength Step Scan interval: 0.1,0.2, 0.5, 1.0,2.0, 5.0,10.0 nm HS: High speed...
-
Page 25: Troubleshooting
Press the item to select or key in the parameters, press the button Measure to accept the new parameters and back to measurement interface. Put the reference in the measurement channel, press the icon to scan baseline. Put the sample in the measurement channel, press the icon to scan a sample and record the result. -
Page 26: Repair And Maintenance
Problem Cause Solution Power cord connection is not reliable Improve connectivity Power on, no response Fuse burning Replace fuse Glass cuvettes used in UV Range Use quartz cuvettes Sample is not Stable Improve the sample The concentration of sample is too high Diluted sample Measurement uncertainty Power Supply Voltage Low or not Improve the Power Supply... -
Page 27: User Replaceable Accessories And Spare Parts
5. Reset the fuse seat Replace the fuse seat in the power socket. Push the fuse case by using the screwdriver, and turn it clockwise, the fuse seat will be locked when released. 6. Switch on the power Plug the socket and switch on the power. User replaceable accessories and spare parts Description Quantity... -
Page 28: Technical Service
(2) years from date of delivery. If a defect is present, VWR will, at its option and cost, repair, replace, or refund the purchase price of this product to the customer, provided it is returned during the warranty period. -
Page 29: Equipment Disposal
Equipment disposal This equipment is marked with the crossed out wheeled bin symbol to indicate that this equipment must not be disposed of with unsorted waste. Instead it's your responsibility to correctly dispose of your equipment at lifecycle -end by handling it over to an authorized facility for separate collection and recycling. -
Page 30: Functions
You can set the gain(1 to 8 times); Automatically list spectrum peaks; Installation We will show you how to install VWR Software Multi Wave Pro on your PC in this chapter. Install and Uninstall VWR Software Multi Wave Pro PC System Requirements ... - Page 31 Unplug the USB cable if connected before, click Next; After finished copy all files of VWR Software Multi Wave Pro, it will start install the USB Drive. Click Next; Select “I accept this agreement”. Click Next to copy files to PC;...
- Page 32 Plug the USB cable, click Next; 10. Click Finish to finish all the setup. Uninstall VWR Software Multi Wave Pro Start→All Files→VWR Software→Uninstall VWR Software Multi Wave Pro 1.0, click Next to uninstall. After all the files were removed, click Finish to end.
-
Page 33: Run Vwr Software Multi Wave Pro
Search to automatically search the instrument’s communication port, after get the communication port, click OK to save setting. If you choose the option of Connect to Spectrophotometer When Start, the instrument will connect to the PC automatically when you run VWR Software Multi Wave Pro next time. Set User’s Information Click Main Menu→Options, pop-up Options window, click User’s Information tag, choose it and input relative... -
Page 34: Introduction
Tool Bar to connect with PC. After connection, the icon is on the pitched on state, you can release PC if you click the icon again. Introduction We will introduce the VWR Software Multi Wave Pro in this chapter. Main Interface This is the main interface after start. - Page 35 General Operating Instructions Set Wavelength Click the icon on the Tools Bar to set wavelength. Input the value of wavelength in the frame of Set Wavelength, click Goto to confirm. Then the instrument will move the wavelength to the point you want, then it blanks automatically.
- Page 36 Name a Sample 1. Select the line you want to rename. 2. Double-click Sample Name, input the sample’s name, and press Enter on the keyboard to confirm. Save a Testing Click the icon in Tools Bar, input the file name and click Save to confirm in the dialog box. Open a Testing Click the icon in Tools Bar, choose the file name you need in the dialog box, then click Open to confirm.
- Page 37 We will introduce you how to use VWR Software Multi Wave Pro. Quantitative Analysis VWR Software Multi Wave Pro use Standard Curve to test the sample’s concentration at a fixed wavelength point. 1. Click the icon in the Tools Bar shortcut to create a new Quantitative Analysis.
- Page 38 2. Click the icon in the Tools Bar Shortcut to set the parameters of Quantitative Analysis. Choose test method; Input test wavelength in WL Frame; Choose the Concentration Unit ; Choose curve fitting method; Create Standard Curve Two methods are under your choice to create a new curve.
- Page 39 3. Pull the unknown into the light path (if it is Automatic 8-cell Holder in the instruments, click to set the location of the relative cell first), Then click the icon, click in the shortcut toolbar to test, the test result will display in the data sheet.
- Page 40 Spectrum Scan We’ll introduce how to create the spectrum while using Spectrum Scan function. 1. Click the icon on the Tools Bar to start a new Spectrum scan; 2. Click the icon in the Tool Bar to set the parameters of Wavelength Scan; 3.
- Page 41 Multi-wavelength Analysis We’ll introduce how to measure a sample in different wavelengths (≤20). 1. Click the icon on the Tools Bar, a new form appears on the screen; 2. Click the icon on the Tools Bar to set the parameters; 3.
- Page 42 DNA/Protein Analysis We will introduce how to operate a DNA/Protein Analysis. 1. Click the icon on the Tools Bar to begin a DNA/Protein Analysis; 2. Click the icon to set parameters; 3. Choose the measure method first. We provide you 2 methods to measure, and you can also definite the coefficients and wavelength by yourself;...
- Page 43 Energy Scan We will introduce how to scan the variability of energy in the range of wavelength. 1. Click Main Menu→File→New→Energy Scan to build Energy Scanning; 2. Click the icon on the Tools Bar to set parameter; 3. Select Lamp Switch Mode, Wavelength Range, Intervals, Repeat Times and Coordinate Range; ▪...
- Page 44 Other Functions We will introduce the additional function about VWR Software Multi Wave Pro in this chapter. Turn On/Off W Lamp Click Main Menu→Device→Turn On/Off W Lamp to open or close W Lamp. Turn On/Off D2 Lamp Click Main Menu→Device→Turn On/Off D2 Lamp to open or close D2 Lamp.
- Page 45 Three Wavelengths Method: Abs.=A -(WL )*(A )/(WL APPENDIX 2 Methods of DNA/Protein Analysis Method 1: = (A Protein Ratio=(A )/ (A (Optional) 260nm 280nm 320nm =62.9, f =36.0, f =1552, f =757.3 Method 2: = (A Protein Ratio=(A )/ (A (Optional) 260nm 230nm...
Need help?
Do you have a question about the M4 and is the answer not in the manual?
Questions and answers