
Subscribe to Our Youtube Channel
Related Manuals for fann 520 HT


Summary of Contents for fann 520 HT
- Page 1 Model 520 HT Ultrasonic Cement Analyzer Instruction Manual Manual No. D01157216 Revision A Instrument No. 102546636 © 2015 Fann Instrument Company...
- Page 2 Printed in USA. The information contained in this document includes concepts, methods, and apparatus which may be covered by U.S. Patents. Fann Instrument Company reserves the right to make improvements in design, construction, and appearance of our products without prior notice.
-
Page 3: Table Of Contents
Model 520 HT UCA Table of Contents Introduction ......................5 1.1 Document Conventions ..................6 Safety ........................7 2.1 Safe Pressurization ..................7 2.2 Safe Heating ....................7 2.3 Safe Electrical Operation .................. 7 Features and Specifications ..................8 Installation ......................10 4.1 Connecting the Drain Line ................ - Page 4 Model 520 HT UCA 10.1 Warranty ......................35 10.2 Returns ......................35 D01157216 Revision A, October 2015...
-
Page 5: Introduction
Model 520 HT UCA Introduction Cements are a critical element in the drilling, completion, workover, and abandonment of wells. For each application, a cement slurry is designed with specific properties and is given additives that provide predictable slurry density, volume, viscosity, compressive strength, fluid loss, gas migration, and thickening time. -
Page 6: Document Conventions
Model 520 HT UCA Document Conventions The following icons are used as necessary in this instruction manual. NOTE. Notes emphasize additional information that may be useful to the reader. CAUTION. Describes a situation or practice that requires operator awareness or action in order to avoid undesirable consequences. -
Page 7: Safety
Model 520 HT UCA Safety Safe laboratory practices and procedures should be observed while operating and maintaining the Model 520. Follow the instructions provided to avoid personal injuries or damage to the equipment. Always wear appropriate personal protective equipment (PPE) when operating or maintaining the Consistometer. -
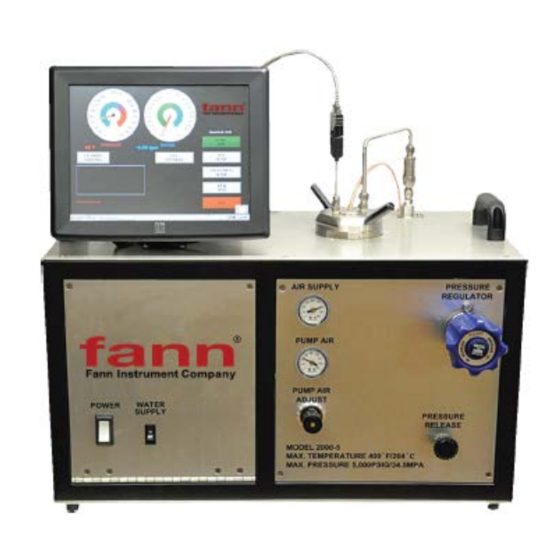
Page 8: Features And Specifications
Model 520 HT UCA Features and Specifications The major features of the UCA are listed below: • Easy to install. • Completely self-contained. No need for pressure controllers, control boxes, or computer • All software is Windows ® * based. - Page 9 Model 520 HT UCA Table 3-1 Model 520 Specifications Category Specification Electrical Input Voltage 230 VAC (+15%) Input Power 2500W Input Current 11 A Input Frequency 50-60 Hz Mechanical Height 14.5 in. (36.8 cm) Width 26 in. 66 cm) Depth 15.3 in.
-
Page 10: Installation
It is good practice to leave space behind the instrument so that qualified Fann personnel can have service access. If this is not possible, try to make the unit easy to disconnect and move for service. - Page 11 Model 520 HT UCA be dry and relatively free from dirt and oil. The air should be supplied at a pressure of 20-100 psig (1.4-6.8 bar). Compressed nitrogen may also be used in place of the Drive air should be filtered between 5μ and 40μ and compressed air if necessary.
-
Page 12: Connecting An Uninterruptible Power Supply (Ups)
Model 520 HT UCA Before plugging the monitor into the rear of the UCA, make certain power to the instrument is off. If a printer is included with the instrument, it may be connected to the control box. Connect the USB connector on the printer cable to the control box. The printer must also be connected to a suitable power source. -
Page 13: Using The Touchscreen Software
Model 520 HT UCA Using the Touchscreen Software Touch screens were created to provide operators with an easy to use interface. They allow the user to input and view data without a keyboard or mouse. The touch surface is able to detect contact for selecting options. -
Page 14: The Main Menu
USB memory module or network drive. VIEW TEST – This button allows the user to view any previously stored test. The software looks for the tests in the C:\Fann directory and you will be prompted to D01157216... -
Page 15: Test Setup Menu
Model 520 HT UCA select a file. Use care when choosing a file name so you will be able to retrieve it if desired. Test Setup Menu From this menu the user can setup the parameters for the next test. - Page 16 Model 520 HT UCA accept the current profile and continue or cancel to make further modifications. Once the first ramp has been entered, press the NEXT STEP button to proceed to the next ramp or DONE to end the profile programming. If you end the programming at this point and start the test the temperature will reach set point and then fall because there was no second ramp or soak entered.
-
Page 17: Instrument Setup Menu
Model 520 HT UCA Instrument Setup Menu From this menu the user can run diagnostics on the ultrasonic transducer circuitry to determine if everything is functioning properly. This menu is also used to move data files from the UCA computer to another PC in order to free space in the UCA memory. -
Page 18: Diagnostics
Model 520 HT UCA Never calibrate transit time with a cement slurry or steel bar from other devices. Diagnostics The Diagnostics button displays a diagnostic screen where the user may pulse the transducer and display the waveform on the screen. This tool allows the user to quickly verify transducer operation. -
Page 19: Running A Test
Model 520 HT UCA Running a Test Once a test has begun, a RUN-TIME MENU of current values will be shown. The user may control all available parameters of the instrument from this menu. Under the Pressure column, the user can turn the water supply to the pressure vessel on or off and can turn the pump on when the cylinder is filled. - Page 20 Model 520 HT UCA Under the Time column, the user can STOP TEST or select SHUTDOWN parameters for the Auto Shutdown feature. The user can select between Time (hr) or Compressive Strength and adjust the target value using the Shutdown Value control.
-
Page 21: Stopping A Test
Model 520 HT UCA This will display a waveform similar to the one shown below. It may take up to a minute for the waveform to be displayed since the software waits for the next pulse to occur. Note that the amplitude of the first waveform peak must be greater than 20 or an error will occur. -
Page 22: Networking
Model 520 HT UCA cables are required. 2. Press the ARCHIVE DATA button on the UCA touch screen. 3. Navigate to the USB drive and select the desired save location on the pop- up window. 4. The files will be copied to the USB memory module and deleted from the UCA. - Page 23 Model 520 HT UCA 2. Apply compressed air pressure of 60-180 psi to the cell. 3. Insert the cell into the instrument and connect the top transducer and thermocouple cables. 4. In Instrument Setup, select CALIBRATE TRANSIT TIME from the touch screen menu.
-
Page 24: Front Panel Controls
Model 520 HT UCA Front Panel Controls The controls can be divided into three categories: hydraulic controls that control the pressure inside the reservoir, pneumatic controls that control the air pressure to the pump, and the switches that control the electrical components of the instrument. -
Page 25: Electrical Controls And Displays
Model 520 HT UCA operate. The pressure should be between 20 and 100 psig (1.4 and 6.8 bar) when the pump is not in use. It is normal for the inlet air pressure to drop when the pump is in operation. If the air pressure drops significantly and the pump seems unable to achieve the desired pressure, it may be because the compressed air system is not capable of delivering enough air to operate the pump. -
Page 26: Operation
Model 520 HT UCA Operation To prepare the test cell, follow this procedure: 1. Apply a light coating of grease to the inside of the test cylinder, including the top and bottom plug surfaces that are in contact with the cement slurry. -
Page 27: Setting Up Automatic Pressure Control
Model 520 HT UCA plug and the other end to the connector on the rear panel labeled TRANSDUCER. 8. Align pressure port in top plug with high pressure fitting on top of autoclave assembly. Rotate test cell in a clockwise direction only. The top or bottom plugs may come unscrewed if the test cell is rotated counterclockwise. -
Page 28: Stopping A Test
Model 520 HT UCA software. Make certain the system is holding pressure before proceeding. The pump contains metal-to-metal inlet and outlet check valves that may not be bubble tight, so a small amount of pressure leakage is to be expected. - Page 29 Model 520 HT UCA 1. Press the STOP TEST button to manually stop a test. WARNING! Failure to maintain pressure at temperatures above 212°F (100°C) may cause water in the test cell to vaporize into steam. Use the pump to maintain pressure on the test cell until the cell is cool.
-
Page 30: Cleaning The Test Cell
Model 520 HT UCA Cleaning the Test Cell When the test cylinder has been cooled and removed from the instrument, it should be cleaned according the following guidelines. 1. Place the test cylinder in a vice, topside up. The top of the cylinder is marked on the cylinder wrench flats. -
Page 31: Interpreting Test Results
40+ years ago. Having strength values compute a bit low just makes for conservative results. Fann recommends customers use algorithm B unless they have reason to think another algorithm might work better. If the crush data seems to indicate that algorithm A fits a slurry better than algorithm B, then there is no reason not to use algorithm A. -
Page 32: Troubleshooting And Maintenance
Model 520 HT UCA Troubleshooting and Maintenance Troubleshooting Table 9-1 Troubleshooting Guide Symptom Cause Remedy Leak Check fittings for leaks and tighten fittings. TESCOM Regulator System builds Leaking Rebuild regulator or replace. pressure but will not PRESSURE RELEASE hold pressure Close valve tightly. - Page 33 Model 520 HT UCA Symptom Cause Remedy Faulty heater. Replace. Faulty solid state relay. Replace. Faulty thermocouple. Replace thermocouple. Temperature display Loose connection in Check for loose wiring and correct is erratic. thermocouple wiring. if necessary. USB Cable unplugged Ensure that USB from computer to back of instrument is connected.
-
Page 34: Maintenance
Model 520 HT UCA Symptom Cause Remedy pump muffler. remove all water from air side of pump. Pump may also be sent back for repair. Maintenance The maintenance requirements for UCA are simple and should consume little time. The first maintenance item is to check and replace the 2 micron filter element inside the high pressure filter housing periodically. -
Page 35: Warranty And Returns
Fann or, at Fann's option, to the allowance to Customer of credit for the cost of such items. In no event shall Fann be liable for special, incidental, indirect, consequential or punitive damages.
Need help?
Do you have a question about the 520 HT and is the answer not in the manual?
Questions and answers