
Related Manuals for Castex CASC505

Summary of Contents for Castex CASC505
- Page 1 AUTOMATIC TYRE CHANGER CASTEX CASC505 Authorized representative: Anna Bednarz ul. Fordońska 44C 85-719 Bydgoszcz tel. 52 515 64 22...
-
Page 2: Table Of Contents
Instructions for use of the tyre assembly system. INDEX 1. Introduction ..........................2 2. General safety rules ......................... 33 ..............................3 3. Technical data ......................... 33 ..............................3 4. Transport ..........................34 ..............................3 5. Rozpakowywanie ........................44 ..............................4 6. Workplace ..........................44 .............................. -
Page 3: Introduction
Warning This manual is necessary for proper operation and maintenance of the device. Before starting work, it is imperative that you read this user manual. Please keep this manual carefully so that you can use it at any time if necessary. 1. -
Page 4: Workplace
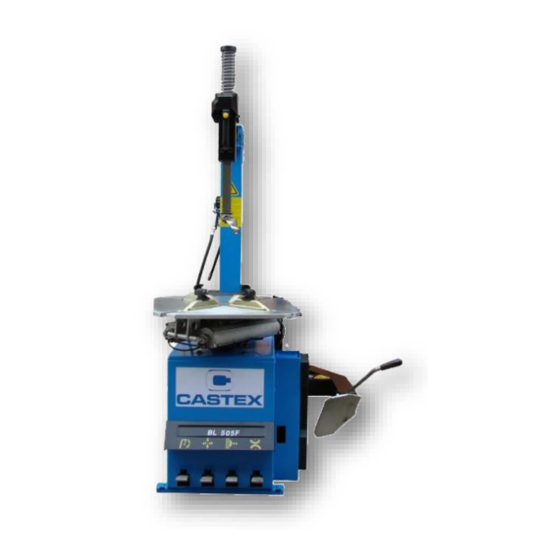
5. Unpacking To unpack the machine, remove the steel strips first and remove the box. Check for missing parts. In cases of doubt, please contact the service before installing the device. 6. Workplace The selected workplace should meet health and safety requirements, have access to electrical power supply and air source as described in the manual. - Page 5 7. Device Description Rotation pedal Stage Break-off pedal Table jaw Brush clamp pedal Column Column tilt pedal Arm of the carer Head Vertical frames Clamping bracket Horizontal arm The paw of the de-super Rubber resistance cap Fitter bucket Sączek Auxiliary arm 006 (model 505f) Tank (optional) Pumping pedal (optional) Note: The 19.20 instrument from the table above used when using the tireless...
-
Page 6: Installation Method
8. Installation method Columns : Fig. 4 1). Prepare the necessary tool 2). Insert the column (1, Fig. 4) into the square opening of the device (2, Fig. 4), push the airline (3, Fig. through the hole in the column. 3). -
Page 7: How The Device Is Used
Warning: The rated power of the mounting device is indicated on the back of the unit panel. Please check the voltage. All work carried out on the electrical installation may be outsourced only to qualified personnel. The manufacturer is not responsible in case of non-compliance with the rules of conduct contained in the instructions. -
Page 8: Loosening The Tyre Edging
Warning: Before starting work, make sure that all weights are removed from the rim. 13.1 Loosening of the tyre edging Be careful when loosening the tyre edging. Pressing the pedal of the paw of the caresser, will trigger with great force the arm of the carer, which can threaten objects located within the device. -
Page 9: Tyre Assembly
Holding the mounting bucket (16, Fig. 3) in the position according to Fig. 8 turn the Stage clockwise, constantly pressing the pedal (1, Fig. 3) until the tire completely disemmbs the rim. To avoid injury, keep your hands and body parts as far away from the table as possible when it rotates. - Page 10 13.5. Pumping of the heatless wheel (without the use of a special device for pumping heatless tyres) Important: Fig. 10 Tire filling steps are dangerous, be careful, follow the instructions. A tyre burst can cause serious injury and even death to the operator. The device has a decompression valve that prevents the pressure from exceeding the 3.5bar value in the assembly unit.
- Page 11 d. The tyre is pumped at a higher pressure than recommended by the manufacturer. e. The operator does not comply with the required safety standards. 5) Wind tires (a) . Unscrew the valve. B. Connect the tip to the tyre valve while making sure it is tightly coupled. c.
- Page 12 -Clean the machine regularly after each use. Clean the Stage with detergent at least once a week and lubricate the sliders and jaws. - Empty the air filter from the water once a day to ensure that the cylinder is working. At least once a month, check the oil level in the hydraulic unit.
- Page 13 16.Fault detection Vulnerability Cause Help The Stage rotates only in the Faulty switch Replace one page or not at all. Damaged belt Replace Engine malfunction Check cables or cables: Replace the engine if it is damaged. The problem with lowering and lifting Leakage from the air system Check all parts of the air the jaws, jamming on the Stage.
- Page 14 Product name and symbol Customer*) Customer Address Seller's stamp and signature (in the absence of a stamp and signature, the Guarantor, i.e. CASTEX, is considered to be the Seller Anna Bednarz on the basis of proof of sale) Customer Signature...
- Page 15 *) The owner of the equipment making claims under the guarantee is obliged to provide personal data in accordance with Art. 23 paragraph 1 point.3 of the Personal Data Protection Act of 29.07.1997, as amended. D size I COLLECTION PROTOCOL I hereby confirm the reception of the device according to the following specifications on......
- Page 16 For distance purchases, this voucher must be returned to the guarantor within 14 days from the date of purchase of the device. Warranty Terms CASTEX hereinafter referred to as the Guarantor provides a guarantee for the smooth operation of the above-called equipment within 12 months from the date of purchase. This guarantee covers:...
- Page 17 Recipient is obliged to immediately report this fact to CASTEX or the Distributor. Please write down the damage report with the Courier delivering the device at the time of delivery.
- Page 18 + 8 and 25 degrees C. 12. CASTEX reserves the right to refuse free service in the absence of a warranty card. 13. In case of purchase of the device/equipment at a distance, the Buyer undertakes to send back to the Seller/Guarantor page III - the collection protocol and receipts for the Guarantor.
Need help?
Do you have a question about the CASC505 and is the answer not in the manual?
Questions and answers