Table of Contents
Advertisement
Quick Links
We value your feedback!
Your input helps to create even better
products and experiences.
Share the warmth and leave a review.
convectair.com/sharethewarmth
INSTALLATION AND USER'S GUIDE
To be read and kept by the user.
A BRAND OF GLEN DIMPLEX AMERICAS
SOPRANO
Fan-forced
Wall Heater
7216600000R00
7809
Advertisement
Table of Contents

Related Manuals for Glen Dimplex ConvectAir SOPRANO 7809


Summary of Contents for Glen Dimplex ConvectAir SOPRANO 7809
- Page 1 We value your feedback! Your input helps to create even better products and experiences. Share the warmth and leave a review. convectair.com/sharethewarmth INSTALLATION AND USER’S GUIDE To be read and kept by the user. A BRAND OF GLEN DIMPLEX AMERICAS 7216600000R00...
-
Page 3: Table Of Contents
Foreword Dear owner, Congratulations on the purchase of your new CONVECTAIR premium electric heater. To obtain the best results and the ultimate in performance and comfort, please take a moment to read the installation, operation and maintenance instructions detailed in this manual. Table of Contents Specifications . -
Page 4: Specifications
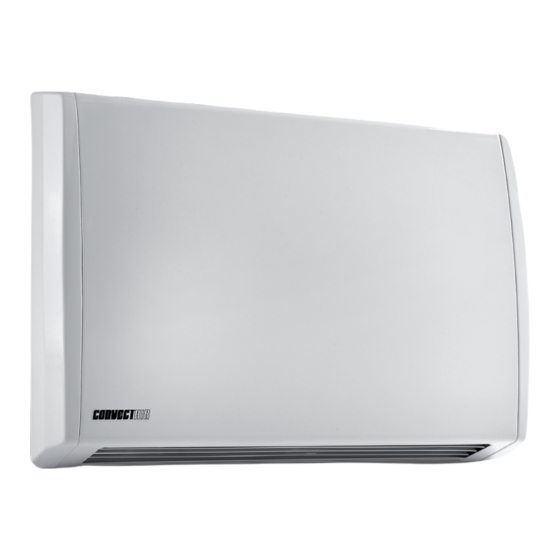
Specifications The Soprano is a compact, discreet and efficient unit that may be used in any room of the house. It features forward-louvered air outlets, which direct air towards the centre of the room. During the installation, the Soprano allows you to select a wattage, either 750 W or 1500 W. -
Page 5: Location Recommendations
Location Recommendations PLEASE READ CAREFULLY: These instructions are essential for safe installation and use of your CONVECTAIR unit. This unit must be connected to a 240 Volt 60 Hz. Switch breaker in the off position “OFF” before connecting. Convectair recommends that the unit be installed by a qualified electrician in accordance with national and local codes. -
Page 6: Installation And Mounting
Installation and Mounting TOOLS REQUIRED #2 Phillips (4) 1½" Screws Stud Finder Screwdriver (Optional) (4) Wall anchors (if needed): Wire Strippers Utility Knife must be suitable for min. 50 lb / 22.7 kg Wire Connectors Level Tape Measure... - Page 7 1 Ensure the wall bracket is installed on a flat surface and the grilles on the back of the heater are not obstructed. 2 Release mounting bracket by pressing and pulling the locking tab on the back side of the heater using a flat screwdriver (Fig. 2). 3 Position the mounting bracket on the wall and ensure it is level horizontally.
-
Page 8: Electrical Connection
Electrical Connection CAUTION: - DO NOT INSTALL HEATER OVER A BATHTUB OR OTHER CONTAINER. - DO NOT USE IN AREAS WHERE GASOLINE, PAINT, OR FLAMMABLE LIQUIDS ARE USED OR STORED. - From the junction box connect the ground wire to the unit’s green wire, using wire connectors (not included). -
Page 9: Operating Instructions
Operating Instructions The operation can vary according to the type of control used. Please consult the instruction manual of the thermostat, timer, or wall switch used. CAUTION: THIS HEATER IS HOT WHEN IN USE. TO AVOID BURNS, DO NOT LET BARE SKIN TOUCH HOT SURFACES. -
Page 10: Maintenance
Maintenance For best performance and maximum efficiency of the appliance, regular maintenance is required. To remove dust on the outside of the heater and on the grilles, use a soft cloth. To remove a stain, dampen the cloth. To remove dust and debris that accumulate inside the heater, shut off the power to the heater at the breaker, remove the heater from the back bracket, vaccum it, and secure it to the back bracket before turning the power back on. -
Page 11: Identifying Your Device
Identifying Your Device IMPORTANT: PRODUCT INFORMATION APPEARS ON THE RATING LABEL. The rating label is placed on an internal side of the appliance near the supply grille, to allow for identification of the heater. It includes: - The complete model number (A), which must be included in any warranty claim. - Its power in Watts (B). -
Page 12: Warranty
Warranty 2 years against all defects / 5 years on the heating element. All CONVECTAIR devices have a dual warranty: two years against defects in materials and workmanship on all parts, and five years on the heating element itself. They are applicable from the date of purchase by the consumer and under the conditions specific to them. - Page 13 Share the warmth and leave a review. convectair.com/sharethewarmth 1 800 463-6478 | www.convectair.ca In keeping with our policy of continuous product improvement, we reserve the right to make changes without notice. A BRAND OF GLEN DIMPLEX AMERICAS © 2021 Glen Dimplex Americas...
Need help?
Do you have a question about the ConvectAir SOPRANO 7809 and is the answer not in the manual?
Questions and answers