
Subscribe to Our Youtube Channel
Related Manuals for Belling BFS60SCCER


Summary of Contents for Belling BFS60SCCER
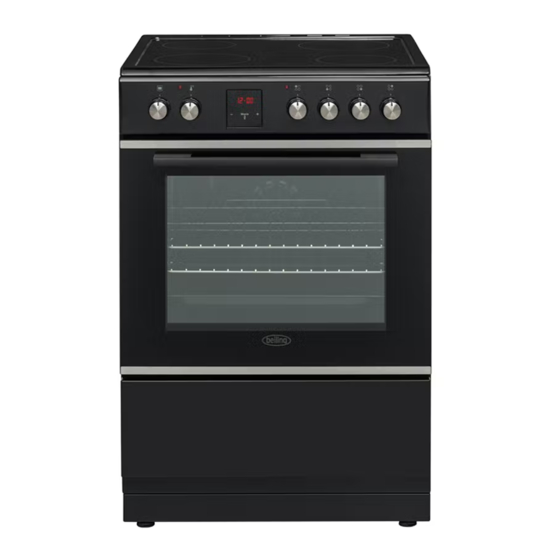
- Page 1 BFS60SCCER Freestanding Single Door Oven with Ceramic Cooktop INSTRUCTION MANUAL PLEASE READ THE INSTRUCTION MANUAL CAREFULLY BEFORE USING THE UNIT. www.belling.com.au www.belling.co.nz...
- Page 2 Icon Type Meaning WARNING Serious injury or death risk RISK OF ELECTRIC SHOCK Dangerous voltage risk SYMBOL ISO 7010 W021 CAUTION IMPORTANT / NOTE EN - 2...
- Page 3 CONTENTS EN - 3...
-
Page 4: Safety Instructions
1. SAFETY INSTRUCTIONS 1.1 General Safety Warnings WARNING: WARNING: WARNING: WARNING: EN - 4... - Page 5 WARNING: To prevent WARNING: CAUTION: EN - 5...
- Page 6 CAUTION: 1.2 Installation Warnings EN - 6...
-
Page 7: During Use
1.3 During Use EN - 7... - Page 8 in the “0 CAUTION: EN - 8...
-
Page 9: Disposal Of Your Old Machine
1.4 During Cleaning and Maintenance Disposal of your old machine EN - 9... -
Page 10: Installation And Preparation For Use
2. INSTALLATION AND Installation of the Cooker PREPARATION FOR USE WARNING : 2.1 Instructions for the Installer General instructions EN - 10... - Page 11 2.2 Electrical Connection and Safety WARNING: WARNING: THE APPLIANCE MUST BE EARTHED. EN - 11...
- Page 12 2.3 Safety Chain Screw (x1) Anti-tilting Bracket (x1) (will be attached to the wall plug (x1) wall) The document bag contains an anti-tilting kit. Loosely attach the anti- tilting bracket (1) to the wall using the screw (2) and wall plug (3), following the measurements shown in the figure and table below.
-
Page 13: Product Features
3. PRODUCT FEATURES Important: List of Components 4. Oven Door Control Panel EN - 13... -
Page 14: Use Of Product
4. USE OF PRODUCT 4.1 Hob controls Hints and Tips Ceramic Heater Important: WARNING: Knob Position Function Off position 4-5-6 position Important: Dual and Oval Heaters (if available) Circular Saucepan Base Small Saucepan Saucepan base that Residual Heat Indicator (if available) Diameter has not settled EN - 14... - Page 15 : The 4.2 Oven Controls Oven function control knob Oven thermostat knob Oven Functions : The Defrost: The use the defrost frozen food in the oven grilling and toasting foods on the upper : The Warning: The oven’s evenly disperses the heat in the oven so all : The oven’s EN - 15...
- Page 16 Warning: flashing using the “+” 4.3 Use of the Digital Touch Timer and “- Function Description Key Lock press and hold the “MODE Audible warning time adjustment 0:00” and “23:59” 1. Press “MODE flash and “000 Time adjustment A” and “000 “+”...
- Page 17 2. Press “MODE” until you see “end” and A” and the Semi-automatic time adjustment (cooking period) 3. Use the “+” and “- 2. Press “MODE” until you see “dur” and A” “A using the “+” and “-” A” and 0” position Full-automatic programming 2.
- Page 18 “A 4.4 Accessories The Flap Drawer 5. Press “MODE” until you see “end” and WARNING: A” and “+” and “- The Wire Grid for Deep Trays The Deep Tray A” and 0” position Sound Adjustment EN - 18...
-
Page 19: Cleaning And Maintenance
The Wire Grid Cleaning the Inside of the Oven WARNING Catalytic Cleaning 5. CLEANING AND MAINTENANCE 5.1 Cleaning WARNING: General Instructions EN - 19... - Page 20 Cleaning the Glass Parts Cleaning the Enamelled Parts Removal of Catalytic Liner Cleaning the Stainless Steel Parts (if available) Cleaning the Ceramic Glass WARNING : Removal of the Inner Glass B and EN - 20...
- Page 21 If the oven door is a triple glass oven Removal of the Oven Door EN - 21...
- Page 22 Removal of the Wire Shelf 5.2 Maintenance WARNING: Changing the Oven Lamp WARNING: EN - 22...
-
Page 23: Troubleshooting & Transport
6. TROUBLESHOOTING & TRANSPORT 6.1 Troubleshooting Problem Possible Cause Solution No heat or oven does not Do not frequently open the door unless you are 6.2 Transport EN - 23... -
Page 24: Warranty
WARRANTY The warranty period is 3 years from the date of purchase in Australia and 2 years from the date of purchase in New Zealand. For service advice, please contact the Customer Care Centre on 1300 556 816 (AU) / +64 9 274 8265 (NZ).
Need help?
Do you have a question about the BFS60SCCER and is the answer not in the manual?
Questions and answers