
Related Manuals for Faema PRESTIGE +


Summary of Contents for Faema PRESTIGE +
- Page 1 PRESTIGE USE AND INSTALLATION UTILISATION ET INSTALLATION Translation of the original instructions Traduction du manuel d’origine PRESTIGE + PRESTIGE 929-200-000 (rev. 2111)
- Page 2 An updated, electronic version of the manual can be accessed from the website shown at the bottom of the page, using the credentials below. Une copie actualisée du présent manuel est disponible au format électronique en accédant https://order.gruppocimbali.com/explorer/spareparts/page/login User ID: guest PW: Entr@nc3...
- Page 3 Translation of the original instructions English ............Traduction du manuel d’origine Français ............
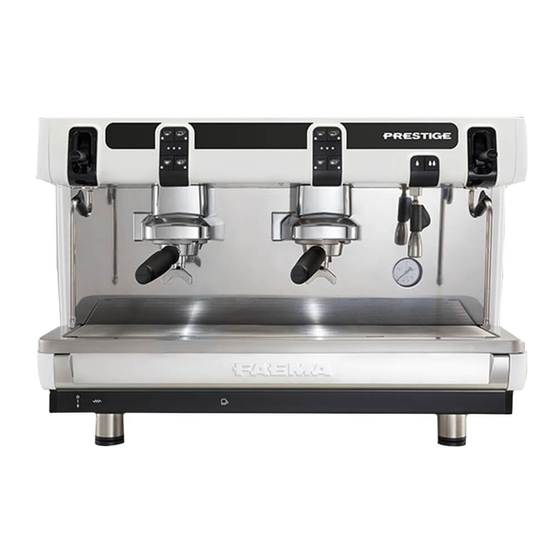
- Page 4 PRESTIGE (10)* 12 (16)* (22)* (2a)* (10)* (17a)*...
- Page 5 LEGEND LÉGENDE Main ON/OFF switch Interrupteur général 1a Boiler heat resistance switch (*) 1a Interrupteur branchement résistance chaudière (*) Steam adjustment knob Poignée de réglage de la vapeur 2a Autosteam selector (*) 2a Sélecteur Autosteam (*) Touche débit 1 café court Touche débit 2 café...
- Page 6 Type of machine 2 groups 3 groups type de machine 2 groupes 3 groupes [ bar ] [ °C ] [ psi ] [ °F ] Fluid - Fluide Capacity - Capacité [ L ] Service boiler water/steam Chaudière eau/vapeur Heat exchanger water Échangeur de chaleur...
- Page 7 Symbols - Symboles Generic warning - Avertissement générique WARNING: Electrical Hazard - ATTENTION: danger électrique WARNING: Trapping Hazard, Take Care with Hands - ATTENTION: danger d'écrasement des mains WARNING: Hot surface - ATTENTION: Surface chaude Environmental protection - Sauvegarde de l’environnement These pages of the manual are for the use of the worker operating the machine.
- Page 8 This page is intentionally left blank.
-
Page 9: Table Of Contents
Index Page Page General Rules ..........2 Changing the water in the boiler ....24 Groups of S version / 2.1 Transport and handling ........3 A version without display ....... 25 2.2 Installation Rules ..........4 Filter-holders ........... 25 Electrical Installation Rules ...... -
Page 10: General Rules
1. General Rules Please read the warnings and rules in this User’s Manual carefully before using or handling the machine in any way because they provide important information regarding safety and hygiene when operating the machine. Keep this booklet handy for easy reference. •... -
Page 11: Transport And Handling
WARNING authorized technicians. Carefully read the warnings and rules in this manual because they provide important information regarding safe installation, use and maintenance of the machine. Keep this booklet handy for easy reference. 2.1 Transport and handling Packaging • the appliance. •... -
Page 12: Installation Rules
Handling 2.2 Installation Rules • matches that of the electrical and water systems. • • • • • • • • Do not install the appliance outdoors. • • 4 EN... -
Page 13: Electrical Installation Rules
3. Electrical Installation Rules that allows for complete disconnection when there is a category III overload and that provides Check that the type of connection and voltage correspond with the information on the nameplate: see illustrations chapter, Figure 1. illustrations chapter, Figure 2. in a commercial environment. -
Page 14: Installation Check-Up
5. Installation Check-up WARNING WATER CONNECTIONS • FUNCTIONING • Boiler and operating pressures are normal. • The pressure gauge is working properly. • • WARNING TO THE INSTRUCTIONS BELOW: GROUPS • • HOT WATER • See the “Hot water dispensing” chapter in the User’s Manual. STEAM •... -
Page 15: Rules For The Worker Operating The Machine
6. Prescrizioni per l’operatore 6. Rules for the worker operating the machine BEFORE YOU START WARNING Groups • • Hot Water • A version with display. Run the water replacement as indicated in the section "Changing the water in the boiler". •... -
Page 16: Caution
7. Caution Danger of burns WARNING: Hot surface ACHTUNG: hot. Great care should be taken when ATTENTION: Surface chaude in the vicinity of these areas. ATTENZIONE: GENERAL tray. The manufacturer disclaims all liability for warmer tray. damages to items or persons due to improper MACHINE CLOSE-DOWN for purposes other than its intended use. -
Page 17: Decomissioning The Machine
9. Decomissioning the machine treated and disposed of in an To protect the environment, please proceed in compliance with the local laws in force. environment and health, and encourages the the machine is made. Improper disposal of electric equipment that fails ENVIRONMENTAL INFORMATION national disposal and recycling regulations. -
Page 18: Use
10. Daily operation “Before setting the machine to work, make sure that: • the main electric power switch is on; • the mains water tap has been turned on". MANUAL POWERING MANUAL POWERING DT version with display this phase, the icon will appear in the lower left hand corner of the display. - Page 19 S version / A version without display CAREFULLY PAY ATTENTION TO THE SEQUENCE FOR ACTIVATING THE SWITCHES (1) AND (1A). ONLY AFTER Press the luminous main switch (1) into position completed should you press the light switch that related indicator light switches on and the key also light up. activates the resistance (1A) into position At this point, the machine is ready for use.
- Page 20 only A version with display AUTOMATIC SWITCH OFF / SWITCH ON AUTOMATIC SWITCH OFF / SWITCH ON programmed times. Consult the “Service time menu” chapter to set the “ON Time Time When a service time is set, the machine automatically display: Note.
-
Page 21: Description Display Symbols (Only A Version With Display)
11. Description display symbols (only A version with display) WATER LEVEL The machine has reached the set work pressure and looks like this: temperature when the icon disappears from the display. RESISTANCE WIFI (*) resistance is activated and functioning. looks like this When the machine is in operation, the two icons alternate on the display, indicating the presence of the electric heating. -
Page 22: Changing The Water In The Boiler (Only A Version With Display)
12. Changing the water in the boiler (only A version with display) once a day. NOTE: the "WATER CHANGE request message appears at the time set and the water corresponds to the working pressure value. WATER CHANGE...% After the procedure, the machine will return to its normal 14 EN... -
Page 23: Hot Water Dispensing
means of the pressing disc of the grinder. S version. dispense. A version. again to stop dispensing. the preferred dose. The LED corresponding to the selected stop automatically. for continuous dispensing. Dispensing, whether for dosed servings or in the continuous 14. -
Page 24: Group With Temperature Adjustment Valve (Where Applicable)
Group with temperature adjustment valve (where applicable) To change the working temperature of the group, use the turn clockwise turn anticlockwise to increase the temperature. The system has a dual function: • To adapt the temperature of the water dispensed to the •... -
Page 25: Steam Dispensing
15. Steam dispensing Scalding hazard! appropriate insulating devices (A) to move the water and steam nozzles. General indications at a storage temperature no higher than 41°F (5°C) from the moment the container is opened and throughout its for this purpose. NOTE: at the end of the work day (or not more than 24 hours from the time the container is opened), any remaining milk must be discarded. -
Page 26: Dispensing With The Autosteam Selector
15.1 Dispensing with the Autosteam selector (2a) (where applicable) MILK Scalding hazard! appropriate insulating devices (A) to move the water and steam nozzles. General indications at a storage temperature no higher than 41°F (5°C) from the moment the container is opened and throughout its for this purpose. -
Page 27: Cleaning And Maintenance
16. Cleaning and maintenance For correct application of the food safety system (HACCP), please follow the instructions in this paragraph. Washing must be carried out using original “Service Line” products, see details on the last page. Any other product could compromise the suitability of the materials which come into contact with food products GENERAL OVERVIEW OF CLEANING INTERVALS WHEN EVERY... -
Page 28: Groups Of A Version With Display
Procedure to follow at the end of the working day on all groups or when signalled by the machine. COFFEE CIRCUIT CLEANING CYCLES circuit. NOTE: the following operations must be carried out when the machine is on and pressurized. Groups of A version with display COFFEE CIRCUIT performed at any time: ATTENTION, RISK OF SCALDING: During the wash... -
Page 29: Simultaneous Washing
SIMULTANEOUS WASHING SIMULTANEOUS WASHING CUSTOMER PROG. WASHING DATA MENU CUSTOMER Use the keys to Press the key. cover gasket. press the key. c h a n g e s e l . using the key will display: c o n f i r m The simultaneous washing p u s h O K t o c o n f i r m... -
Page 30: Sequential Washing
SEQUENTIAL WASHING SEQUENTIAL WASHING CUSTOMER PROG. WASHING DATA MENU CUSTOMER Use the keys to Press the key. cover gasket. press the key. c h a n g e s e l . c h a n g e s e l . using the key will display: c o n f i r m... -
Page 31: Single Washing
SINGLE WASHING: SINGLE WASHING: Cannot be carried out if the machine launches a warning message. Cannot be carried out if the machine launches a warning message. CUSTOMER PROG. WASHING DATA MENU CUSTOMER Use the keys to Press the key. cover gasket. press the key. -
Page 32: Block Function
BLOCK FUNCTION If the on the display: if the key is pressed and the instructions integrated as shown: on the display are followed, the wash cycle is performed message appears on the display: alternation. At this point, follow the steps on the previous pages for the wash cycle. -
Page 33: Groups Of S Version / A Version Without Display
Groups of S version / A version without display Pour in 5 g of detergent Remove the filter holder cover gasket. teaspoon. dispenser unit. Press the Do not remove the seconds. Repeat this step FILTER-HOLDERS - Pour one litre of hot water 50÷80°C holders in this solution for equal to two teaspoCons, in... -
Page 34: Steam Dispensing Pipes
MANUAL/AUTOMATIC CLEANING OF STEAM NOZZLES - Procedure to follow at the end of a working day > 194 °F MANUAL AUTOMATIC the part of the nozzle that comes into contact with the milk. Throw the water away and rinse the container thoroughly. Throw the water away and rinse the container thoroughly. -
Page 35: Hot-Water Dispensing Pipe
HOT-WATER NOZZLE - This operation must be carried out at the end of each working day Using a clean sponge, wash with hot water removing any organic residue present. Rinse carefully. GRILLE AND DRIP BASIN - This operation must be carried out at the end of each working day 3. -
Page 36: Defects - Malfunctions
17. Defects - Malfunctions Direct action by the customer PROBLEM CAUSE SOLUTION No electricity supply. Check the electricity supply. Check the position of the main switch Clean. Use a coarser grind. Loss of water under the machine. Discharge well clogged up. Clean. -
Page 37: Customer Programming
CUSTOMER PROGRAMMING (only A version with display) To EXIT menu press To ACCESS menu press Only if "Prog. cliente" is YES and “Program. block” is NO KEY MENU WASHING SELF.LEARNING DATA MENU CUSTOMER Press Press Press Press Press SELECTION Type COUNTERS SERVICE TIME c h a n g e... -
Page 38: Clock Adjustment
19. Clock adjustment Use the keys to adjust the clock. the key is pressed. 20. How to access the programming mode N.B. ONLY if the item “Program. block” is set on “NO". Note: When modifying data, the cursor changes to " ", or a slide bar with maximum and minimum settings will appear: To access programming press the... -
Page 39: Programming Measures Using The "Self-Learning" Function
21. Programming measures using the “SELF-LEARNING” function Hot water doses “SELF-LEARNING” function. pressed until the desired level is reached in the cup. CUSTOMER PROG. KEY MENU DATA MENU CUSTOMER of the display Use the the value reached is stored and appears under the key on the desired line and then press the key. -
Page 40: Key Menu - Hot Water Selection
following message will appear on the display: KEY MENU programing the amount of desired dispensing for each - water dose 23. Key menu - Hot water selection message will appear on the display: KEY MENU Type water - water dispensing time 24. -
Page 41: Data Menu - Counter Display And Zeroing
25. DATA menu - Counter display and zeroing Press the key and use the keys to position key. The following message appears on the display: message will appear on the display: CUSTOMER PROG. COUNTERS MENU KEY MENU DATA MENU CUSTOMER By pressing any dispensing key, the associated LED remains Parameters calculated are: - N. -
Page 42: Customer Parameters Menu
26. Customer parameters menu Press the key and use the keys to position To access "Customer parameters" press following message will appear on the display: message will appear on the display: CUSTOMER PARAMETERS CUSTOMER PROG. SERVICE TIME ITALIANO ENGLISH FRANCAIS DATA MENU DEUTSCH CUSTOMER... -
Page 43: Service Time Menu
SERVICE TIME MENU - Wash Pressing the key, the following message will appear on the display: set time, the display will show: this message “EXECUTE COFFEE WASHING”. SERVICE TIME DATE AND TIME Operations” paragraph. WASH key the indicated - ON time - OFF time General indications - Water Change... - Page 44 This page is intentionally left blank.
- Page 45 Index Page Page Consignes générales ........2 Groupes Versions S / ........25 2.1 Transport et manutention ....... 3 ......25 2.2 Consignes d’installation ......... 4 Buses à vapeur ..........26 Consignes électriques d’installation ..... 5 Buse eau chaude ..........27 Consignes hydrauliques d’installation ..
- Page 46 1. Consignes générales Lire attentivement les avertissements et les consignes contenus dans le manuel Conserver soigneusement ce livret pour une consultation ultérieure. • L’appareil est prévu uniquement pour préparer un café expresso et des boissons chaudes à l’aide comme non conforme. •...
- Page 47 ATTENTION Lire attentivement les avertissements et les consignes contenus dans le présent manuel car ils fournissent d’importantes indications concernant la sécurité d’installation, d’utilisation et d’entretien. Conserver soigneusement ce livret pour une consultation ultérieure. 2.1 Transport et manutention Emballage • La machine est conditionnée dans un emballage en carton robuste avec des protections internes •...
- Page 48 Manutention des charges. Manipuler l’appareil avec la plus grande attention, en utilisant, si possible, un engin de levage adéquat (type chariot élévateur). En cas de manutention manuelle, s’assurer que : - toujours utiliser les dispositifs de prévention des accidents du travail (chaussures, gants). 2.2 Consignes d’installation •...
- Page 49 3. Consignes électriques d’installation avec une distance d’ouverture des contacts permettant une interruption totale dans les conditions de surtension III et une protection contre le courant de fuite avec une valeur de 30mA. Ce dispositif Dans des conditions d’alimentation défavorables, l’appareil peut causer des chutes de tension transitoires. Le fabricant ne peut être tenu pour responsable des éventuels dommages causés par le manque de mise à...
- Page 50 ATTENTION BRANCHEMENT HYDRAULIQUE • Absence de fuites au niveau des branchements ou des tuyaux FONCTIONNEMENT • Pression de la chaudière et pression de service conformes aux valeurs normales • Fonctionnement correct du contrôle de pression • Fonctionnement correct du niveau •...
- Page 51 6. Consignes pour l’opérateur DEMARRAGE ACTIVITE ATTENTION SE AU MOINS UNE FOIS PAR JOUR. Groupes • • Eau chaude • Versions A avec l'écran. « ». • Versions S / Versions A sans l'écran. correspondante) jusqu’à prélever au moins 5 litres pour machine à 2 groupes, 8 litres pour machine à...
- Page 52 7. Avertissements Danger de brûlures WARNING: Hot surface ACHTUNG: parties chaudes. Il est dont recommandé de ATTENTION: Surface chaude ATTENZIONE: plus grande prudence. AVERTISSEMENTS GÉNÉRAUX Le fabricant décline toute responsabilité pour tout dommage matériel ou physique suite à une mauvaise utilisation de la machine à café. En cas de non-utilisation prolongée de Ne pas mettre en marche la machine à...
- Page 53 L’appareillage électrique ne peut pas être jeté Le tri sélectif, qui permet de recycler, comme un déchet urbain. Pour la sauvegarde de l’environnement, sur la santé et favorise la réutilisation et/ou le procéder selon la normative locale en recyclage des matériaux de composant le produit. vigueur.
- Page 54 UTILISATION 10. Mise en marche quotidienne de la machine • • le robinet principal d’alimentation en eau est ouvert ». ALLUMAGE MANUEL ALLUMAGE MANUEL dans la partie inférieure Attendre que la pression de travail programmée soit atteinte , la distribution se fera à la température atteinte à ce moment-là.
- Page 55 FAIRE PARTICULIEREMENT ATTENTION A LA SEQUENCE D’ACTIONNEMENT DES SEULEMENT APRES que le processus de chargement position eux aussi. Si le niveau de l’eau dans la chaudière est inférieur au minimum, la chaudière sera remplie jusqu’au niveau optimal, Attendre jusqu’à ce que le manomètre (19) indique la indiqué...
- Page 56 EXTINCTION / ALLUMAGE AUTOMATIQUE EXTINCTION / ALLUMAGE AUTOMATIQUE Menu horaire de service heure heure OFF”. juin 2019 mercredì 15:18:12 N.B. : quand la machine fonctionne avec allumage/ extinction automatique, ne pas utiliser MODALITÉ MODALITÉ ENERGY SAVING ENERGY SAVING activée manuellement en appuyant pendant quelques secondes sur la touche programmée.
- Page 57 NIVEAU Ce symbole indique que la machine est en phase Ce symbole indique le niveau d’eau dans la chaudière. est descendue en-dessous de 7 psi (0.5 bar). Durant la phase de chargement, la partie inférieure de manière alternée avec celle qui indique la pression Quand le niveau optimal est atteint, le symbole chaudière.
- Page 58 N.B. : la fonction « CHANGEMENT EAU » peut être programmée par le personnel technique : dans ce cas, échéant) correspond à la valeur de pression d’exercice. Appuyer et maintenir enfoncée pendant environ 5 secondes la touche de distribution d’eau chaude (11). Le message «...
- Page 59 13. Distribution de café et le remplir avec une dose de café moulu dans le cas monté sur le moulin ou le disque tasseur livré. moulu. mettre en place la (ou les) tasse(s) en dessous du (des) Versions S. Appuyer sur la touche de distribution de café et procéder à...
- Page 60 Chaque groupe de distribution de la machine est doté d’un bouton (36 production du café positionné sur le plateau repose-tasses. Le groupe de distribution atteint la température de fonctionnement sélectionnée environ 60 minutes après allumage de la machine faut tourner le bouton de réglage (36) comme suit : , la température , la température augmente.
- Page 61 15. Distribution de vapeur Danger de brûlure ! Utiliser les dispositifs isolants (A) pour manipuler les buses à eau et à vapeur. Dès son ouverture et tout au long de son utilisation, le lait doit être conservé à une température maximum de 41°F nos appareils de conservation du lait sont prévus lait résiduel doit être éliminé.
- Page 62 MILK Danger de brûlure ! Utiliser les dispositifs isolants (A) pour manipuler les buses à eau et à vapeur. Dès son ouverture et tout au long de son utilisation, le lait doit être conservé à une température maximum de 41°F nos appareils de conservation du lait sont prévus lait résiduel doit être éliminé.
- Page 63 17. Nettoyage et entretien 16. Nettoyage et entretien respecter les indications du respecter les indications du présent paragraphe. présent paragraphe. SI NÉCESSAIRE À CHAQUE QUOTIDIEN HEBDOMADAIRE OU DEMANDÉ OUTILS À UTILISER UTILISATION PAR LOGICIEL • petite brosse (1) CIRCUIT CAFÉ •...
- Page 64 NETTOYAGE CIRCUIT CAFÉ L’objectif du cycle de lavage est l’élimination des dépôts de graisse et de calcaire durant les préparations de café. circuit café. N.B. : les opérations suivantes doivent être exécutées avec la machine allumée et sous pression. CIRCUIT CAFÉ ATTENTION, RISQUE DE BRÛLURES : durant les phases Appuyer sur la touche «...
- Page 65 LAVAGE SIMULTANÉ LAVAGE SIMULTANÉ PROG. CLIENT LAVAGE MENU DONNEES Placer le curseur (ligne foncée) sur la ligne désirée en utilisant les touches Retirer le porte-filtre du , puis appuyer sur la Nettoyer la garniture de la Appuyer sur la touche groupe café.
- Page 66 LAVAGE ALTERNÉ LAVAGE ALTERNÉ PROG. CLIENT LAVAGE MENU DONNEES Placer le curseur (ligne foncée) sur la ligne désirée en utilisant les touches Nettoyer la garniture de , puis appuyer sur la Appuyer sur la touche groupe café. la cloche avec la petite touche brosse.
- Page 67 LAVAGE SIMPLE : LAVAGE SIMPLE : PROG. CLIENT LAVAGE MENU DONNEES Placer le curseur (ligne foncée) sur la ligne désirée en utilisant les touches Retirer le porte-filtre du , puis appuyer sur la Nettoyer la garniture de la Appuyer sur la touche groupe café.
- Page 68 FONCTION BLOCAGE En appuyant sur la touche , le message précédent sera et en est exécuté et la machine est débloquée. alternée. dépend du numéro des groupes de la machine. dans les pages précédentes. Versions A avec l'écran. Appuyer et maintenir enfoncée pendant environ 5 secondes la touche de distribution d’eau chaude (11).
- Page 69 Introduire le disque en Verser 5 g de détergent en Retirer le porte-filtre du Nettoyer la garniture de la caoutchouc dans le porte- poudre, correspondant à en- groupe café. cloche avec la petite brosse. viron deux cuillères à café. Fixer le porte-filtre au groupe.
- Page 70 NETTOYAGE BUSES À VAPEUR MANUELLES/AUTOMATIQUES - de travail > 194 °F MANUELLE AUTOMATIQUE Dans un récipient adéquat, prélever de la chaudière une Laisser la buse tremper pendant au moins 30 minutes. la partie de buse entrée en contact avec le lait. >...
- Page 71 BUSE EAU CHAUDE - bien rincer. NE PAS utiliser de produits abrasifs. 1. Enlever la grille du bac. 2. Extraire le bac. à l’eau courante. Danger de brûlures NE PAS introduire les mains sous le panneau frontal. BAC COLLECTEUR couvercle du bac collecteur. 2.
- Page 72 17. Anomalies - Avaries Interventions directes de la part du client ANOMALIE CAUSE SOLUTION La machine à café ne fonctionne pas Interruption de l’énergie électrique. 16) est éteint. général (1). 21) fuit. La garniture de la soucoupe est encrassée Nettoyer avec la petite brosse fournie de café.
- Page 73 PROGRAMMATION DU CLIENT 18. Flux de programmation client Pour sortir dans le menu presser Pour entrer dans le menu presser Seulement si "Progr. Client" est OUI et si “Bloc program.” est NON APPRENTISS. DOSES MENU TOUCHE LAVAGE MENU DONNÉES CLIENT Presser Presser Presser...
- Page 74 Pour régler l’horloge, utiliser les touches Juin 2019 À chaque pression, l’heure augmente (ou diminue) d’une mercredì 15:18:12 minute. reste stable sur « 00 ». 20. Comment accéder à la programmation réglé sur "NON" : curseur devient « Pour accéder à la programmation, appuyer sur la touche de réglage : dose eau 0090...
- Page 75 21. Programmation des doses avec la fonction d’”AUTO-APPRENTISSAGE” Doses eau chaude 1 - Appuyer sur le bouton à programmer. Maintenir le « AUTO- APPRENTISSAGE ». atteint dans la tasse. PROG. CLIENT MENU TOUCHE MENU DONNEES Au cours de cette phase, le temps en secondes (en Placer le curseur (ligne foncée) sur la ligne désirée en utilisant les touches , puis appuyer sur la touche...
- Page 76 22. Menu touche - Sélection Café MENU TOUCHE type 1 café dose eau Chaque groupe est commandé par un tableau de commande qui permet pour chaque touche de mémoriser la quantité à distribuer. - dose eau (impulsions doseur volumétrique). 23. Menu touche - Sélection Eau Chaude Appuyer sur la touche (11 MENU TOUCHE type...
- Page 77 Appuyer sur la touche et placer le curseur (ligne foncée) Les compteurs apparaissent en appuyant sur la touche MENU COMPTEURS PROG. CLIENT MENU TOUCHE N° café gr. 1 01234 N° café gr. 2 01234 N° café gr. 3 01234 MENU DONNEES N°...
- Page 78 Pour accéder au tableau "Paramètres client", appuyer sur Appuyer sur la touche et placer le curseur (ligne foncée) la touche PARAMÉTRES PROG. CLIENT HORAIRE DE SERVICE ITALIANO ENGLISH FRANCAIS MENU DONNEES DEUTSCH PARAMÉTRES CHOIX DE LA LANGUE PARAMÉTRES par défaut, après avoir accédé aux « Paramètres client », HORAIRE DE SERVICE positionner le curseur sur la langue souhaitée en appuyant ITALIANO...
- Page 79 MENU HORAIRE DE SERVICE - Lavage En appuyant surla touche après avoir placé le curseur EXÉCUTER LAVAGE CAFÉ”. HORAIRE DE SERVICE (simultané ou séquentiel), selon les modalités décrites DATE ET HEURE dans le paragraphe "Opérations de nettoyage". Heure ON 03:00 Heure OFF 03:00 Fermetu.
- Page 80 Cette page est délibérément laissée vierge. 36 FR...
-
Page 81: Illustrations
Illustrations - Illustrations - see Installation Rules chapters - voir chapitres Consignes d’installation Fig. 3 MACHINE MACHINE Fig. 1 Fig. 5 A) possible water-treatment device A) dispositif possible pour le Fig. 2 traitement de l’eau Ø 3/8 GAS Install a water feeding tap iInstaller un robinet d'eau Wire colours - Couleur des câbles... -
Page 82: Service Line
GRUPPO CIMBALI S.p.A. GRUPPO CIMBALI S.p.A. Via A. Manzoni, 17 Via A. Manzoni, 17 20082 Binasco 20082 Binasco (MI) Italy (MI) Italy La société GRUPPO CIMBALI se réserve le droit GRUPPO CIMBALI reserves the right to make changes d'apporter des changements à l'équipement de la to the machines in accordance with the needs of individual countries and on the basis of technological progresses. - Page 84 The Manufacturer reserves the right to modify the appliances presented in this publication without notice des appareils présentés dans cette publication GRUPPO CIMBALI SpA - 20082 BINASCO (MILANO) ITALY CERT. NR. 50 100 3685 / 10877 / 11721...
Need help?
Do you have a question about the PRESTIGE + and is the answer not in the manual?
Questions and answers
we need the dip switch configuration