
Related Manuals for Aritech DD66X Series


Summary of Contents for Aritech DD66X Series
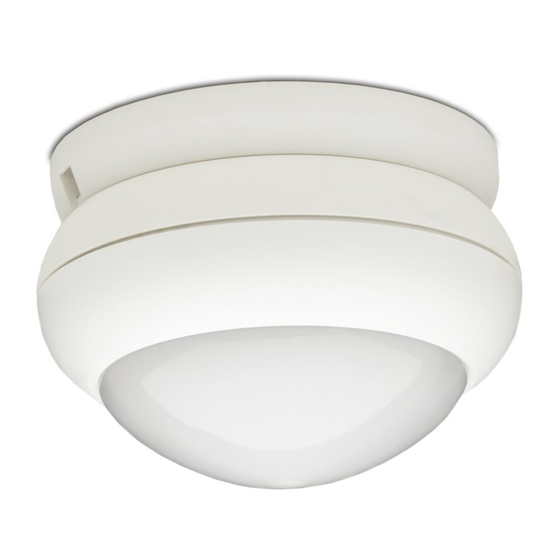
- Page 1 DD66X Series Dual Detector Installation Sheet EN DA DE ES NL NO PL PT SV © 2021 Carrier P/N 146249999-5 (ML) • REV J • ISS 27JUL21 1 / 42...
- Page 2 Floor pattern at mounting heights between Floor pattern at mounting heights above 3.0 m (9 2.5 and 3.0 m (8 and 9 10 m 10 m (32 ft. 10 in.) (32 ft. 10 in.) (26 ft. 3 in.) (26 ft. 3 in.) (19 ft.
-
Page 3: En: Installation Sheet
• Moving or vibrating objects like fans, heating or air- EN: Installation Sheet conditioning ducts WARNING! The equipment is not earthed. Any Introduction external circuit connected to the equipment must be The DD66X/AM family is made up of Dual/Dual-AM motion located within the same building and connected to a sensors. -
Page 4: Setting The Detector
Walk testing the detector SW 5 (AM detectors only): When to signal AM (anti- masking) or TF (technical fault) output The DD66X series provides a walk test mode for testing the Note: Switch 5 has an effect only when J1 (Setting LED) is detectors operation and coverage pattern if the detector is set to LED’s disabled. -
Page 5: Specifications
mode for 30 minutes. The detector returns to normal operating Continuously on Normal blinking (1 Hz) mode after the walk test mode times out. Tri-colour LED. During the walk test the installer should cross a curtain to Depends on the setting of the DIP switch SW8. trigger the PIR, and change the distance from detector to trigger the radar. - Page 6 Strømforsyning til detektoren skal være begrænset til 15 W. Contact information Carrier Fire & Security anbefaler, at detektoren gangtestes www.firesecurityproducts.com or www.aritech.com med jævne mellemrum og kontrolleres ved centralenheden Installation af detektoren DA: Installationsvejledning Afmonter monteringssoklen fra detektoren (se figur 2, punkt 1).
-
Page 7: Indstilling Af Detektoren
Vælg de ønskede indstillinger for jumper og DIP-switch FRA: Dag/nat-tilstand (D/N mode). Signalerer altid AM eller TF (se figur 7). Se afsnittet “Indstilling af detektoren” under Dag/Nat-tilstand. angående yderligere oplysninger. SW 6 (kun for AM-detektorer): AM-følsomhed For at montere / fastgøre detektormodulet til TIL: Høj. -
Page 8: Green Tilstand (Kun For Am-Detektorer)
30 minutter. Detektoren vender tilbage til normal driftstilstand, DD66XAM efter at gangtest tiden er udløbet. Under Walk Test skal Installatøren passere gardinet for at aktivere enheden, og ændre afstanden til detektoren for at aktivere den indbyggede radar. Den nemmeste måde er at Åben Gennemført Teknisk fejl... -
Page 9: Installation Des Melders
Querschnittsfläche. Alternativ müssen diese Leitungen der UL 2556 VW-1 entsprechen. Kontaktinformation Die Leistung der Spannungsquelle muss auf 15 W begrenzt www.firesecurityproducts.com eller www.aritech.com sein. Carrier Fire & Security empfiehlt, in regelmäßigen Abständen DE: Installationsanweisungen einen Gehtest durchzuführen und die Reaktion der Einbruchmeldezentrale zu überprüfen. -
Page 10: Einstellen Des Melders
SW 4: Erfassungsbereich 12 und 14 m bei kurzer Reichweite und zwischen 20 und 22 m bei langer Reichweite. Der Erfassungsbereich kann auf einen Wert zwischen Hinweis: Der Pfeil (Abb. 2, Position 4) gibt die 360 Grad bei normalen Anwendungen und 180 Grad bei Mittelvorhang-Richtung und die aktive Richtung an, wenn Sonderanwendungen festgelegt werden. -
Page 11: Durchführen Eines Gehtests
technischer Fehler gemeldet. Nach einem erfolgreichen LED-Anzeige (Dual)Bewegungsalarm wird das Zeitintervall zwischen DD66X Selbsttests um 6 Stunden verlängert. Dual Melder-Selbstkalibrierung Die DD66X Melderbaureihe erfordert eine Selbstkalibrierung, Start Geschl. Automatisch nach 45 s nachdem die Versorgungsspannung angelegt wurde. Es wird empfohlen 5 Minuten vor Ausführung eines Gehtest zu Geringe Spannung Offen Korrekte Spannung... -
Page 12: Rechtliche Hinweise
In VdS-Installationen muß ein VdS-Plombiersiegel über den Deckel und den Meldersockel geklebt werden. Die VdSPlombiersiegel können unter der Bestellnummer Introducción Aritech VS00 (50 Siegel pro Blatt) bestellt werden. La familia DD66X/AM se compone de sensores de movimiento Rechtliche Hinweise Dual/Dual-AM. Cuentan con la tecnología patentada Range... -
Page 13: Instalación Del Detector
La tecnología de procesamiento dual de este detector es muy Para montar el módulo del sensor en la placa de montaje, segura ante el riesgo de falsas alarmas. Sin embargo, debe utilice los tornillos proporcionados para su transporte en la evitar potenciales causas de falsas alarmas, como: placa de montaje (consulte la figura 2, elemento 5). -
Page 14: Prueba Remota/Autotest (Sólo A Los Detectores Am)
On: Sólo modo Día. Activa señales AM o TF sólo cuando el Es también altamente recomendable asegurarse que no sistema está en modo Día. Compatible con EN 50131-2-4 existan objetos en movimiento en la zona de cobertura del (programación por defecto). detector durante el proceso de autocalibración. -
Page 15: Especificaciones
DD66X DD669 DD666-D DD669AM DD666AM-D mín. 2,5 m, máx. 5 m Altura de instalación mín. 0.3, mín. 0.2, mín. 0.2, mín. 0.2, Rango de máx. máx. máx. máx. 3.0 m/s velocidades del PIR (memoria) Cambiar a modo Noche objeto 3.0 m/s 3.0 m/s 3.0 m/s 80 mA... -
Page 16: Información De Contacto
: recyclethis.info Carrier Fire & Security suosittelee ilmaisimen säännöllistä Información de contacto testausta kävelytestillä ja hälytysten aktivoitumisen tarkastamista keskuslaitteelta. www.firesecurityproducts.com o www.aritech.com Ilmaisimen asentaminen FI: Asennusohjeet Irroita asennuslevy (katso kuvaa 2, kohta 1). Kiinnitä asennuspohja kattoon sopivaan paikkaan kiinnitysaukkojen läpi (katso kuvaa 2, kohta 2). -
Page 17: Ilmaisimen Testaus Kävelytestillä
SW 8 (vain AM-ilmaisimia): AM- tai TF-lähdön toiminta Poistettu: Molempien merkkivalojen toimintaa ohjataan kävelytestitulolla ja järjestelmä päällä/poistulolla. Tämä aktivoi On: AM + hälytysrele. AM-hälytys aktivoi sekä AM- että ilmaisimen hälytysmuistitoiminnon. Kun järjestelmä ei ole hälytysreleen. TF-hälytys vain AM-releen (EN 50131). päälla eikä... -
Page 18: Tekniset Tiedot
Järjestelmä pois päältä Asetua J1: Poistettu DD669 DD666-D DD669AM DD666AM-D Kävelytesti pois päältä Normaali 12 mA 19 mA virrankulutus Merkkivalot Virrankulutus 10 mA 20 mA hälytyksessä DD66X Enimmäis- 15 mA 25 mA Kaksois virrankulutus väh. 2,5 m, enint. 5,0 m Kiinnityskorkeus väh. -
Page 19: Installation Du Détecteur
Carrier Fire & Security recommande de tester régulièrement le Yhteystiedot détecteur et de vérifier la centrale. www.firesecurityproducts.com tai www.aritech.com Installation du détecteur Relevez la plaque de montage (voir figure 2, objet 1). FR: Manuel d’installation Fixez la plaque de montage au plafond dans la position requise, à... -
Page 20: Auto-Test / Test À Distance (Détecteurs Am Uniquement)
Le système réinitialise une alarme AM une fois qu’il s’est J1: LEDs assuré que la cause de l’alarme AM a été supprimée. Si le On : Active les LEDs (par défaut). circuit AM ne peut pas revenir à ses niveaux de référence d’origine, soit le détecteur est toujours masqué, soit il a été... -
Page 21: Mode Vert (Détecteurs Am Uniquement)
vers le détecteur pour activer une double alarme. Voir les Allumage continu Clignotement normal (1 Hz) figures 4 et 5 pour le motif du rideau au sol. Voyant tricolore. Ensuite, l'installateur doit attendre 40 secondes avant de Dépend du réglage du commutateur DIP SW8. répéter le test de marche sur le rideau consécutif. -
Page 22: Information Réglementaire
Pour nous contacter La fonte di alimentazione del rilevatore deve essere limitata a 15 W. www.firesecurityproducts.com ou www.aritech.com Carrier Fire & Security raccomanda di eseguire regolarmente il IT: Istruzioni per l’installazione test di copertura del rilevatore e i relativi controlli sulla centrale. -
Page 23: Dispositivo Antirimozione
È possibile regolare il campo di rivelazione di un massimo Antimascheramento. In questa configurazione il rivelatore di ±15° (max 30°) mediante la rotazione della piastra di lavora con il solo infrarosso. montaggio prima di stringere le viti. J2: Impostazione doppio bilanciamento Collegare il rivelatore (vedere Figura 2, 3, 6). -
Page 24: Modalità Ecologica (Solo Rivelatori Am)
Modalità ECOLOGICA (solo rivelatori AM) Off: Reset autorizzato: resetta lo stato AM o TF dopo un allarme movimento (doppia tecnologia), quando il sistema è Il rivelatore può essere impostato in diversi modi per impostato nel modo giorno e test di copertura. Il LED giallo si minimizzare l’esposizione alle radiazioni della microonda di spegne e il sistema è... -
Page 25: Certificazione E Conformità
IP30 IK04 (Solo uso interno) IP/IK Informazioni di contatto Per la conformità alle norme CEI 79.2 – 2° Livello è obbligatorio Nota: www.firesecurityproducts.com o www.aritech.com l’utilizzo della protezione antirimozione. P/N 146249999-5 (ML) • REV J • ISS 27JUL21 25 / 42... -
Page 26: Nl: Installatie-Instructies
Carrier Fire & Security adviseert om regelmatig een looptest NL: Installatie-instructies van de detector uit te voeren en het resultaat op het controlepaneel te verifiëren. Inleiding De detector installeren De DD66X/AM-reeks bestaat uit Dual/Dual-AM Verwijder de bevestigingsplaat (zie figuur 2, item 1). bewegingsdetectoren. -
Page 27: Zelftest Op Afstand (Alleen Am-Detectoren)
SW 1: Polariteit van controlespanning (CV) instellen Zelftest op afstand (alleen AM-detectoren) AAN: “Actieve hoge” biedt de standaard Carrier Fire & Test op afstand: Met deze test kunt u de DD66XAM vanaf het Security-logica met “Actieve hoge”-logica om de ingangen controlepaneel testen. -
Page 28: Led-Indicatie
instelling J1: Verwijderd Systeem in uitgeschakelde DD669 DD666-D DD669AM DD666AM-D toestand Normaal 12 mA 19 mA Systeem loop test uitgeschakeld stroomverbruik Stroomverbruik in 10 mA 20 mA LED-indicatie alarm Maximaal 15 mA 25 mA DD66X stroomverbruik Dubbel Montagehoogte min. 2,5 m, max. 5,0 m Bewegingsnelheid min 0.2, min 0.2,... - Page 29 Contact informatie Montere sensoren www.firesecurityproducts.com of www.aritech.com Ta av monteringsplaten (se figur 2, enhet 1). Fest monteringsplaten til taket i ønsket posisjon ved hjelp NO: Monteringsveiledning av monteringshullene (se figur 2, enhet 2). Angitt monteringshøyde: min.
-
Page 30: Ekstern Test / Egentest (Bare Am-Detektorer)
mikrobølgedelen deaktiveres i DD66X eller settes i antimask Ekstern test / egentest (bare AM-detektorer) modus i DD66XAM. I denne konfigurasjonen er detektoren kun Ekstern test: Med denne testen kan du teste DD66XAM fra i PIR modus. kontrollpanelet. Bruk terminal 12 til å aktivere den eksterne J2: Dobbelbalansert innstilling testen. -
Page 31: Regulativ Informasjon
LED-indikasjon DD669 DD666-D DD669AM DD666AM-D Maksimalt 15 mA 25 mA DD66X strømforbruk Dobbel Monteringshøyde min. 2,5, maks. 5,0 m Målets hastighet min. 0,3, min. 0,2, min. 0,2, min. 0,2, maks. maks. maks. maks. Oppstart Lukket Automatisk etter 3,0 m/s 3,0 m/s 3,0 m/s 3,0 m/s 45 sek. -
Page 32: Pl: Instrukcja Montażu
Kontaktinformasjon IEC TS 60695-11-21 niezależnie od przekroju. Ewentualnie te kable muszą spełniać wymogi normy UL 2556 VW-1. www.firesecurityproducts.com eller www.aritech.com Moc źródła zasilania czujki musi być ograniczona do 15 W. PL: Instrukcja montażu Zaleca się regularne przeprowadzanie walktestów oraz kontroli z poziomu centrali. -
Page 33: Test Zdalny/ Autotest (Tylko Czujki Am)
Zworka usunięta: Diody LED są sterowane przez wejścia On: Po walkteście. Po 40-sekundowym blokowaniu następuje “Walk Test” i “Day/Night”. To załącza funkcję pamięci. W resetowanie statusu AM lub TF po alarmie dualnym. czasie gdy czujka jest rozbrojona oraz wejście “Walk Test” jest Off: Autoryzowany reset. -
Page 34: Wskazania Diod Led
aby zminimalizować działanie promieniowania mikrofalowego DD669 DD666-D DD669AM DD666AM-D na ludzi i zwierzęta. Czestotliowoa 5725–5875 MHz Część mikrofalowa czujki zostanie wyłączona na 3 minuty po mikrofali alarmie dualnym. W tym czasie czujka bedzie działać Maskymalna moc 3,89 W wyłącznie jako PIR. wyjściowa 0.003 μW/cm²... -
Page 35: Pt: Instruções De Instalação
A fonte de alimentação do detetor deve ser limitada a 15 W Informacje kontaktowe de potência. www.firesecurityproducts.com lub www.aritech.com A Carrier Fire & Security recomenda que seja regularmente feito um walk test ao detector e verificado no painel de PT: Instruções de instalação controlo. -
Page 36: Configuração Do Detector
SW 4: Cobertura de detecção 22 metros para longo alcance, dependendo da altura da montagem. A cobertura de detecção pode ser seleccionada entre A seta (fig. 2-4) indica a direcção da cortina central 360 graus para a aplicação normal e 180 graus para Nota: e a direcção activa quando o interruptor 4 está... -
Page 37: Walk Test Do Detector
Auto calibração de detetor Indicação dos LEDs Os detetores da série DD66x requerem auto calibração, após DD66X a aplicação de alimentação. Duplo Recomenda-se que aguarde 5 minutos antes de inicia o walk test, por forma a que o detetor complete o seu processo de calibração. -
Page 38: Informação De Contacto
Tamper de Opcional Incorporado (sim) Informação de contacto remoção Característica do — 80 mA a 30 VCC máx. www.firesecurityproducts.com ou www.aritech.com relé AM Tempo de alarme −10 a +55°C Temperatura de SV: Installationsanvisning funcionamento 138 x 92 mm Dimensões ( x A) Inledning Máx. -
Page 39: Installera Detektorn
Urkopplad: Lysdioder kontrolleras och styrs av Gångtest och Utrustningen är inte jordad. Alla externa VARNING! Dag-/nattstyrning. Detta aktiverar minnesfunktionen i kretsar som är anslutna till utrustningen måste vara detektorn. Mikrovågssändaren stängs av i kombidetektorn då belägna i samma byggnad och anslutna till en den är frånkopplad (dagstyrning) och ingen styrspänning in på... -
Page 40: Gångtesta Detektorn (Endast Am-Detektorer)
gångtestsstatus. Den gula lysdioden släcks och systemet Mikrovågssändaren är avstängd och för DD66XAM är AM- återställs (fabriksinställning). övervakningen aktiv. Detektorn fungerar endast som en passiv IR-detektor. SW 8 (endast AM-detektorer): Signalera AM- eller TF- utgångsaktivering Inställning System i Frånkopplat läge J1: Urkopplad On: AM + larmrelä. -
Page 41: Information Om Regler Och Föreskrifter
Carrier Fire & Security Americas Corporation Inc. 13995 Pasteur Blvd Palm Beach Gardens, FL 33418, USA Kontaktuppgifter AUKTORISERAD EU-REPRESENTANT: www.firesecurityproducts.com eller www.aritech.com Carrier Fire & Security B.V. Kelvinstraat 7, 6003 DH Weert, Netherlands/Holland P/N 146249999-5 (ML) • REV J • ISS 27JUL21... - Page 42 Declaration of Conformity The DD669/DD666-D are suitable for use in alarm systems designed to comply with PD6662 at security grade 2 and environmental class II. The DD669AM/DD666AM-D are suitable for use in alarm systems designed to comply with PD6662 at security grade 3 and environmental class II.
Need help?
Do you have a question about the DD66X Series and is the answer not in the manual?
Questions and answers