Tenda AC1200 Quick Installation Manual
Hide thumbs
Also See for AC1200:
- User manual (207 pages) ,
- Quick installation manual (11 pages) ,
- User manual (97 pages)
Advertisement
Quick Links
Quick Installation Guide
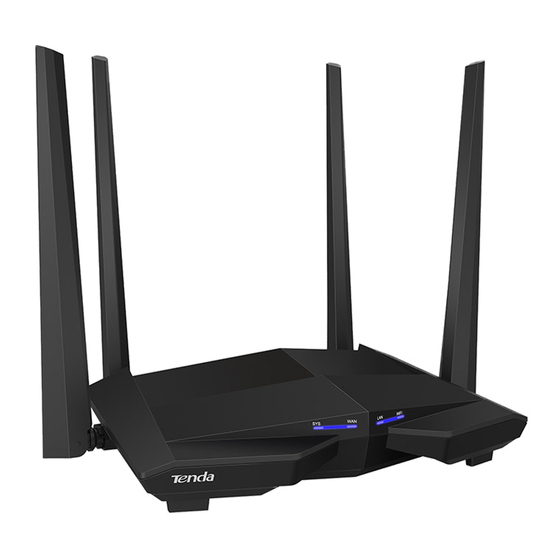
AC1200 Dualband Wi-Fi Gigabit VDSL/ADSL Modem Router
V12
Package contents
Modem router x 1
Power adapter x 1
Ethernet cable (RJ45) x 1
Phone cable (RJ11) x 2
DSL splitter x 1
Quick installation guide x 1
This guide offers a basic introduction of the modem router and walks you through Quick Setup. For product or
function details, please go to www.tendacn.com
Advertisement

Related Manuals for Tenda AC1200


Summary of Contents for Tenda AC1200
- Page 1 Quick Installation Guide AC1200 Dualband Wi-Fi Gigabit VDSL/ADSL Modem Router Package contents Modem router x 1 Power adapter x 1 Ethernet cable (RJ45) x 1 Phone cable (RJ11) x 2 DSL splitter x 1 Quick installation guide x 1 This guide offers a basic introduction of the modem router and walks you through Quick Setup. For product or...
-
Page 2: Get To Know Your Device
Get to know your device LED indicators Color Status Description Indicator Reserved for future use. Solid on The DSL negotiation is successful. Green Blinking The modem router is performing DSL negotiation. The port is disconnected or not connected properly. Solid on 5 GHz WiFi network is enabled. - Page 3 The port is disconnected or not connected properly. Solid on A USB device is properly connected to the modem router. Green Blinking Data transmission is under way. No USB device is connected or the USB device is ejected safely. Solid on The modem router has connected to the internet.
-
Page 4: Ports And Buttons
Ports and buttons Button/Port Description ON/OFF Power button. Used to turn on/off the modem router. Power port. Use the included power adapter to connect this port to a power source for power supply. USBV2.0 port. Used to connect to a USB storage device for file sharing. 1/2/3 LAN ports. - Page 5 I Install the modem router The modem router can be installed either on wall or desktop. Recommended specifications of screws and plastic anchors you may use in the wall-mounting scenario are: Screws: PA3*14mm Plastic anchors: 2.4mm in inner diameter and 26.4mm in length...
- Page 6 II Connect the modem router If you don’t need phone service, directly use a phone cable to connect the phone jack to the DSL port of the modem router, and then perform step 4 and 5. Otherwise, perform the following steps one by one. 1.
- Page 8 III Configure the modem router 1. Start a web browser on a device connected to the modem router, enter 192.168.1.1 in the address bar, and visit it. (Computer is taken as an example here) 2. Enter the login user name and password, and click Login. (The default user name and password are both admin) 3.
- Page 9 • If you switch to a different link type after finishing the configurations for the previous link type, a prompt message “Configuration conflict” may appear. In this case, perform all the steps again to reconfigure the modem router. If you want to enter the VLAN parameters manually, deselect Auto Vlan scan and fill in the parameters. 5.
- Page 10 To access the internet with: Wired devices: Connect to ports 1, 2, 3 or 4 of the modem router. Wireless devices: Connect to the WiFi networks of the modem router using Wireless SSID and Wireless Key you set.
- Page 11 Q1: I cannot log in to the web UI of the modem router. What should I do? A1: Refer to the following solutions: If you are using a wireless device, such as a smartphone: Verify that the device connects to the WiFi network of the modem router. ...
- Page 12 A4: Refer to the following solutions: Use an Ethernet cable to connect your computer to the modem router, log in to the web UI and navigate to module to check the password. Wireless Settings If you forget the login password of the web UI as well, reset the modem router and refer to the bottom label of the modem router for the default SSID and WLAN Key.
- Page 13 RJ45 cable. Declaration of Conformity Hereby, SHENZHEN TENDA TECHNOLOGY CO., LTD. declares that the radio equipment type V12 is in compliance with Directive 2014/53/EU. The full text of the EU declaration of conformity is available at the following internet address: http://www.tendacn.com/en/service/download-cata-101.html...
- Page 14 Operating Temperature: 0°C - 40°C Operating Humidity: (10% - 90%) RH, non-condensing Technical Support Shenzhen Tenda Technology Co., Ltd. 6-8 Floor, Tower E3, NO.1001, Zhongshanyuan Road, Nanshan District, Shenzhen, China. 518052 USA hotline: 1-800-570-5892 Toll Free: 7 x 24 hours...
- Page 15 © 2020 Shenzhen Tenda Technology Co., Ltd. All rights reserved. Tenda is a registered trademark legally held by Shenzhen Tenda Technology Co., Ltd. Other brand and product names mentioned herein are trademarks or registered trademarks of their respective holders. Specifications...
Need help?
Do you have a question about the AC1200 and is the answer not in the manual?
Questions and answers