Advertisement
Quick Links
Advertisement

Related Manuals for Kogan Fortis EXR-500


Summary of Contents for Kogan Fortis EXR-500
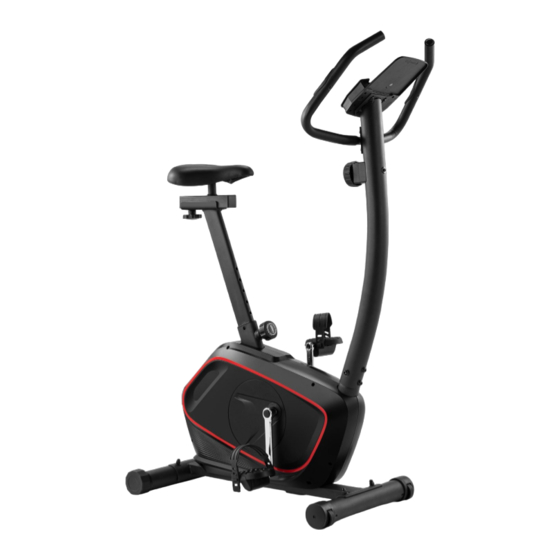
- Page 1 MAGNETIC FLYWHEEL UPRIGHT EXERCISE BIKE (EXR-500) FSMFEXR500A...
-
Page 3: Safety And Warnings
Always use the equipment as intended. If you find any defective components while assembling or checking the equipment, or if you hear any unusual noises coming from the equipment during exercise, cease use immediately and contact help.kogan.com for assistance. Do not use until resolved. - Page 4 Operating temperature: 0 - 40 °C • Storage temperature: -10 - 60°C • This appliance contains no user-serviceable parts. If it suffers any failure or damage, cease use immediately and contact help.kogan.com • This equipment is designed and intended for indoor use only.
- Page 5 OVERVIEW...
- Page 6 Part List Part Description Qty. Part Description Qty. Main Frame Sensor Wire L=450mm Handlebar Seat Cushion Handlebar Post End Cap for Front Stabilizer Rear Stabilizer ø60x1.5 End Cap for Rear Stabilizer Magnetic Wheel Belt Pulley Front Stabilizer ø60x1.5 Magnetic Wheel Axle Tension Control Knob Arc Washer ø8xø16x1.5 Seat Height Adjustment...
- Page 7 Part Description Qty. Part Description Qty. Cross Pan Head Tapping Crank Cover Screw ST4.2x20 Cross Pan Head Screw Flat Washer ø10xø25x2.0 M6x10 Hand Pulse Sensor Wire Knob M10 Tension Cable Square End Cap 38x38 Hexagon Bolt M8x20 Adjusting Pin Cross Pan Head Self-Drilling Seat Slider Screw ST4.2x25 Cross Pan Head Bolt M5x45...
- Page 8 ASSEMBLY Step 1: Front and Rear Stabilizers Installation • Attach the Front Stabilizer (6) onto the front curve of the Main Frame (1) with x2 M8x65 Bolts (35), x2 ø8x ø20x1.5 Arc Washers (36) and x2 M8 Cap Nuts (34). Tighten cap nuts using the Spanner with Phillips Screwdriver provided.
- Page 9 Tool:...
- Page 10 3. Meter Post Installation • Remove x4 M8x15 Hexagon Bolts (24) and x4 ø8xø20x1.5 Arc Washers (36) from the tube of Main Frame (1). Remove bolts using the S6 Allen Wrench provided. • Connect the Sensor Wire (26) from the Main Frame (1) to the Extension Sensor Wire (59) from the Handlebar Post (3).
- Page 11 Step 4: Handlebar Installation • Remove x2 M8x15 Hexagon Bolts (24) and x2 ø8xø16x1.5 Arc Washers (32) from the Handlebar Post (3). • Attach the Handlebar (2) onto the Handlebar Post (3) with x2 M8x15 Hexagon Bolts (24) and x2 ø8xø16x1.5 Arc Washers (32) that were removed. Tighten bolts using the Allen Wrench S6 provided.
- Page 12 Step 6: Seat Cushion, Seat Post Installation • Remove x3 M6 Hexagon Bolts (42) and x3 ø8xø16x1.5 Flat Washers (37) from the seat cushion (27). • Attach the seat cushion (27) onto the Seat Slider (65) and secure using x3 M6 Hexagon Bolt (42) and x3 ø8xø16x1.5 Flat Washers (37).
-
Page 13: Operation
OPERATION BUTTONS Mode: Press this button to changeover display or choose the window needs to be set. Set: In setting status, press this button to increase setting value in relevant flashing window for TIME, DIST, and CAL. Reset: • In setting status, press this button to reset the value in relevant flashing window for TIME, DIST and CAL, PULSE. -
Page 14: Warm Up And Cool Down Routine
WARM UP & COOL DOWN ROUTINE The warm-up is an important part of any workout. The purpose of warming up is to prepare your body for exercise and to minimise injuries. Warm up for 2 - 5 minutes before commencing exercise. The purpose of cooling down is to return the body to its resting state at the end of each exercise session. - Page 15 Quadriceps Stretch With one hand against a wall for balance, reach behind you and pull your right foot up. Bring your heel as close to your buttocks as possible. Hold for 15 counts and repeat with left foot. Inner Thigh Stretch Sit with the soles of your feet together and your knees pointing outward.
- Page 16 Need more information? We hope that this user guide has given you the assistance needed for a simple set-up. For the most up-to-date guide for your product, as well as any additional assistance you may require, head online to help.kogan.com.
Need help?
Do you have a question about the Fortis EXR-500 and is the answer not in the manual?
Questions and answers