
Related Manuals for ergoline ergoselect 1


Summary of Contents for ergoline ergoselect 1
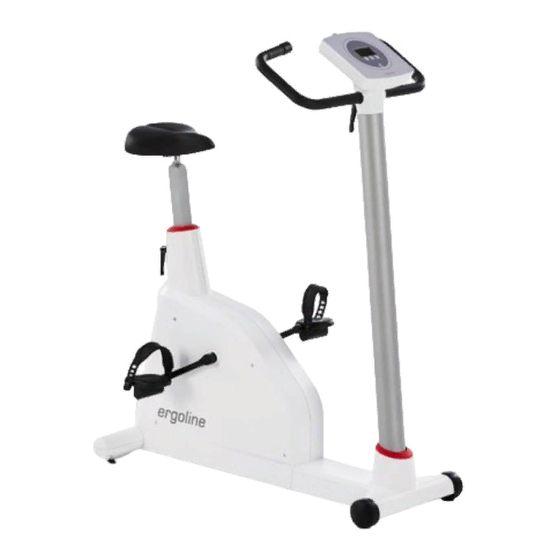
- Page 1 1 Bicycle Ergometer Operator’s Manual 201000551000 • Version 2021-05-12 / Rev 02 • English...
- Page 3 This manual also describes optional components that are not included in the standard scope of delivery of this product. The document „Cleaning, and Disinfecting ergoline Medical Devices“ (Part No. 201000641000) in its most recent version is also part of this manual. This document is exclusively made available for download from the ergoline website www.ergoline.com.
- Page 4 1...
-
Page 5: Table Of Contents
........6.9.9 HR Belt Number ....... . . ergoselect 1... - Page 6 ..10.4 Family of characteristics of the load periods according to IEC 60601-1 . . . Electromagnetic Compatibility EN 60601-1-2 ....ergoselect 1...
-
Page 7: General Information
• This manual reflects the device specifications and appli‑ cable safety standards valid at the time of printing. All rights are reserved for devices, circuits, techniques, software programs, and names appearing in this manual. • On request ergoline will provide a Field Service Manual. ergoselect 1... -
Page 8: Safety Information
Patient Hazard Equipment Malfunction The medical device is only intended for use by trained and Only the special shielded cables supplied by ergoline may be appropriately qualified staff. used to connect the device to other pieces of equipment. Equipment Malfunction... -
Page 9: Contraindications
Contraindications in exercise testing carried ments. out with ergometers If in doubt, please consult your local dealer or ergoline GmbH. (source: Banerjee A et al., 2012) Contraindications in exercise testing: Note •... -
Page 10: Intended Use
If you have questions regarding laws, regulations or direc‑ Only the intended users are allowed to use the ergometer. tives related to the product, please contact ergoline GmbH. The group of intended users includes: • healthcare professionals thoroughly instructed on the basis of the operator manual •... -
Page 11: Symbols
Nationally Recognized Testing Laboratory NRTL label for the USA and Canada. Do not lean against device: tipping hazard. Manufacturer’s identification. Date of manufacture. The number found under this symbol is the date of manufacture in the YYYY‑MM‑DD format. ergoselect 1... -
Page 12: Preparing The Patient
The handlebar is not designed to support the full body weight! Risk of falling! 4.2 Saddle adjustment The saddle height of the ergoselect 1 is adjusted manually with a rotary lever. When the pedal is in its lower position, there should be a 10°... - Page 13 Danger With the ergometer standing firmly, check that the saddle is securely clamped by trying to push it downwards from above. Adjust the clamping force of the rotary lever if necessary. ergoselect 1...
-
Page 14: Setup And Mains Connection
Leveling feet to adjust the ergometer to uneven floors Sockets for power cord and connection cables (under‑ side of ergometer) Figure 5 – 1: Operating controls of the ergoselect 1 5.2 Mounting the Control Terminal The control terminal can be installed with the display either facing the patient or the operator. -
Page 15: Transport
• Rotate the handlebar of the ergoselect 1 towards the front and tighten the clamping lever. • Stand in front of the ergoselect 1, grasp the handlebar and tilt the ergometer towards you until it is standing on the castors only and is balanced. -
Page 16: Connecting The Power Cord
• Rotate the handlebar of the ergometer towards the front. • Tilt the ergometer carefully towards the front until it rests on the handlebar. Figure 5 – 5: Assembly position of the ergoselect 1 ergometer • Connect the power cord on the underside of the ergoselect 1. -
Page 17: Connecting The Ecg Cable
The ergoselect 1 ergometers can be connected to electrocardio‑ graphs and PC‑based ECG systems of most manufacturers. The ergoselect 1 ergometers are equipped with a digital interface. The connection cable is plugged into the 9‑pole socket of the connection panel (Port 1) or the USB port and secured at the metal frame with an additional strain relief. -
Page 18: Operation
6 Operation 6 Operation Figure 6 – 1: Control terminal of ergoselect 1 6.1 Turning the System On You turn on the ergometer by pressing the power switch. ergoline The ergometer runs a self‑test. Subsequently, the main menu displays. GmbH Selftest running Figure 6 –... -
Page 19: Operating Modes
The functions of these 3 softkeys change with the displayed menu – the key label describing the function is shown on the display. Figure 6 – 4: ergoselect 1 – keypad and display 6.2 Operating Modes The ergoselect 1 ergometer supports the following operating... -
Page 20: Pc Mode
6.5 Ergometry Use the softkeys on the right and left (↑ ↓) to position the bar cursor on Ergometry and confirm the selection with PC Mode Select. Ergometry Manual Settings Select Figure 6 – 9: Main menu ergoselect 1... -
Page 21: Terminating An Exercise Test
It is recommended that the patient continue to pedal in the recovery phase. +10 W –10 W The End key in the middle will terminate the test. Figure 6 – 13: Recovery phase ergoselect 1... -
Page 22: Manual
End key located in the middle. 15:23 The load will immediately drop to 0 watt. Watt min:sec /min There is no recovery phase in the manual mode. +10 W –10 W Figure 6 – 16: Display during the exercise test ergoselect 1... -
Page 23: Settings
Use the softkeys on the right and left (↑ ↓) to position the bar cursor on the protocol to change (No. 6 to 15) and Figure 6 – 20: Selecting the exercise test protocol to edit confirm the selection with Select. ergoselect 1... -
Page 24: Contrast
Depending on your choice, each key press will change the +/– 1 Watt load by +/–1, 5, 10 or 25 watts. +/– 5 Watt +/– 10 Watt +/– 25 Watt Select Figure 6 – 24: Selecting the increment for manual load changes ergoselect 1... -
Page 25: Language
Note Figure 6 – 28: Selecting the ergometer communication mode • The EKG Type needs to be selected only when the ergometer is connected to an ECG unit. This config uration setting is part of the installation procedure. ergoselect 1... -
Page 26: Rpm
Select key. Repeat these steps for each numeral until the 00037942 complete number has been entered. Select Figure 6 – 31: Setting the HR belt no. – screen 2 ergoselect 1... -
Page 27: Accessory / Compatible Devices
POAG connection kit (potential equalization/functional ground) Connection optional 7.2 Compatible Devices A large number of ECG and ergospirometry devices as well as PC software programs are compatible with ergoline ergometers via the ergoline interface protocol P10Vnnn. Please contact service@ergoline.com for more information. ergoselect 1... -
Page 28: Cleaning, Disinfection And General Hygiene Measures
General Hygiene Measures The document "Cleaning, and Disinfecting ergoline Medical Devices" (Part No. 201000641000) in its most recent version is also part of this manual. This document is exclusively made available for download from the ergoline website www.ergoline.com. ergoselect 1... -
Page 29: Maintenance
The product described in this operator manual must not be disposed as unsorted municipal waste; it must be collected separately. Please contact your authorized manufacturer ergoline GmbH for information concerning the disposal of your equipment. There is no waste approval. Proper disposal is documented by ergoline GmbH. -
Page 30: Technical Specifications
10 Technical Specifications 10 Technical Specifications 10.1 Ergometer Version modular ergometer system model ergoselect 1 Operating mode continuous operation Power supply 100 – 240 V / 50 – 60 Hz / 60 VA max. specifications of the US power cord: SPT 2x18AWG 125 V / 10 A... -
Page 31: Exercise Test Protocols
3. Hollmann 4. STD France 5. Standard 6. – 15. (user programmable) Adjustment Range 20 – 100 1 – 30 1 – 400 20 – 100 (*) 1 – 99 (*) The recovery load is fixed at 25 W. ergoselect 1... -
Page 32: Family Of Characteristics Of The Braking Torque Control Range
10.3 Family of characteristics of the braking torque control range Figure 10 – 1: black: speed-independent range to DIN VDE 0750-0238 black + gray: speed-independent range of the ergoselect 1 ergometer 10.4 Family of characteristics of the load periods according to IEC 60601-1... -
Page 33: Electromagnetic Compatibility En 60601-1-2
Guidance and Manufacturer’s Declaration – Electromagnetic Emissions The ergoselect 1 ergometer is intended for use in the electromagnetic environment specified below. It is the responsibility of the customer or user to ensure that the ergoselect 1 ergometer is used in such an environment. - Page 34 Guidance and Manufacturer’s Declaration – Electromagnetic Immunity The ergoselect 1 ergometer is intended for use in the electromagnetic environment specified below. It is the responsibility of the customer or user to ensure that the ergoselect 1 ergometer is used in such an environment.
- Page 35 RF transmitters, an electromagnetic site survey should be considered. If the measured field strength in the location in which the ergoselect 1 ergometer is used exceeds the applicable RF compliance level above, the ergoselect 1 ergometer should be observed to verify normal operation.
- Page 36 Recommended separation distances between portable and mobile RF communications equipment and the ergoselect 1 ergometer The ergoselect 1 ergometer is intended for use in an electromagnetic environment, as specified below, in which radiated RF dis‑ turbances are controlled. The customer or the user of the ergoselect 1 ergometer can help prevent electromagnetic interference by maintaining a minimum distance between portable and mobile RF communications equipment (transmitters) and the ergoselect 1 ergometer as recommended below, according to the maximum output power of the communications equipment.
- Page 38 GmbH Lindenstraße 5 72475 Bitz Germany Tel.: +49-(0) 7431 98 94 - 0 Fax: +49-(0) 7431 98 94 - 128 e-mail: info@ergoline.com http: www.ergoline.com...
Need help?
Do you have a question about the ergoselect 1 and is the answer not in the manual?
Questions and answers