
Related Manuals for SPX Johnson Pump AquaT

Summary of Contents for SPX Johnson Pump AquaT
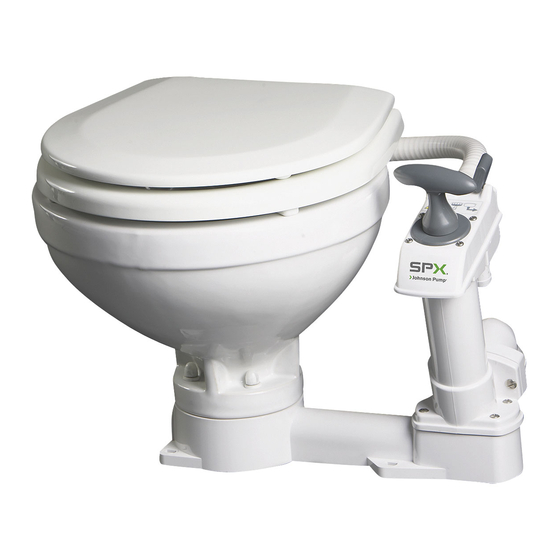
- Page 1 Instruction Manual AquaT™ Marine Toilet Manual Operated Read and understand this manual prior to operating or servicing this product. IB-412-1 R01 (1011)
-
Page 2: Warranty
Garanti Produkterna har två års garanti. Garanti medges ej vid följande fall: • om skålen är trasig • om de avpassade instruktionerna avseende det elektriska systemet och bruksanvisningen inte följts på rätt sätt. Varning: användning av starka rengöringsmedel för att rengöra toaletten är förbjudet eftersom dessa produkter stannar kvar inuti systemet och bränner igenom pumpens gummitätningar. - Page 3 Bruksanvisning AquaT™ Marintoalett, Manuell Tillämpningar Allmänna instruktioner för samtliga in- stallationer Johnson Pump Comfort och Compact skål manuella marintoaletter kan installeras både i motor- och segelbåtar, antingen ovan eller under vattenlin- Du behöver: jen, för användning till havs, på älvar, sjöar eller kanaler. •...
- Page 4 Alternativ 2: Alternativ 3: Toalett över vattenlinjen Toaletten töms till en tank, utloppets vinkelrör Du kan använda en 19 mm (¾”) backventil • Led inloppsslangen den rakaste vägen från inloppetsbottenkran till är nedanför tankens översta del vid alla tillfäl- spolpumpens inloppsanslutning. •...
- Page 5 5. PROVNING: RÖRDRAGNING SLÄPPER All rördragning måste fästas både på portsidan och på de återstående med Hänvisning till driftanvisningarna och följ tillvägagångssätten för normal slangklämmor av rostfritt stål. användning. I händelse av att spolpumpen är svår att flöda, fyll skålen till Ha i åtanke att eventuella läckage kan orsaka att båten sjunker med följden hälften med färskvatten.
- Page 6 2. MONTERING • Under användning, pumpa så mycket som behövs för att hålla innehållet för skålen tillräckligt för komfort. Du behöver • Använd ett toalettpapper, hårt eller mjukt, av bra kvalitet för hus- • Bultar av rostfritt stål: 4 st, 8 mm (5/16”) diameter av längd som hållsbruk, men använd inte mer än nödvändigt.
- Page 7 Service 4 Översyn Du behöver en servicesats som innehåller alla slitdelar, se efter i listan över 1 Förberedelse för vinterrustning delar för mer detaljer. Johnson Pump manuela toaletter är konstruerade för att vara enkla att serva; därför krävs inga specialkunskaper och dessutom krävs inte några specialverktyg.
- Page 8 Dimensioner & Vikt Modell Nr Beskrivning Net vikt 80-47229-01 Compact skål 9,6 kg 21 lbs 13,58 25,59 8,46 16,73 17,72 6,69 (inch) 80-47230-01 Comfort skål 11 kg 24lbs 13,39 27,76 10,83 19,29 18,50 7,28 (inch) Ø19mm (0,75") Inlet Ø38mm (1,5") Outlet Multi Angle Ø6,8 (0,27")
-
Page 9: Installation Instructions, General
Johnson Pump Marine Toilet, Manual Applications General instructions for all possible installations Johnson Pump Comfort and Compact bowl manually operated marine toi- lets can be installed in both power and sailing craft, either above or below You need: the waterline, for use on sea, river, lake or canal. •... - Page 10 Alternative 2: Alternative 3: Toilet above the waterline Toilet waste discharging into holding tank, You may use a 19 mm. (3/4”) non-return valve discharge elbow below top of holding tank at • Run the inlet hose by the most direct route from the inlet seacock any time to the flushing pump inlet tail •...
-
Page 11: Installation Instructions
6. SAFETY: PIPEWORK LOOSING All pipeworks must be fastened both in the gate side and in the remain- Ensure that these instructions reach the owner, the skipper or the operator ing ones with a stainless steel hose clamp. Please keep in mind that an of the craft, as it contains important safety information ON COMPLETION eventual leak might cause the craft to sink, with consequent loss of life USE OF Installation:... -
Page 12: Maintenance Instructions
3. Cleaning If you do not use self-locking nuts, you will need some nut-locking com- pound A regular flushing with clean (sea)-water represents one of the most effec- tive methods to keep the toilet clean and good smelling. Put the toilet in the selected position. Using the holes in the base •... - Page 13 3 Winterization Refit Pump assembly on the toilet as follows: • Locate the bottom valve gasket on its pegs on the base and locate Drain the complete system both as a protection against frost damage and the joker valve in the discharge elbow. to avoid the growth in the pipework of bacteria that could cause unpleasant •...
-
Page 14: Dimensions And Weight
Dimensions & Weight Model No Description Net Weight 80-47229-01 Compact bowl 9,6 kg 21 lbs 13,58 25,59 8,46 16,73 17,72 6,69 (inch) 80-47230-01 Comfort bowl 11 kg 24lbs 13,39 27,76 10,83 19,29 18,50 7,28 (inch) Ø19mm (0,75") Inlet Ø38mm (1,5") Outlet Multi Angle Ø6,8 (0,27") - Page 15 Bedienungsanleitung AquaT Schiffstoilette Manuell betrieben ™ Anwendungen Rohrleitung – die richtige Methode wählen: Sie müssen für das Einlaufrohr aus zwei Möglichkeiten und für das Auslass- rohr aus vier Möglichkeiten die richtige Einbaumethode herausfinden, je Johnson Pump Comfort und Compact Becken manuell betriebene Schiff- nachdem, ob sich die Toilette über oder unterhalb der Wasserlinie befindet stoiletten können sowohl in motor- als auch windbetriebenen Schiffen über und ob der Abfall über Bord oder in einem Sammelbehälter auf dem Bord...
- Page 16 • Ersetzen Sie den weißen Schlauch mit einem längeren Schlauch Sie können eine 38 mm (1 1/2”) Rohrschlaufe verwenden. mit einem Innendurchmesser von 19 mm Und ordnen Sie ihn so • Bringen Sie den Auslaufschlauch mindestens 30 cm (12’) über an, dass er wenigstens 20 cm (8”) über der höchstmöglichen den Entsorgungsbogen und montieren Sie danach eine Rohr- Wasserlinie steht, und montieren Sie die belüftete Rohrschlaufe an...
-
Page 17: Montage
kann. Aus diesem Grund muss eine belüftete Rohrschlaufe in alle Rohr- Aus diesem Grund muss eine belüftete Rohrschlaufe in alle Rohr- Aus diesem Grund muss eine belüftete Rohrschlaufe in alle Rohr- leitungen montiert werden, die an einen Schiffsrumpfstutzen angeschlos- sen werden, falls die Kante der Toilette weniger als 20 cm (8”) über die Wasserlinie während des Stillstands des Schiffs reicht, ungeachtet dessen, ob es ein Einlauf oder ein Auslauf ist. - Page 18 Falls Sie keine selbstsichernde Muttern verwenden, brauchen Sie etwas NACH DER BENUTZUNG: Schraubensicherungsmittel. • SCHLIESSEN SIE DIE SPÜLUNGSSTEUERUNG ( • SCHLIESSEN SIE DIE BEIDEN SEEVENTILE Stellen Sie die Toilette in die gewählte Stellung auf. Markieren Sie die Stellungen für 4 Bolzen auf die Montageoberfläche, indem Sie HINWEIS: Folgendes nicht in die Toilette werfen: Damenbinden, die Bohrungen im Fuß...
- Page 19 2 Dichtung ersetzen Unterventils und des Jokerventils. Falls Wasser um die Kolbestange im Oberteil der Pumpe austritt, bedeutet Bauen Sie die Pumpe wie folgt aus: das, dass die Dichtung verschlissen ist und ausgetauscht werden muss. • Entfernen Sie die 6 Schrauben, die den Ventildeckel festhalten. Dazu müssen Sie wie folgt vorgehen: Sie brauchen ein Dichtungsset.
- Page 20 Abmessungen und Gewichte Modell Nr Beschreibung Nettogewicht 80-47229-01 Becken Compact 9,6 kg 21 lbs 13,58 25,59 8,46 16,73 17,72 6,69 (inch) 80-47230-01 Becken Comfort 11 kg 24lbs 13,39 27,76 10,83 19,29 18,50 7,28 (inch) Ø19mm (0,75") Inlet Ø38mm (1,5") Outlet Multi Angle Ø6,8 (0,27") 105-125...
- Page 21 Manuel d’utilisation AquaT Toilettes de Marine ™ Fonctionnement Manuel Applications Tuyauterie - sélection de la méthode cor- recte: Les toilettes de marine Johnson Pump avec cuvette Comfort et Compact à Vous devez, pour la tuyauterie de la prise d’eau, choisir la méthode d’instal- fonctionnement manuel peuvent être installées aussi bien dans des voiliers lation correcte entre 2 possibilités et pour la tuyauterie pour le refoulement que des bateaux à...
- Page 22 • En utilisant une clé, faites tourner le joint d’admission sur les Vous pouvez utiliser un raccord de Boucle de Ventilation de 38 mm (1½”). toilettes de manière à ce que le coude pointe vers le haut. • Installez le tuyau d’évacuation au-dessus du coude de refoule- •...
-
Page 23: Instructions Pour L'installation
6. SECURITE: TUYAUTERIE DESSERREE Assurez-vous que ces instructions parviennent au propriétaire, au skipper Tous les tuyaux doivent être fixés aux deux bouts, du côté de la vanne ainsi ou à l’opérateur du bateau, car il contient d’importantes informations que de l’autre côté avec un étrier en acier inoxydable. concernant la sécurité... -
Page 24: Utilisation Normale
2. MONTAGE 2. Utilisation normale Vous avez besoin de: Ouvrez les vannes de prise d’eau et de refoulement (ainsi que les vannes • Boulons en acier inoxydable: 4 pces, diamètre 8mm (5/16”) secondaires si installées). de longueur suffisante pour s’adapter à l’épaisseur de la surface •... -
Page 25: Remise En Service
INSTRUCTIONS POUR LA MAINTENANCE vannes et, si possible, marquer la position fermée de la vanne. RAPPELEZ-VOUS D’ATTACHER UNE FICHE D’AVERTISSEMENT! INTRODUCTION: Les toilettes de marine Johnson Pump ne demandent normalement aucun entretien durant la saison pour autant qu’elles soient préparées pour l’hiver- Avertissement: L’USAGE D’ANTIGEL N’EST PAS RECOMMANDÉ, parce nage en automne et remises en état au printemps. -
Page 26: Dimensions & Poids
• Fixez la bride de refoulement au cylindre de la pompe avant de • Reconnectez tous les bouts des tuyaux et fixez-les avec leurs fixer le cylindre à la base des toilettes. étriers. • Examinez soigneusement toute la longueur de tous les tuyaux •... - Page 27 Manual de Instrucciones AquaT Aseo Marino Funcionamiento Manual ™ Aplicaciones Tuberías –selección del método correcto: Debe seleccionar el método de instalación correcto para las tuberías de entrada de entre 2 posibilidades y para las tuberías de salida de entre 4 Los aseos para embarcaciones de funcionamiento manual Johnson Pump, posibilidades, dependiendo de si el aseo está...
- Page 28 Debe usar un ajuste de Manguito sifónico de 38mm (1½”). • Lleve la tubería de salida desde el codo de descarga, al menos 30 cm (12’) por encima del codo de descarga, después ajuste un manguito sifónico en la parte superior de la tubería, asegurándose CUIDADO: de esta manera de mantener algo de agua en la base del aseo sin NO PONGA EL MANGUITO SIFÓNICO ENTRE LA VÁLVULA DE EN-...
-
Page 29: Instrucciones De Instalación
6. SEGURIDAD: SOLTADO DE TUBERÍAS Todas las tuberías deben estar sujetas en el lado de la entrada y en todos Asegúrese de que estas instrucciones llegan al propietario, el capitán o el los demás con abrazaderas de acero inoxidable. operador de la embarcación ya que contienen información de seguridad Por favor, tenga en cuenta que una fuga podría causar que la embarcación importante. -
Page 30: Montaje
2. MONTAJE • Durante la utilización, bombee si resulta necesario para mantener el contenido de la taza en un nivel suficientemente bajo para su confort. Necesita • Utilice papel higiénico doméstico, suave o no, de buena calidad, • Pernos de acero inoxidable: 4 uds, 8 mm (5/16 pulgadas) de pero no use más del necesario. -
Page 31: Preparación Para El Invierno
Funcionamiento 4 Revisión y Puesta a punto Necesitará un kit de servicio que contenga todas las piezas desgastadas. 1 Preparación para su utilización en condi- Vaya a la lista de piezas para obtener más información. ciones invernales Los indoros para embarcaciones de funcionamiento manual Johnson Pump, se han diseñado para que su utilización resulte sencilla, por lo que no se necesitan habilidades ni herramientas especiales. - Page 32 Dimensiones & Peso Modelo Nº Descripción Peso neto 80-47229-01 Taza wc Compacta 9,6 kg 21 lbs 13,58 25,59 8,46 16,73 17,72 6,69 (inch) 80-47230-01 Taza wc Comfort 11 kg 24lbs 13,39 27,76 10,83 19,29 18,50 7,28 (inch) Ø19mm (0,75") Inlet Ø38mm (1,5") Outlet Multi Angle...
-
Page 33: Funzionamento Manuale
Manuale di Istruzioni AquaT Toilette per imbarcazioni ™ Funzionamento Manuale Tubazioni – scelta del metodo corretto: Dovete scegliere il metodo di installazione corretto tra 2 possibilità per le tubazioni di entrata e tra 4 possibilità per le tubazioni di sbocco, a seconda Applicazioni che la toilette sia al di sopra o al di sotto della linea di galleggiamento e a seconda che lo scarico dei rifiuti avvenga fuori bordo o in un apposito... - Page 34 ad almeno 20 cm (8”) sopra la linea di galleggiamento più alta E’ possibile utilizzare un raccordo per il Passante di Sfiato da 38 mm (1½”). possibile; adattate il passante di sfiato al suddetto punto più alto • Fate passare la manichetta di sbocco dal gomito di scarico ad almeno 30 cm (12’) sopra il gomito di scarico;...
-
Page 35: Istruzioni Di Installazione
BORDO DEL VASO SOTTO LA LINEA DI GALLEGGIAMENTO: Se la toilette è collegata a qualsiasi dispositivo passante per lo scafo e se il bordo del vaso viene a trovarsi al di sotto della linea di galleggiamento, è possibile che venga incamerata dell’acqua, causando l’affondamento dell’imbarcazione con conseguente possibile perdita della vita. -
Page 36: Istruzioni Di Funzionamento
• Rondelle in acciaio inossidabile: 8 pz., diametro largo, ma non • Quando il vaso è vuoto, Aprite di nuovo il Regolatore di Flusso superiore a 21 mm (13/16”). ) e continuate a pompare finché tutti i rifiuti sono stati •... -
Page 37: Messa A Riposo
Istruzioni di servizio 4 Revisione E’ necessario un kit di manutenzione contenente tutti i componenti soggetti 1 Preparazione per la messa a riposo ad usura. Fate riferimento alla lista dei componenti per ulteriori dettagli. Le toilette manuali per imbarcazioni Johnson Pump sono progettate per una manutenzione semplice;... -
Page 38: Dimensioni E Peso
Dimensioni e peso Modello n. Descrizione Peso netto 80-47229-01 Vaso compatto 9,6 kg 21 lbs 13,58 25,59 8,46 16,73 17,72 6,69 (inch) 80-47230-01 Vaso comfort 11 kg 24lbs 13,39 27,76 10,83 19,29 18,50 7,28 (inch) Ø19mm (0,75") Inlet Ø38mm (1,5") Outlet Multi Angle Ø6,8 (0,27") - Page 40 SPX Corporation reserves the right to incorporate our latest design and material changes without notice or obligation. Design features, materials of construction and dimensional data, as described in this bulletin, are provided for your information only and should not be relied upon unless confirmed in writing.
Need help?
Do you have a question about the Johnson Pump AquaT and is the answer not in the manual?
Questions and answers