
Related Manuals for SPX Johnson Pump AquaT Series

Summary of Contents for SPX Johnson Pump AquaT Series
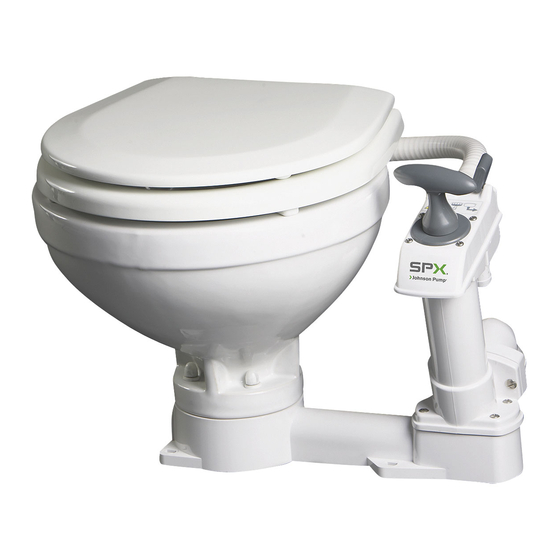
- Page 1 Instruction Manual AquaT™ Marine Toilet Manual Operated Read and understand this manual prior to operating or servicing this product. IB-412 R01 (1011)
-
Page 2: Warranty
Garanti Produkterna har två års garanti. Garanti medges ej vid följande fall: Varning För att kunna utnyttja garantin måste samtliga artiklar skickas tillbaka till inköpsstället tillsammans med monteringsinstruktioner och inköpsbevis. Warranty Warning: To take advantage of warranty. All articles must be send back to the point of purchase complete with assem- bling Instructions and evidence of purchase. - Page 3 Bruksanvisning AquaT™ Marintoalett, Manuell Tillämpningar Allmänna instruktioner för samtliga in- stallationer Johnson Pump Comfort och Compact skål manuella marintoaletter kan OBS! Johnson Pump manuella toaletter är speciellt konstruerade för marint bruk. Konsultera din återförsäljare av Johnson Pump för råd om icke marina tillämpningar.
- Page 4 Alternativ 2: Alternativ 3: Toalett över vattenlinjen Toaletten töms till en tank, utloppets vinkelrör är nedanför tankens översta del vid alla tillfäl- spolpumpens inloppsanslutning. Rördragning – Utlopp, 4 alternativ Alternativ 1: Toalett under vattenlinjen och tömning över- bord utloppets rördragning. avluftade kröken på...
- Page 5 5. PROVNING: RÖRDRAGNING SLÄPPER 6. SÄKERHET: SKÅLENS KANT UNDER VATTENLINJEN: resultera i dödsfall. sugs över kröken. 1. PLACERING Toalettens underrede och pump levereras monterad för högerhandsmanöv- innan installation av toaletten. INSTALLATIONSANVISNING slangen mellan pumpen och skålen. Inledning: installera toaletten i enlighet med ifrågavarande installationsinstruktioner. SKADA GENOM OLYCKSHÄNDELSE följden att risk för liv uppkommer.
- Page 6 2. MONTERING passar till monteringsunderlagets tjocklek. ) och pumpa ningsmedel. EFTER ANVÄNDNING: OBS! Stoppa inget av följande i toaletten: Sanitetsbindor, våtservetter, bomull, cigaretter, tändstickor, tugg- på underredet. gummi eller andra fasta föremål, bensin, diesel, olja, lösningsme- del av någon sort eller vatten som är varmare än fingerljummet. 3.
- Page 7 Service 4 Översyn 1 Förberedelse för vinterrustning delar för mer detaljer. VARNING! Lossa pumpmonteringen enligt följande: 2 Byte av tätning slangen från pumpens övre del. kolven direkt under handtaget. Greppa kolvstången med en tång jokerventilen. Demontera pumpmonteringen enligt följande: dra åt den. Återmontera pumpen enligt följande: att greppa kolvstången över tejpen.
- Page 8 Dimensioner & Vikt Modell Nr Beskrivning Net vikt 80-47229-01 80-47230-01 Ø19mm (0,75") Inlet Ø38mm (1,5") Outlet Multi Angle Ø6,8 (0,27") 105-125 (4x) 50-55 216-226 Reservdelar och referenslista Pos. Beskrivning Modell Nr Pos. Beskrivning Modell Nr Toalett sits Compact 81-47141-01 Underrede av plast 81-47243-01 Toalett sits Comfort 81-47141-02...
- Page 9 Johnson Pump Marine Toilet, Manual Applications General instructions for all possible installations diameter outlet hose holding tank. Note: Johnson Pump manual toilets are designed specifically for marine use. Consult your Johnson Pump retailer for advice about possible non- marine applications. Features Design lengths just make the toilet harder to pump.
- Page 10 Alternative 2: Alternative 3: Toilet above the waterline Toilet waste discharging into holding tank, discharge elbow below top of holding tank at any time return valve next to the inlet seacock which will ensure that the next to the seacock to maintain the pump in a primed condition Pipework –...
-
Page 11: Installation Instructions
6. SAFETY: PIPEWORK LOOSING ing ones with a stainless steel hose clamp. Please keep in mind that an OF Installation: BOWL RIM BELOW THE WATERLINE: irrespective of whether inlet or outlet. 1. LOCATION Change to left hand operation 3 locating pegs. INSTALLATION INSTRUCTIONS protect the ceramic from the stainless steel washers and nuts. -
Page 12: Maintenance Instructions
3. Cleaning pound tive methods to keep the toilet clean and good smelling. OPERATING INSTRUCTIONS CAUTION: crew and craft. Hazard Risk: Accidental Damage MAINTENANCE INSTRUCTIONS INTRODUCTION: in the spring. Take special care to instruct children, the elderly and visitors 1. First use the warm water Service 2. - Page 13 3 Winterization Refit Pump assembly on the toilet as follows: smells. replace worn out or damaged parts . If you not are going to disassemble the toilet: attach a warning notice. 4 Overhaul for further details. CAUTION Remove the pump assembly as follows: from the top of the pump.
- Page 14 Dimensions & Weight Model No Description Net Weight 80-47229-01 80-47230-01 Ø19mm (0,75") Inlet Ø38mm (1,5") Outlet Multi Angle Ø6,8 (0,27") 105-125 (4x) 50-55 216-226 Spare Parts & Reference guide Pos. Description Model No Pos. Description Model No Wooden Seat, Compact 81-47141-01 Plastic Base 81-47243-01...
Need help?
Do you have a question about the Johnson Pump AquaT Series and is the answer not in the manual?
Questions and answers