
Related Manuals for Belling BE444444690


Summary of Contents for Belling BE444444690
- Page 1 Free Standing Cooker / User Manual BE444444690 BE444444691 BE444444692 BE444444693 BE444444694...
- Page 2 Thank you for choosing this product. This User Manual contains important information on safety and instructions intended to assist you in the operation and maintenance of your appliance. Please take the time to read this User Manual before using your appliance and keep this book for future reference.
-
Page 3: Table Of Contents
CONTENTS 1.SAFETY INSTRUCTIONS ....................4 1.1. General Safety Warnings ....................4 1.2. Installation Warnings .....................7 1.3. During Usage .......................8 1.4. During Cleaning and Maintenance ................10 2.INSTALLATION AND PREPARATIONS FOR USE ............11 2.1. Instructions for the Installer ..................11 2.2. Installation of the Cooker .....................12 2.3. - Page 4 CONTENTS 1.SAFETY INSTRUCTIONS ....................4 1.1. General Safety Warnings ....................4 1.2. Installation Warnings .....................7 1.3. During Usage .......................8 1.4. During Cleaning and Maintenance ................10 2.INSTALLATION AND PREPARATIONS FOR USE ............11 2.1. Instructions for the Installer ..................11 2.2. Installation of the Cooker .....................12 2.3.
-
Page 5: Safety Instructions
1. SAFETY INSTRUCTIONS • Read these instructions carefully and completely before using your appliance and keep them in a convenient place for reference when necessary. • This manual is prepared for more than one model. Your appliance may not have some of the features described in this manual. - Page 6 shock. • For models which incorporate a hob lid, clean any spillages off the lid before using and allow the Cooker to cool before closing the lid. • Do not operate the appliance by means of an external timer or separate remote-control system. •...
- Page 7 out by authorised service technicians. Installation and repair work that is carried out by unauthorised technicians may be dangerous. Do not alter or modify the specifications of the appliance in any way. Inappropriate hob guards can cause accidents. • Before connecting your appliance, make sure that the local distribution conditions (nature of the gas and gas pressure or electricity voltage and frequency) and the specifications of the appliance...
-
Page 8: Installation Warnings
• All possible measures have been taken to ensure your safety. Since the glass may break, care should be taken while cleaning to avoid scratching. Avoid hitting or knocking the glass with accessories. • Make sure that the supply cord is not trapped or damaged during installation. -
Page 9: During Usage
• Protect your appliance against atmospheric effects. Do not expose it to effects such as sun, rain, snow, excessive humidity etc. • The material around the appliance (cabinet) must be able to withstand a minimum temperature of 100°C. 1.3. During Usage • When you first use your Oven you may notice a slight smell. - Page 10 • Make sure the appliance control knobs are always in the “0” (stop) position when it is not used. • The trays incline when pulled out. Take care not to spill or drop hot food when removing it from the ovens.
-
Page 11: During Cleaning And Maintenance
use. Avoid touching the CE Declaration of conformity We declare that our products meet the inside surface. applicable European Directives, Decisions and Regulations and the requirements • Do not hang towels, listed in the standards referenced. dishcloths or clothes This appliance has been designed to be used only for home cooking. -
Page 12: Instructions For The Installer
2.1. Instructions for the Installer Cooker Ventilation requirements hood flue • For rooms with a volume of less than Air inlet section permanent ventilation of 100 cm min. 100 cm free area is required. • For rooms with a volume of between 5 and 10 m permanent ventilation of 50 cm... -
Page 13: Gas Connection
be installed above the appliance, the safety distance between cooktop and A (mm) any cupboard/cooker hood should be as shown below. B (mm) Cooker Hood/Cupboard 650/700 C (mm) D (mm) Product Width E (mm) 2.3. Gas Connection • If the gas connection is made by a flexible hose fixed onto the gas inlet of Assembly of gas supply and leakage the hob, it must be fixed on by a pipe... -
Page 14: Gas Conversion (If Available)
fluids to perform the check. Do not use a naked flame to check for gas leakage. Gas pipe • All metal items that are used during gas connection must be free from rust. Check the expiry date of any components used for connection. Seal Points that must be checked during Mechanical... -
Page 15: Electrical Connection And Safety
does not die out when passing from the maximum position to the minimum position. Burner Create an artificial wind with your hand toward the flame to see if the flames are stable. Adapter Changing the gas inlet For some countries, the gas inlet type can be different for NG/LPG gases. -
Page 16: Anti-Tilting Kit
• The appliance is designed for a power supply of 220-240 V~. If your supply is different, contact the authorized service personnel or qualified electrician. Wall • The power cable (H05VV-F) must be of Anti- tilting sufficent length to be connected to the bracket appliance. - Page 17 Inner part EN - 17...
-
Page 18: Product Features
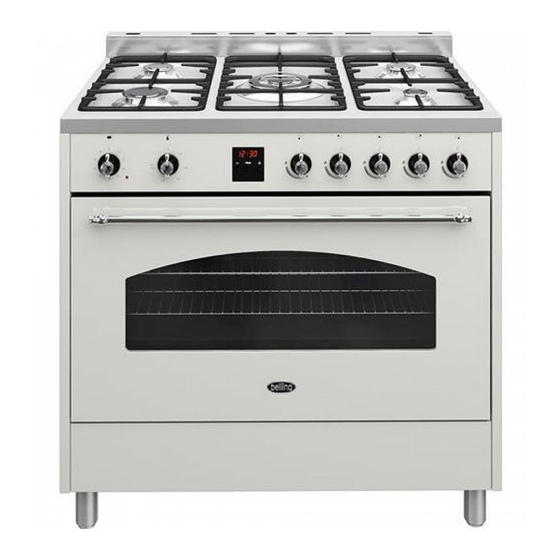
3. PRODUCT FEATURES Important: Specifications for the product vary and the appearance of your appliance may differ from that shown in the figures below. List of Components 1. Cooktop 2. Control Panel 3. Oven Door Handle 4. Oven Door 5. Adjustable Feet Control Panel 6. -
Page 19: Use Of Product
4. USE OF PRODUCT 4.1. Use of gas burners Ignition of the burners The position symbol above each control knob determines the burner that the knob controls. Manual Ignition of the Gas Burners OFF position MAX position If your appliance is not equipped with any ignition aid or in case there is a failure in the electric network, follow the procedures listed below:... - Page 20 Turn the knob to the corresponding symbol Rapid / Wok Burner 22-26 cm of the desired cooking function. For the Semi-rapid Burner 14-22 cm details of different functions see ´Oven functions`. Auxiliary Burner 12-18 cm Oven thermostat knob Make sure that the tips of the flames do not After selecting a cooking function, turn this spread out from the outer circumference knob to set the desired temperature.
-
Page 21: Use Of Digital Timer
Faster Grilling and lasagne and pizza. Prehating the oven for 10 minutes is recommended and it is best Roasting Chicken to cook on only one shelf at a time in this Function: The oven’s thermostat and warning function. lights will be turned on. Fan Function: The The grill, upper heating Oven’s thermostat and... - Page 22 1. Press ´+` and ´-` keys simultaneously. 3. The symbol lights Symbol will continuously, the appear, and the dot time is saved and the in the middle of the warning is set. screen will start to flash. 2. Adjust the time while the dot is flashing, When the timer reaches zero an audible using the ´+` and ´-`...
- Page 23 so that cooking finishes at a set time. You 3. Select the desired can set an end time up to 10 hours after the cooking time period current time. Prepare the food for cooking using the ´-` and ´+` and put it in the oven. keys.
- Page 24 To alter the signal beep, while the timer shows the time of day press and hold the ´-` button for 1-2 seconds until an audible signal beep sounds. After that each time the ´-` button is pressed a different signal beep is sounded.
-
Page 25: Cleaning And Maintenance
up immediately to avoid parts becoming damaged. • Do not use steam cleaners for cleaning any part of the appliance. Cleaning the inside of the Oven • The inside of enamelled ovens are best cleaned when the oven is warm. • Wipe the oven with a soft cloth soaked in soapy water after each use. - Page 26 • Wipe the hotplate with a soft cloth soaked in only water. Then run the hotplate for a short time to dry completely. Cleaning the Glass Parts • Clean the glass parts of your appliance on a regular basis. • Use a glass cleaner to clean inside and outside of the glass parts, then rinse To replace the inner glass;...
- Page 27 3. Close the door until it almost reaches the fully closed position and remove the door by pulling it towards you. EN - 27...
- Page 28 Removal of Wire Shelf To remove the wire rack; Pull the wire rack as shown in the figure. After releasing it from clips (a), lift it up. 5.2. Maintenance WARNING: The maintenance of this appliance should be carried out by an authorised service person or qualified technician.
- Page 29 Brand BE444444690 Model BE444444691 BE444444692 BE444444693 BE444444694 Type of Hob Number of Cooking Zones Heating Technology-1 Size-1 Auxiliary Energy Efficiency-1 Heating Technology-2 Size-2 Semi-Rapid Energy Efficiency-2 59,0 Heating Technology-3 Size-3 Semi-Rapid Energy Efficiency-3 59,0 Heating Technology-4 Size-4 Rapid Energy Efficiency-4...
- Page 30 Brand BE444444690 Model BE444444691 BE444444692 BE444444693 BE444444694 Type of Oven ELECTRIC Mass 72,0 Energy Efficiency Index - conventional 116,0 Energy Efficiency Index - fan forced 103,9 Energy Class Energy consumption (electricity) - conventional kWh/cycle 1,15 Energy consumption (electricity) - fan forced...
- Page 31 G30 28/30mbar 10,7 kW 778 gr/h G25 25 G25.3 25 G20 20 G30 28-30 NL Cat:II2L3B/P + II2EK3B/P mbar mbar mbar mbar Class:1 LARGE BURNER DIA. of INJECTOR (1/100mm) NOMINAL RATING (KW) CONSUMPTION 321,2 l/h 314,3 l/h 276,2 l/h 210,9 g/h MEDIUM BURNER DIA.
- Page 33 Burgemeester Maenhautstraat 64 B-9820 Merelbeke T: +32 (0)2100210 Registering your product: To make things easy for you, you can register your Belling product online. This will help you make the most of the guarantee offered by Belling. For the Netherlands: https://www.belling.nl/klantenservice/product-registratie/ For Belgium: http://www.belling.be/klantenservice/product-registratie/...
- Page 34 On the websites, you will also find Belling's guarantee and repair conditions. In the unlikely event that your appliance has a fault, please contact our service department during office hours.
Need help?
Do you have a question about the BE444444690 and is the answer not in the manual?
Questions and answers