
Subscribe to Our Youtube Channel
Related Manuals for Gentherm Electri-Cool II


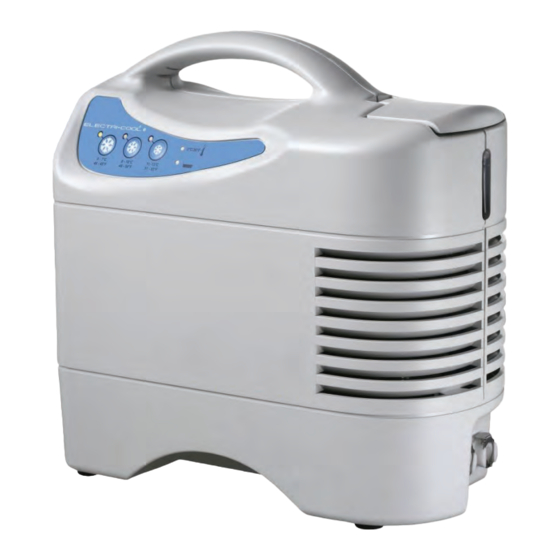
Summary of Contents for Gentherm Electri-Cool II
- Page 1 Technology to the next degree™ ELECTRI-COOL ® OPERATION AND TECHNICAL MANUAL Model 767 Localized Cooling System Gentherm Medical, LLC • 12011 Mosteller Road Cincinnati, Ohio 45241, U.S.A. www.gentherm.com...
- Page 2 Mailing Address: 12011 Mosteller Road Cincinnati OH 45241 Electri-Cool® II is a registered trademark of Gentherm Medical, LLC, Cincinnati, Ohio, USA. © 2021, Gentherm Medical, LLC All rights reserved. All other trademarks are the property of their respective owners. Part No. 56269 Rev. V...
-
Page 3: Table Of Contents
SECTION TITLE Electri-Cool II Model 767 Contents Introduction ............. . 1 Receiving and Inspection/ Important Safety Information . - Page 4 Gentherm Medical, LLC 13.2 Inspection Frequency ............18 13.3...
- Page 5 SECTION TITLE Electri-Cool II Model 767 25.0 Float Switch Replacement ..........56 25.1...
- Page 6 Draining the Electri-Cool II ........
- Page 7 Figure 3 Electri-Cool II Membrane Control Panel ....... . . 11 Figure 4 Step 1 Unplug power cord.
- Page 8 Gentherm Medical, LLC Figure 30 Step 5 Reconnect ribbon cable........45 Figure 31 Step 5 Install front enclosure.
- Page 9 SECTION TITLE Electri-Cool II Model 767 Figure 61 Step 3 Unplug pump wiring ......... . . 65 Figure 62 Step 4 Remove the wire tie.
- Page 10 Gentherm Medical, LLC Figure 92 Step 1 Place fuses into holders ........79 Figure 93 Step 2 Match arrow direction .
- Page 11 SECTION TITLE Electri-Cool II Model 767 Figure 123 Step 5 Power supply wires placement ........94 Figure 124 Step 6 Secure power supply wires to front bracket .
- Page 12 Gentherm Medical, LLC Figure 153 Step 2 Place filter into retainer ........111 Figure 154 Step 8 Re-attach filter retianer .
- Page 13 SECTION TITLE Electri-Cool II Model 767 List of Tables Table 1 Device and Manual Symbols ......... . . 5 Table 2 Presented in Fulfillment of IEC 60601-1-2 .
- Page 14 Gentherm Medical, LLC This page intentionally left blank. xii of xii...
-
Page 15: Introduction
This manual may not be reproduced in whole or in part without written permission from Gentherm Medical, LLC. Gentherm Medical, LLC reserves the right to make changes to the Electri-Cool II that might not be reflected in this manual. Current manuals are available on the website: https://www. -
Page 16: Indications For Use
(in writing). Failure to do this within 15 days may result in loss of claim. Do not return the equipment to Gentherm. Call our Medical Technical Service department for further instructions. -
Page 17: Warnings
• Do not use the Electri-Cool II system in the presence of flammable anesthetics. Risk of explosion can result. • Power interruption will cause the Electri-Cool II system to revert to the default range of 40°F - 45°F (5°C - 7°C). Follow instructions for section 11.4 Startup Instructions, on page 10 to resume operation. - Page 18 • If the Electri-Cool II system or other equipment is not operating normally, remove the device from service and have a biomedical or service technician observe the device in operation.
-
Page 19: Symbols On The Device And In The Manual
Introduction Electri-Cool II Model 767 5.0 Symbols on the Device and in the Manual Table 1. Device and Manual Symbols Symbol Definition On / Off Read and Understand the Manual Warning Inspect and Change Filter Regularly Low Water Level Caution Low Water Temperature 2°C/36°F... - Page 20 Operation & Service Manual Table 1. Device and Manual Symbols Symbol Definition Potential Equalization Connection (Grounding) Risk of Explosion: Do not use in the presence of flammable anesthetics Power On (Located on Switch) Power Off (Located on Switch) Separate Disposal for Electrical Equipment 6 of 126...
-
Page 21: Serial Number
If a part requires replacement while under warranty, return the original part to Gentherm. Labor is covered under the warranty only if the device is returned to Gentherm. If the part is no longer under warranty, dispose of the part as required by site or local regulations. -
Page 22: Introduction
Operation & Service Manual 10.0 Introduction 10.1 Before you call for service..To help us better serve you, please have the serial number of your Electri-Cool® II unit ready when you call for parts or service. The serial number is located on the unit’s rear panel. 8 of 126... -
Page 23: Setup
3. The Electri-Cool II should be placed on a secure, flat surface at least 61cm (2 feet) from any wall or object that may restrict airflow to the unit. A bed bracket or universal stand as listed in “Accessories”... -
Page 24: Reservoir Filling Instructions
3. The Electri-Cool II is now ready for use. 11.5 Setting Temperature 1. The Electri-Cool II must be filled with sterile water or water that has been passed through a filter less than or equal to 0.22 microns and connected to a pad before attempting to set temperature. - Page 25 The time may also vary from patient to patient. Green Temperature Indicating LEDs Blue Water Low- Temperature LED Blue Low- Water LED Figure 3 - Electri-Cool II Membrane Control Panel 11 of 126...
-
Page 26: Accessories
Operation & Service Manual 11.6 Accessories Thermal Pads consist of two layers of plastic sealed together to provide multiple passageways for water flow in a random-flow pattern designed to prevent occlusion. The essential accessories for the Electri-Cool® II are listed below: Localized Cold Therapy Pads Description Non-Sterile... -
Page 27: Pad Instructions
Electri-Cool II Model 767 11.7 Pad Instructions The Electri-Cool® II has been designed and tested to be used with GENTHERM thermal pads. Use of unapproved pads is not recommended. GENTHERM pads allow maximum flow while resisting restriction or kinks. 1. Read and understand operation manual before connecting pad to Electri-Cool® II. -
Page 28: Storage
Guidance and manufacturer’s declaration – electromagnetic emissions The Electri-Cool II system is intended for use in the electromagnetic environment specified below. The customer or the user of the Electri-Cool II system should assure that it is used in such an environment. -
Page 29: Table 3 Electromagnetic Immunity
Table 3. Electromagnetic Immunity Guidance and manufacturer’s declaration – electromagnetic immunity The Electri-Cool II system is intended for use in the electromagnetic environment specified below. The customer or the user of the Electri-Cool® II system should assure that it is used in such an environment. - Page 30 Operation & Service Manual Table 3. Electromagnetic Immunity Guidance and manufacturer’s declaration – electromagnetic immunity Voltage <5% UT <5% UT Mains power quality should be dips, short (>95% dip in (>95% dip in that of a typical commercial or interruptions hospital environment.
- Page 31 Maintenance Electri-Cool II Model 767 Maintenence Electri-Cool II Model 767 Maintenance Section 17 of 126 17 of 126...
-
Page 32: Maintenance
Check the plug for missing or bent pins. Check the hoses and pads for leaks or kinks. • See section 10.9 Cleaning (External), on page 14. 13.4 Draining the Reservoir • See section 37.1 Draining the Electri-Cool II, on page 122. 18 of 126... -
Page 33: Air Filter Inspection And Replacement
Maintenance Electri-Cool II Model 767 Filter 14.0 Air Filter Inspection and Replacement Inspect filter before each use of unit. Remove air filter retainer to access the air filter on Tools the bottom of the unit. Inspect the filter for accumulated dust. If the filter is 30% clogged with dust, replace filter with a new one and reattach the air filter retainer. -
Page 34: Remove The Filter Retainer
Operation & Service Manual 14.1 Remove the Filter Retainer Unplug the unit from any power source. Figure 4 - Step 1 Unplug power cord Use a slotted screwdriver to pry where the filter retainer meets with the filter housing. Take care to not damage the fan guard beneath. - Page 35 Maintenance Electri-Cool II Model 767 Place a new filter in the filter retainer recess. Figure 7 - Step 4 Place filter in retainer Align the four tabs to the slots of the filter housing. Figure 8 - Step 5 Align tabs to slots Press firmly until the retainer snaps into place.
-
Page 36: Draining The Reservoir
Operation & Service Manual 15.0 Draining the Reservoir The Electri-Cool II must be drained at least every 30 days. The unit must also be drained prior to storage, and prior to transportation. Unplug the unit from any power source. 2. Place the unit over a sanitary drain. - Page 37 Service Electri-Cool II Model 767 Operation & Service Manual Service Section 24 of 126 23 of 126...
-
Page 38: Troubleshooting Guide
Operation & Service Manual 16.0 Troubleshooting Guide 16.1 General This section provides information to aid the service technician in diagnosing problems with the Electri-Cool® II system. The left column lists problems which may occur; the right column lists the most probable causes of the problem. Table 4. -
Page 39: Indicator Specifics
Service Electri-Cool II Model 767 Table 4. Troubleshooting Problem Probable Cause Loose or disconnected ground (green) wire(s) Ground continuity exceeds 0.2 Defective connector on ground wire Ohms. Defective power cord Leackage current exceeds 300 Defective power supply microamperes 16.2 Indicator Specifics... -
Page 40: Service
Operation & Service Manual 17.0 Service Maintenance and service activities will sometimes overlap. In general, maintenance refers to any activity that does not require a certified technician. Maintenance may be performed by healthcare personnel or by other trained persons. The following actions are considered maintenance: •... -
Page 41: Ecii Interior Access
Service Electri-Cool II Model 767 18.0 ECII Interior Access WARNING: ALL ground wires must be connected. Improper grounding may result in electric shock. CAUTION: Working with electronic boards, plugs, and cables requires delicate handling. Proper Electrostatic Discharge (ESD) procedures should be followed during replacement of any electronic board. -
Page 42: Flow Test
2. Fill reservoir with sterile water or water that has been passed through a filter less than or equal to 0.22 microns. 3. Connect bypass hose to both quick-disconnect connectors. 4. Turn unit on. 5. Check Electri-Cool II for any water leaks. 18.3 Temperature Test Tools needed: • In-line temperature probe •... -
Page 43: Low Water Switch/Indicator Test
Service Electri-Cool II Model 767 1. Remove the device from any power source. 2. When removing covers to check for internal water leaks, the service technician must be grounded with an ESD mat and wristband or equivalent. 3. Attach an in-line temperature probe to the device’s outlet and a six foot insulated connecting hose with a pad to the return port of the machine. -
Page 44: Leakage Current Test
Operation & Service Manual 18.5 Leakage Current Test 1. Unit must be plugged into a power source and running. 2. Connect the leakage current tester ground lead clamp to the equipotential ground on the back of the unit. 3. Test unit in all combinations of power switch off and on, normal and reverse polarity, and normal and open ground. -
Page 45: Internal Physical Inspection
Service Electri-Cool II Model 767 8. Confirm that the indicator sounds and verify the low temperature LED lights up. 9. Move the jumper at J9 on the control board from the TEST to the OPERATE position and reconnect the 8-position connector from the TE subassembly to the control board. - Page 46 Operation & Service Manual Figure 13 - Control board diagram Figure 15 - Detail A Test Position Figure 14 - Detail A Operate Position 32 of 126...
-
Page 47: Preventive Maintenance For Service Personnel
Service Electri-Cool II Model 767 19.0 Preventive Maintenance for Service Personnel Table 5. Preventive Maintenance Inspection Sheet Daily Preventive Maintenance Inspection Sheet Date Section Procedures 12.3 Exterior Physical Inspection Value Pass/Fail External enclosure in good condition, No cracks, bent, missing, or damaged parts... - Page 48 Operation & Service Manual Monthly Preventive Maintenance Checklist 18.1 Flow Test Value Pass/Fail Check flow rate is minimum 68 LPH (18 GPH) 18.7 Water Temperature Low-Limit Thermistor Test Value Pass/Fail Temperature reading when set at 5-7 °C (40-45 °F). Reading within 3.9-8.1 °C (31-47 °F) Temperature reading when set at 8-10 °C (46-50 °F) Reading within 6.9-11.1 °C (44-52 °F) Temperature reading when set to 11-13 °C (51-55 °F)
- Page 49 Service Electri-Cool II Model 767 35 of 126...
-
Page 50: Table
Operation & Service Manual Table 6. Parts List Item # Name Qty. Brackets Lug Ground, Euro Ground Lug Washer, Green/Yellow Fuse Power Supply Control Board Float Switch TE Module Fan Guard Fan Motor Pump Insulation Tubing, 3/8” ID x 1/8 W Reservoir Reservoir Lid Bottom Enclosure... - Page 51 Service Electri-Cool II Model 767 Item # Name Qty. Insulation Tubing, 1/2” Clear PVC Tubing, 1/4” ID x 3/8” OD Barbed Elbow, 25 x 25 Fuse Holder Exterior Logo Label Power Entry Shroud Phillips Screw, #8-32 x 5/16" Phillips Truss Head Screw, #8-32 x 3/4 Head Screw, #8-32 x 3/8"...
-
Page 52: Rear Enclosure And Reservoir Lid Replacement
Operation & Service Manual 20.0 Rear Enclosure and Reser- voir Lid Replacement CAUTION: Working with electronic boards, plugs, and cables requires delicate handling. Proper Electrostatic Discharge (ESD) procedures should be followed during replacement of any electronic board. Failure to do so may result in damage to the board. Note: If the rear enclosure replacement must be replaced for any reason, the specifications label on the back must also be replaced. -
Page 53: Rear Enclosure And Reservoir Lid Removal
Service Electri-Cool II Model 767 20.1 Rear Enclosure and Reservoir Lid Removal Disconnect the device from mains power (Figure 17). 2. Drain the device. See section 15.0 Draining the Reservoir, on page 22. Figure 17 - Step 1 Unplug power cord Remove the two handle screws. - Page 54 Operation & Service Manual Remove the reservoir collar (Figure 20). Figure 20 - Step 5 Remove collar Lift rear enclosure with lid up and away (Figure 21). Figure 21 - Step 6 Lift rear enclosure with lid up and away 40 of 126...
-
Page 55: Rear Enclosure And Reservoir Lid Installation
Service Electri-Cool II Model 767 20.2 Rear Enclosure and Reservoir Lid Installation Install enclosure and lid (Figure 22). Figure 22 - Step 1 Install enclosure and lid Screw on the reservoir collar (Figure 23). Figure 23 - Step 2 Install reservoir collar Secure the rear enclosure to the bottom enclosure using two #10-24 x 3/4”... - Page 56 Operation & Service Manual Secure the rear enclosure handle to the front enclosure handle with two #10-24 x 3/4” phillips, fillister-head screws (Figure 25). 5. Tighten all screws to 10 in-lbs. Figure 25 - Step 4 Install two handle screws 42 of 126...
-
Page 57: Front Enclosure Replacement
Service Electri-Cool II Model 767 21.0 Front Enclosure Replacement CAUTION: Working with electronic boards, plugs, and cables requires delicate handling. Proper Electrostatic Discharge (ESD) procedures should be followed during replacement of any electronic board. Failure to do so may result in damage to the board. -
Page 58: Front Enclosure Removal
Operation & Service Manual 21.1 Front Enclosure Removal Follow instructions for section 20.0 Rear Enclosure and Reservoir Lid Replacement, on page 38. 2. Place the unit on its back. Remove the four screws in the base (Figure 26). Do not discard the screws. Figure 26 - Step 2 Remove four screws Lift the front enclosure up and away from the base. -
Page 59: Front Enclosure Installation
Service Electri-Cool II Model 767 21.2 Front Enclosure Installation 1. Follow instructions for section 24.0 Membrane Panel Replacement, on page 2. Install a new exterior logo label if required. Remove the adhesive backing from a corner of the label. Align it with the recessed area on the front enclosure and press the corner in place. - Page 60 Operation & Service Manual Install the front enclosure to the base enclosure with four #10-24 x 3/4” Phillips fillister head screws (Figure 31). 6. Perform the maintenance as defined in the “Preventive Maintenance for Service Personnel” on page 33. 7. Follow instructions for section 20.2 Rear Enclosure and Reservoir Lid Installation, on page 41.
-
Page 61: Bottom Enclosure Replacement
Service Electri-Cool II Model 767 22.0 Bottom Enclosure Replacement CAUTION: Working with electronic boards, plugs, and cables requires delicate handling. Proper Electrostatic Discharge (ESD) procedures should be followed during replacement of any electronic board. Failure to do so may result in damage to the board. -
Page 62: Bottom Enclosure Removal
Operation & Service Manual 22.1 Bottom Enclosure Removal 1. Follow the instructions for section 20.0 Rear Enclosure and Reservoir Lid Replacement, on page 38. 2. Follow instructions for section 21.0 Front Enclosure Replacement, on page 43. 3. Follow the instructions for section 35.1 Fan Guard Removal, on page 107. -
Page 63: Bottom Enclosure Installation
Service Electri-Cool II Model 767 22.2 Bottom Enclosure Installation Install the feet by pushing them into place and pull and turn them from the inside to lock them in place. Figure 33 - Step 1 Install feet Install BF applied part label next to the quick disconnect couplings (Figure 34). -
Page 64: Equipotential Grounding Stud Replacement
Operation & Service Manual 23.0 Equipotential Grounding Stud Replacement Tools: • 10mm open end wrench (2) Parts provided: • Stud replacement kit 23.1 Grounding Stud Removal Use a 10mm open end wrench to remove the first Keps nut that holds the ground stud in place. -
Page 65: Grounding Stud Installation
Service Electri-Cool II Model 767 23.2 Grounding Stud Installation Insert the stud in the hole in the side of the bottom enclosure. Figure 38 - Step 1 Insert stud Slide the green and white ring over it so that the colors show to the outside of the enclosure. -
Page 66: Figure 41 Step 5 Attach Ground Wire And Second Keps Nut
Operation & Service Manual Install Keps nut #1 on the outside of the base enclosure, and #2 Keps nut on the inside. Tighten both nuts with two open end wrenches. Figure 40 - Step 3 Install Keps nuts 1 & 2 Attach the ground wire and place Keps nut #3 on the end. -
Page 67: Membrane Panel Replacement
Service Electri-Cool II Model 767 Membrane Panel 24.0 Membrane Panel Replacement CAUTION: Working with electronic boards, plugs, and cables requires delicate handling. Proper Electrostatic Discharge (ESD) procedures should be followed during replacement of any electronic board. Failure to do so may result in damage to the board. -
Page 68: Membrane Panel Removal
Operation & Service Manual 24.1 Membrane Panel Removal 1. Follow instructions for section 20.0 Rear Enclosure and Reservoir Lid Replacement, on page 38. 2. Follow instructions for section 21.0 Front Enclosure Replacement, on page 43. Grasp the ribbon cable plug by the edges. -
Page 69: Membrane Panel Installation
Service Electri-Cool II Model 767 24.2 Membrane Panel Installation Thread the ribbon cable through the square cutout on the surface of the front enclosure (Figure 44). 2. Peel the adhesive backing off the new membrane panel. 3. Begin applying the membrane from the narrow end to the wide end. -
Page 70: Float Switch Replacement
Operation & Service Manual 25.0 Float Switch Replacement Float Switch Tools required: • 9/16” open end wrench Parts provided: • Float switch with gasket and mounting nut. Tools 56 of 126... -
Page 71: Float Switch Removal
Service Electri-Cool II Model 767 25.1 Float Switch Removal 1. Follow instructions for section 20.0 Rear Enclosure and Reservoir Lid Replacement, on page 38. 2. Follow instructions for section 21.0 Front Enclosure Replacement, on page 43. Disconnect the float switch cable from J7 on the control board (Figure 46). -
Page 72: Float Switch Installation
Operation & Service Manual 25.2 Float Switch Installation Make sure the words “GEMS Sensors” on the float are facing up as the switch is installed. If the words will not face up, remove the float retainer clip and flip the float over. -
Page 73: Figure 52 Step 4 Secure Float Switch Mounting Nut
Service Electri-Cool II Model 767 Secure the float switch in place beneath the reservoir with the accompanying nut (Figure 52). Figure 52 - Step 4 Secure float switch mounting nut Fasten the float switch cable under the reservoir insulation. Ensure the float switch wires extend towards the front left corner of the reservoir (Figure 53). - Page 74 Operation & Service Manual Connect the float switch cable to J7 on the control board (Figure 55). 8. Follow instructions for section 21.2 Front Enclosure Installation, on page 45. 9. Perform a leak test with the unit running (section 18.2 on page 28). 10.
-
Page 75: Reservoir Replacement
Service Electri-Cool II Model 767 Reservoir 26.0 Reservoir Replacement CAUTION: Working with electronic boards, plugs, and cables requires delicate handling. Proper Electrostatic Discharge (ESD) procedures should be followed during replacement of any electronic board. Failure to do so may result in damage to the board. -
Page 76: Reservoir Removal
Operation & Service Manual 26.1 Reservoir Removal 1. Follow instructions for section 20.0 Rear Enclosure and Reservoir Lid Replacement, on page 38. 2. Follow instructions for section 21.0 Front Enclosure Replacement, on page 43. 3. Follow instructions for section 25.0 Float Switch Replacement, on page 4. -
Page 77: Reservoir Installation
Service Electri-Cool II Model 767 26.2 Reservoir Installation Install tubing onto new reservoir and secure with hose clamps. 2. Follow instructions for securing the float switch into the new reservoir, section 25.0 Float Switch Replacement, on page Figure 58 - Step 1 connect tubing to reservoir... -
Page 78: Pump Replacement
Operation & Service Manual Pump kit 27.0 Pump Replacement CAUTION: Working with electronic boards, plugs, and cables requires delicate handling. Proper Electrostatic Discharge (ESD) procedures should be followed during replacement of any electronic board. Failure to do so may result in damage to the board. Tools required •... -
Page 79: Pump Removal
Service Electri-Cool II Model 767 27.1 Pump Removal 1. Refer to section 20.0 Rear Enclosure and Reservoir Lid Replacement, on page 2. Refer to section 21.0 Front Enclosure Replacement, on page 43. Disconnect the pump connector from J5 on the control board (Figure 61). -
Page 80: Figure 64 Step 7 Remove Discharge Tubing
Operation & Service Manual Remove discharge tubing from the pump. Figure 64 - Step 7 Remove discharge tubing Use the slotted screwdriver to loosen the two hose clamps at the tubing connection to the reservoir Figure 65 - Step 5 Loosen two hose clamps Remove pump mount bracket from the base by removing two Phillips screws (Figure 66). -
Page 81: Figure 68 Step 1 Remove Pump From Bracket
Service Electri-Cool II Model 767 Remove inlet tubing from the pump. Figure 67 - Step 8 Remove inlet tubing Use a #2 Phillips screwdriver to remove pump from the bracket (Figure 68). Figure 68 - Step 1 Remove pump from... -
Page 82: Pump Installation
Operation & Service Manual 27.2 Pump Installation Mount new pump to the new pump bracket using two #8-32 x 5/16” Phillips screws (Figure 69). Figure 69 - Step 1 Mount pump to bracket Mount pump bracket to the base enclosure using two #8-32 x 1/2” flat- head screws (Figure 70). -
Page 83: Figure 72 Step 4 Tighten The Hose Clamps
Service Electri-Cool II Model 767 Use the slotted screwdriver to tighten the two hose clamps at the tubing connection to the reservoir. Figure 72 - Step 4 Tighten the hose clamps. Install the EMI suppressor around the fan and pump wires (Figure 73). -
Page 84: Figure 76 Step 8 Route Wires Behind Bracket
Operation & Service Manual Secure the fan and pump wires to the front thermoelectric subassembly bracket with a wire tie (Figure 75). Use the wire cutters to remove the excess wire tie. Slide the EMI suppressor down to the wire tie. Figure 75 - Step 7 Secure wires to bracket Route the pump and fan wires between the power supply and the thermoelectric... -
Page 85: Quick Disconnect Panel Mount Couplings Replacement
Service Electri-Cool II Model 767 Quick disconnect panel mount couplings 28.0 Quick Disconnect Panel Mount Couplings Replacement Tools: • 3/4” open end wrench • 13/16” open end wrench • Heat gun • Tubing cutter Parts supplied: • One foot of clear PVC Tubing 1/4” ID x 3/8”... -
Page 86: Quick Disconnect Removal
Operation & Service Manual 28.1 Quick Disconnect Removal 1. Follow instructions for section 20.1 Rear Enclosure and Reservoir Lid Removal, on page 39. 2. Follow instructions for section 21.1 Front Enclosure Removal, on page 44. 3. Use the heat gun to soften the tubing at the couplings. -
Page 87: Figure 81 Step 7 Pull Couplings Out Of Enclosure
Service Electri-Cool II Model 767 Use the 3/4” wrench to unscrew the retainer nuts on the back of the quick disconnect couplings (Figure 80). Slide the nuts up onto the tubing. Figure 80 - Step 6 Slide retainer nuts up Pull the quick disconnect couplings out of the bottom enclosure. -
Page 88: Quick Disconnect Installation
Operation & Service Manual 28.2 Quick Disconnect Installation 1. Cut a 2 inch length of PVC tubing and install it on the 90 degree hose barb. 2. Cut a 2-1/2 inch length of Insulation tubing and slide it over the 2 inch PVC tube. -
Page 89: Figure 84 Step 7 Insert Couplings Into Hose
Service Electri-Cool II Model 767 Heat the PVC tubing ends and push them onto the quick disconnects (Figure 84). Figure 84 - Step 7 Insert couplings into hose Push the quick disconnect couplings through the openings in the base enclosure. Turn them so the release button is facing up. -
Page 90: Figure 88 Step 12 Apply Electrical Tape Around Insulation
Operation & Service Manual Thread the retaining nuts onto the threads and tighten with the open end wrench. 10. Perform a leak test of the tubing connections (section 18.2 on page 28). Figure 86 - Step 9 Tighten retaining nuts Tape up the exposed clamps with insulation tape. -
Page 91: Fuse Replacement
Service Electri-Cool II Model 767 Fuses 29.0 Fuse Replacement Tools: • 1/8 inch slotted screwdriver Parts provided: Tools • Fuses (requires two) CAUTION: Working with electronic boards, plugs, and cables requires delicate handling. Proper Electrostatic Discharge (ESD) procedures should be followed during replacement of any electronic component. -
Page 92: Fuse Removal
Operation & Service Manual 29.1 Fuse Removal Disconnect the device from any power source (Figure 89). Figure 89 - Step 1 Unplug power Locate the slot at the top of the power inlet and use a screw driver to pry the fuse door open (Figure 90). -
Page 93: Fuse Installation
Make sure the lock tabs are inside the enclosure (Figure 94). 4. Attach a pad to the device. 5. Turn on the Electri-Cool II. 6. Check that the device will sustain power when it is in 5-7 °C cooling mode. -
Page 94: Power Inlet And Wire Harness Replacement
Operation & Service Manual Power inlet and wire harness 30.0 Power Inlet and Wire Harness Replacement 10mm x2 CAUTION: Working with electronic boards, plugs, and cables requires delicate handling. Proper Electrostatic Discharge (ESD) procedures should be followed during replacement of any electronic board. -
Page 95: Power Inlet Removal
Service Electri-Cool II Model 767 30.1 Power Inlet Removal 1. Follow instructions for section 20.1 Rear Enclosure and Reservoir Lid Removal, on page 39. 2. Follow instructions for section 21.1 Front Enclosure Removal, on page 44. Remove the power inlet plastic shroud (Figure 95). -
Page 96: Figure 97 Step 5 Disconnect Harness From The Power Supply
Operation & Service Manual Disconnect the power inlet wire harness from the power supply (Figure 97). Figure 97 - Step 5 Disconnect harness from the power supply Remove the EMI suppressor from the control board power wire. Figure 98 - Step 6 Remove suppressor 82 of 126... - Page 97 Service Electri-Cool II Model 767 Remove the two retaining screws and small Keps nuts that mount the power inlet to the bottom enclosure (Figure 99). Do not discard the screws and nuts. Figure 99 - Step 7 Remove retaining screws Pull the power inlet out from the bottom enclosure (Figure 100).
-
Page 98: Power Inlet Installation
Operation & Service Manual 30.2 Power inlet Installation 1. Follow instructions for section 29.2 Fuse Installation, on page 79. Install new power inlet using two (2) #4- 40 x 3/4” screws and two (2) #4-40 Keps nuts (Figure 101). Figure 101 - Step 2 Install power inlet Connect the control board power wires to connector J2. -
Page 99: Figure 104 Step 5 Route Wire Harness Connector Behind Bracket
Service Electri-Cool II Model 767 Route the new wire harness connector behind the thermoelectric subassembly bracket (Figure 104). Figure 104 - Step 5 Route wire harness connector behind bracket Connect the power supply to the three wires that come from the power inlet (Figure 105). -
Page 100: Figure 107 Step 8 Reinstall Plastic Power Inlet Shroud
Operation & Service Manual Reinstall the power inlet plastic shroud. 9. Follow instructions for section 21.2 Front Enclosure Installation, on page 45. 10. Perform the maintenance as defined in the “Preventive Maintenance for Service Personnel” on page 33. 11. Follow instructions for section 20.2 Rear Enclosure and Reservoir Lid Installation, on page 41. -
Page 101: Control Board Replacement
Service Electri-Cool II Model 767 Control Board 31.0 Control Board Replacement CAUTION: Working with electronic boards, plugs, and cables requires delicate handling. Proper Electrostatic Discharge (ESD) procedures should be followed during replacement of any Tools electronic board. Failure to do so may result in damage to the board. -
Page 102: Control Board Removal
Operation & Service Manual 31.1 Control Board Removal 1. Refer to section 20.0 Rear Enclosure and Reservoir Lid Replacement, on page 2. Refer to section 21.0 Front Enclosure Replacement, on page 43. Disconnect all five (5) electrical connectors from the control board (Figure 108). -
Page 103: Control Board Installation
Service Electri-Cool II Model 767 31.2 Control Board Installation Reinstall the three #8 plastic washers onto the thermoelectric bracket assembly (Figure 112). Figure 111 - Step 1 Remove three plastic washers (one shown) Place the new control board in place and install the three #8-32 x 1/4 “... -
Page 104: Power Supply Replacement
Operation & Service Manual Power Supply 32.0 Power Supply Replacement CAUTION: Working with electronic boards, plugs, and cables requires delicate handling. Proper Electrostatic Discharge (ESD) procedures should be followed during replacement of any electronic board. Failure to do so may result in damage to the board. Tools Tools: •... -
Page 105: Power Supply Removal
Service Electri-Cool II Model 767 32.1 Power Supply Removal 1. Refer to section “Rear Enclosure and Reservoir Lid Replacement” on page 2. Refer to section “Front Enclosure Replacement” on page 43. 3. Follow instructions for section 31.1 Control Board Removal, on page 88. -
Page 106: Figure 116 Step 6 Remove Phillips Screws From Rear Braket
Operation & Service Manual Remove the two Phillips, truss-head screws and two spacers (if present) holding the power supply to the thermoelectric subassembly rear bracket. Figure 116 - Step 6 Remove Phillips screws from rear braket. Use the Phillips screwdriver to disconnect the power supply from the three wires that come from the power inlet. -
Page 107: Power Supply Installation
Service Electri-Cool II Model 767 32.2 Power Supply Installation Connect the power supply to the three wires that come from the power inlet (Figure 119). • Connect the blue wire to pin one • Connect the brown wire to pin two •... -
Page 108: Figure 123 Step 5 Power Supply Wires Placement
Operation & Service Manual Connect the control board power wire harness to the power supply (Figure 122). • Red wire to pin one • Black wire to pin three Figure 122 - Step 4 Detail Make sure the power supply wires are placed between the power supply and the thermoelectric subassembly bracket (Figure 123). -
Page 109: Figure 125 Step 7 Wire Tie The Harness To The Third Slot
Service Electri-Cool II Model 767 Wire tie the power supply wiring harness to the third slot on the side of the power supply (Figure 125). 8. Follow instructions for section 31.2 Control Board Installation, on page 9. Follow instructions for section 21.2 Front Enclosure Installation, on page 45. -
Page 110: Thermoelectric (Te) Module Replacement
Operation & Service Manual Thermoelectric Module 33.0 Thermoelectric (TE) Module Replacement CAUTION: Working with electronic boards, plugs, and cables requires delicate handling. Proper Electrostatic Discharge (ESD) procedures should be followed during replacement of any electronic components. Tools: Tools • #2 Phillips screwdriver Parts provided: •... -
Page 111: Te Module Removal
Service Electri-Cool II Model 767 33.1 TE Module Removal 1. Follow instructions for section 20.0 Rear Enclosure and Reservoir Lid Replacement, on page 38. 2. Follow instructions for section 21.0 Front Enclosure Replacement, on page 43. 3. Follow instructions for section 31.1 Control Board Removal, on page 88. -
Page 112: Figure 128 Step 7 Remove Tubing From Te Module
Operation & Service Manual Remove the tubing from the TE module. 8. Lift the TE module out of the enclosure. Figure 128 - Step 7 Remove tubing from TE module 98 of 126... -
Page 113: Te Module Installation
Service Electri-Cool II Model 767 33.2 TE Module Installation Reconnect the tubing that goes from the TE module to the pump and quick disconnect (Figure 129). Figure 129 - Step 1 Reconnect TE tubing Install the TE Module onto the front bracket with two #8-32 x 3/8”... - Page 114 Operation & Service Manual 4. Follow instructions for section 32.2 Power Supply Installation, on page 5. Follow instructions for section 31.2 Control Board Installation, on page 6. Follow instructions for section 21.2 Front Enclosure Installation, on page 45. 7. Follow instructions for section 20.2 Rear Enclosure and Reservoir Lid Installation, on page 41.
-
Page 115: Fan Motor Replacement
Service Electri-Cool II Model 767 Fan Motor 34.0 Fan Motor Replacement CAUTION: Working with electronic boards, plugs, and cables requires delicate handling. Proper Electrostatic Discharge (ESD) procedures should be followed during replacement of any electronic board. Failure to do so may result in damage to the board. -
Page 116: Fan Motor Removal
Operation & Service Manual 34.1 Fan Motor Removal 1. Follow instructions for section 20.0 Rear Enclosure and Reservoir Lid Replacement, on page 38. 2. Follow instructions for section 21.0 Front Enclosure Replacement, on page 43. 3. Follow instructions for section 31.1 Control Board Removal, on page 88. -
Page 117: Fan Motor Installation
Figure 134 - Step 1 Install four screws into fan guard holes Install the Gentherm air filter into the filter retainer. Figure 135 - Step 2 Place filter into retainer Re-attach filter retainer to fan guard to hold screws in place when you put the fan motor on top of them. -
Page 118: Figure 139 Step 6 Place Fan Over Te Brackets On Fan Guard Screws
Operation & Service Manual Raise the bottom enclosure off of the table. Place a support under the fan guard so that the unit is suspended (Figure 137). Figure 137 - Step 4 Raise up off table Place the TE brackets over the fan guard screws. - Page 119 Service Electri-Cool II Model 767 Position the fan wires (Figure 140). 8. Follow instructions for section 35.2 Fan Guard Installation, on page 110. 9. Follow instructions for section 33.2 TE Module Installation, on page 99. 10. Follow instructions for section 32.2...
-
Page 120: Fan Guard Replacement
Tools: • #2 Phillips screwdriver Tools • Long small tip slotted screwdriver • Needle-nose pliers Parts provided: • Fan guard with Manufacturer Filter* *A Gentherm filter is not supplied and must be ordered separately. 106 of 126... -
Page 121: Fan Guard Removal
Service Electri-Cool II Model 767 35.1 Fan Guard Removal 1. Follow instructions for section 20.1 Rear Enclosure and Reservoir Lid Removal, on page 39. 2. Follow instructions for section 21.0 Front Enclosure Replacement, on page 43. Use the slotted tip screwdriver to pry the filter retainer from the base of the unit. - Page 122 Operation & Service Manual Remove screw and nut #1. Figure 144 - Step 6 Remove Keps nut #1 Remove screw and nut #2. Figure 145 - Step 7 Remove Keps nut #2 Remove screw and nut #3. Figure 146 - Step 8 Remove Keps nut #3 108 of 126...
- Page 123 Service Electri-Cool II Model 767 Remove screw and nut #4. 10. Dispose of the used fan guard, the filter and the filter retainer according to facility protocols. Figure 147 - Step 9 Remove Keps nut #4 109 of 126...
-
Page 124: Fan Guard Installation
Operation & Service Manual 35.2 Fan Guard Installation Screws should be inserted and tightened in the order shown. Insert the first #8-32 x 1” oval-head screw into the fan guard screw holes. The screw should point in the opposite direction from the filter. Insert them in the order shown for best results (Figure 148). -
Page 125: Figure 152 Step 6 Place Plastic Shield In Position
Place the plastic shield in position (Figure 152). Figure 152 - Step 6 Place plastic shield in position Place the Gentherm air filter inside the filter retainer recess. Figure 153 - Step 2 Place filter into retainer 111 of 126... - Page 126 Operation & Service Manual Place the filter retainer with filter into position against the fan guard. Press firmly on all four sides until it snaps into place (Figure 154). 9. Follow instructions for section 21.2 Front Enclosure Installation, on page 45. 10.
-
Page 127: Specifications
Service Electri-Cool II Model 767 36.0 Specifications Physical Approximate Dimensions: 30.5 cm (12 in.) Width 15.2 cm (6 in.) Depth 30.5 cm (12 in.) Height Approximate Weight: 5.9 kg (13 lb.) Approximate Hose Length: 1.83 m (6 ft.) Filtration: Outer Construction: Case material: G.E Cycoloy 6600 Plastic, Grey... -
Page 128: Expected Service Life
Classified to IEC 60601-1-2: 36.1 Expected Service LIfe The Electri-Cool II has a maximum lifetime of 5 years, when used with sterile water or water that has been passed through a filter less than or equal to 0.22 microns. 114 of 126... - Page 129 Service Electri-Cool II Model 767 Guidance and manufacturer’s declaration – electromagnetic immunity The Electri-Cool® II system is intended for use in the electromagnetic environment specified below. The customer or the user of the Electri-Cool® II system should assure that it is used in such an environment.
- Page 130 Operation & Service Manual Guidance and manufacturer’s declaration – electromagnetic immunity Note 1: At 80 MHz and 800 MHz, the higher frequency range applies. Note 2: These guidelines may not apply in all situations. Electromagnetic propagation is affected by absorption and reflection from structures, objects and people. a Field strengths from fixed transmitters, such as base stations for radio (cellular/cordless) telephones and land mobile radios, amateur radio, AM and FM radio broadcast and TV broadcast cannot be predicated theoretically with accuracy.
- Page 131 Service Electri-Cool II Model 767 For transmitters rated at a maximum output power not listed above, the recommended separation distance (d) in meters (m) can be estimated using the equation applicable to the frequency of the transmitter, where (P) is the maximum output power rating of the transmitter in watts (W) according to the transmitter manufacturer.
-
Page 132: Replacement Parts
36.2 Replacement Parts All replacement parts for the Electri-Cool® II can be found below and must be purchased from Gentherm. Service is intended to be performed by a biomedical technician. The Electri-Cool® II must be turned OFF and the power cord must be unplugged before replacing any parts. - Page 133 Service Electri-Cool II Model 767 Item No. Description Illustration Reservoir Insulation Shown in Figure 6 Operation Manual Not shown Membrane Control Panel Shown in Figure 6 Exterior Spec Label Not shown Plastic Spacer Shown in Figure 6 Screw, 8-32 x ½” flat head SS Shown in Figure 6 8-32 x 1”...
- Page 134 Operation & Service Manual 120 of 126...
- Page 135 Service Electri-Cool II Model 767 Figure 157 - Wiring Schematic 121 of 126...
- Page 136 Gigasept FF 15 Minutes 37.2.1 Disinfection/Dry Storage Procedure The following procedure disinfects the fluid circuit in the Electri-Cool II. Required tools and supplies: • Household bleach • Sterile water or water that has been passed through a filter less than or equal to 0.22 microns •...
- Page 137 Service Electri-Cool II Model 767 Gigasept FF (not available in the US) Water 35 Milliliters 315 Milliliters (Product of Schulke & Mayr) 29 Milliliters of Maranon H 321 Milliliters (Product of Ecolab) 4. Turn the unit on and circulate for 5 minutes.
- Page 138 • Tested and passed in accordance with IEC 60601-1-2 EMC requirements Classified by Underwriters Laboratory Inc. ® with respect to Electric Shock, Fire and Mechanical Hazards only in accordance with UL 60601-1, CAN/GENTHERM-C22.2 No. 601-1, 5R37 European In compliance with the Medical Device Directive 93/42/EEC...
- Page 139 SECTION TITLE Electri-Cool II Model 767 This page intentionally left blank. 125 of 126...
- Page 140 Technology to the Next Degree Gentherm Medical LLC 12011 Mosteller Road Cincinnati OH 45241 USA www.gentherm.com 1-800-989-7373 Fax: 1-513-772-9119...
Need help?
Do you have a question about the Electri-Cool II and is the answer not in the manual?
Questions and answers