
Subscribe to Our Youtube Channel
Related Manuals for i-team i-vac 30UR


Summary of Contents for i-team i-vac 30UR
- Page 1 i-vac 30UR The most flexible of its kind User manual i-team Professional b.v. Hoppenkuil 27b, 5626 DD Eindhoven, The Netherlands T +31402662400 E hello@i-teamglobal.com I www.i-teamglobal.com...
- Page 2 Original user manual, written in the English Language Future Cleaning Technologies B.V. Hoppenkuil 27b, 5626 DD Eindhoven, The Netherlands T +31402662400 E hello@i-teamglobal.com I www.i-teamglobal.com Model: i-vac 30UR Date: 16/04/2020 Production code: SM.I-V.1110C Version: v.1.1...
-
Page 3: Preface
Become familiar with the correct operation and maintenance procedures. Store the manual in a safe place. The manual is an essential part of the i-vac 30UR and must be handed over to the new owner upon resale or exchange. Each i-vac 30UR has a unique identification number that can be found at the back of the main body. -
Page 4: Reading Guide
Reading guide The following symbols and terms are used throughout this manual to alert the reader to safety issues and important information: Symbol Term Explanation WARNING Indicates a hazardous situation which, if the safety instructions are not followed, can lead to injuries of the operator or bystanders, light and/or moderate damage to the product or the environment. -
Page 5: Table Of Contents
Content Preface ..................................3 Purpose of the user manual ............................ 3 Target audience ..............................3 Operators of the i-vac 30UR ............................ 3 Reading guide ................................4 Introduction ..............................7 Intended use of the product ........................7 Non-intended use of the product ......................8 Modifications ............................ - Page 6 7.1.1 Clean the machine ........................... 25 7.1.2 Clean the hose and wand ........................ 25 Replacing parts ............................ 26 7.2.1 Replacing the cassette filter ......................26 7.2.2 Replacing the felt air outlet of the rotating brush ................27 7.2.3 Replacing the rotating brush ......................28 Brush condition............................
-
Page 7: Introduction
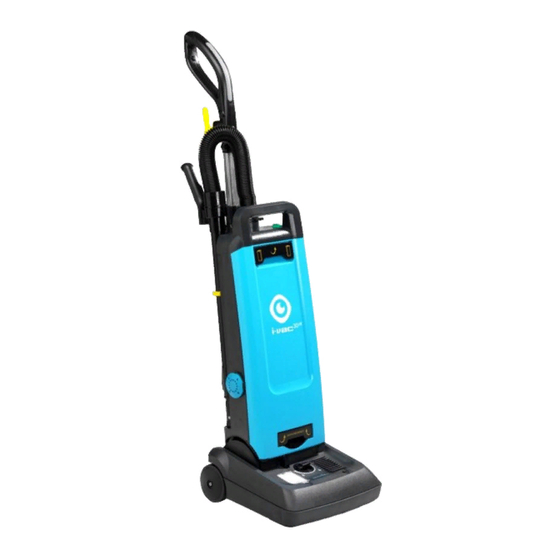
1 Introduction The i-vac 30UR® is an easy and safe machine to use. Because the i-vac 30UR is equipped with an internal rotating brush the cleaning is very efficient. You will be surprised how fast and effective the i-vac 30UR is. It also comes with several different accessories for vacuuming on different surfaces. -
Page 8: Non-Intended Use Of The Product
Do not use non original attachments, consumables or brushes. The use of other devices may impair safety. Do not use the i-vac 30UR to remove anything else than dry materials. The i-vac 30UR is not suitable for the collection of: •... -
Page 9: Specifications
1.4 Specifications Figure 3 Product size (body unit): 340 x 310 x 700 mm Diameter accessories: 35 mm Cable length: 1200 cm Hose length: 220 cm Weight: 8.3 kg Capacity (dust bag): 6 liter Voltage: 230-240 V Motor power: 1000 W Water lift/suction: 2000 mm Air flow:... -
Page 10: Warranty
The i-vac 30UR® should only be operated with the materials supplied. Using alternative supplies may cause damage to the i-vac 30UR and may cause a risk to the operator. The use of alternative supplies or not following the advised maintenance schedule voids manufacturer's warranty. The warranty period Is 1 year. -
Page 11: Description
2 Description The i-vac 30UR® has an ergonomic handle for comfortable use and an inspection hatch for blockages. The telescopic wand makes it easy to reach high spots. It can be combined with different tools to use the i-vac 30UR on different surfaces. -
Page 12: Safety
30UR . WARNING DO NOT use the i-vac 30UR on damp or wet surfaces. This will cause damage to the i- vac 30UR and it is dangerous to the user. The damage caused by the use on a wet surface is not covered under the warranty. -
Page 13: Transport And Storage
30UR® outside; • store the i-vac 30UR in a dry place; • store the i-vac 30UR with the upper body in an upright position; • store the main power cable on the cable storage hooks during transport and storage; •... -
Page 14: Assembly And Installation
5 Assembly and installation The i-vac 30UR® does not require much assembly. The machine comes with 3 additional tools for vacuuming different surfaces. 5.1 Unboxing The i-vac 30UR and all the components and accessories are packed in 1 box. Figure 6... -
Page 15: Assembly
5.2 Assembly 5.2.1 Installing the handle 1. Remove the thumb screw (Figure 7, pos 3). 2. Keep the cable strain relief (Figure 7, pos 4) at hand. 3. Release the latch (Figure 7, pos 2). 4. Place the handle (Figure 7, pos 1) into the handle intake (Figure 7, pos 5). 5. -
Page 16: Installing The Upper Body To Brush Unit
5.2.2 Installing the upper body to brush unit 1. Adjust the swivel nick shaft to align its yellow mark with the yellow mark on the motor side cover (Figure 8, pos 2). 2. Adjust the steel support bracket with the yellow mark on the right side of the motor cover (Figure 8, pos 1). -
Page 17: Installing The Hose And Telescopic Wand
5.2.3 Installing the hose and telescopic wand 1. Connect one side of the hose (Figure 9, pos 1) to the broad side of the telescopic wand (Figure 9, pos 3) while depressing the clip (Figure 9, pos 2). 2. Connect the other side of the hose to the upper body (Figure 9, pos 4) while pressing the clip (Figure 9, pos 2). -
Page 18: Installing The Main Power Cable
5.2.4 Installing the main power cable 1. Open the cover (Figure 10, pos 5). 2. Place the main power cable connector into the slot (Figure 10, pos 6). 3. Close the cover (Figure 10, pos 5). 4. Insert the main power cable into the cable strain relief (Figure 10, pos 4) and secure the main power cable. -
Page 19: Replacing The Dust Bag
• unplug the main power cable before replacing the dust bag filter; • only use original i-team dust bags as these enhance the performance of the i-vac 30UR® and keep it clean. 1. Pull the front cover release handle (Figure 11, pos 1). - Page 20 7. Slide the cardboard collar (Figure 13, pos 1) of the dust bag into the slots to fully insert the dust bag. 8. Push the handle (Figure 13, pos 2) inwards until it locks. Figure 13 9. Put the front cover (Figure 14, pos 1) back into place and close it.
-
Page 21: Operation
The lower position allows you to clean under furniture such as beds, chairs and tables. A tiny guide wheel in the handle makes moving the i-vac 30UR® very easy. 1. Press the position switch (Figure 16, pos 1) to release the main body of the i-vac 30UR from its vertical position. -
Page 22: Adjusting The Height Of The Rotating Brush
6.1.3 Adjusting the height of the rotating brush You can adjust the height of the rotating brush to match the floor type you want to clean, such as tiles (low setting) or carpet (intermediate or high setting). Turn the height adjustment knob (Figure 17, pos 1) to adjust the height of the rotating brush. -
Page 23: Before You Start
2. Put the main power cable plug in the wall socket (Figure 19, pos 3). 3. Press the ON/OFF switch (Figure 19, pos 1) at the top of the main body to turn on the i-vac 30UR. 4. Start vacuuming. -
Page 24: After Operation
6.4 After operation 1. Press the ON/OFF switch (Figure 20, pos 1) at the top of the main body to turn off the i-vac 30UR®. 2. Remove the main power cable from the wall socket (Figure 20, pos 3). 3. Wind the main power cable over the hook and back handle (Figure 20, pos 2). Figure 20... -
Page 25: Maintenance
Maintenance that is not described in this manual should be done by your i-vac 30UR partner. Please make sure to have the model and serial number of the i-vac 30UR available when you call a partner. For more Information please fill out the contact form on www.i-teamglobal.com. -
Page 26: Replacing Parts
Figure 22 HEPA and ULPA filter types Your i-vac 30UR® is equipped with a standard cassette filter, which is perfect for everyday cleaning. In addition to the standard cassette filter we have the HEPA and the ULPA filter types: •... -
Page 27: Replacing The Felt Air Outlet Of The Rotating Brush
7.2.2 Replacing the felt air outlet of the rotating brush 1. Open the cover (Figure 23, pos 1). 2. Remove the old felt air outlet cotton (Figure 23, pos 2). 3. Remove the old felt air outlet (Figure 23, pos 3). 4. -
Page 28: Replacing The Rotating Brush
7.2.3 Replacing the rotating brush 1. Lay down the i-vac 30UR® horizontally. 2. Remove the metal screws (Figure 24, pos 1). Figure 24 3. Press down the three clips (Figure 25, pos 2). 4. Take out the cover plate (Figure 25, pos 1). - Page 29 5. Pull out the rotating brush at the grip (Figure 26, pos 1) and slide it out as indicated at Figure 26, pos 2. Figure 26 6. Place the new rotating brush, first at the side of the drive belt ( Figure 27, pos 1). Make sure that the grooves in the brush are aligned with the cams of the drive wheel.
-
Page 30: Brush Condition
7.5 Maintenance frequency Make sure that routine and preventive maintenance is carried out monthly to ensure safe operation. Failure to carry out maintenance as necessary may cause damage to the i-vac 30UR® and may cause a risk to the operator. -
Page 31: Trouble Shooting
Remove blockage. brush is on Whizzo makes whistling Dust bag full Turn off the i-vac 30UR. noise Replace dust bag. * If you ignore the red light in the main switch the i-vac 30UR will turn off. -
Page 32: Decommissioning And Disposal
It is the responsibility of the i-vac 30UR® owner to dispose of the product.. At the end-of-life the i-vac 30UR still contains valuable resources and needs to be disposed of according to your local laws and regulations regarding recycling of electrical equipment. -
Page 33: Attachments
10 Attachments 10.1 CE Certificate... - Page 34 This document is part of the technical file of the i-vac 30UR® and will be available upon request.
Need help?
Do you have a question about the i-vac 30UR and is the answer not in the manual?
Questions and answers