
Related Manuals for i-team i-vac 5


Summary of Contents for i-team i-vac 5
- Page 1 5 Continuously easy User manual i-team Professional b.v. Hoppenkuil 27b, 5626 DD Eindhoven, The Netherlands T +31402662400 E hello@i-teamglobal.com I www.i-teamglobal.com...
- Page 2 Original user manual, written in the English Language Future Cleaning Technologies B.V. Hoppenkuil 27b, 5626 DD Eindhoven, The Netherlands T +31402662400 E hello@i-teamglobal.com I www.i-teamglobal.com Model: C05 Date: 10/04/2020 Product code: C05.I-V.XXXXC Version: v.1.0...
-
Page 3: Preface
Become familiar with the correct operation and maintenance procedures. Store the manual in a safe place. The manual is an essential part of the i-vac 5 and must be handed over to the new owner upon resale or exchange. Each i-vac 5 has a unique identification number that can be found on top of the main body. -
Page 4: Reading Guide
Reading guide The following symbols and terms are used throughout this manual to alert the reader to safety issues and important information: Symbol Term Explanation WARNING Indicates a hazardous situation which, if the safety instructions are not followed, can lead to injuries of the operator or bystanders, light and/or moderate damage to the product or the environment. -
Page 5: Table Of Contents
Content Preface ..................................3 Purpose of the user manual ............................ 3 Target audience ..............................3 Operators of the i-vac 5 ............................3 Reading guide ................................4 Introduction ..............................7 Intended use of the product ........................7 Non-intended use of the product ......................8 Lifespan .............................. - Page 6 Storage ..............................25 Trouble shooting ............................26 Decommissioning and disposal ........................27 Attachments ..............................28 10.1 CE Certificate ............................28...
-
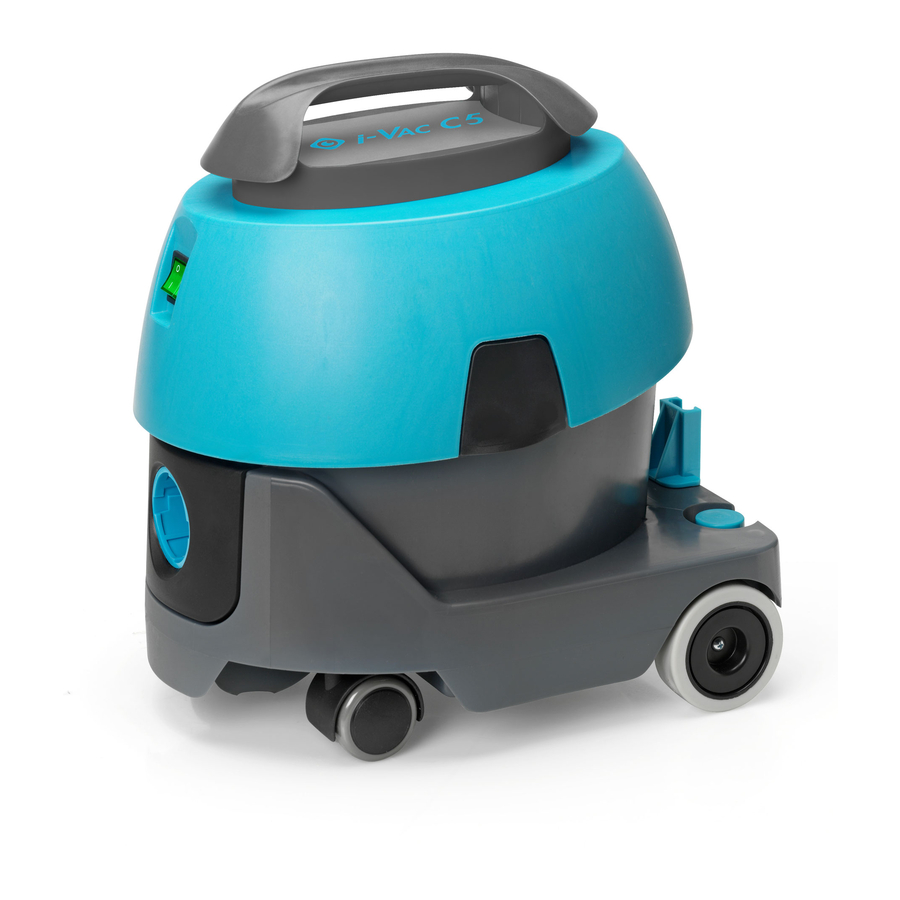
Page 7: Introduction
1 Introduction The i-vac 5® has an egg shaped canister for optimal working in smaller areas, also you can carry it close to your body. You always have the right accessories and necessary equipment with you as it can be stored on the machine. The sturdy and ergonomic main handle provides a freedom of mobility you haven’t experienced before. -
Page 8: Non-Intended Use Of The Product
Keep the i-vac 5 and the accessories clean. In order to use the i-vac 5 on different types of surfaces, extra tools are provided. These tools are easy to replace. Select the right tool for each job, see Figure 2. -
Page 9: Lifespan
1.3 Lifespan For a proper functioning and a long lifespan of the i-vac 5®, it is important to follow the recommended maintenance intervals mentioned in this manual. 1.4 Modifications It is not permitted to make modifications to the design of the i-vac 5 without consultation and permission from the manufacturer. -
Page 10: Warranty
The warranty period is 1 year. 1.7 Identification Each i-vac 5® has a unique serial number that can be found on the bottom of the main body and on the bottom of the head. Your i-team partner needs this number when you order parts. -
Page 11: Description
2 Description The body of the i-vac 5® is made of durable and impact resistant material. The wand consists of three pieces so you can extend it to reach out to difficult spots. It can be combined with different tools to use the i-vac 5 on different types of surfaces. -
Page 12: Safety
DO NOT operate the i-vac 5 without a filter dust bag. WARNING DO NOT use the i-vac 5 on damp or wet surfaces. This will cause damage to the i-vac 5 and is dangerous to the user. The damage caused by the use on a wet surface is not covered under the warranty. -
Page 13: Transport And Storage
4 Transport and storage • do not store the i-vac 5® outdoors; store the i-vac 5 in a dry place. •... -
Page 14: Assembly And Installation
5 Assembly and installation The i-vac 5® does not require much assembly. The machine comes with 2 additional tools for vacuuming different types of surfaces. 5.1 Unboxing The i-vac 5 and its components and accessories are packed in 1 box. -
Page 15: Assembly
5.2 Assembly 1. Place the main power cable in the cable strain relief (Figure 7, pos 1), at a cable length of approximately 10 to 12 centimeters from the machine. 2. Place the main power cable plug (Figure 7, pos 2) into the connector (Figure 7, pos 3). 3. -
Page 16: Replacing The Dust Bag
5.3 Replacing the dust bag Check the dust bag every week and replace it if it is full. Only use original i-team dust bags. • unplug the main power cable before replacing the dust bag; make sure that the hose is removed from the i-vac 5® before removing the dust bag. You •... - Page 17 6. Turn the hose (Figure 10, pos 5) counterclockwise and remove it from the hose connector. 7. Remove the filter bag (Figure 10, pos 1). 8. Pull the cardboard tag (Figure 10, pos 3) to seal the dust bag. 9. Fold the ends of the dust bag (Figure 10, pos 2) towards each other.
- Page 18 14. Place the hose (Figure 12, pos 1) into the hose connector (Figure 12, pos 2) turn it clockwise to lock it. Figure 12 15. Place the head (Figure 13, pos 1) onto the can. Figure 13...
- Page 19 16. Fasten the latches (Figure 14, pos 1). Figure 14 ATTENTION Make sure that the head is correctly placed on the can, otherwise false air may be sucked in and this affects the performance of the i-vac 5®.
-
Page 20: Operation
6 Operation 6.1 Before you start 1. Make sure that the main power cable is placed in the cable strain relief (Figure 15, pos 1). 2. Make sure that the main power cable is not damaged. Pull it through a fiber cloth. 3. -
Page 21: Start
6.2 Start 1. Put the main power cable into the wall socket (Figure 17, pos 1). 2. Press the ON/OFF switch (Figure 17, pos 2) to start the i-vac 5®. The green light in the ON/OFF switch will go . -
Page 22: Maintenance
Maintenance that is not described in this manual should be done by your i-vac 5 partner. Please make sure to have the model and serial number of the i-vac 5 available when you call a partner. For more Information please fill out the contact form on www.i-teamglobal.com. -
Page 23: Replacing The Motor Filter
7.1.3 Replacing the motor filter 1. Turn off the i vac 5® with the ON/OFF switch (Figure 18, pos 1). 2. Release the latches (Figure 18, pos 2). Lift the head by the handle (Figure 18, pos 3). Figure 18 4. -
Page 24: Tool Condition
Check the condition of the tool for wear and tear before use. Only change the tool when the machine is turned off. 7.3 Damaged or worn parts Damaged or worn parts need to be replaced immediately. Contact your local i-team Global partner or visit www.i-teamglobal.com for more information. -
Page 25: Maintenance Frequency
7.4 Maintenance frequency Make sure that routine and preventive maintenance is carried out periodically to ensure safe operation. Failure to carry out maintenance as necessary may cause damage to the i-vac 5® and may cause a risk to the operator. -
Page 26: Trouble Shooting
Check the wall socket. ON/OFF switch off Turn on ON/OFF switch. i-vac 5® stops working Motor overheated, a thermal Let the i-vac 5 cool down. switch stopped the motor Check the filters, dust bag and hose: see 6.3.2. and 6.3.3. -
Page 27: Decommissioning And Disposal
It is the responsibility of the i-vac 5® owner to dispose of the product responsibly. At the end-of-life the i-vac 5 still contains valuable resources and needs to be disposed of according to your local laws and regulations regarding recycling of electrical equipment. -
Page 28: Attachments
10 Attachments 10.1 CE Certificate... - Page 29 This document is part of the technical file of the i-vac 5® and will be available upon request.
Need help?
Do you have a question about the i-vac 5 and is the answer not in the manual?
Questions and answers