
Related Manuals for Ugolini NG6


Summary of Contents for Ugolini NG6
- Page 1 MANUALE D’ISTRUZIONE O P E R A T O R ’ S M A N U A L CARNET D’INSTRUCTIONS GEBRAUCHSANWEISUNG MANUAL DE INSTRUCCIONES...
-
Page 2: Installation
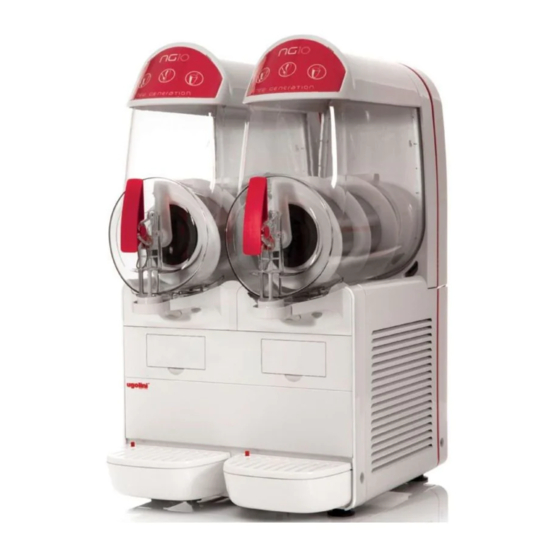
1 ELECTRICAL SAFETY INSTRUCTIONS 3 TECHNICAL CHARACTERISTICS 1 Before connecting the dispenser to the mains, check that the voltage shown on the rating plate matches your electricity Transparent removable bowls supply. Connect the dispenser to a single-phase supply Capacity of each bowl, approx. 6 10 10 10 through an earthed socket as required by current regulations. - Page 3 warning in point 1 above. homogeneous and that the powder is well dissolved. 4 Allow a minimum clearance of at least 15 cm all around the dispenser so as not to impede the flow of cooling air. 5 Check the stability of the device, adjusting the height of the feet if necessary.
-
Page 4: Additional Functions
The keys have the following functions: Pilot light A On the right bowl: if it is on, it indicates that 7. 2 ADDITIONAL FUNCTIONS the machine is in Standby mode; if it is off, it indicates that the machine is working; if it fla- shes, it indicates that the right bowl only is LIGHT SWITCHING ON/OFF off. -
Page 5: Operation Helpful Hints
you can select the Night Mode or Cleaning on any tank. Press Timer icon (N) when this symbol is lit, the timer is opera- the day key again to reactivate the timer. ting. TIMER DAY/NIGHT TIMER 7. 3 OPERATION HELPFUL HINTS This control board has a clock module which is used to automatically switch from day mode to night mode and vice versa at preset times. - Page 6 the container inside it.(see figure 2)(see figure 3). 7. 4. 2 DISASSEMBLY ATTENTION Before disassembling any component, always unplug the device from the mains. 1 To remove the lid of the container, press the top button and slide the lid towards the front of the container. If there is a safety lock for the lid, turn the key in an anti- clockwise direction to release the open button (see figure 6).
- Page 7 figure 7) and then remove the container itself (see figure 8). cylinder. Then remove the hexagonal joint (see figure 9). figure 9 4 Remove the gasket from its housing (see figure 10). figure 7 figure 10 5 Disassemble the tap by following the order given (see figure 11).
- Page 8 12). tablespoon per 2 litres of water. 3 Immerse all parts to be sanitised in the solution for the time indicated by the product manufacturer. 4 Allow the sanitised parts to air dry on a clean surface. 5 Dry the external parts of the dispenser without using abrasive cloths.
- Page 9 1 Slide the drip tray into place.. 2 Lubricate the tap piston, the hexagonal joint and the mixer at the points indicated in figure 16 (NG6) or figure 17 (NG10), using only the grease that came with the machine or other grease for use with food.
-
Page 10: Routine Maintenance
20). 8 ROUTINE MAINTENANCE 1 Every day: inspect the dispenser and check for leaks of product from the gaskets. If you notice leaks, first make sure that the components of the dispenser are properly installed, then check that the gaskets do not require lubrication and finally that they are not worn or damaged.
Need help?
Do you have a question about the NG6 and is the answer not in the manual?
Questions and answers