Advertisement
Table of Contents
- 1 Dichiarazione DI Conformità Ce
- 2 Ec Declaration of Conformity
- 3 Declaration de Conformite Ce
- 4 Declaración de Conformidad Ce
- 5 Installation
- 6 Additional Functions
- 7 Operation Helpful Hints
- 8 In-Place Sanitization
- 9 Routine Maintenance
- 10 Maintenance (to be Carried out by Qualified Service Personnel Only)
- Download this manual
Advertisement
Table of Contents

Subscribe to Our Youtube Channel
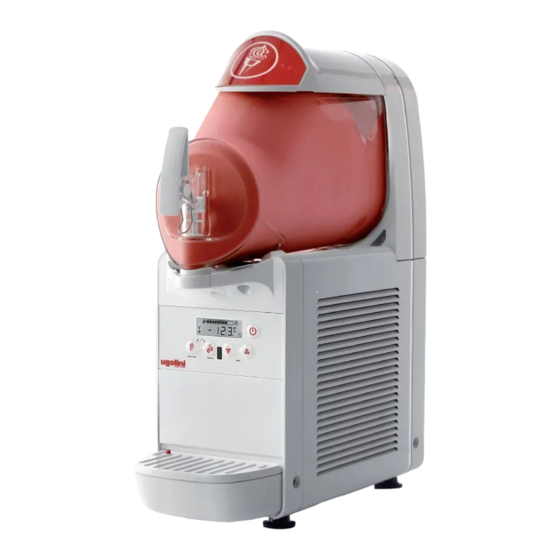
Summary of Contents for Ugolini MINIGEL PLUS Series
- Page 1 MANUALE D’ISTRUZIONE O P E R A T O R ’ S M A N U A L CARNET D’INSTRUCTIONS GEBRAUCHSANWEISUNG MANUAL DE INSTRUCCIONES...
-
Page 2: Dichiarazione Di Conformità Ce
EC DECLARATION OF CONFORMITY We Ugolini spa, via dei Pioppi, 33 20090 Opera Milano ITALY declare, under our responsibility, that the apparatus COLD DRINK DISPENSER - Trademark: UGOLINI S.p.A. - Manufacturer: UGOLINI S.p.A. - Model: MiniGEL 1/2/3 PLUS - 230V 50Hz are in conformity with the following... -
Page 3: Installation
1 ELECTRICAL SAFETY INSTRUCTIONS 3 TECHNICAL CHARACTERISTICS 1 Before connecting the dispenser to the mains, check that the voltage shown on the rating plate matches your electricity Transparent removable bowls supply. Connect the dispenser to a single-phase supply Capacity of each bowl, approx. through an earthed socket as required by current regulations. - Page 4 with a series of high feet (approximately 100 mm), these must homogeneous and that the powder is well dissolved. replace the original ones. IMPORTANT ATTENTION In any case, once the mixture is obtained, its degrees Make sure the device is properly earthed, otherwise you Brix (sugar content percentage) must be greater than 13.
-
Page 5: Additional Functions
The functions of the keys on the keypad are as follows: FOR DISPENSER OPERATION Set the ON/OFF switch to I. The red LED B will be on. Key A If pressed for 2 seconds, this allows the user to Hold down key A until the dispenser starts up. switch from standby mode to operating mode and Use keys E or H to select the desired dispenser operating mode: vice versa. -
Page 6: Operation Helpful Hints
prevent damage to the dispenser, both cooling and the mixer SETTING THE DEFROST PERIODS are stopped for 90 seconds and the display shows the mesage Having set the current time, you can set the desired de- PAUS. After 90 seconds, both mixing and cooling are restarted frost periods. - Page 7 described below should be considered general in nature and together. (see figure 4)(see figure 5). may vary due to the health regulations in force. 2 Before disassembly for washing, the dispenser must be emptied out of the product. Proceed as follows: use the keypad to select the CLEANING operating mode if necessary, wait until the product becomes liquid place a container under each tap and empty the containers...
- Page 8 figure 7) and then remove the container itself (see figure 8). cylinder. Then remove the hexagonal joint (see figure 9). figure 7 figure 9 4 Remove the gasket from its housing (see figure 10). figure 8 3 Remove the mixer by sliding it out of the evaporator figure 10 5 Disassemble the tap by following the order given (see figure 11).
- Page 9 12). specifications. In the absence of a specific sanitising product, prepare a solution of water and sodium hypochlorite (bleach) at a ratio of 1 tablespoon per 2 litres of water. 3 Immerse all parts to be sanitised in the solution for the time indicated by the product manufacturer.
-
Page 10: In-Place Sanitization
7. 4. 6 ASSEMBLY 19). 1 Slide the drip tray into place.. 2 Lubricate the tap piston, the hexagonal joint and the mixer at the points indicated in figure 16, using only the grease that came with the machine or other grease for use with food. figure 16 3 Reassemble the tap on the container in reverse order compared to that shown in figure 12. -
Page 11: Routine Maintenance
remaining sanitising solution from the bottom of the containers. Never remove the anti-condensation material wrapped around Do not perform further rinsing. the evaporator outlet tube (the copper tube located to the right of the geared motor). If said material is missing or lost, replace with original spare parts from the manufacturer.


Need help?
Do you have a question about the MINIGEL PLUS Series and is the answer not in the manual?
Questions and answers