Table of Contents
Advertisement
Quick Links
Advertisement
Table of Contents

Subscribe to Our Youtube Channel
Related Manuals for HIKVISION DS-2TD8167-190ZE2F/W


Summary of Contents for HIKVISION DS-2TD8167-190ZE2F/W
- Page 1 DS-2TD8167-190ZE2F/W Thermal & Optical Bi-Spectrum PTZ Network Camera User Manual...
- Page 2 INTERRUPTION, OR LOSS OF DATA, CORRUPTION OF SYSTEMS, OR LOSS OF DOCUMENTATION, WHETHER BASED ON BREACH OF CONTRACT, TORT (INCLUDING NEGLIGENCE), PRODUCT LIABILITY, OR OTHERWISE, IN CONNECTION WITH THE USE OF THE PRODUCT, EVEN IF HIKVISION HAS BEEN ADVISED OF THE POSSIBILITY OF SUCH DAMAGES OR LOSS.
- Page 3 DS-2TD8167-190ZE2F/W Thermal & Optical Bi-Spectrum PTZ Network Camera User Manual Symbol Conventions The symbols that may be found in this document are defined as follows. Symbol Description Indicates a hazardous situation which, if not avoided, will or could result in death or serious injury.
- Page 4 DS-2TD8167-190ZE2F/W Thermal & Optical Bi-Spectrum PTZ Network Camera User Manual Maintenance • If the product does not work properly, contact your dealer or the nearest service center. We shall not assume any responsibility for problems caused by unauthorized repair or maintenance.
-
Page 5: Table Of Contents
DS-2TD8167-190ZE2F/W Thermal & Optical Bi-Spectrum PTZ Network Camera User Manual Contents Chapter 1 Overview ............................11 1.1 Brief Description ............................. 11 1.2 Function ..............................11 Chapter 2 Device Activation and Accessing ....................12 2.1 Activate the Device via SADP ......................... 12 2.2 Activate the Device via Browser ...................... - Page 6 DS-2TD8167-190ZE2F/W Thermal & Optical Bi-Spectrum PTZ Network Camera User Manual 5.3.2 Set Rules ............................27 5.3.3 Set the Scene Patrol ........................28 5.4 Advanced Configuration ........................29 Chapter 6 Event and Alarm ..........................30 6.1 Set Motion Detection ..........................30 6.1.1 Normal Mode ..........................
- Page 7 DS-2TD8167-190ZE2F/W Thermal & Optical Bi-Spectrum PTZ Network Camera User Manual 8.12 Set Manual Compass ..........................47 8.12.1 Set Auto Compass ........................47 8.13 Set Power Off Memory ..........................47 8.14 Set PTZ Priority ............................48 Chapter 9 Live View ............................49 9.1 Live View Parameters ..........................
- Page 8 DS-2TD8167-190ZE2F/W Thermal & Optical Bi-Spectrum PTZ Network Camera User Manual 10.1.11 Two-Way Audio ........................57 10.1.12 Set ROI ............................. 57 10.2 Display Settings ............................58 10.2.1 Scene Mode ..........................58 10.2.2 Image Adjustment ........................58 10.2.3 Image Adjustment (Thermal Channel) ..................58 10.2.4 Exposure Settings ........................
- Page 9 DS-2TD8167-190ZE2F/W Thermal & Optical Bi-Spectrum PTZ Network Camera User Manual 11.2 Video Recording ............................68 11.2.1 Record Automatically ........................68 11.2.2 Record Manually .......................... 69 11.2.3 Playback and Download Video ....................69 11.3 Capture Configuration ..........................70 11.3.1 Capture Automatically ........................ 70 11.3.2 Capture Manually .........................
- Page 10 DS-2TD8167-190ZE2F/W Thermal & Optical Bi-Spectrum PTZ Network Camera User Manual 13.8 Set Electric Current Limit ........................81 13.9 View Open Source Software License ..................... 82 13.10 Time and Date ..........................82 13.10.1 Synchronize Time Manually ....................82 13.10.2 Set NTP Server ........................82 13.10.3 Set DST ............................
-
Page 11: Chapter 1 Overview
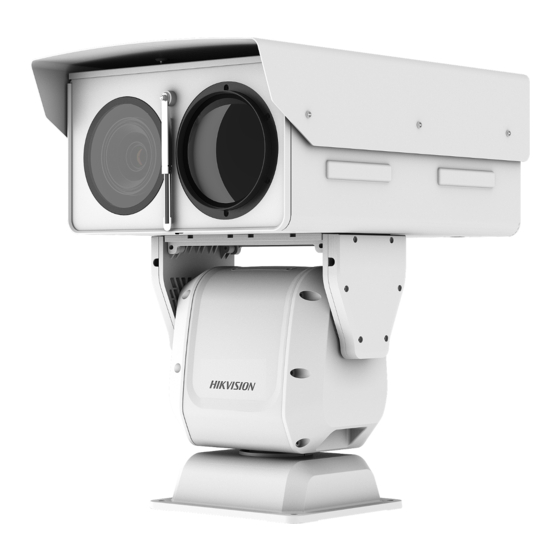
Chapter 1 Overview 1.1 Brief Description Hikvision’s Thermal & Optical Bi-Spectrum PTZ Network Camera integrates the function of a decoder, thermal camera, and a high-definition zoom camera. It performs temperature measurement, dynamic fire source detection, and other smart detections in the remote surveillance of power systems, metallurgy systems, petrochemical engineering, and so on. -
Page 12: Chapter 2 Device Activation And Accessing
DS-2TD8167-190ZE2F/W Thermal & Optical Bi-Spectrum PTZ Network Camera User Manual Chapter 2 Device Activation and Accessing To protect the security and privacy of the user account and data, you must set a login password to activate the device when accessing the device via a network. -
Page 13: Login
DS-2TD8167-190ZE2F/W Thermal & Optical Bi-Spectrum PTZ Network Camera User Manual 3. Input 192.168.1.64 in a browser. 4. Set device activation password. STRONG PASSWORD RECOMMENDED − We highly recommend that you create a strong password of your own choosing (using a minimum of eight characters, including at least three of the following categories: upper case letters, lower case letters, numbers, and special characters) in order to increase the security of your product. -
Page 14: Chapter 3 Temperature Measurement
DS-2TD8167-190ZE2F/W Thermal & Optical Bi-Spectrum PTZ Network Camera User Manual Chapter 3 Temperature Measurement When you enable this function, the device measures the actual temperature of the scene. It alarms when the temperature exceeds the temperature threshold value. 3.1 Notice This section introduces configuring the temperature measurement function. -
Page 15: Automatic Thermography
DS-2TD8167-190ZE2F/W Thermal & Optical Bi-Spectrum PTZ Network Camera User Manual Figure 1, Thermography Configuration Flow Chart Quick Start Guide See the for detailed Installation information in the flow chart. 3.3 Automatic Thermography Configure the temperature measurement parameters and temperature measurement rules. The device can measure the actual temperature and output alarms when temperature exceeds the alarm threshold value. -
Page 16: Set Normal Mode
DS-2TD8167-190ZE2F/W Thermal & Optical Bi-Spectrum PTZ Network Camera User Manual • Display Temperature Info. on Capture: Select Yes to display temperature information on the capture. • Display Rule Info. on Capture: Select Yes to display rule information on the capture. Enable Rules to display the rules information on live view. -
Page 17: Set Expert Mode
DS-2TD8167-190ZE2F/W Thermal & Optical Bi-Spectrum PTZ Network Camera User Manual • Distance: The distance between the target and the device. • Pre-Alarm Threshold: When the temperature of target exceeds the pre-alarm threshold, and this status is not shorter than the Filtering Time, it triggers the pre-alarm. -
Page 18: Point Thermography
DS-2TD8167-190ZE2F/W Thermal & Optical Bi-Spectrum PTZ Network Camera User Manual Steps 1. Customize the rule name. 2. Set the rule type to Point, Line, or Area. Then draw a point, line, or area on the interface where the position is to be measured. -
Page 19: Line Thermography
DS-2TD8167-190ZE2F/W Thermal & Optical Bi-Spectrum PTZ Network Camera User Manual Configure the temperature measurement rule and click any point in live view to monitor the temperature. Steps 1. Click in the live view, and a cross cursor shows on the interface. -
Page 20: Search History Temperature
DS-2TD8167-190ZE2F/W Thermal & Optical Bi-Spectrum PTZ Network Camera User Manual 4. Click Save. 5. Go to live view, select the thermal channel, and click . Click any position on the interface to show the real temperature. 3.5 Search History Temperature You can search the history temperature and generate a temperature/time graphic. -
Page 21: Chapter 4 Fire Source Detection
DS-2TD8167-190ZE2F/W Thermal & Optical Bi-Spectrum PTZ Network Camera User Manual Chapter 4 Fire Source Detection The device will trigger and upload an alarm when detecting a fire source. Fire source detection is applied for fire-prevention purposes in scenic regions, forests, tunnels, and so on. -
Page 22: Set The Presets
DS-2TD8167-190ZE2F/W Thermal & Optical Bi-Spectrum PTZ Network Camera User Manual • The installation place should be the highest position within the detection area. The lens should not be covered during movement, to detect the maximum area. • It is best to choose an installation place with convenient traffic, well-equipped power, and Internet facilities (e.g., communication tower, watchtower, high-rise roof, etc. -
Page 23: Set Fire Detection Parameters
DS-2TD8167-190ZE2F/W Thermal & Optical Bi-Spectrum PTZ Network Camera User Manual 4.4 Set Fire Detection Parameters To avoid the potential fire damage, configure the fire detection function for certain areas. Detailed configuration steps are shown below. Before You Start Go to Configuration → System → Maintenance → VCA Resource Type, select Temperature Measurement + •... - Page 24 DS-2TD8167-190ZE2F/W Thermal & Optical Bi-Spectrum PTZ Network Camera User Manual 4. Optional: Shield certain areas from being detected in fire source detection. 1) Go to Configuration → Event → Smart Event → Fire Source Detection Shield. 2) Check Enable Fire Source Detection Shield.
-
Page 25: Chapter 5 Behavior Analysis
DS-2TD8167-190ZE2F/W Thermal & Optical Bi-Spectrum PTZ Network Camera User Manual Chapter 5 Behavior Analysis The behavior analysis function is used to detect whether any target breaks the VCA rules. The optical camera will track the target or the device will alarm when the VCA rule is triggered. -
Page 26: Configure The Behavior Analysis
DS-2TD8167-190ZE2F/W Thermal & Optical Bi-Spectrum PTZ Network Camera User Manual • Display VCA Info. on Stream: Select to display target info and rule on stream, and the overlay will be displayed if you get live view or play back with the VS Player. -
Page 27: Set Rules
DS-2TD8167-190ZE2F/W Thermal & Optical Bi-Spectrum PTZ Network Camera User Manual 2. Click Save. 3. Go to Configuration → VCA → Advanced Configuration, and set parameter. • Post-tracking: Set the duration of automatic tracking of the target after it stops. 4. Go to Configuration → VCA → Zooming Ratio and configure the parameters. The optical camera will track the target when the VCA rule is triggered, which is configured on the thermal camera. -
Page 28: Set The Scene Patrol
DS-2TD8167-190ZE2F/W Thermal & Optical Bi-Spectrum PTZ Network Camera User Manual • When the rule type is set as Line Crossing, click to draw a line in live view. You can drag end points of the line to adjust the position and length. -
Page 29: Advanced Configuration
DS-2TD8167-190ZE2F/W Thermal & Optical Bi-Spectrum PTZ Network Camera User Manual 5.4 Advanced Configuration Go to Configuration → VCA → Advanced Configuration and configure the parameters. Detection Parameters • Detection Sensitivity: The higher the sensitivity, the easier the target will be detected. -
Page 30: Chapter 6 Event And Alarm
DS-2TD8167-190ZE2F/W Thermal & Optical Bi-Spectrum PTZ Network Camera User Manual Chapter 6 Event and Alarm This section introduces the configuring events. The device takes certain responses to triggered alarms. 6.1 Set Motion Detection It detects moving objects in the detection region and triggers the linkage actions. -
Page 31: Expert Mode
DS-2TD8167-190ZE2F/W Thermal & Optical Bi-Spectrum PTZ Network Camera User Manual Figure 5, Set Rules 4. Optional: You can set the parameters for multiple areas by repeating the above steps. 6.1.2 Expert Mode You can configure the day/night switch motion detection parameters according to actual needs. -
Page 32: Set Video Tampering Alarm
DS-2TD8167-190ZE2F/W Thermal & Optical Bi-Spectrum PTZ Network Camera User Manual Figure 6, Set Rules 4. Optional: Repeat the above steps to set multiple areas. 6.2 Set Video Tampering Alarm When the configured area is covered and cannot be monitored normally, the alarm is triggered and the device takes defined alarm response actions. -
Page 33: Set Alarm Input
DS-2TD8167-190ZE2F/W Thermal & Optical Bi-Spectrum PTZ Network Camera User Manual Figure 7, Set Video Tampering Area 6. Refer to Set Arming Schedule for setting scheduled time. Refer to Linkage Method Settings for setting linkage method. 7. Click Save. 6.3 Set Alarm Input Alarm signal from an external device triggers corresponding actions of the current device. -
Page 34: Set Exception Alarm
DS-2TD8167-190ZE2F/W Thermal & Optical Bi-Spectrum PTZ Network Camera User Manual 6.4 Set Exception Alarm Exception such as network disconnection can trigger the device to take corresponding action. Steps 1. Go to Configuration → Event → Basic Event → Exception. 2. Select Exception Type. - Page 35 DS-2TD8167-190ZE2F/W Thermal & Optical Bi-Spectrum PTZ Network Camera User Manual 2. Select one or several audio exception detection types. • Audio Loss Detection: Detect sudden loss of audio track. • Sudden Increase of Sound Intensity Detection: Detect sudden increase in sound intensity.
-
Page 36: Chapter 7 Arming Schedule And Alarm Linkage
DS-2TD8167-190ZE2F/W Thermal & Optical Bi-Spectrum PTZ Network Camera User Manual Chapter 7 Arming Schedule and Alarm Linkage Arming schedule is a customized time period in which the device performs certain tasks. Alarm linkage is the response to certain detected incidents or targets during the scheduled time. -
Page 37: Ftp/Nas/Memory Card Uploading
DS-2TD8167-190ZE2F/W Thermal & Optical Bi-Spectrum PTZ Network Camera User Manual Manual Alarm You can trigger an alarm output manually. Steps 1. Set the manual alarm parameters. • Alarm Output No.: Select the alarm output no. according to the alarm interface connected to the external alarm device. -
Page 38: Send Email
DS-2TD8167-190ZE2F/W Thermal & Optical Bi-Spectrum PTZ Network Camera User Manual 7.2.3 Send Email Check Send Email, and the device will send an e-mail to the designated addresses with alarm information when an alarm event is detected. For e-mail settings, refer to Set Email. -
Page 39: Trigger Recording
DS-2TD8167-190ZE2F/W Thermal & Optical Bi-Spectrum PTZ Network Camera User Manual 7.2.5 Trigger Recording Check Trigger Recording, and the device records video about the detected alarm event. For devices with more than one camera channel, you can set one or more channels to make recordings if needed. -
Page 40: Chapter 8 Ptz
DS-2TD8167-190ZE2F/W Thermal & Optical Bi-Spectrum PTZ Network Camera User Manual Chapter 8 PTZ PTZ is an abbreviation for pan, tilt, and zoom–the camera movement options. 8.1 PTZ Control In live view interface, you can use the PTZ control buttons to control the device panning, tilting, and zooming. -
Page 41: Set Preset
DS-2TD8167-190ZE2F/W Thermal & Optical Bi-Spectrum PTZ Network Camera User Manual 8.2 Set Preset A preset is a predefined image position. For the defined preset, you can call the preset no. to view the position. Steps 1. Click to show the setting panel, and click . -
Page 42: Set Patrol Scan
DS-2TD8167-190ZE2F/W Thermal & Optical Bi-Spectrum PTZ Network Camera User Manual 8.3 Set Patrol Scan Patrol scan automatically moves between multiple presets. Before You Start Make sure that you have defined more than one preset. See Set Preset for detailed configuration. -
Page 43: Set Pattern Scan
DS-2TD8167-190ZE2F/W Thermal & Optical Bi-Spectrum PTZ Network Camera User Manual 2. Choose one of the following methods to enable the function. 1) Click 2) Call patrol path no. 8. 3) Select and call preset no. 45. 8.4 Set Pattern Scan The device can move as the recorded pattern. -
Page 44: Set Limit
DS-2TD8167-190ZE2F/W Thermal & Optical Bi-Spectrum PTZ Network Camera User Manual 5. Set the left/right/up/down limits with the PTZ control panel, and click to confirm settings. 6. Optional: Click Clear to delete the saved scan area. 7. Click Save. 8. Click Call Linear Scan to start linear scan, and click Stop Linear Scan to stop linear scan. -
Page 45: Set Scheduled Tasks
DS-2TD8167-190ZE2F/W Thermal & Optical Bi-Spectrum PTZ Network Camera User Manual • Call: The device moves to the set initial position. • Clear: Clear the set initial position. 8.8 Set Scheduled Tasks You can set the device to perform a certain task during a certain period. -
Page 46: Set Device Position
DS-2TD8167-190ZE2F/W Thermal & Optical Bi-Spectrum PTZ Network Camera User Manual Steps 1. Go to Configuration → PTZ → Privacy Mask. 2. Adjust the live image to the target scene via the PTZ control buttons. 3. Draw the area. Click Draw Area, and click on the live view image to determine the mask boundary. -
Page 47: Set Manual Compass
DS-2TD8167-190ZE2F/W Thermal & Optical Bi-Spectrum PTZ Network Camera User Manual • Sensitivity: The higher the value, the easier the alarm will be triggered. • Upload Vandal-Proof Alarm: The device uploads the alarm information when triggered. 5. Get the device location information in advance, and input the device longitude and latitude manually. -
Page 48: Set Ptz Priority
DS-2TD8167-190ZE2F/W Thermal & Optical Bi-Spectrum PTZ Network Camera User Manual the position is saved as a memory point. The device returns to the last memory point when it restarts. 3. Click Save. 8.14 Set PTZ Priority The function can set the PTZ priority of different signals. -
Page 49: Chapter 9 Live View
DS-2TD8167-190ZE2F/W Thermal & Optical Bi-Spectrum PTZ Network Camera User Manual Chapter 9 Live View This section introduces live view parameter, function icon, and transmission parameter settings. 9.1 Live View Parameters For multichannel devices, select the desired channel first before live view settings. -
Page 50: Lens Initialization
DS-2TD8167-190ZE2F/W Thermal & Optical Bi-Spectrum PTZ Network Camera User Manual Steps 1. Go to wiper setting page: Configuration → PTZ → Wiper. 2. Select a wiper mode. • One Time: The wiper wipes one time when you click on the live view page. -
Page 51: Lens Parameters Adjustment
DS-2TD8167-190ZE2F/W Thermal & Optical Bi-Spectrum PTZ Network Camera User Manual Steps 1. Click to show the quick setup page. 2. Set PTZ, display settings, OSD, video/audio, and VCA resource parameters. • For PTZ settings, see Lens Parameters Adjustment. • For display settings, see Display Settings. -
Page 52: Icing
DS-2TD8167-190ZE2F/W Thermal & Optical Bi-Spectrum PTZ Network Camera User Manual • Left click on a point on the live image: the point is relocated to the center of the live image, with no zooming in or out effect. • Hold and drag the mouse to a lower right position to frame an area on the live view screen: the framed area is zoomed in and relocated to the center of the live image. - Page 53 DS-2TD8167-190ZE2F/W Thermal & Optical Bi-Spectrum PTZ Network Camera User Manual • Auto Start Live View Yes: Live view starts automatically. It requires a high performance monitoring device and a stable network environment. No: Live view must be started manually.
-
Page 54: Chapter 10 Video And Audio
DS-2TD8167-190ZE2F/W Thermal & Optical Bi-Spectrum PTZ Network Camera User Manual Chapter 10 Video and Audio This part introduces configuring video and audio related parameters. 10.1 Video Settings This section introduces setting video parameters such as stream type, video encoding, and resolution. -
Page 55: Video Quality
DS-2TD8167-190ZE2F/W Thermal & Optical Bi-Spectrum PTZ Network Camera User Manual 10.1.5 Video Quality When Bitrate Type is set to Variable, video quality is configurable. Select a video quality according to actual needs. Note that higher video quality requires higher bandwidth. -
Page 56: Smoothing
DS-2TD8167-190ZE2F/W Thermal & Optical Bi-Spectrum PTZ Network Camera User Manual • Profile: This function means that under the same bitrate, the more complex the profile, the higher the quality of the image, and the requirement for network bandwidth is also higher. -
Page 57: Two-Way Audio
DS-2TD8167-190ZE2F/W Thermal & Optical Bi-Spectrum PTZ Network Camera User Manual Environmental Noise Filter Set to OFF or ON. When enabled, the environment noise can be filtered to some extent. 10.1.11 Two-Way Audio This is used to realize the two-way audio function between the monitoring center and the target in the monitoring screen. -
Page 58: Display Settings
DS-2TD8167-190ZE2F/W Thermal & Optical Bi-Spectrum PTZ Network Camera User Manual 6. Input the Region Name and ROI Level. 7. Click Save. The higher the ROI level, the clearer the image of the detected region. 8. Optional: Select another region no. and repeat the above steps to draw multiple fixed regions. -
Page 59: Exposure Settings
DS-2TD8167-190ZE2F/W Thermal & Optical Bi-Spectrum PTZ Network Camera User Manual 10.2.4 Exposure Settings Exposure is controlled by the combination of iris, shutter, and photo sensitivity. You can adjust the image effect by setting exposure parameters. In manual mode, you need to set Exposure Time, Gain, and Slow Shutter. -
Page 60: Set Supplement Light
DS-2TD8167-190ZE2F/W Thermal & Optical Bi-Spectrum PTZ Network Camera User Manual mode is Night, the image turns black and white when the device receives an alarm input signal. Day/Night Switch function varies by model. 10.2.8 Set Supplement Light Steps 1. Go to Configuration → Maintenance → System Service. -
Page 61: Set Laser Parameters
DS-2TD8167-190ZE2F/W Thermal & Optical Bi-Spectrum PTZ Network Camera User Manual 10.2.14 Set Laser Parameters Steps 1. Go to Configuration → System → Maintenance → System Service. 2. Enable Laser Optical Axis Adjustment. 3. Adjust the optical zoom ratio to the maximum value via the PTZ control panel. - Page 62 DS-2TD8167-190ZE2F/W Thermal & Optical Bi-Spectrum PTZ Network Camera User Manual Figure 8, Set the Temperature and Color of Target • Above (Be Colored): When a high temperature target needs to be in color, you can set the high temperature color. Targets above the setting temperature will be displayed in setting color.
-
Page 63: Dde
DS-2TD8167-190ZE2F/W Thermal & Optical Bi-Spectrum PTZ Network Camera User Manual 10.2.17 DDE Digital Detail Enhancement is used to adjust the details of the image. OFF and Normal modes are selectable. • OFF: Disable this function. • Normal: Set the DDE level to control the details of the image. The higher the level, the more details shows, but the higher the noise. -
Page 64: Overlay Picture
DS-2TD8167-190ZE2F/W Thermal & Optical Bi-Spectrum PTZ Network Camera User Manual 10.4 Overlay Picture Overlay a custom picture on live view. Before You Start The picture to overlay has to be in 24-bit BMP format, and the maximum picture size is 128 × 128 pixels. - Page 65 DS-2TD8167-190ZE2F/W Thermal & Optical Bi-Spectrum PTZ Network Camera User Manual Steps 1. Select a channel number. 2. Select the picture-in-picture mode. • Normal Mode: Disable picture-in-picture mode. • Overlay Mode: Enable picture-in-picture mode. You can overlay the image of another channel in the current channel.
-
Page 66: Chapter 11 Video Recording And Picture Capture
DS-2TD8167-190ZE2F/W Thermal & Optical Bi-Spectrum PTZ Network Camera User Manual Chapter 11 Video Recording and Picture Capture This section introduces capturing video clips and snapshots, playback, and downloading captured files. 11.1 Storage Settings This part introduces configuring several common storage paths. -
Page 67: Set Ftp
DS-2TD8167-190ZE2F/W Thermal & Optical Bi-Spectrum PTZ Network Camera User Manual 3. Click Test to check if the network disk is available. 4. Click Save. 11.1.3 Set FTP You can configure the FTP server to save images that are captured by events or a timed snapshot task. -
Page 68: Video Recording
DS-2TD8167-190ZE2F/W Thermal & Optical Bi-Spectrum PTZ Network Camera User Manual • Server Port: The cloud storage server port. 6001 is the default port, and you are not recommended to edit it. • User Name and Password: The cloud storage server user name and password. -
Page 69: Record Manually
DS-2TD8167-190ZE2F/W Thermal & Optical Bi-Spectrum PTZ Network Camera User Manual 6. Click Advanced to set the advanced settings. • Overwrite: Enable Overwrite to overwrite the video records when the storage space is full. Otherwise the camera cannot record new videos. -
Page 70: Capture Configuration
DS-2TD8167-190ZE2F/W Thermal & Optical Bi-Spectrum PTZ Network Camera User Manual 1) Set search condition, then click Search. 2) Select the video files, then click Download. Go to Configuration → Local , click Save downloaded files to to change the saving path of downloaded video files. -
Page 71: View And Download Picture
DS-2TD8167-190ZE2F/W Thermal & Optical Bi-Spectrum PTZ Network Camera User Manual 11.3.3 View and Download Picture You can search, view, and download the pictures stored in the local storage or network storage. Steps 1. Click Picture. 2. Select channel no. 3. Set search condition and click Search. -
Page 72: Chapter 12 Network Settings
DS-2TD8167-190ZE2F/W Thermal & Optical Bi-Spectrum PTZ Network Camera User Manual Chapter 12 Network Settings 12.1 TCP/IP TCP/IP settings must be properly configured before you operate the device over network. IPv4 and IPv6 are both supported. Both versions can be configured simultaneously without conflicting with each other. -
Page 73: Port
DS-2TD8167-190ZE2F/W Thermal & Optical Bi-Spectrum PTZ Network Camera User Manual 12.2 Port Modify the device port when the device cannot access the network due to port conflicts. Do not modify the default port parameters at will, otherwise the device may be inaccessible. -
Page 74: Set Auto Port Mapping
DS-2TD8167-190ZE2F/W Thermal & Optical Bi-Spectrum PTZ Network Camera User Manual 12.3.1 Set Auto Port Mapping Steps 1. Check Enable UPnP , and choose a friendly name for the camera, or use the default name. ™ 2. Set the port mapping mode to Auto. -
Page 75: Access To Device Via Domain Name
DS-2TD8167-190ZE2F/W Thermal & Optical Bi-Spectrum PTZ Network Camera User Manual 2. Check Enable SNMPv1, Enable SNMP v2c or Enable SNMPv3. The SNMP version you select should be the same as that of the SNMP software. You also need to use the version according to the security level required. SNMP v1 is not secure, and SNMP v2 requires password for access. -
Page 76: Accessing Via Mobile Client
DS-2TD8167-190ZE2F/W Thermal & Optical Bi-Spectrum PTZ Network Camera User Manual 2. Check Enable PPPoE. 3. Set the PPPoE parameters. • Dynamic IP: After successful dial-up, the WAN’s dynamic IP address is displayed. • User Name: User name for dial-up network access. -
Page 77: Set Up Hik-Connect
1. Get and install the Hik-Connect application through the following ways. • Visit https://appstore.hikvision.com to download the application for your mobile phone system. Visit the Hikvision Website at www.hikvision.com, then go to Support → Tools → Hikvision App Store. • •... -
Page 78: Add Camera To Hik-Connect
DS-2TD8167-190ZE2F/W Thermal & Optical Bi-Spectrum PTZ Network Camera User Manual Visit https://appstore.hikvision.com/, and click Installation Help at the upper right corner of the interface to refer to the troubleshooting. 2. Start the application and register for a Hik-Connect user account. -
Page 79: Set Onvif
DS-2TD8167-190ZE2F/W Thermal & Optical Bi-Spectrum PTZ Network Camera User Manual 1. Go to Configuration → Network → Advanced Settings → Platform Access. 2. Select ISUP as the platform access mode. 3. Select Enable. 4. Select a protocol version and input related parameters. -
Page 80: View Device Information
DS-2TD8167-190ZE2F/W Thermal & Optical Bi-Spectrum PTZ Network Camera User Manual This chapter introduces system maintenance, system settings, and security management and explains how to configure relevant parameters. 13.1 View Device Information You can view device information such as Device No., Model, Serial No., and Firmware Version. -
Page 81: Reboot
DS-2TD8167-190ZE2F/W Thermal & Optical Bi-Spectrum PTZ Network Camera User Manual Go to Configuration → System → Maintenance → Upgrade & Maintenance, and click Diagnose Information to export device diagnostic information. 13.5 Reboot You can reboot the device via a browser. -
Page 82: View Open Source Software License
DS-2TD8167-190ZE2F/W Thermal & Optical Bi-Spectrum PTZ Network Camera User Manual Go to Configuration → System → Maintenance → System Service, and select Electric Current Limit type. You can limit the device current to 75 percent of full current or half the full current for power saving control. -
Page 83: Set Dst
DS-2TD8167-190ZE2F/W Thermal & Optical Bi-Spectrum PTZ Network Camera User Manual 13.10.3 Set DST If the region where the device is located uses Daylight Saving Time (DST), you can set this function. Steps 1. Go to Configuration → System → System Settings → DST. -
Page 84: Set Same Unit
DS-2TD8167-190ZE2F/W Thermal & Optical Bi-Spectrum PTZ Network Camera User Manual 13.13 Set Same Unit Set the same temperature unit and distance unit. When you enable this function, the unit cannot be configured separately in other setting pages Steps 1. Go to Configuration → System → System Settings → Unit Settings. -
Page 85: Set Ip Address Filter
DS-2TD8167-190ZE2F/W Thermal & Optical Bi-Spectrum PTZ Network Camera User Manual Security audit logs can be saved on the device’s internal storage. The log will be saved every half hour after device booting. Due to limited storage space, you can also save the logs to a log server. -
Page 86: Set Ssh
DS-2TD8167-190ZE2F/W Thermal & Optical Bi-Spectrum PTZ Network Camera User Manual 13.14.4 Set SSH SSH is a protocol to ensure remote login security. This setting is reserved for professional maintenance personnel only. Steps 1. Go to Configuration → System → Security → Security Service. -
Page 87: Set Qos
DS-2TD8167-190ZE2F/W Thermal & Optical Bi-Spectrum PTZ Network Camera User Manual Steps 1. Select Create certificate request first, and continue the installation. 2. Click Create. 3. Follow the prompt to input Country, Hostname/IP, Validity and other parameters. 4. Click Download to download the certificate request and submit it to the trusted authority for signature. - Page 88 DS-2TD8167-190ZE2F/W Thermal & Optical Bi-Spectrum PTZ Network Camera User Manual To increase security of using the device on the network, change the password of your account regularly. Changing the password every three months is recommended. If the device is used in a high-risk environment, it is recommended that the password be changed monthly or weekly.
-
Page 89: Chapter 14 Appendix
14.2 Device Command Scan the following QR code to get common device serial port commands. Note that the command list contains commonly used serial port commands for Hikvision thermal cameras. 14.3 Device Communication Matrix Scan the following QR code to get device communication matrix.
Need help?
Do you have a question about the DS-2TD8167-190ZE2F/W and is the answer not in the manual?
Questions and answers