Table of Contents
Advertisement
Quick Links
Advertisement
Table of Contents

Related Manuals for GLITZHOME GH50108


Summary of Contents for GLITZHOME GH50108
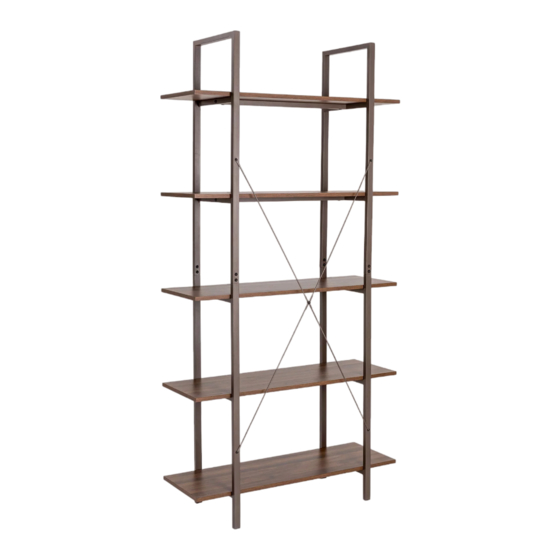
- Page 1 Assembly Instruction 5 SHELF BOOKCASE...
- Page 2 PRE-ASSEMBLY PREPARATION • CAUTION: Assembly will require at least 2 adults. DO NOT use power tools. Please inspect all items BEFORE assembly. If for any reason you need to return this item, please kindly return it in it's original packaging. •...
- Page 3 PARTS LIST SHELF PANEL (A) TOP PANEL (B) SHELF CROSS BAR (C) LEFT UPPER FRAME (D) Qty: 4 Qty: 1 Qty: 5 Qty: 1 LEFT BOTTOM PANEL RIGHT UPPER FRAME RIGHT BOTTOM FRAME REAR CROSS BAR (H) Qty: 1 Qty: 1 Qty: 1 Qty: 4 HARDWARE LIST...
- Page 4 REQUIRED HARDWARE IN THIS STEP SKETCH DESCRIPTION 8PCS ALLEN BOLT M6*12mm ALLEN WRENCH STEP 1 Assemble left upper frame (D) on left bottom frame (E) with Allen bolts (1) by using Allen wrench (7). Repeat this action for F & G. These 4 holes These 4 holes must be one side...
- Page 5 REQUIRED HARDWARE IN THIS STEP SKETCH DESCRIPTION ALLEN BOLT M5*15MM NUT M5 ALLEN WRENCH OPEN END WRENCH STEP 3 Assemble all rear cross bars (F) together at one end with Allen bolts (4) and nut (6) using Allen wrench (7) and Open end wrench (8). Fully tighten in this step. REQUIRED HARDWARE IN THIS STEP SKETCH DESCRIPTION...
- Page 6 REQUIRED HARDWARE IN THIS STEP SKETCH DESCRIPTION 10PCS ALLEN BOLT M6*30MM ALLEN WRENCH STEP 5 Assemble top panel (B) & shelf panel (A) on ready metal frame with Allen bolts (3) by using Allen wrench (7). The hole on top panel (B) should be on the bottom and same side as x steel wire (F).
- Page 7 REQUIRED HARDWARE IN THIS STEP SKETCH DESCRIPTION STEEL PLATE ANTI-TIPPING STRIP WALL ANCHOR Ø8.5*30MM SCREW M4*25MM STEP 7 Drill one hole on the wall and then put wall anchor (11) into the pre-drilled hole. Assemble steel plate (9) to the wall with screw (12) using screwdriver. Attach anti-tipping strip (10) to the steel plate (9) as shown.
Need help?
Do you have a question about the GH50108 and is the answer not in the manual?
Questions and answers