Advertisement
Quick Links
Advertisement

Related Manuals for GLITZHOME 2007100007


Summary of Contents for GLITZHOME 2007100007
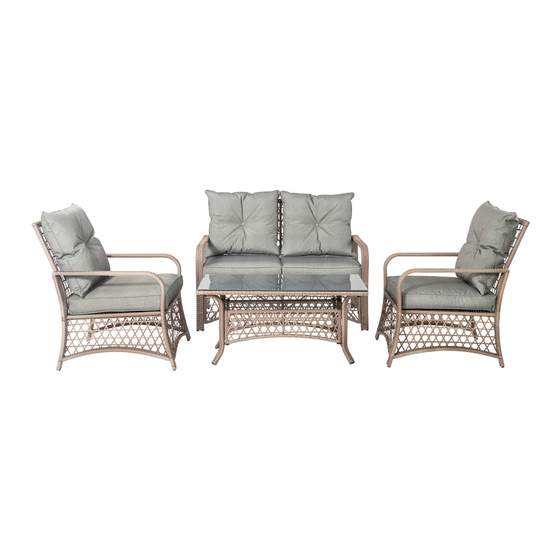
- Page 1 Assembly Instruction 4 PIECE PATIO WICKER SOFA SET...
-
Page 2: Pre-Assembly Preparation
PRE-ASSEMBLY PREPARATION WARNING! DO NOT LET CHILDREN PLAY IN OR AROUND THE UNIT DUE TO THE POSSIBLE RISK OF FINGER ENTRAPMENT • Please read through this instruction before beginning assembly. • Two adults assembly is recommended. • Clear out the space for assembly and lay out all parts base on Parts List, extra room will allow you to easily determine if all the pieces are present. -
Page 3: Hardware List
HARDWARE LIST Bolt (J) Bolt (K) Bolt (L) Washer (M) M6 x M6 x M6 x 50mm Qty: 20 Qty: 28 Qty: 12 Qty: 60 Plastic Cap (N) Wrench (O) Qty: 60 Qty: 1 NOTE: From step 1 to step 4 is for loveseat sofa assembly. Please find panel A1, B1, C1, C2 and D1 firstly. - Page 4 Step 2 Atach Right Armrest (C1) and Let Armrest (C2) to Front Panel on both side by using 4 medium Bolts (K) and 4 Washers (M). put Bolt Caps (N) unil all parts have been connected and bolts are ightened. Finally Step 3 Atach Backrest Panel (D1) to the Seat Panel by using 4 medium Bolts (K) and 4 Washers (M).
- Page 5 Step 4 Atach Backrest Panel (D1) to the Armrest Panels on both side by using 4 long Bolts (L) and 4 Washers (M). Finally put Bolt Caps (N) unil all parts have been connected and bolts are ightened. NOTE: From step 5 to step 8 is for single sofa assembly, the way is similar to loveset sofa. Please find panel A2, B2, C1, C2 and D2 firstly.
- Page 6 Step 6 Atach Right Armrest (C1) and Let Armrest (C2) to Front Panel on both sides by using 4 medium Bolts (K) and 4 Washers (M). Finally put Bolt Caps (N) unil all parts have been connected and bolts are ightened.
- Page 7 Step 8 Atach Backrest Panel (D2) to the Armrest Panels on both side by using 4 long Bolts (L) and 4 Washers (M). Finally put bolt caps (N) unil all parts have been connected and bolts are ightened. NOTE: From step 9 to step 11 is for table assembly. Please find panel E, F, G, H and I firstly.
- Page 8 Step 10 Atach 2 Front Panels (G) and 2 Side Panels (H) to the table legs down by using 8 short Bolts (J) and 8 Washers (M). Finally put Bolt Caps (N) unil all parts have been connected and bolts are ightened.
- Page 9 Step 12 Put Glass Top (I) to the table stand. Step 13 Put on seat cushion and back cushion. Please make sure all bolts are properly ightened before use.
Need help?
Do you have a question about the 2007100007 and is the answer not in the manual?
Questions and answers