Table of Contents
Advertisement
Quick Links
Advertisement
Table of Contents

Related Manuals for Symbol LS 2106


Summary of Contents for Symbol LS 2106
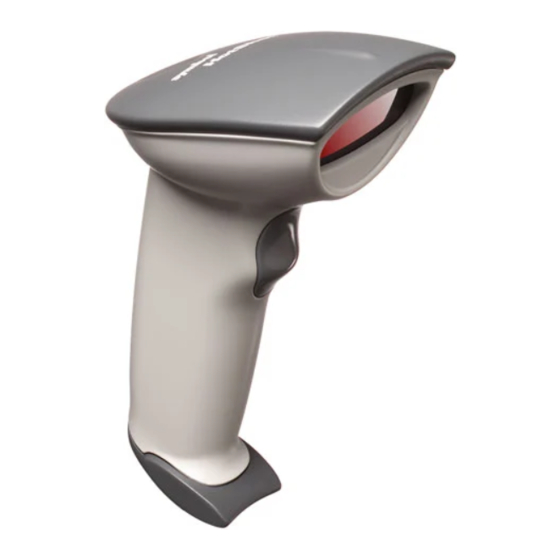
- Page 1 LS 2106 Product Reference Guide...
- Page 2 LS 2106 Product Reference Guide 70-32821-01 Revision D — September 2000 Symbol Technologies, Inc. One Symbol Plaza, Holtsville N.Y. 11742-1300...
- Page 3 LS 2106 Product Reference Guide 70-32821-01 Revision D September 2000...
- Page 4 The material in this manual is subject to change without notice. Symbol reserves the right to make changes to any product to improve reliability, function, or design. Symbol does not assume any product liability arising out of, or in connection with, the application or use of any product, circuit, or application described herein.
-
Page 5: Table Of Contents
Scanning with the LS 2106 ........ - Page 6 LS 2106 Signal Descriptions ........
- Page 7 Contents Enable/Disable Discrete 2 of 5 ........... 4-38 Set Lengths for Discrete 2 of 5 .
- Page 8 LS 2106 Product Reference Guide...
-
Page 9: Notational Conventions
70-32820-xx Service Information If you have a problem with your equipment, contact the Symbol Support Centers. Before calling, have the model number, serial number, and several of your bar code symbols at hand. Call the Support Center from a phone near the scanning equipment so that the service person... - Page 10 LS 2106 Product Reference Guide and the problem is symbol readability, the Support Center will request samples of your bar codes for analysis at our plant. If your problem cannot be solved over the phone, you may need to return your equipment for servicing.
- Page 11 92184 Antony Cedex, France +358 9 5407 580 (Outside Finland) 01-40-96-52-21 (Inside France) +33-1-40-96-52-50 (Outside France) Germany Italy Symbol Technologies GmbH Symbol Technologies Italia S.R.L. Waldstrasse 68 Via Cristoforo Columbo, 49 D-63128 Dietzenbach, Germany 20090 Trezzano S/N Navigilo 6074-49020 (Inside Germany) Milano, Italy...
- Page 12 This warranty is provided to the original owner only and is not transferable to any third party. It shall not apply to any product (i) which has been repaired or altered unless done or approved by Symbol, (ii) which has not been maintained in accordance with any operating or handling instructions supplied by...
- Page 13 Shipments from the US or other locations will be made F.O.B. Symbol’s manufacturing plant. Symbol will use new or refurbished parts at its discretion and will own all parts removed from repaired products. Customer will pay for the replacement product in case it does not return the replaced product to Symbol within 3 days of receipt of the replacement product.
- Page 14 LS 2106 Product Reference Guide...
-
Page 15: Chapter 1. Setting Up The Ls 2106
Visible Laser Diode (VLD). This state of the art technology gives the scanner a wider decode zone, greater depth of field, and a visible scan beam. This model reads color bar codes and symbols printed on all substrates. See the LS 2106 Decode Zone on page 2-4. -
Page 16: Audience
LS 2106 scanners. Unpacking Remove the LS 2106 from its packing and inspect it for damage. If the scanner was damaged in transit, call the Symbol Support Center at one of the telephone numbers listed on page xx. -
Page 17: Setting Up The Ls 2106
Setting Up the LS 2106 Setting Up the LS 2106 Installing the Cable Insert the cable into the receptable on the bottom of the scanner, as shown below: Figure 1-2. Installing the Cable Switching Cables Different cables are required for different hosts. To change the scanner cable: 1. -
Page 18: Connecting To A Host
LS 2106 Product Reference Guide Connecting to a Host Plug the connector at the end of the LS 2106 cable into the appropriate port on the Symbol interface controller or portable terminal. Refer to the controller user documentation for full details. -
Page 19: Chapter 2. Scanning With The Ls 2106
Before you can use the scanner, it should have already been installed and programmed. If not, refer to Chapter 4, Parameter Menus for instructions on programming your scanner. If you need assistance, contact your local supplier or Symbol Techologies. 1. Before you use the scanner, make sure all cable connections are secure. - Page 20 LS 2106 Product Reference Guide Figure 2-1. Holding the Scanner Aiming the Scanner Hold the scanner at an angle. Do not hold the scanner directly over the bar code. Laser light reflecting directly back into the scanner from the bar code is known as specular reflection.
- Page 21 Scanning with the LS 2106 Scan the Entire Symbol " The scan beam must cross every bar and space on the symbol (as in the left bar code below). " The larger the symbol, the farther away you should hold the scanner.
-
Page 22: Ls 2106 Decode Zone
LS 2106 Product Reference Guide LS 2106 Decode Zone... -
Page 23: Chapter 3. Maintenance And Specifications
Chapter 3 Maintenance and Specifications Introduction This chapter covers the appropriate methods for maintaining and the technical specifications for the scanner. Maintenance Cleaning the exit window is the only maintenance required. A dirty window may affect scanning accuracy. Do not allow any abrasive material to touch the window. Remove any dirt particles with a damp cloth. -
Page 24: Accessories
Make sure the symbol is not defaced. Try scanning test symbols of the same code type. If after performing these checks the symbol still does not scan, contact your distributor or call the Symbol Support Center. See page viii for the telephone number. -
Page 25: Optional Accessories
Maintenance and Specifications Optional Accessories Optional accessories, supplied at extra cost, include additional units of any item listed above and the following items: Description Part Number Hands-Free Stand-free 21-33324-01 standing Desk-Mount Stand 21-33323-01 Technical Specifications Item Description Power Requirements 4.75 to 5.25 VDC; 180 mA @ 5 VDC Typical Low Power: 20µ... - Page 26 LS 2106 Product Reference Guide Item Description Straight Cable Length 6 ft (183 cm) Weight (without cable) 5.5 oz. (170 gm) Dimensions: Height 6.7 in (167 mm) Width 2.8 in (70 mm) Depth 3.4 in (85 mm)
-
Page 27: Ls 2106 Signal Descriptions
Maintenance and Specifications LS 2106 Signal Descriptions The following signal descriptions apply to the connection between the scanner and the cable, and are for reference only. Table 3-1. Signal Descriptions Signal Name Function VBATT Input power. GROUND Power supply input ground pin and reference for both output signals. - Page 28 LS 2106 Product Reference Guide PIN 10 PIN 1 Figure 3-1. 10-pin Connector...
-
Page 29: Beeper Indications
4 Beeps - long low tone A transmission error has been detected in a scanned symbol. The data is ignored. This will occur if a unit is not properly configured. Check option settings. 5 Beeps - low tone Convert or format error... - Page 30 LS 2106 Product Reference Guide...
-
Page 31: Chapter 4. Parameter Menus
Parameter Menus Introduction The LS 2106 is shipped with the settings shown in the Default Parameters beginning on page 4-2. These default values are stored in non-volatile memory and are preserved even when the scanner is powered down. You can change these default values by scanning the appropriate bar codes included in this manual. -
Page 32: Default Parameters
LS 2106 Product Reference Guide Default Parameters Table 4-1. Default Parameters Parameter Default Page Number Set Default Parameter All Defaults Beeper Volume High Laser On Time 3.0 seconds Power Mode Continuous 4-10 Beep After Good Decode Enable 4-11 Transmit “No Read” Message... - Page 33 Parameter Menus Table 4-1. Default Parameters (Continued) Parameter Default Page Number Convert UPC-E to A Disable 4-22 EAN-8 Zero Extend Disable 4-23 EAN Zero Extend Code Type EAN13 4-24 Code 128 Code 128 Enable 4-25 UCC/EAN-128 Enable 4-26 Code 39 Code 39 Enable 4-27...
- Page 34 LS 2106 Product Reference Guide Table 4-1. Default Parameters (Continued) Parameter Default Page Number Code 93 Code 93 Disable 4-34 Interleaved 2 of 5 Interleaved 2 of 5 Enable 4-35 Set Length(s) for I 2 of 5 4-36 Convert I 2 of 5 to EAN 13...
- Page 35 Parameter Menus Table 4-1. Default Parameters (Continued) Parameter Default Page Number MSI Plessey MSI Plessey Disable 4-43 MSI Plessey Check Digits 4-44 Transmit MSI Plessey Check Digit Disable 4-45 MSI Plessey Check Digit Algorithm Mod 10/Mod 10 4-46 Data Options Transmit Code ID Character None 4-48...
- Page 36 LS 2106 Product Reference Guide Table 4-1. Default Parameters (Continued) Parameter Default Page Number Keyboard Wedge Host Type IBM PC AT 4-52 National Keyboard Type North American 4-53 Fast Transmit Enabled 4-55 Intercharacter Delay 4-56...
-
Page 37: Set Default Parameter
Parameter Menus Set Default Parameter Scanning this bar code returns all parameters to the default values listed in Table 4-1. beginning on page 4-2. SET ALL DEFAULTS... -
Page 38: Beeper Volume
LS 2106 Product Reference Guide Beeper Volume To select a beeper volume, scan the LOW VOLUME or HIGH VOLUME bar code. LOW VOLUME HIGH VOLUME... -
Page 39: Laser On Time
Parameter Menus Laser On Time This parameter sets the maximum time decode processing continues during a scan attempt. It is programmable in 0.1 second increments from 0.5 to 9.9 seconds. To set a Laser On Time, scan the bar code below. Next scan two numeric bar codes beginning on page 4-57 that correspond to the desired time on. -
Page 40: Power Mode
LS 2106 Product Reference Guide Power Mode This parameter determines whether or not power remains on after a decode attempt. When in low power mode, the scanner enters into a low power consumption mode to preserve battery life after each decode attempt. When in continuous power mode, power remains on after each decode attempt. -
Page 41: Beep After Good Decode
BEEP AFTER GOOD DECODE Do Not Beep After Good Decode Scan this symbol if you do not want the unit to beep after a good decode. The beeper still operates during parameter menu scanning and indicates error conditions. DO NOT BEEP AFTER GOOD DECODE... -
Page 42: Transmit "No Read" Message
LS 2106 Product Reference Guide Transmit “No Read” Message When enabled, if a symbol does not decode, “NR” is transmitted. Any prefixes or suffixes which have been enabled are appended around this message. ENABLE NO READ Do Not Transmit “No Read” Message When disabled, if a symbol does not read, nothing is sent to the host. -
Page 43: Decode Redundancy
Parameter Menus Decode Redundancy Use this parameter to indicate whether the scanner must read a bar code one time (Level 0), two times (Level 1) or three times (Level 2) before decoding it. A higher level of redundancy ensures the accuracy of a decode in, for example, poor quality symbols. LEVEL 0 LEVEL 1 LEVEL 2... -
Page 44: Autodiscriminate Response Time
LS 2106 Product Reference Guide Autodiscriminate Response Time This parameter extends the length of time during which the scanner tries to detect which host it is connected to on power up. Note: When connected to an LS 5700/5800, the 5-second option must be used. -
Page 45: Enable/Disable Upc-E/Upc-A
Parameter Menus Enable/Disable UPC-E/UPC-A To enable or disable UPC-E or UPC-A, scan the appropriate bar code below. ENABLE UPC-E DISABLE UPC-E ENABLE UPC-A DISABLE UPC-A 4-15... - Page 46 LS 2106 Product Reference Guide Enable/Disable EAN-8/EAN-13 To enable or disable EAN-8 or EAN-13, scan the appropriate bar code below. ENABLE EAN-8 DISABLE EAN-8 ENABLE EAN-13 DISABLE EAN-13 4-16...
-
Page 47: Enable/Disable Bookland Ean
Parameter Menus Enable/Disable Bookland EAN To enable or disable EAN Bookland, scan the appropriate bar code below. ENABLE BOOKLAND EAN DISABLE BOOKLAND EAN 4-17... -
Page 48: Decode Upc/Ean Supplementals
If UPC/EAN with supplemental characters is selected, UPC/EAN symbols without supplemental characters are not decoded. If UPC/EAN without supplemental characters is selected, and the LS 2106 is presented with a UPC/EAN plus supplemental symbol, the UPC/EAN is decoded and the supplemental characters ignored. -
Page 49: Transmit Upc-A/Upc-E Check Digit
Parameter Menus Transmit UPC-A/UPC-E Check Digit Scan the appropriate bar code below to transmit the symbol with or without the UPC-A or UPC-E check digit. TRANSMIT UPC-A CHECK DIGIT DO NOT TRANSMIT UPC-A CHECK DIGIT TRANSMIT UPC-E CHECK DIGIT DO NOT TRANSMIT UPC-E CHECK DIGIT... -
Page 50: Upc-A Preamble
Three options are given for lead-in characters for UPC-A symbols transmitted to the host device: transmit system character only, transmit system character and country code (“0” for USA), and no preamble transmitted. The lead-in characters are considered part of the symbol. NO PREAMBLE (<DATA>) -
Page 51: Upc-E Preamble
Three options are given for lead-in characters for UPC-E symbols transmitted to the host device: transmit system character only, transmit system character and country code (“0” for USA), and no preamble transmitted. The lead-in characters are considered part of the symbol. NO PREAMBLE (<DATA>) -
Page 52: Convert Upc-E To Upc-A
LS 2106 Product Reference Guide Convert UPC-E to UPC-A This parameter converts UPC-E (zero suppressed) decoded data to UPC-A format before transmission. After conversion, data follows UPC-A format and be affected by UPC-A programming selections (e.g., Preamble, Check Digit). Scanning DO NOT CONVERT UPC-E TO UPC-A allows you to transmit UPC-E (zero suppressed) decoded data. -
Page 53: Ean Zero Extend
Parameter Menus EAN Zero Extend If this parameter is enabled, five leading zeros are added to decoded EAN-8 symbols to make them compatible in format to EAN-13 symbols. Disabling this parameter returns EAN-8 symbols to their normal format. ENABLE EAN ZERO EXTEND DISABLE EAN ZERO EXTEND 4-23... -
Page 54: Ean Zero Extend Code Type
LS 2106 Product Reference Guide EAN Zero Extend Code Type This parameter allows a decoded EAN-8 symbol that has been converted to EAN-13 to be transmitted with either an EAN-13 code type or an EAN-8 code type. TYPE IS EAN-13 (Default) -
Page 55: Enable/Disable Code 128
Parameter Menus Enable/Disable Code 128 To enable or disable Code 128, scan the appropriate bar code below. ENABLE CODE 128 DISABLE CODE 128 4-25... -
Page 56: Enable/Disable Ucc/Ean-128
LS 2106 Product Reference Guide Enable/Disable UCC/EAN-128 To enable or disable UCC/EAN-128, scan the appropriate bar code below. ENABLE UCC/EAN-128 DISABLE UCC/EAN-128 4-26... -
Page 57: Enable/Disable Code 39
Parameter Menus Enable/Disable Code 39 To enable or disable Code 39, scan the appropriate bar code below. ENABLE CODE 39 DISABLE CODE 39 4-27... -
Page 58: Code 39 Check Digit Verification
LS 2106 Product Reference Guide Code 39 Check Digit Verification When enabled, this parameter checks the integrity of a Code 39 symbol to ensure it complies with specified algorithms. Only those code 39 symbols which include a modulo 43 check digit are decoded when this parameter is enabled. -
Page 59: Transmit Code 39 Check Digit
Parameter Menus Transmit Code 39 Check Digit Scan this symbol if you want to transmit the check digit with the data. TRANSMIT CODE 39 CHECK DIGIT (ENABLE) Do Not Transmit Code 39 Check Digit Scan this symbol if you want to transmit the data without the check digit. -
Page 60: Enable/Disable Code 39 Full Ascii
LS 2106 Product Reference Guide Enable/Disable Code 39 Full ASCII To enable or disable Code 39 Full ASCII, scan the appropriate bar code below. When enabled, the ASCII character set assigns a code to letters, punctuation marks, numerals, and most control keystrokes on the keyboard. -
Page 61: Code 39 Buffering (Scan & Store)
The leading space is not buffered. Decode of a valid Code 39 symbol with no leading space causes transmission in sequence of all buffered data in a first-in first-out format, plus transmission of the “triggering” symbol. -
Page 62: Buffer Data
LS 2106 Product Reference Guide Buffer Data To buffer data, Code 39 buffering must be enabled, and a symbol must be read with a space immediately following the start pattern. Unless symbol overflows the transmission buffer, the unit gives a lo/hi beep to indicate successful decode and buffering. -
Page 63: Transmit Buffer
" No transmission occurs. Data in buffer is not affected. Attempt to Transmit an Empty Buffer If the symbol just read was the transmit buffer symbol and the Code 39 buffer is empty: A short lo/hi/lo beep signals that the buffer is empty. -
Page 64: Enable/Disable Code 93
LS 2106 Product Reference Guide Enable/Disable Code 93 To enable or disable Code 93, scan the appropriate bar code below. ENABLE CODE 93 DISABLE CODE 93 4-34... -
Page 65: Enable/Disable Interleaved 2 Of 5
Parameter Menus Enable/Disable Interleaved 2 of 5 To enable or disable Interleaved 2 of 5, scan the appropriate bar code below. ENABLE INTERLEAVED 2 OF 5 DISABLE INTERLEAVED 2 OF 5 4-35... -
Page 66: Set Lengths For Interleaved 2 Of 5
LS 2106 Product Reference Guide Set Lengths for Interleaved 2 of 5 Lengths for I 2 of 5 may be set for any length, one or two discrete lengths, or lengths within a specific range. The length of a code refers to the number of characters (i.e., human readable characters) the code contains, and includes check digits. -
Page 67: Convert I 2 Of 5 To Ean-13
Parameter Menus Convert I 2 of 5 to EAN-13 This parameter converts a 14 character I 2 of 5 code into EAN-13, and transmits to the host as EAN-13. In order to accomplish this, the I 2 of 5 code must be enabled, one length must be set to 14, and the code must have a leading zero and a valid EAN-13 check digit. -
Page 68: Enable/Disable Discrete 2 Of 5
LS 2106 Product Reference Guide Enable/Disable Discrete 2 of 5 To enable or disable Discrete 2 of 5, scan the appropriate bar code below. ENABLE DISCRETE 2 OF 5 DISABLE DISCRETE 2 OF 5 4-38... -
Page 69: Set Lengths For Discrete 2 Of 5
Parameter Menus Set Lengths for Discrete 2 of 5 Lengths for D 2 of 5 may be set for any length, one or two discrete lengths, or lengths within a specific range. The length of a code refers to the number of characters (i.e., human readable characters) the code contains, and includes check digits. -
Page 70: Enable/Disable Codabar
LS 2106 Product Reference Guide Enable/Disable Codabar To enable or disable Codabar, scan the appropriate bar code below. ENABLE CODABAR DISABLE CODABAR 4-40... -
Page 71: Clsi Editing
CLSI Editing When enabled, this parameter strips the start and stop characters and inserts a space after the first, fifth, and tenth characters of a 14-character Codabar symbol. Note: Symbol length does not include start and stop characters. ENABLE CLSI EDITING... -
Page 72: Notis Editing
LS 2106 Product Reference Guide NOTIS Editing When enabled, this parameter strips the start and stop characters from decoded Codabar symbol. ENABLE NOTIS EDITING DISABLE NOTIS EDITING 4-42... -
Page 73: Enable/Disable Msi Plessey
Parameter Menus Enable/Disable MSI Plessey To enable or disable MSI Plessey, scan the appropriate bar code below. ENABLE MSI PLESSEY DISABLE MSI PLESSEY 4-43... -
Page 74: Msi Plessey Check Digits
LS 2106 Product Reference Guide MSI Plessey Check Digits These check digits, at the end of the bar code verify the integrity of the data. At least one check digit is always required. Check digits are not automatically transmitted with the data. -
Page 75: Transmit Msi Plessey Check Digit
Parameter Menus Transmit MSI Plessey Check Digit Scan this symbol if you want to transmit the check digit with the data. TRANSMIT MSI Plessey CHECK DIGIT (ENABLE) Do Not Transmit MSI Plessey Check Digit Scan this symbol if you want to transmit the data without the check digit. -
Page 76: Msi Plessey Check Digit Algorithm
LS 2106 Product Reference Guide MSI Plessey Check Digit Algorithm When the two MSI Plessey check digits option is selected, an additional verification is required to ensure integrity. Either of the two following algorithms may be selected. MOD 11/MOD 10... -
Page 77: Transmit Code Id Character
ID character is inserted between the prefix and the decoded symbol. The user may select no code ID character, a Symbol Code ID character, or an AIM Code ID character. The Symbol Code ID characters are listed below. - Page 78 LS 2106 Product Reference Guide Transmit Code ID Character SYMBOL CODE ID CHARACTER AIM CODE ID CHARACTER NONE 4-48...
-
Page 79: Prefix/Suffix Values
Parameter Menus Prefix/Suffix Values A prefix/suffix may be appended to scan data for use in data editing. These values are set by scanning a four-digit number (i.e. four bar codes) that corresponds to key codes for various terminals. See Table A-1 on page A-1 for conversion information. Numeric bar codes begin on page 4-57. -
Page 80: Scan Data Transmission Format
LS 2106 Product Reference Guide Scan Data Transmission Format Use this parameter to change the format of the scanned data. DATA AS IS <DATA><SUFFIX 1> <DATA> <SUFFIX 2> 4-50... - Page 81 Parameter Menus Scan Data Transmission Format (cont’d) <DATA <SUFFIX 1><SUFFIX 2> <PREFIX> <DATA> <PREFIX><DATA><SUFFIX 1> <PREFIX><DATA><SUFFIX 2> <PREFIX><DATA><SUFFIX 1><SUFFIX 2> 4-51...
-
Page 82: Host Interfaces
LS 2106 Product Reference Guide Host Interfaces Use these bar codes to select your host interface. IBM PC/AT IBM PS/2-50, 55SX, 60, 70, 80 (Default) IBM PS/2-30 IBM PC/XT NCR 7052 4-52... -
Page 83: National Keyboard Types
Parameter Menus National Keyboard Types Use these bar codes to select the appropriate national keyboard type. North American (Default) French German French International 4-53... - Page 84 LS 2106 Product Reference Guide Spanish Italian Swedish British 4-54...
-
Page 85: Fast Transmit
Parameter Menus Fast Transmit Older systems may require a slower transmission method. If your system still needs additional time to process keyboard dat after setting an Intercharacter Delay, scan the DISABLE FAST TRANSMIT bar code. ENABLE FAST TRANSMIT DISABLE FAST TRANSMIT (Default) 4-55... -
Page 86: Intercharacter Delay
LS 2106 Product Reference Guide Intercharacter Delay Select the intercharacter delay option matching host requirements. The intercharacter delay gives the host system time to service its receiver and perform other tasks between characters. The delay period can range from no delay to 99 msec in 1-msec increments. After scanning the bar code below, scan two bar codes beginning on page 4-57 to set the desired time-out. -
Page 87: Numeric Bar Codes
Parameter Menus Numeric Bar Codes For parameters requiring specific numeric values, scan the appropriately numbered bar code(s). 4-57... - Page 88 LS 2106 Product Reference Guide Numeric Bar Codes (cont’d) 4-58...
-
Page 89: Cancel
Parameter Menus Numeric Bar Codes (cont’d) Cancel If you make an error or wish to change your selection, scan the bar code below. CANCEL 4-59... -
Page 90: Keyboard Maps
LS 2106 Product Reference Guide Keyboard Maps The keyboard maps on the following pages are provided for prefix/suffix keystroke parameters, and are used only with scanners that support data formatting. To program the prefix/suffix values, see the bar codes on page 4-49. - Page 91 Parameter Menus Normal CNTRL 7010 7006 7014 5001 5002 5003 5004 5005 5006 5007 5008 5009 5010 5011 5012 3023 7001 7011 7008 7012 7003 6047 6045 6042 7019 7002 7004 7005 7009 6043 7013 7013 7015 6058 7017 7016 7018 Figure 4-3.
- Page 92 LS 2106 Product Reference Guide 1068 1067 1066 1070 1071 1065 1069 1075 1072 1074 1076 1073 1077 1078 1082 1079 1080 1083 1084 1085 1081 5001 5002 1045 5013 1086 5011 5003 5004 5014 5015 1087 5005 5006 1043...
- Page 93 Appendix A ASCII Character Set Table A-1. ASCII Character Set ASCII Value Full ASCII Keystroke Code 39 Encode Char. 1000 CTRL 2 1001 CTRL A 1002 CTRL B 1003 CTRL C 1004 CTRL D 1005 CTRL E 1006 CTRL F 1007 CTRL G 1008...
- Page 94 LS 2106 Product Reference Guide Table A-1. ASCII Character Set (Continued) 1014 CTRL N 1015 CTRL O 1016 CTRL P 1017 CTRL Q 1018 CTRL R 1019 CTRL S 1020 CTRL T 1021 CTRL U 1022 CTRL V 1023 CTRL W...
- Page 95 ASCII Character Set Table A-1. ASCII Character Set (Continued) 1041 1042 1043 1044 1045 1046 1047 1048 1047 1050 1051 1052 1053 1054 1055 1056 1057 1058 1059 1060 < 1061 1062 > 1063 1064 1065 1066 1067...
- Page 96 LS 2106 Product Reference Guide Table A-1. ASCII Character Set (Continued) 1068 1069 1070 1071 1072 1073 1074 1075 1076 1077 1078 1079 1080 1081 1082 1083 1084 1085 1086 1087 1088 1089 1090 1091 1092 1093 1094...
- Page 97 ASCII Character Set Table A-1. ASCII Character Set (Continued) 1095 1096 ‘ 1097 1098 1099 1100 1101 1102 1103 1104 1105 1106 1107 1108 1109 1110 1111 1112 1113 1114 1115 1116 1117 1118 1119 1120 1121...
- Page 98 LS 2106 Product Reference Guide Table A-1. ASCII Character Set (Continued) 1122 1123 1124 1125 1126 1127 Undefined 1128 ALT Keys Keystroke 2064 ALT 2 2065 ALT A 2066 ALT B 2067 ALT C 2068 ALT D 2069 ALT E...
- Page 99 ASCII Character Set Table A-1. ASCII Character Set (Continued) 2083 ALT S 2084 ALT T 2085 ALT U 2086 ALT V 2087 ALT W 2088 ALT X 2089 ALT Y 2090 ALT Z 2091 ALT [ 2092 ALT \ 2093 ALT ] 2094 ALT 6...
- Page 100 LS 2106 Product Reference Guide Table A-1. ASCII Character Set (Continued) 3014 £ 3015 ¤ 3016 ¬ 3017 ° 3018 3019 ¶ 3020 § 3021 3022 0/00 PF Keys Keystrokes 4001 PF 1 4002 PF 2 4003 PF 3 4004...
- Page 101 ASCII Character Set Table A-1. ASCII Character Set (Continued) 4018 PF 18 4019 PF 19 4020 PF 20 4021 PF 21 4022 PF 22 4023 PF 23 4024 PF 24 F Keys Keystroke 5001 5002 5003 5004 5005 5006 5007 5008 5009 5010...
- Page 102 LS 2106 Product Reference Guide Table A-1. ASCII Character Set (Continued) 5020 5021 5022 5023 5024 5025 5026 5027 5028 5029 5030 5031 5032 5033 5034 5035 5036 5037 5038 5039 5040 Numeric Keystroke Keypad 6042 6043 6044 undefined 6045...
- Page 103 ASCII Character Set Table A-1. ASCII Character Set (Continued) 6046 6047 6048 6049 6050 6051 6052 6053 6054 6055 6056 6057 6058 Enter 6059 Num Lock 6060 Extended Keystroke Keypad 7001 Break 7002 Delete 7003 Pg Up 7004 7005 Pg Dn 7006 Pause 7007...
- Page 104 LS 2106 Product Reference Guide Table A-1. ASCII Character Set (Continued) 7012 Home 7013 Enter 7014 Escape 7015 Up Arrow 7016 Dn Arrow 7017 Left Arrow 7018 Right Arrow 7019 Back Tab A-12...
- Page 105 (e.g., characters per inch). Bar Height The dimension of a bar measured perpendicular to the bar width. Thickness of a bar measured from the edge closest to the symbol start Bar Width character to the trailing edge of the same bar.
- Page 106 Character Set Those characters available for encodation in a particular bar code symbology. A digit used to verify a correct symbol decode. The scanner inserts the Check Digit decoded data into an arithmetic formula and checks that the resulting number matches the encoded check digit. Check digits are required for UPC but are optional for other symbologies.
- Page 107 Continuous Code A bar code or symbol in which all spaces within the symbol are parts of characters. There are no intercharacter gaps in a continuous code. The absence of gaps allows for greater information density.
- Page 108 The exact (or ideal) intended value for a specified parameter. Tolerances are specified as positive and negative deviations from this value. Nominal Size Standard size for a bar code symbol. Most UPC/EAN codes can be used over a range of magnifications (e.g., from 0.80 to 2.00 of nominal). Parameter A variable that can have different values assigned to it.
- Page 109 A minimum PCS value is needed for a bar code symbol to be scannable. PCS = (RL - RD) / RL, where RL is the reflectance factor of the background and RD the reflectance factor of the dark bars.
- Page 110 A scannable unit that encodes data within the conventions of a certain symbology, usually including start/stop characters, quiet zones, data characters, and check characters. Symbol Aspect Ratio The ratio of symbol height to symbol width. Symbol Height The distance between the outside edges of the quiet zones of the first row and the last row.
- Page 111 We’d like to know what you think about this manual. Please take a moment to fill out this questionnaire and fax this form to: (516) 738-3318, or mail to: Symbol Technologies, Inc. One Symbol Plaza M/S B-4 Holtsville, NY 11742-1300 Attn: Technical Publications Manager IMPORTANT: If you need product support, please call the appropriate customer support number provided.
Need help?
Do you have a question about the LS 2106 and is the answer not in the manual?
Questions and answers