Advertisement
Quick Links
Advertisement

Related Manuals for Riverlea Duratuf KIWI KS3


Summary of Contents for Riverlea Duratuf KIWI KS3
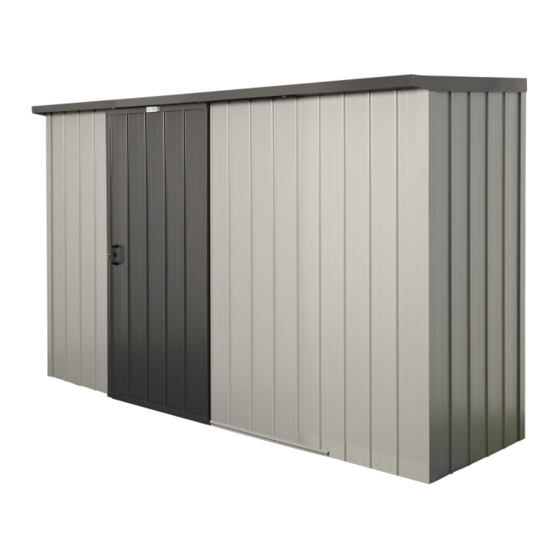
- Page 1 Quality – Built In ASSEMBLY INSTRUCTIONS BASE SIZE 3380mm x 876mm...
- Page 2 CHECK OUT OUR ASSEMBLY VIDEO Let Keith and Justin show you how to build your Kiwi shed like a professional. When used in conjunction with these assembly instructions, Keith’s practical tips and tricks will make your assembly experience that much simpler, giving you visual guidance through sections that seem tricky on paper, and help you achieve a flawless end result.
- Page 3 ASSEMBLY INSTRUCTIONS • Tools Required: Drill • Drill Bit 3.5mm • Drill Bit 6mm (for clear roof panel only) • Hex Drive 5/16 • Riveter (free Duratuf riveter supplied in kit) • Hammer • Nail Punch • Tape Measure • Ladder or Saw stool •...
- Page 4 KIWI KS3 PARTS LIST Wall Sheets 1.890m Roof Sheets 1.016m Door - Standard Security Instruction Booklet Hardware Pack Touch-up Paint & Brush Duratuf Riveter 50mm Flooring Nails 75mm Flooring Nails Fixed Window Frame Glaze Beads 0.580m Glass 0.603 x 0.603m Louvre Window Frame 0.588 x 0.150m Glass...
- Page 5 KS3 TIMBER FRAME 3380 1622 END WALL FRONT WALL...
- Page 6 KS3 TIMBER FRAME Note: For sheds with the Raised Floor Modification option the studs will be 1.780m long to allow the Wall Sheets to pro- trude 20mm below the Bottom Plate. Refer to Raised Floor Modification section (Page 15). Note: If fitting a window in the Back Wall, there will be no centre stud on that side.
- Page 7 KS3 WALL CLADDING TO AVIOD CORROSION: • Where at all possible try not to trap metal filings between two sheets. Remove all metal filings before riveting. • Carbon in pencils reacts with the Zinc/Aluminium coating on steel. Use either crayon or ink to mark steel. TERMS EXPLANATION •...
- Page 8 KS3 WALL CLADDING Step 1: Front Wall: Start at the left hand side. Position the Wall Sheet with the LIP on the left hand side. Ensur- ing the LIP is flush with side of the Stud and the top of the Top Plate, tack in place.
- Page 9 KS3 WINDOW (Optional) LOUVRE WINDOW 588mm Step 2: On the inside of the shed, position studs Step 1: Lay out the two window studs (883mm) and and Nog centrally on window opening. Nog (634mm) on a flat surface. Position Make sure the studs are parallel and nail Nog and nail in place using 2x 75mm nails into Top Plate and End Wall Nog.
- Page 10 KS3 DOOR JAMB & CORNER FLASHINGS Step2: Measure and cut Doorstep Flashing (106) to Step1: Fit Door Jamb Flashing (104) in between fit in between Door Jambs. Position the Door- Top and Bottom Plates and hard against step Flashing in between the Door Jambs at Stud.
- Page 11 KS3 DOOR Step 1: Position the Door Track (107) on the front wall with the top of the track 7mm below the top of the timber frame. The left-hand end of the door track should be 20mm in from left side of the left-hand door jamb flashing. Pre-drill a hole in the centre of the track and screw in place using one 45mm door track screw.
- Page 12 KS3 ROOF Note: Condensation can form on the under side of shed roof. If building paper is required, fit now. Building paper will need to be supported by netting or roofing twine. Roof with Clear Panel: Handle Clear Panel with care. The Clear Panel will crack if not fitted correctly. Riveting: Pre-drill 3.5mm hole through Clear Panel and Steel.
- Page 13 KS3 BARGE & SPOUTING Step 1: Fit Ridge Cap Flashing as shown. When posi- tioned correctly rivet through rivet Ridge Cap Flashing to Roof Sheets and back Wall Sheets, one rivet every second rib. Step 2: Position Barge Flashing (G102) on End Walls ensuring the back of the Barge is flush with the Ridge Cap.
- Page 14 KS3 FLOOR (Optional) Step 1: Place shed in final position. Check the di- agonal measurements are the same and the shed is level before fitting Floor. It is recommended that the shed is anchored down with either a Duratuf Bolt Down Kit or Duratuf Peg Down Kit depending on what the shed is sited on.
- Page 15 KS3 HASP & STAPLE Using six rivets and one 50mm clout attach hasp to Door Jamb Flashing and the staple to the Door as shown. (Note: See below for security option.) SECURITY DOOR (Optional) Step 1: Attach “ T” locking handle with two 8x10mm screws.
- Page 16 SECURITY DOOR (Optional) Step 3: On the left hand Door Jamb, position latch as shown, at correct height to door handle. Rivet in place with four rivets. RAISED FLOOR MODIFICATION For sheds being placed on a purpose built floor, (concrete, cob- bles, ply etc.), the Wall Sheets will protrude 20mm below the Base Plate.
- Page 17 COMPLETE OUR CUSTOMER SURVEY Thank you for investing in a Duratuf Garden Shed. We are sure that it will provide excellent long-term storage and add value to your property. To continually improve our products and service, we would love to hear about your Duratuf experience and why you chose us. Further to that, we would also love to see a picture or a short video of your shed installed and doing its job so that we can share this with others for their inspiration.
-
Page 18: Terms And Conditions
WARRANTY ON METAL CLADDING Riverlea Group Ltd guarantee that the metal roofing and wall cladding on Kiwi and Fortress Garden Sheds may be used in moderate and inland corrosion zones or areas where the first year mild steel corrosion rate is less than 200g/m2, and that in these conditions, they will not perforate due to corrosion within 30 years of date of manufacture.
Need help?
Do you have a question about the Duratuf KIWI KS3 and is the answer not in the manual?
Questions and answers