Advertisement
Quick Links
Advertisement

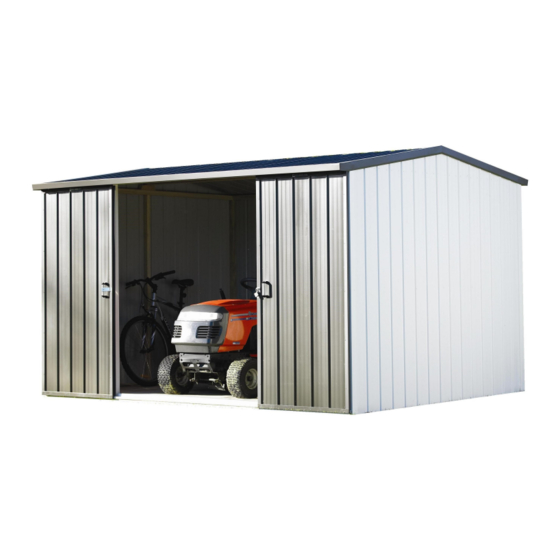
Summary of Contents for Riverlea Duratuf KIWI SHEDS MK3A
- Page 1 Quality – Built In ASSEMBLY INSTRUCTIONS MK3A BASE SIZE 3380mm x 2545mm...
- Page 2 ASSEMBLY INSTRUCTIONS Tools Required: Drill Drill Bit 3.5mm Drill Bit 6mm (for clear roof panel only) Riveter Hammer Nail Punch Tape Measure Ladder or Saw stool Spanner x2 String Line ...
-
Page 4: Front Wall
MK3A TIMBER FRAME 3380 1630 1900 (or 1870 for Raised Base Plate only) FRONT WALL 3380 1622 1622 1900 (or 1870 for Raised Base Plate only) BACK WALL... - Page 5 MK3A TIMBER FRAME Note: If fitting a window, there will be no centre stud on the window side. Instead nail in a full length nog (2.455 in Gable or 3.290 in Back Wall) using window studs (.883) to get correct height. Position one window stud cen- trally beneath the nog and nail in place.
-
Page 6: Terms Explanation
MK3A WALL CLADDING TO AVIOD CORROSION: Where at all possible try not to trap metal filings between two sheets. Remove all metal filings before riveting. Carbon in pencils reacts with the Zinc/Aluminium coating on steel. Use ink to mark steel. TERMS EXPLANATION ... - Page 7 MK3A WALL CLADDING Note: For sheds with the Raised Base Plate option, the Wall Sheets will protrude 20mm below the Bottom Plate. Refer to Raised Base Plate sec- tion (page 15). Step 1: Front Wall: Start at the left hand side. Posi- tion the Wall Sheet with the LIP on the left hand side.
- Page 8 MK3A LOUVRE WINDOW (Optional) 588mm Step 1: Lay out the two window studs (883mm) and Nog Step 2: On the inside of the shed, position studs and (634mm) on a flat surface. Position Nog and nail Nog centrally on window opening. Make sure the in place using 2x 75mm nails at each end.
- Page 9 MK3A FIXED WINDOW (Optional) Step 1: Lay out the two window studs (883mm) and Nog (590mm) on a flat surface. Position 570mm Nog and nail in place using two 75mm nails at each end. Follow Steps 2 - 5 on page 8. Step 6: From the outside of the shed, place glass in Window Frame.
- Page 10 MK3A DOOR JAMB & CORNER FLASHINGS Step 3: Fit Corner Flashing (101) over corner Ribs with the top flush with the top of the Top Plate. Rivet in place with six rivets, three each side. Repeat with other three Corner Flashings. When fitting Corner Flashings on front wall, ensure they are parallel with Door Jambs.
- Page 11 MK3A CLEAR ROOF PANEL (Optional) Step 1: Leave a gap where the Clear Panel is to be fitted. Position the next Roof Sheet. Ensure it overlaps correctly, then rivet together, one rivet in the centre and one approximately 600 mm down from the centre on both sides. Rit re- maining Roof Sheets, overlapping and riveting as you go.
- Page 12 MK3A DOORS Step 1: Top Door Tracks: Mark the centre of the doorway on the Overdoor Flashing. Position Centre Door Stop on the front face of the Overdoor Flashing and up against the under- side of roof. Pre-drill holes and nail in place with 50mm nails.
- Page 13 MK3A DOORS CLADDING Step 6: Bottom Door Guides: Slide Door to corner. Hang Door Guide (A108) on bottom of the Door. Make it flush with Corner Flashing. Lift up approximately 3mm so that the Door will Slide DOOR freely. Pre-drill hole and nail in place using a BOT- 50mm nail.
- Page 14 MK3A FLOOR Step 1: Place shed in final position. Check the di- agonal measurements are the same and the shed is level before fitting Floor. It is recommended that the shed is anchored down with either a Duratuf Bolt Down Kit or Duratuf Peg Down Kit depending on what the shed is sited on.
- Page 15 MK3A HASP & STAPLE Using seven rivets attach hasp to Left Hand Door and the staple to the Right Hand Door as shown. RAISED BASE PLATE For sheds being placed on a purpose built floor, (concrete, cobbles, ply etc.), the Wall Sheets will pro- trude 20mm below the Base Plate.
- Page 16 Minimum maintenance must be carried out in accordance with instructions below. Should the cladding fail to perform as specified above, the liability of Riverlea Group Ltd shall in all cases be limited to replacing or repairing the defective product. The balance of the original warranty will cover any repaired or replaced material. Riverlea Group Ltd will not be liable for any consequential loss or damage, labour or transport charges.


Need help?
Do you have a question about the Duratuf KIWI SHEDS MK3A and is the answer not in the manual?
Questions and answers