Table of Contents
Advertisement
Quick Links
Advertisement
Table of Contents

Subscribe to Our Youtube Channel
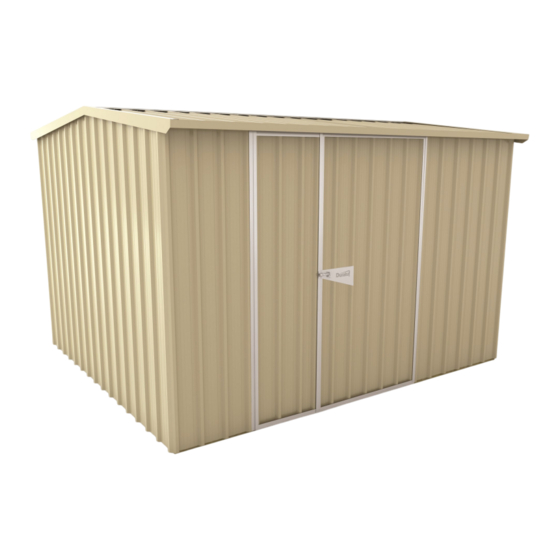
Summary of Contents for Riverlea Duratuf Guardian SHED SG3025
- Page 1 ASSEMBLY INSTRUCTIONS SG3025 BASE SIZE: 3.020m x 2.520m...
- Page 2 CHECK OUT OUR ASSEMBLY VIDEO...
-
Page 3: Before You Start
CONGRATULATIONS ON PURCHASING A DURATUF SENTRY SHED. BEFORE YOU BEGIN THE ASSEMBLY PLEASE NOTE SOME IMPORTANT POINTS: BEFORE YOU START: • Read all instructions carefully • Identify all parts and check quantities against parts list • Select a level site •... - Page 4 SG3025 PARTS LIST PACK 1 CLADDING + FLASHINGS + HARDWARE DESCRIPTION DIAGRAM CHECKED Front & Back Wall - 1.850m Side Wall Angle- 1.880m (Measurement along centre of sheet) Side Wall Angle- 1.940m (Measurement along centre of sheet) Side Wall Angle– 2.000m (Measurement along centre of sheet) Roof - 1.350m Door Sheet Narrow - 1.810m...
- Page 5 SG3025 FRAMING PACK PARTS LIST PACK 2 TIMBER DESCRIPTION DIAGRAM Front/Back Bottom Plates - H4 (Green) 3.020 m Front & Back Top Plate - H1 (Red) 3.020 m Side Wall Bottom Plates - H4 (Green) 2.520 m Side Wall Top Plates - H1 (Red) 2.520 m Ridge Beam - 90 x 45 3.020m...
-
Page 6: Parts Location
PARTS LOCATION Ridge Cap—x 2 Roof Sheets Barge Flashing Spouting Back Wall Sheets Ridge Beam Jack Stud Top Plate Back Top Plate Side Top Plate Front Front Wall Sheets Door Brace Door Sheets Door Jambs Side Wall Sheets Padbolt Support Bottom Plate Side Bottom Plate Front Hinge... - Page 7 FOUNDATION No doubt by now you will have decided what sort of base you are putting down. Please read the section that applies to your situation. If you choose to pour a concrete base you will need to decide whether you wish to raise the base plate of your shed. This allows the cladding to protrude below the surface of the concrete and ensures a water tight pad.
- Page 8 ASSEMBLE DOOR SELECT: 3 x 1.810 m Door Sheets (Narrow) 2 x 0.945 m Door Top/Bottom Flashings 2 x 0.495 m Door Top/Bottom Flashings 4 x 1.810 m Door Side Flashings 2 x 1.160 m Door Brace Flashings 2 x 0.915 m Door Brace Flashings 1 x 1.810 m Weatherstrip 6 x Hinges 1 x Padbolt Support Flashing...
- Page 9 ASSEMBLE SIDE PANELS SELECT: IMPORTANT—IF YOU CHOOSE TO RAISE YOUR TIMBER BASE PLATE –READ THE FOLLOWING; 4 x 1.880 m Gable Wall Sheets (Angled) 4 x 1.940 m Gable Wall Sheets (Angled) For sheds with Raised Base Plate option only (see page 6), deduct 2 x 2.000 m Gable Wall Sheets (Angled) 30mm from measurement shown between Top and Bottom Plates on 2 x 2.520 m Top Plates (Red)
- Page 10 ASSEMBLE BACK PANEL IMPORTANT—IF YOU CHOOSE TO RAISE YOUR TIMBER SELECT: BASE PLATE –READ THE FOLLOWING; 6 x 1.850m Wall Sheets For sheds with Raised Base Plate option only (see page 6), deduct 1 x 3.020 m Top Plate (Red) 30mm from measurement shown between Top and Bottom Plates on 1 x 3.020 m Bottom Plate (Green) all wall panels, so cladding protrudes 20mm below bottom plate...
- Page 11 ASSEMBLE FRONT PANEL IMPORTANT—IF YOU CHOOSE TO RAISE YOUR TIMBER SELECT: BASE PLATE –READ THE FOLLOWING; 3 x 1.850 Wall Sheets For sheds with Raised Base Plate option only (see page 6), deduct 1 x 3.020 Top Plate (Red) 30mm from measurement shown between Top and Bottom Plates on 1 x 3.020 Bottom Plate (Green) all wall panels, so cladding protrudes 20mm below bottom plate 2 x 1.850 Door Jamb Flashings...
-
Page 12: Wall Panel Assembly
WALL PANEL ASSEMBLY SELECT: 4 x Pre-made Wall Panels SIDE OVERLAPS 16 x 40mm Screws BACK 16 x Rivets TOP PLATE BACK WALL STEP 1: • Stand the Back Panel and the Side Panel BOTTOM PLATE up using someone to support the panels SIDE while they are screwed together. -
Page 13: Roof Assembly
ROOF ASSEMBLY IMPORTANT—FOR SHEDS WITH OPTIONAL CLEAR ROOF PANEL SELECT: Assemble as below, making sure that the Clear Roof Sheets overlap the stand- ard roof sheets on both sides. 12 x 1.350 m Roof Sheets The Clear Roof Panel must be secured to the Top Plate and the Ridge Beam. 2 x 3.055 m Spouting 4 x 1.352 m Barges Pre drill and fasten with the 50mm roofing screws provided.. - Page 14 ROOF ASSEMBLY CONT... STEP 3: TOP PLATE • Position 1 x roof sheet so that the top of the sheet is at the cen- BACK WALL tre of the Ridge Beam and the side of the sheet over hangs the BOTTOM PLATE end of the Ridge Beam and the Top Plate by 15mm.
- Page 15 SECURING SHED Secure your shed using Treated Timber Pegs or a Bolt Down Kit TIMBER PEGS—WOODEN FLOOR • The optional Duratuf Timber Peg Down Kit includes six H5 treated timber pegs that can be hammered into the ground and then attached to the Base Plate with stainless steel screws.
-
Page 16: Year Warranty
20 YEAR WARRANTY Riverlea Group Ltd warrant that the cladding used in the manufacture of the Sentry shed will not rust within 20 years from the date of purchase. Any liability for product failure that may arise will be limited to repair or replacement of the defective product and will only apply for the benefit of the original purchaser.


Need help?
Do you have a question about the Duratuf Guardian SHED SG3025 and is the answer not in the manual?
Questions and answers