Advertisement
Quick Links
Advertisement

Subscribe to Our Youtube Channel
Related Manuals for Riverlea CEDAR SHED NOTTINGHAM


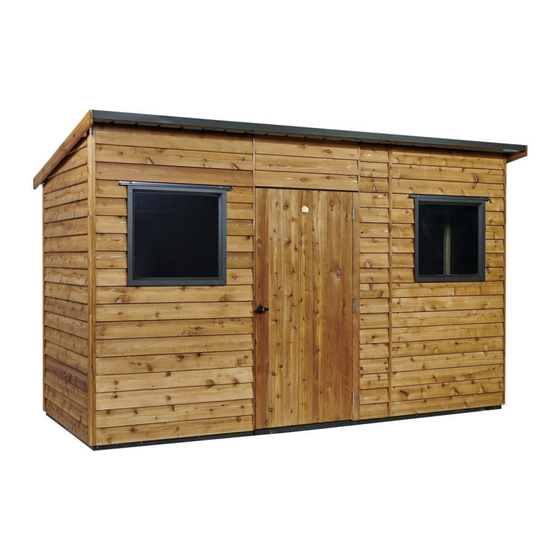
Summary of Contents for Riverlea CEDAR SHED NOTTINGHAM
- Page 1 CEDARSHED INSTRUCTIONS NOTTINGHAM - COLOURSTEEL ROOF Base size: 3600mm x 1500mm deep...
- Page 2 NOTTINGHAM Battery Drill Tools Required: • Riveter • Hammer • Tape Measure • Ladder • Skillsaw • Level • Screwdriver - Flat • 3/8 Hex Drive bit • 8mm Hex Drive bit • Drill Bit 3.2mm • Before you start: Read all instructions carefully.
- Page 3 NOTTINGHAM PARTS LIST Description Size PACK ONE - SHED Standard Door 895 x 1780 Front Wall Panel 300 x 2177 Front Wall Panel 1200 x 2177 Back Wall Panels 1200 x 1937 Side Raking Wall Panels (1L, 1R) 1410 x 2152 Cedar Corner Clashings - Front 65 x 17 x 2152 Cedar Corner Clashings - Back...
- Page 4 NOTTINGHAM CONCRETE FLOOR OPTION- Building a Raised Concrete Base Step 1: Establish size of shed and excavate sufficient area. Re- member to allow for rear roof overhang up to 150mm, and 120mm on each end. Step 2: Ensure that the base substrate is compacted firmly. We suggest that the slab should be 80mm thick in the middle and 100mm thick around the edges.
- Page 5 NOTTINGHAM FLOOR - OPTIONAL Step 1: Lay out floor joists, spacing them evenly as shown. Using 50mm flooring nails, nail a floor board on each end, ensuring ends are flush with joists. Make sure floor is level and joists are sup- ported at 900mm centres.
- Page 6 NOTTINGHAM WALL PLAN 1200 1200 1200 NOTTINGHAM WALL PLAN 1410R 1410L 1200 1200 NOTE: FRONT WALL IS THE HIGH WALL. 15 x 17mm Std Cedar bead 30 x 17mm Std Cedar bead Corner Clashing 45 x 15mm Packer Tek Screws (To secure walls to the floor) Please note: The walls are not screwed down to the floor until all the walls are erected, the roof is in place and the doors are about to be installed.
- Page 7 NOTTINGHAM WALLS Step 5: Screw wall panels together using 75mm Tek screws (3 per short panel, 4 per long panel), ensuring side raking wall panels are inside the front and back wall panels as per wall plan. Step 6: Silicone edge of weatherboards on standing panel and nail on cedar beads with 5 x bead nails.
- Page 8 NOTTINGHAM TOP LINTEL Step 9: Using 4 x 75mm tek screws screw door lintel to studs. Ensure outside cedar weatherboard on lintel is flush with weather- boards each side . Door lintel shown from inside Door lintel shown from outside. NOTTINGHAM TOP STIFFENER Step 10: Using 75mm framing nails, nail both top plate stiffeners into front and back wall panels...
- Page 9 NOTTINGHAM CORNER CLASHINGS Step 12: Silicone and nail 15 x 17mm beads on all cor- ners as shown using 5 x 50mm beading nails, per bead. Step 13: Silicone and nail corner clashings on all cor- ners as shown using 5 x bead nails per clashing. Note long clashings at the front, short clashings at the rear.
- Page 10 NOTTINGHAM ROOF Step 16: Ensure shed is square, by measuring diagonals at top corner of wall panels. Using 30mm clouts, nail building paper on to purlins. Note: Temporary screw packaging timber to underside of Purlins to hold purlins straight until roof is screwed off Step 17: Position first full sheet with rib flush with ends of purlins and 200mm overhang at front of shed.
- Page 11 NOTTINGHAM DOOR Step 19: Fit door stop in door way. Check all wall panels are straight and panels either side of door stop are tight against door stop. Screw panels to floor using 1 x 75mm tek screw per panel. Screw near the panel joins, where possible.
- Page 12 NOTTINGHAM BARGE Step 22: Attach barges with 2 x 50mm bead nails into each purlin. Step 23: Attach spouting channels to front and rear of roof, leaving ap- proximately 5mm at each end for water to run off. One rivet through both end ribs, then every second rib between.
-
Page 13: Warranty Registration
Your new shed is guaranteed for the benefit of the original purchaser, against defective material or faulty workmanship for fifteen years from date of purchase. Riverlea Group Limited will, at its discretion, replace or repair any faulty or defective materials within this time on condition that due care and maintenance has been carried out as detailed below.
Need help?
Do you have a question about the CEDAR SHED NOTTINGHAM and is the answer not in the manual?
Questions and answers