Sign In
Upload
Download
Table of Contents
Contents
Add to my manuals
Delete from my manuals
Share
URL of this page:
HTML Link:
Bookmark this page
Add
Manual will be automatically added to "My Manuals"
Print this page
×
Bookmark added
×
Added to my manuals
Manuals
Brands
Megger Manuals
Test Equipment
BALTO Modular
User manual
Megger BALTO Modular User Manual
Dc high current circuit breaker tester
Hide thumbs
1
2
3
Table Of Contents
4
5
6
7
8
9
10
11
12
13
14
15
16
17
18
19
20
21
22
23
24
25
26
27
28
29
30
31
32
33
34
35
36
37
38
39
40
41
42
43
44
45
46
47
48
49
50
51
52
53
54
55
56
57
58
59
60
61
62
63
64
65
66
67
68
69
70
71
72
73
74
75
76
77
78
79
80
81
82
83
84
85
86
87
88
89
90
91
92
93
94
95
96
97
98
99
100
101
102
103
104
105
106
107
108
109
110
111
112
113
114
115
116
117
118
119
120
121
122
123
124
125
126
127
128
129
130
131
132
133
134
135
136
137
138
139
140
141
142
143
144
145
146
147
148
149
150
151
152
153
154
155
156
157
158
159
160
161
162
163
164
165
166
167
168
169
170
171
172
173
174
175
176
177
178
179
180
181
page
of
181
Go
/
181
Contents
Table of Contents
Troubleshooting
Bookmarks
Table of Contents
Table of Contents
1 Introduction
Product Description
Features
Applications
Company Web Site
2 Safety Warnings and Standards
Fundamental Rule
Warnings, Cautions and Notes
Staff Obligations
User Manual
Emc
Installation - Maintenance - Handling
Unauthorised Use
Requirements for Safe Operation
Packing and Shipping
3 Principles of Operation
General Characteristics
General Diagram
Testing Modes
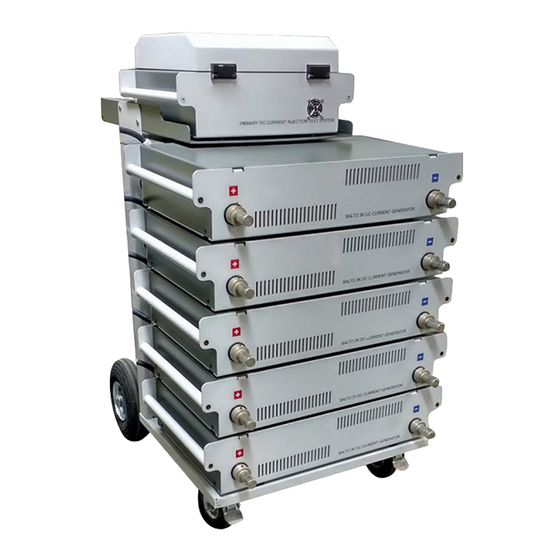
4 BALTO Modular Hardware
Support Carriage
Emergency Stop Device
Supply, Fuses and Charge Connector
Power Connections
Sockets for the DC Current Generators
The Control Unit (Incl. Protection Test Module)
Work Surface Cover
5 BALTO Compact 4000 Hardware
Main Unit
DC Current Generator Connection Panel
Emergency Stop Device
Supply, Fuses and Charge Connector
Protection Test Module
6 Control Panel
Display with Embedded PC
External Measurements
Communication Interfaces
Start Button - System Ready Indicator
Emergency Stop
600 DC Current Generator
8 Installation
Safety Warnings
Preparation : Charge the BALTO Beforehand
Charging the Current Generators
How to Use the Power Flex-Cables
Connecting the High-Speed DC Circuit Breaker
Assembly of the BALTO Modular on Site
Assembly of the BALTO Compact 4000 on Site
9 Operation
Test Procedures
To Determine the Release Threshold
To Determine the Opening Time
To Determine the Voltage Drop
Software Structure
General Information
Background
Message Management
Booting up the BALTO System
Start Procedure
Operating Conditions
Power Capacity
Flow Chart Primary BALTO System
Start Dialog
Main Menu
Information BALTO Range
Safety Mode
Emergency Stop
Test Mode
Quicktest Mode
Auto Mode
Manual Mode
Opening Time Test
DC Protection Relay Test
Reaction Time Tests
Measuring Reaction Time
Shunt Mode
Voltage Drop Measurement
I_Max no - NC
Reports
Report Info
Saving and Exporting
Auto-Verification
Info Dialog
Exiting the BALTO Application
10 Master/Slave Version
System Assembly
Identification of the Control Units
Start-Up Master/Slave
Operating Master/Slave
Status Reporting
Info Master/Slave
Stop Master/Slave
11 Secondary Injection
Introduction
Principle of Operation
DC Protective Relay Interface
Booting up Secondary Injection
Main Menu
Tuning the BALTO PROTECTION TEST Module for a Specific Relay
Testmodes
Manual Mode
Advanced Mode
12 Calibration
Preparations
Calibration Sets
Precautions
Calibration Software
Accessing the Application
Operation
Step 1/6 - OFFSET CALIBRATION
Step 2/6 - CALIBRATION of OUTPUT FACTOR
Step 3/6 - CALIBRATION of INPUT FACTOR
Step 4/6 - LINEARITY ADJUSTMENT I-OUT
Step 5/6 - LINEARITY ADJUSTMENT I-IN
Step 6/6 - Verification and Application
Results
Calibration Sets Overview
Saving the Report
Message Codes
General Messages
Initialisation Warnings
Initialisation Critical Errors
Failed Calibration Messages
13 Baltowin
System Requirements
Baltowin Files
Installation
Communication
PC Configuration
Connecting to the BALTO System
Operation
Starting Baltowin
Dialog Information
Downloading
Report Graphs
USB Downloading
14 Maintenance
Junction Connectors
Tyres (BALTO Modular Only)
Components
Trained Personnel Only
Battery Chargers
Ultracapacitors
Batteries
Power Connectors
Ventilation
Control Panel
Screen Repairs
Screen Maintenance
Control Electronics
Embedded PC Battery
15 Troubleshooting
Booting up the BALTO System
Starting Procedure
Info Dialog Status
Emergency Stop Device
Message Codes
Operation Error Codes
Test Result Error Codes
Current Injection
16 Appendix
Concise Technical Specifications
17 Appendix
References for Technical Assistance
18 Calibration, Repair and Warranty
Return Procedure
19 Decommissioning
WEEE Directive
Battery Disposal
Advertisement
Quick Links
Download this manual
DC High Current Circuit
Breaker Tester
BALTO Modular 4,000A to 40,000A
BALTO Compact 4,000 A
User Guide
Table of
Contents
Previous
Page
Next
Page
1
2
3
4
5
Advertisement
Table of Contents
Need help?
Do you have a question about the BALTO Modular and is the answer not in the manual?
Ask a question
Questions and answers
Related Manuals for Megger BALTO Modular
Test Equipment Megger Baker AWA-IV User Manual
Static motor analyzer (186 pages)
Test Equipment Megger Baker ADX Quick Reference Manual
Automated diagnostic test equipment (72 pages)
Test Equipment Megger BITE2 Manual
Battery testers (58 pages)
Test Equipment Megger BITE 3 Instruction Manual
Battery impedance (42 pages)
Test Equipment Megger BM11D User Manual
5kv digital insulation testers (71 pages)
Test Equipment Megger BM100/4 User Manual
500 v. analogue insulation & continuity testers (13 pages)
Test Equipment Megger BM15 User Manual
Insulation testers (50 pages)
Test Equipment Megger BITE 2 Instruction Manual
Battery impedance test equipment (135 pages)
Test Equipment Megger BITE 2 Instruction Manual
Battery impedance test equipment (98 pages)
Test Equipment Megger BM5200 User Manual
5 kv digital insulation tester (36 pages)
Test Equipment Megger BM80/2 Series User Manual
Multi-voltage insulation and continuity tester (89 pages)
Test Equipment Megger BM121 User Manual
Insulation & continuity tester (9 pages)
Test Equipment Megger BITE5 User Manual
Battery tester (63 pages)
Test Equipment Megger BM224 User Manual
Insulation & continuity testers (12 pages)
Test Equipment Megger BM25 User Manual
5 kv digital insulation tester (91 pages)
Test Equipment Megger BVM Cal kit User Manual
Calibration system for bvm units (16 pages)
This manual is also suitable for:
Balto compact 4000
Table of Contents
Print
Rename the bookmark
Delete bookmark?
Delete from my manuals?
Login
Sign In
OR
Sign in with Facebook
Sign in with Google
Upload manual
Upload from disk
Upload from URL


Need help?
Do you have a question about the BALTO Modular and is the answer not in the manual?
Questions and answers