Table of Contents

Related Manuals for Tarter RT104BL


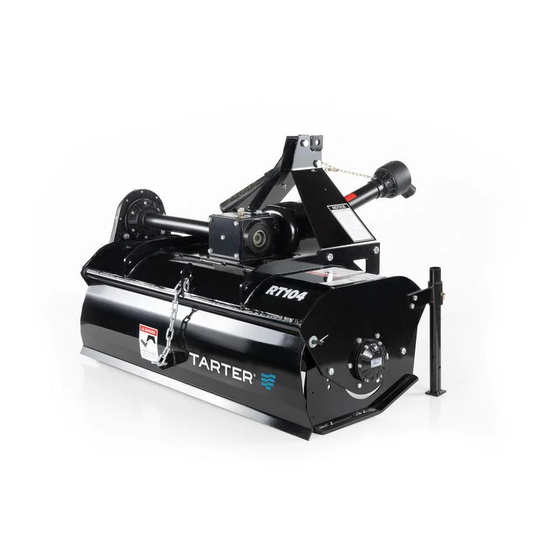
Summary of Contents for Tarter RT104BL
- Page 1 RT104BL ROTARY TILLER OPERATION AND ASSEMBLY MANUAL For more information and questions, please contact: Tarter Customer Service 1-800-RED-GATE (1-800-733-4283) Tarter products are sold through Authorized Retailers. T A R T E R U S A . C O M...
- Page 2 Lubricate the unit as specified. Please observe all safety information in this manual and safety decals on the equipment. Use only genuine Tarter service parts. Substitute parts will void the warranty and may not meet standards required for safe and satisfactory operation.
-
Page 3: Description
DESC RIP TIO N GENERAL DESCRIPTION Your Rotary Tiller has been carefully designed for cultivating and stirring up soil for gardens, food plots and other tillage needs. This manual is provided to give you the necessary operation and maintenance instructions for keeping your rotary tiller in excellent operating condition. Please read this manual thoroughly. -
Page 4: Table Of Contents
TA B LE O F CON T E N TS TABLE OF CONTENTS Description ....................3 Safety . -
Page 5: Safety
SA FE TY Safety is a primary concern in the design and manufacturing of our products. Unfortunately, our efforts to provide safe equipment can be eliminated by an operator’s single careless act. In addition to the design and configuration of equipment, hazard control and accident prevention are dependent upon the awareness, concern, judgment, and proper training of personnel involved in the operation, transport, maintenance and storage of equipment. -
Page 6: Safety Description And Decals
SA F ETY AN D IN ST RUCT ION D ECA LS SAFETY and INSTRUCTIONAL DECALS ATTENTION! BECOME ALERT! YOUR SAFETY IS INVOLVED! Replace Immediately if Damaged! - Page 7 SAF ET Y AN D I NST R U CT I ON D ECA LS SAFETY and INSTRUCTIONAL DECALS ATTENTION! BECOME ALERT! YOUR SAFETY IS INVOLVED! Replace Immediately if Damaged!
- Page 8 Never exceed the limits of any piece of machinery, can be avoided by a few seconds of thought and a whether the power unit of the Tarter implement. If its careful approach to handling equipment. You, the ability to perform a job safely is in question DO NOT operator, can avoid many accidents by observing the TRY IT.
- Page 9 Inspect chain or rubber guards before each use and instructions. replace any that are damaged. Understand how to stop the power unit and Tarter Check that all hardware is properly installed. implement quickly in case of an emergency. Always tighten to torque chart specifications unless When engaging the PTO, the engine RPM should instructed otherwise in this manual.
- Page 10 Be aware that turning the power unit tightly may cause the power unit or a Tarter implement or between the Tarter implement to come in contact with the rear moveable parts even when the engine has been wheels of the power unit and cause damage or injury.
- Page 11 Careless or improper handling may result in serious injury. Do not modify, alter, or permit anyone else to modify or alter the power unit, the Tarter implement or any of their components in any way, except as outlined in this manual.
-
Page 12: Assembly
AS S EM BLY TOOLS REQUIRED 4. Using a 3/4” wrench, remove the bolt that holds the A-Arms on. Discard nut and bolt. • TIN SNIPS • SOCKETS AND WRENCHES: 9/16”, 3/4”, 15/16”, AND 1-1/4”. (Impact wrench is preferred) 1. With rotary tiller still in the rack, set it on a level spot for assembly. - Page 13 AS S E M B LY 12. Using the following: • 5/8” x 1-3/4” hex bolt • Split lock washers Attach the A-Arm on the inside of the deck brace. Repeat on the opposite side, hand tighten. 9. Remove and discard plastic shield on the gearbox shaft.
- Page 14 AS S EM BLY 15. Using the following: 18. Using bolt, split lock washer, and nut, provided • 1/4”-20 x 3/4” hex bolt with PTO Shaft, attach the PTO Shaft to the input • Nylon Lock Nut shaft of the gearbox. •...
- Page 15 AS S E M B LY BEFORE PUTTING YOUR ROTARY TILLER INTO 5. Replace and tighten the check plug. SERVICE IMPORTANT: DO NOT overfill gearbox. This could cause damage to oil seals and can IMPORTANT: This tiller was shipped without cause permanent damage to the gearbox.
- Page 16 AS S EM BLY 11. Grease the two grease fittings on the PTO universal joints. 12. Grease the two grease fittings on the PTO safety shield. 13. Separate the PTO shaft and grease the inner surface.
-
Page 17: Attaching
AT TAC H IN G ATTACHING TO A TRACTOR 9. With driveline level, measure 1” back from universal joint shield to end of outer driveline 1. Place tiller and tractor on level ground. shield as shown in. If measurement is less than 1”, 2. -
Page 18: Modify Pto Driveline
MO DIF YI NG PTO Final Inspection and Adjustments IMPORTANT: PTO driveline may be too long for some tractor models, causing tractor transaxle damage. Modify driveline if necessary. Attach Rotary Tiller to tractor and check tiller-to-tractor driveline telescoping length clearance. (See MAINTENANCE BEFORE EACH USE in Lubrication and Maintenance section.) MODIFY PTO DRIVELINE Modify PTO Driveline (If Necessary) - Page 19 M O D I F Y I N G P TO SIZING THE PTO SHAFT CHECK DRIVELINE MAXIMUM LENGTH Refer to Figure 1 Refer to Figure 2 1. Detach the driveline from tractor PTO shaft and pull outer and inner drivelines apart. Make sure driveline’s collapsible length is acceptable.
- Page 20 MO DIF YI NG PTO 7. Start tractor and raise Rotary Tiller just enough to remove support blocks. 8. Slowly engage tractor hydraulic 3-point control lever to lower the tiller while checking for sufficient drawbar clearance. Move drawbar in, aside or remove if required.
-
Page 21: Operating/Maintenance
OP ERAT I NG /M A IN T E N A N C E OPERATING INSTRUCTIONS 4. Slip clutch operational check. After the implement has been stored for thirty days or more perform the 1. With the Rotary Tiller positioned on level ground, following operational check. -
Page 22: Reversing Tiller Tine Direction
REV E RS I NG T IL L E R T I N E D IR ECTI ON 8. Slide gearbox to left approximately 5”. Side hex shaft 1. Detach tiller from tractor. should drop out of gearbox on right hand side. 2. - Page 23 R E VE R SIN G T I LL ER TI NE D I R ECTI O N 12. On the side opposite where hex shaft was inserted, NOTE: DO NOT tighten any of the six find washer held in by snap ring. gearbox bolts until all six have been threaded and started.
-
Page 24: Storage
STORAGE STORAGE IMPORTANT: When the unit is going to be stored for an extended amount of time, please perform the following steps to keep the oil seals from deteriorating. • Spray shaft extensions with a suitable dry film or similar preservative. •... -
Page 25: Product Specifications
PRO D U CT SP EC IF I CATI O N S Recommended Tractor PTO Horsepower 15-35 Weight 470 lbs. Working Depth 7” Working Width 46.5” Overall Width 51.5” Limited Cat 1/ Quick Hitch Compatible Hitch 540 RPM Slip Clutch Protection Driveline Number of Flanges on Rotor Number of Tines per Flange... -
Page 26: Parts
PA RTS Rotary Tiller Parts List RT104BL Item Part Number Description 9000380 Rear Guard Assembly (black) (4') 9000381 Rear Guard Steel Hinge w/ Hardware (black) (4') P-P1827 1/4" Chain Shackle P-P1870 Tiller Manual Holder w/ Hardware P-P1824 Driveline Shaft Guard (4') - Page 27 PARTS RT104BL Side Gearbox 2000170 Item Number Part Number Description H-C0245 Tiller Agriculture Side Input Shaft Sealed Cap H-C0221 Tiller Side Gearbox Gear Shaft-Input 2000016 Tiller Side Gearbox Input Gasket 0.5mm H-C0253 *416M* Tiller Ring 2000179 Center Idle Gear (H-C8008-02)
- Page 28 PARTS RT104BL Top Gearbox 2000169 Item Part Number Description 2000173 Output Shaft (H-C8007-01) S-122 Agriculture Top Tiller Output Shaft Key 2000174 Output Gear (H-C8007-02) 2000175 Input Gear Shaft (H-C8007-04) 2000176 Input Shaft Seal 72x35x11 (S-218) S-403 Agriculture Tiller Top Output Shaft Retaining Ring...
-
Page 29: Torque Specifications
TORQU E SPECI FICAT IO N S Proper torque for American fasteners used on manufactured implement. Recommended Torque in Foot Pounds (Newton Meters).* AMERICAN Bolt Head Markings WRENCH BOLT DIAMETER SIZE(IN.)”A” (IN.)”B” AND GRADE 2 GRADE 5 GRADE 8 THREAD SIZE 7/16 1/4 -20 UNC 6 (7) -
Page 30: Trouble Shooting
T RO UB LES HO OTI N G PROBLEM POSSIBLE CAUSE POSSIBLE SOLUTION Cannot attach PTO shaft to the PTO shaft is too long, PTO yoke Cut PTO shaft per OM tractor attachment pin is seized. instructions, lubricate attachment pin. Tillage depth insufficient Tractor is holding tiller up, Adjust lift arm settings on... -
Page 31: Warranty
Photograph of UPC label. After receipt of the above information, if the product is alleged to be defective, Tarter Farm and Ranch Equipment will process the claim and issue a Return Manufacturers Authorization number (RMA). Once an RMA number is issued, Tarter Farm and Ranch Equipment will pick up the product from the authorized retailer and return to its facility for inspection. - Page 32 WA RRANTY WARRANTY DISCLAIMER: This limited warranty is in lieu of, and Tarter Farm and Ranch Equipment disclaims and excludes any express and implied warranties with respect to the product including, without limitation, merchantability, and fitness for a particular purpose. No other express warranty, whether written or oral, given by any person or entity, including a retailer, with respect to any product, shall bind Tarter Farm and Ranch Equipment.
-
Page 33: Notes
N OTES ________________________________________________________________________________ ________________________________________________________________________________ ________________________________________________________________________________ ________________________________________________________________________________ ________________________________________________________________________________ ________________________________________________________________________________ ________________________________________________________________________________ ________________________________________________________________________________ ________________________________________________________________________________ ________________________________________________________________________________ ________________________________________________________________________________ ________________________________________________________________________________ ________________________________________________________________________________ ________________________________________________________________________________ ________________________________________________________________________________ ________________________________________________________________________________ ________________________________________________________________________________ ________________________________________________________________________________ ________________________________________________________________________________ ________________________________________________________________________________ ________________________________________________________________________________ ________________________________________________________________________________ ________________________________________________________________________________ ________________________________________________________________________________ ________________________________________________________________________________ ________________________________________________________________________________ ________________________________________________________________________________ ________________________________________________________________________________ ________________________________________________________________________________ ________________________________________________________________________________ ________________________________________________________________________________ ________________________________________________________________________________ ________________________________________________________________________________ ________________________________________________________________________________ ________________________________________________________________________________ ________________________________________________________________________________ ________________________________________________________________________________ ________________________________________________________________________________ ________________________________________________________________________________ ________________________________________________________________________________ ________________________________________________________________________________... - Page 34 P.O. BOX 10 10739 S. HWY 127 DUNNVILLE, KY 42528 1-800-REDGATE | TARTERUSA.COM 4000169 REV3 120621...
Need help?
Do you have a question about the RT104BL and is the answer not in the manual?
Questions and answers