
Related Manuals for Cata 700XGBK


Summary of Contents for Cata 700XGBK
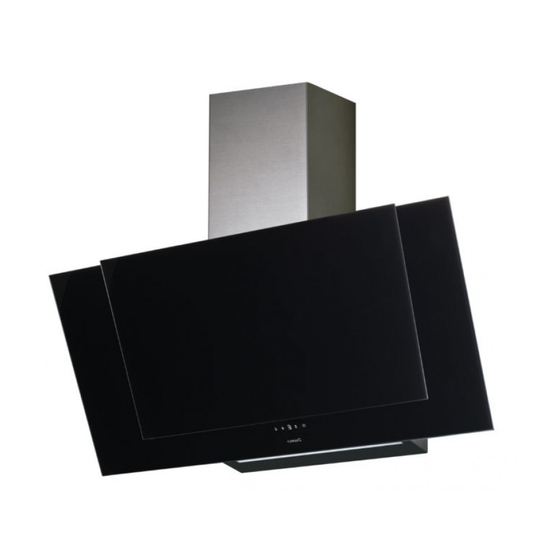
- Page 1 INSTRUCCIONES PARA EL USO USE INSTRUCTIONS MANUEL D’UTILISATION MANUAL DE INSTRUÇÕES GEBRAUCHSANWEISUNG...
- Page 4 ADVERTENCIA: Lea las instrucciones antes de utilizar el aparato. FUNCIONES Y AJUSTES Panel de control Para obtener los mejores resultados de su campana extractora, se recomienda que la deje encendida durante un período de tiempo después de haber terminado de cocinar. Temporizador Función Boost del ventilador y aumento de velocidad del ventilador Pantalla LED...
-
Page 5: Uso General
Ajuste del modo de iluminación Una vez en el modo de configuración, pulse el icono de la luz ( ) y el icono parpa- deará en rojo. La pantalla LED mostrará el modo de iluminación actual. Luz fría: ( ) Ajuste predeterminado para todas las luces. Luz cálida: ( ) Ajustes opcional para todas las luces. - Page 6 de luz ( ) cuando logre el brillo deseado. Esta configuración quedará guardada para posteriores usos de la campana. Funcion temporizador ( • Cuando el motor del ventilador está encendido y se pulsa el icono del tempori- zador ( ), el icono se volverá en rojo y la pantalla mostrará la velocidad actual del ventilador.
- Page 7 FAQS Problema Posible causa Solución Vibración excesiva. El aparato no está instalado Intente quitar el aparato y com- correctamente en los sopor- pruebe que está bien fijado. tes. El aspa del ventilador está Apague el aparato. La dañada. reparación solo debe llevarla a cabo el personal de servicio El motor del ventilador cualificado.
-
Page 8: Functions And Settings
WARNING: Read the instructions before using the appliance FUNCTIONS & SETTINGS CONTROL PANEL To obtain the best results from your cooker hood it is recommended that you leave it switched on for a short time after you have finished cooking. Timer ON, Fan Boost Function and Fan speed increase LED display... -
Page 9: General Use
Cool light: ( ) Default setting for all lights. Warm light: ( ) Optional setting for all lights. To change these settings press ( ) or ( ) and press the Light ( ) icon to accept the change. GENERAL USE ON/OFF AND INCREASE/DECREASE THE FAN SPEED Press the decrease fan speed ( ) icon and the fan will turn on at speed 1. - Page 10 in red and the display will show the current fan speed. • The chosen speed level will remain in use for five minutes before dropping down to the next lowest speed. This speed will remain in operation for two minutes before dropping down again.
- Page 11 FAQS Problem Possible cause Solution Excessive vibration. The appliance is not installed Take down the appliance and properly on the brackets. check it is properly fixed. The fan blade is damaged. Switch off the appliance. Re- pair to be carried out by quali- The fan motor is not fixed fied service personnel only.
-
Page 12: Panneau De Commande
UTILISATION AVERTISSEMENT : Lire les instructions Avant d’utiliser l’appareil. FONCTIONS ET REGLAGES PANNEAU DE COMMANDE Pour obtenir les meilleurs résultats de votre hotte, il est recommandé de la laisser allumée pendant une courte période après avoir terminé la cuisson. Minuterie Boost du ventilateur et augmentation de vitesse Affichage LED Réduction de vitesse du ventilateur y arrêt... -
Page 13: Utilisation Generale
Le paramètre de mode ( ) de recyclage permet de recycler l’air grâce aux filtres à charbon installés. Pour changer cette option, appuyer sur ( ) ou ( ) pour sélectionner le mode sou- haité, puis appuyer sur l’icône de minuterie ( ) pour accepter la modification. -
Page 14: Réglage De La Minuterie
ACTIVATION/DÉSACTIVATION DE L’ÉCLAIRAGE ( Appuyer sur l’icône d’éclairage ( ) pour allumer le spot. Pour modifier la luminosité du spot, appuyer longuement sur l’icône d’éclairage ( ) jusqu’à ce que l’écran affiche la séquence de luminosité. Retirer le doigt de l’icône d’éclairage quand la luminosité... - Page 15 FAQS Problema Cause possible Solution Vibration excessive. L’appareil n’est pas installé Déposer l’appareil et vérifier correctement sur les supports. qu’il est correctement fixé. La pale du ventilateur est Éteindre l’appareil. La répara- endommagée. tion doit etre effectuée unique- ment par un personnel qualifié. Le moteur du ventilateur n’est pas fermement fixé.
-
Page 16: Painel De Controle
UTILIZÇÃO ADVERTENCIA: Leia as instruções antes de utilizar o aparelho. FUNCOES E DEFINICOES PAINEL DE CONTROLE Para obter os melhores resultados do seu exaustor, recomenda-se que o deixe ligado durante pouco tempo após terminar a cozedura. Temporizador Função de impulso do ventilador e aumento da velocidade Telão LED Desligar a exaustor e redução da velocidade do ventilador Luz ligar/desligar... - Page 17 DEFINIR O MODO DE ILUMINAÇÃO Uma vez no modo de configuração, pressione o ícone de luz ( ) e o ícone de luz ficará vermelho. O LED mostrará o modo de iluminação actual. Luz fria: ( ) Ajuste predefinido para todas as luzes. Luz quente: ( ) Ajuste opcional para todas as luzes.
- Page 18 Para alterar o brilho da downlight, toque e segure o ícone luz ( ) até qua a tela mos- tre a sequência de brilho. Retire o dedo do ícone de duz quando o brilho desejado for alcançado. A sequência vai de L1 a L5 e de volta a L1 em passos. O brilho selecionado piscará...
- Page 19 FAQS Problema Causa possível Solução Vibração excessiva. O aparelho não está devida- Retire o aparelho e verifique se mente instalado nos suportes. está corretamente fixado. A pá do ventilador está dani- Desligue o aparelho. Repa- ficada. ração a ser efetuada apenas por pessoal de manutenção O motor do ventilador nao qualificado.
- Page 20 VERWENDUNG WARNUNG: Lesen Sie die Anweisungen, bevor Sie das Gerät benutzen. FUNKTIONEN & EINSTELLUNGEN BEDIENFELD Um die besten Ergebnisse mit Ihrer Dunstabzugshaube zu erzielen, wird empfohlen, diese nach dem Garvorgang kurzzeitig eingeschaltet zu lassen. Timer Boosterfunktion und Geschwindigkeitserhöhung LED-Anzeige Haube aus und reduzierung der Motorgeschwindigkeit Licht Ein/Aus EINSTELLEN Drücken Sie bei ausgeschalteter Motorhaube gleichzeitig auf die Symbole für Ges-...
- Page 21 EINSTELLEN DES BELEUCHTUNGSMODUS Einmal im Einstellmodus, , betätigen sie das Lichtsymbol ( ). Das Symbol leucht e t jetzt rot auf. Die LED anzeige zeigt jetzt den aktuellen Beleuchtungsmodus an. Kaltlicht: ( ) Astandardeinstellung für alle Leuchten. Warmes Licht: ( ) Optional, Einstellung für alleLeuchten.
- Page 22 Um die Hellikeit der Einbauleuchte zu ändern, halten Sie das Lichtsymbol ( ) ge- drückt, bis auf dem Diplay die Helligkeitsfolge angezeigt wird. Entfernen Sie Ihren Finger vom Lichtsymbol ( ), wenn die gewüschte Helligkeit erreixht ist. Die Sequenz läuft schrittweise von L1 bis L5 und zurück zu L1. Die gewählte Helligkeit blinkt einige Sekunden lang und kehrt zur Anzeige der Lüfterdrehzahl zurück.
- Page 23 FAQS Problema Causa possível Soluçao Überma.Bige Vibration. Das Gerat ist nicht ordnungs- Nehmen Sie das Gerat ab und gema.B an den Halterungen prüfen Sie, ob es korrekt befes- montiert. tigt ist. Das Lüfterblatt ist beschadigt. Wenden Sie sich bitte an lhren Handler.
- Page 24 CATA ELECTRODOMÉSTICOS, S.L. Oficinas: c/ Anabel Segura, 11, Edif. A, 3a pl. 28108. Alcobendas. Madrid. España Fábrica: c/ del Ter 2, Apdo. 9. 08570. Torelló.Barcelona. España T . +34 938 594 100 - Fax +34 938 594 101 www.cnagroup.es - cna@cnagroup.es...
Need help?
Do you have a question about the 700XGBK and is the answer not in the manual?
Questions and answers