Advertisement
Quick Links
Advertisement

Related Manuals for Kogan KA60CMICEMB


Summary of Contents for Kogan KA60CMICEMB
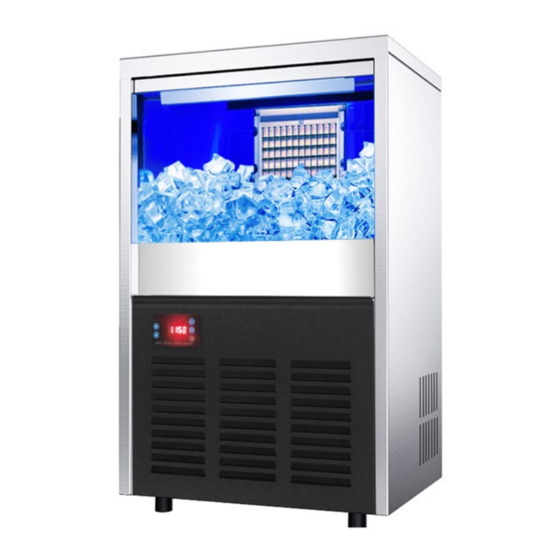
- Page 1 60KG COMMERCIAL ICE CUBE MAKER KA60CMICEMB...
-
Page 2: Table Of Contents
Safety & warnings Components list Overview Installation Operation Cleaning & care Troubleshooting Notes... -
Page 3: Safety & Warnings
• Operating temperature: 10°C -38°C • Operating humidity: Relativity humidity of ≤90% • If wires need replacing, stop use immediately and contact help.Kogan.com. • Before performing maintenance on the ice cube maker, ensure the power has been switched off. •... -
Page 4: Components List
COMPONENTS LIST • Icemaker (x1) • Ice shovel (x1) • Drain hole blocker (x1 pre-installed in the water tank, x1 spare) • Water filter (x1) • Water filter bracket (x2) • Filter connector (x2) • Water tap connector (x1) • Water tap connector seal (x1) •... -
Page 5: Overview
OVERVIEW Air vent 2 Condenser 3 Fan 4 Cabinet components 5 Machine legs 6 Compressor 7 Electrical box 8 Chassis 9 Water supply valve 10 Rear panel 11 Spray water pipe 12 Evaporator 13 Retaining board 14 Icemaker sink 15 Water pump 16 Top panel 17 Door... -
Page 6: Installation
INSTALLATION Open the package and move the icemaker to a well-ventilated grounded area. The icemaker has an operating temperature of between 10°C - 38°C, and operating humidity of ≤90%. Keep the distance between the air vents of the machine and the wall to be at least 50cm. Do not place the icemaker near any heat sources (for example, stoves, ovens, heaters). - Page 7 Installation diagram 1 Tap 6 0.5m water supply pipe 2 Water tap connector seal 7 Water supply valve connector 3 Water tap connector 8 Water supply valve connector seal 4 1.5m water supply pipe 9 Water supply valve 5 Filter Connecting the water supply pipe •...
- Page 8 Connecting the water discharge pipe The water discharge pipe (740mm in length) comes pre-installed on the back of the icemaker. Extend the pipe and connect it to the sewer. Note: To prevent the discharged water flowing back into the icemaker, ensure the highest point of the discharge pipe is higher than the sewer.
-
Page 9: Operation
OPERATION Powering on Switch on the power to the icemaker by pressing the power button on the display. Turn on the tap and water supply valve. Fill the icemaker sink with water. Water pressure balancing Upon first use, the icemaker will then automatically go through a process using the water supply, water pump and pre-installed drain valve to balance the water pressure in the machine. - Page 10 Ice release Once the ice cubes are ready, the water pump will stop. The water supply valve will open and any remaining water will go into the sink. The condenser will then start a heating process to release the ice cubes from the mould. This process will take around 2 minutes, following which the ice cubes will drop into the cabinet.
- Page 11 Display Power When the power is switched on, it turns the icemaker on/off. • Press the button to turn on. • Press and hold the button for 3 seconds to turn off. Manual operation mode button When the icemaker is turned on, it will operate in the standard automatic mode. However, if users desire further adjustments, ice can made using this manual operation mode.
- Page 12 • When the icemaker is turned on, press this button to turn the light inside the icemaker on/off. Note: Pressing and holding the button for 3 seconds during the cleaning mode will stop the icemaker cleaning. The icemaker will then turn off. Increase / time button •...
- Page 13 Refer to the table below for other display descriptions. Display shows Description P 00: Power on delay CLE: Icemaker in cleaning mode P x:xx Icemaker in cooling mode • It will display the time remaining in this mode. xx:xx Icemaker in icemaking mode •...
-
Page 14: Cleaning & Care
CLEANING & CARE These steps should also be followed if the icemaker has not been used for an extended period prior to use. Before cleaning, remove any ice cubes from the cabinet. Ensure the main power and tap are turned off. •... - Page 15 • Grasp and carefully pull the air vent off the front of the icemaker. Use a dust collector brush to clean the dust off the condenser. Notes: • To avoid damage to the condenser, do not use iron or other metal tools to remove the dust.
- Page 16 • Screw off all pre-installed nuts from all nozzles on the pipes. Remove and clean the plates that are sandwiched between nozzle and nut. Ensure the holes on each plate are clear. • After cleaning, secure the plates and nuts back onto the nozzle. Plate Nozzle Pipe...
- Page 17 Water filter The water filter should be replaced regularly for proper hygiene and due to damage caused by limescale build-up over time. If replacement is required, contact help.Kogan.com for further assistance.
-
Page 18: Troubleshooting
The capacitor of the compressor is broken Icemaker is not Replacement required. Water level sensor is making ice Contact help.Kogan.com for assistance. broken Water pump is broken Interrupted water Restart the icemaker after water supply supply returns to normal. - Page 19 Solution shows • Check and remove any ice or foreign Sensor on the retaining board is not working. material blocking the retaining board from its original position. • Return the retaining board its original position. • Contact help.Kogan.com for assistance.
- Page 20 • Check all valves for limescale. Clean the valves if needed. If replacements are Water shortage required, contact help.Kogan.com for assistance. • The water supply valve will open for 30 second intervals every 5 minutes. If the water level sensor detects there is enough water, the fault code will also disappear.
-
Page 21: Notes
NOTES... - Page 24 Need more information? We hope that this user guide has given you the assistance needed for a simple set-up. For the most up-to-date guide for your product, as well as any additional assistance you may require, head online to help.kogan.com...
Need help?
Do you have a question about the KA60CMICEMB and is the answer not in the manual?
Questions and answers