Advertisement
Quick Links
Ashford Handicrafts Limited
415 West Street, Ashburton 7700, New Zealand
Telephone 64 3 308 9087
sales@ashford.co.nz www.ashford.co.nz
INSTRUCTIONS
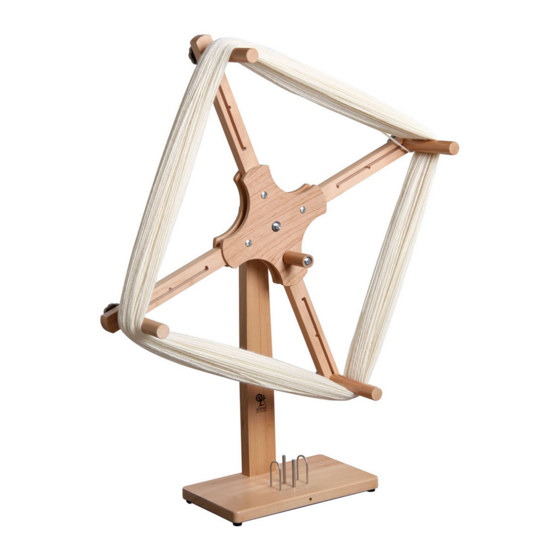
SKEINER 2
Ashford Guarantee
Thank you for purchasing this Ashford product. In the unlikely event there is
any fault in manufacture, please contact the dealer you purchased it from. To
validate the guarantee, please go to www.ashford.co.nz/product-registration
SK2070920V4
Advertisement

Subscribe to Our Youtube Channel
Related Manuals for Ashford SKEINER 2


Summary of Contents for Ashford SKEINER 2
- Page 1 Ashford Guarantee 415 West Street, Ashburton 7700, New Zealand Thank you for purchasing this Ashford product. In the unlikely event there is Telephone 64 3 308 9087 any fault in manufacture, please contact the dealer you purchased it from. To sales@ashford.co.nz www.ashford.co.nz...
-
Page 2: Tools Required
ASSEMBLY INSTRUCTIONS FOR THE ASHFORD SKEINER 2 Tools Required Before commencing, please read these instructions completely, identify the parts and note the assembly sequence. Finishing the wood. The Silver Beech tree is a native of New Zealand and has a lovely variety of colour and grain. - Page 3 Attach the 4 rubber feet to the underside of the base with small screws. The logo faces Tap the 2 wooden the front. dowels into the main upright. Push the wooden dowels in the main upright into the holes in the base. Insert the barrel nut into the main upright.
- Page 4 Press the 2 nylon bearings into the centre holes in the 2 arm- supports keeping the flange to the outside. Align the hole in one arm with the hole in one arm- support and then push into the groove. Align the holes. Note Repeat for all arms with the position...
- Page 5 PUSH Locate the other arm- support on top of the arms. Push 3 x 40mm ⁄ ”) round head bolts through the holes in the arm-supports and arms. Fit small washers and nuts but don’t tighten yet. Use ordinary nut. Fit a small washer followed by the long 58mm (2 ¼”) aluminium spacer to the 100mm (4”) bolt.
- Page 6 Washer Washer Fit a large washer onto the 100mm (4”) bolt and push it through the main upright from the back. Locate the wooden spacer onto the bolt followed by a large washer and 37mm (1 ⁄ ”) aluminium spacer. Apply a drop of oil to the spacer.
- Page 7 Locate the metal threads in the 4 pegs through the slots in the arms and secure with large washers and knobs. The position stops in the grooves indicate specific length skeins. 2.0m (78”) 1.5m (60”) 1.0m (40”) Outside Middle Inside 2.0m (78”) 1.5m (60”) 1.0m (40”)
- Page 8 Your skein holder is now ready for use. When completed, tie you skein between To remove skeins each arm to prevent it from the skein holder, tangling. loosen one peg and slide it inwards. Assemble and use the clamp to hold the skein holder on a table.
- Page 9 Real Scale Hardware List 100mm (4”) 65mm (2 ½”) 37mm (1 ⁄ ”) 58mm (2 ¼”) Nylock nut Ashford Handicrafts Limited 415 West Street, Ashburton 7700, New Zealand Telephone 64 3 308 9087 sales@ashford.co.nz www.ashford.co.nz...
Need help?
Do you have a question about the SKEINER 2 and is the answer not in the manual?
Questions and answers