Table of Contents
Advertisement
Quick Links
Advertisement
Table of Contents

Summary of Contents for DI Lusso OV908DSL
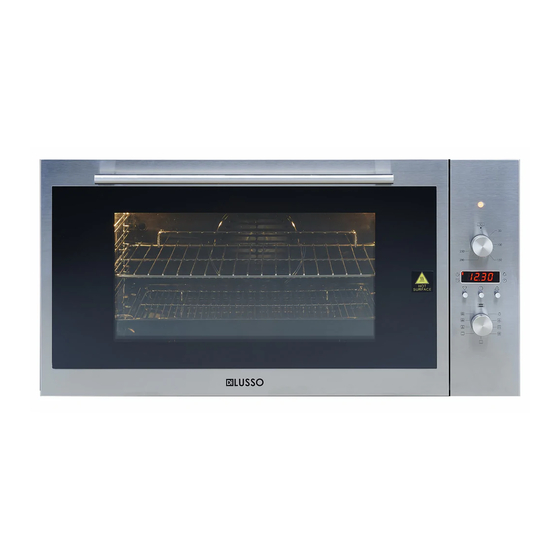
- Page 1 Built-in Oven OV908DSL Installation and Operating Manual...
-
Page 2: Table Of Contents
CONTENTS Important Notes ------------------------------------------------------------------------------------------------Page 2 Installation Instructions ----------------------------------------------------------------------------------------Page 3 Technical Specification--------------------------------------------------------------------------------------------Page 4 Control Panel -------------------------------------------------------------------------------------------------------Page 4 Oven Cooking Function -------------------------------------------------------------------------------------------Page 5 Electronic Timer----------------------------------------------------------------------------------------------------Page 7 General Advise -----------------------------------------------------------------------------------------------------Page 8 Cooking Time -----------------------------------------------------------------------------------------------------Page 10 Cleaning and Maintenance ------------------------------------------------------------------------------------Page 11 Page 1 Version 1.0 Sept 2018... -
Page 3: Important Notes
Important Notes Dear Customer Thank you for choosing our product. This appliance is easy to use; however please read this handbook carefully before installing and operating it. Herein, you will find the correct method of installation and tips for best use and maintenance of the product. -
Page 4: Installation Instructions
Before connecting to the mains, make sure that: The electricity meter, safety valve, feeding line and socket are adequate to withstand the maximum load required (refer to product data label for maximum load) The supply system is regularly earthed, according to the regulations in force. ... -
Page 5: Technical Specification
Before using the oven, we suggest to: Remove the special film covering the oven door glass (if there is any) Heat the empty oven at max. temperature for 45 minutes. This is to remove any unpleasant smell caused by ... -
Page 6: Oven Cooking Function
Oven Cooking Functions The OV908DSL oven is an eight-function oven. The selection between the cooking functions can be done by setting the electronic programmer to the manual position or by the cooking function control & temp control knobs. Oven light - When the function control knob is at any position other than the “0”, the oven light is on. - Page 7 The rotisserie can be used with this function. Rotisserie The OV908DSL oven is equipped with a removable multiple skewer rotisserie positioned parallel to the back of the oven. Slide the meat to be cooked into the spit lengthwise, keeping it in place with the adjustable forks.
-
Page 8: Electronic Timer
Electronic Timer (3 Keys) This timer is set and controlled by using 3 keys. The keys functions are shown below : The 3-key electronic timer could be used for • Countdown • setting cooking duration • setting cooking end time •... -
Page 9: General Advise
Cooking End Time Press the “mode” key until LED L2 is flashing. Cooking end time could be set up to 23.59h by “+” and “-“ key. Timer will be saved 5 seconds after adjustment. Timer starts now and L2 will stay illuminated. The display is now showing local time. -
Page 10: Cooking Time
Pizza or Focaccia Use a light aluminium tray with a maximum diameter of 30cm, placing it on top of the rack supplied. If the pizza has a lot of toppings, it is recommended to add the mozzarella cheese on top of the pizza halfway through the cooking process. - Page 11 Grilling The 1st guide rail is understood as being the lowest position. It is recommended to set 175°C in grill mode. Food Qty (kg) Oven Shell Time in min. Chops guide rail Sausages guide rail Chicken 1st guide rail Veal on the spit Chicken on the spit Hints for Cooking Problem...
-
Page 12: Cleaning And Maintenance
Cleaning and Maintenance Caution: Prior to cleaning or maintenance, always disconnect the power supply. Make sure a steamer cleaner is not used. Check the oven rubber seal condition on a regular basis. Clean it if necessary. Avoid using abrasive cleaners. Should it be damaged, contact the nearest after sales service centre. - Page 13 5) CLEANING OF OVEN DOOR Clean the glass door by using damp cloth and dry it. Do not use harsh abrasive cleaners or sharp metal scrapers to clean the oven glass door as they may scratch the surface and cause glass shattering. 6) REMOVING THE OVEN DOOR AND GLASS To make it easier to clean the oven chamber, the oven door could be removed.
- Page 14 Unscrew the clips 1 and 2 located at left and right of the door frame. Lift the middle glass up a bit and remove the middle glass. 8) REPLACING THE OVEN BULB Set the control knob to position “0” and disconnect the oven plug. Unscrew the lamp cover, wash and dry it. Remove the light bulb from its socket, replacing it with another one suitable for high temperature 300°C.
- Page 15 Warning: 1. Ensure that the appliance is switched off before replacing the lamp to avoid the possibility of electrical shock. 2. Accessible parts may become hot during use. Young children should be kept away. 3. Do not use harsh abrasive cleaners or sharp metal scrapers to clean the oven door glass since they can scratch the surface, which may result in shattering of the glass.


Need help?
Do you have a question about the OV908DSL and is the answer not in the manual?
Questions and answers