
Related Manuals for DI Lusso SO60BBBI


Summary of Contents for DI Lusso SO60BBBI
- Page 1 Built-in Steam Oven SO60BBBI SO60SBBI SO60BSBI SO60BPBI SO60WPBI SO60SSBI Installation and Operating Manual...
-
Page 2: Table Of Contents
CONTENTS Important Notes ------------------------------------------------------------------------------------------------Page 2 Installation Instructions ----------------------------------------------------------------------------------------Page 3 Technical Specification--------------------------------------------------------------------------------------------Page 4 Steam Oven Overview---------------------------------------------------------------------------------------------Page 5 Oven Accessories --------------------------------------------------------------------------------------------------Page 5 Control Panel -------------------------------------------------------------------------------------------------------Page 5 Adding Water -------------------------------------------------------------------------------------------------------Page 6 Setting Local Time -------------------------------------------------------------------------------------------------Page 6 Program Cooking ---------------------------------------------------------------------------------------------------Page 6 Recommended Cooking Time ----------------------------------------------------------------------------------Page 8 Cleaning and Maintenance --------------------------------------------------------------------------------------Page 9 Troubleshooting --------------------------------------------------------------------------------------------------Page 10 V1.0... -
Page 3: Important Notes
Important Notes Dear Customer Thank you for choosing our product. This appliance is easy to use; however please read this handbook carefully before installing and operating it. Herein, you will find the correct method of installation and tips for best use and maintenance of the product. -
Page 4: Installation Instructions
Installation Instruction 22mm 560mm 550mm 600mm 460mm ● Fit the appliance into its surround (beneath a work-top) by inserting screws into the 4 holes that can be seen in the frame of the oven when the door is open. ● The steam oven needs a supporting surface underneath. -
Page 5: Technical Specification
The power socket must be connected to a switch with earth leakage protection. If the power cable is damaged, please contact a qualified electrician for replacement. Technical Specifications Product :Built in Steam Oven Model Number :SO60BBBI, SO60SBBI, SO60BSBI, SO60BPBI, SO60WPBI, SO60SSBI Voltage :(220 – 240)V a.c. Frequency :50Hz... -
Page 6: Steam Oven Overview
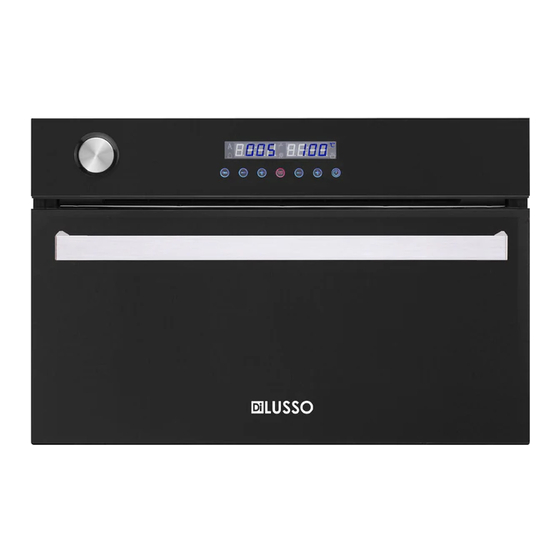
Steam Oven Overview Accessories Stainless Steel Perforated Tray Stainless Steel Solid Tray Bottom Rack Left/Right side frame Time display Temperature display Preset start timer Water reservoir empty Working indicator light Set cooking time Water reservoir full START TIME STOP Cooking time selector Power Start/Pause Reduce the cooking time... -
Page 7: Adding Water
Adding Water Before using the steam oven, we suggest flushing the built in water reservoir. Refer to Section Cleaning and Maintenance ● Turn the steam oven on by pressing ● Push open the water reservoir inlet to access the water filling point then use an appropriate jug to fill with water to the correct level depending on the cooking time required. - Page 8 Setting Preset Start Cooking Time A cooking duration must be set before the preset start timer can be scheduled. ● Follow the above cooking duration setting instructions mentioned above. ● Press TIME button again after setting cooking duration and temperature. At this time, icon is flashing.
-
Page 9: Recommended Cooking Time
Recommended Cooking Time Food Temperature(°C) Time* (minutes) Vegetables Broccoli (small size) Cauliflower 12-14 Cauliflower (small size) Green Soya Bean 8-10 Peas Potato (peeled & cut in half) 20-25 Potato (with skin) 30-35 Carrot (in pieces) Asparagus 10-14 Meat & Sausage Chicken (1kg) 25-30 Chicken in pieces... -
Page 10: Cleaning And Maintenance
Cleaning and Maintenance Caution : Prior to cleaning or maintenance, always disconnect the power supply. Make sure that steamer cleaner is not used. Water reservoir : Before using the steam oven for the first time, we suggest to flushing the built in water reservoir 3 times. Connect the appliance to power and turn on, push-open the water reservoir inlet to access to the water filling point and add water, keep the steam oven door opened, press and hold the “-”... -
Page 11: Troubleshooting
Warning: 1 Ensure that the appliance is switched off before replacing the lamp to avoid the possibility of electrical shock. 2 Accessible parts may become hot during use. Young children should be kept away. 3 Do not use harsh abrasive cleaners or sharp metal scrapers to clean the oven door glass since they can scratch the surface, which may result in shattering of the glass. - Page 12 ● Problem : The steam oven fails to heat up after it starts: ● Possible Causes & Solution : ○ heck whether the steam oven door has been closed properly. ○ heck there is adequate water in the water reservoir. ○...
Need help?
Do you have a question about the SO60BBBI and is the answer not in the manual?
Questions and answers