Advertisement
Quick Links
Advertisement

Related Manuals for InWin Nebula 515


Summary of Contents for InWin Nebula 515
- Page 1 User Manual...
- Page 2 Product Video Information Product Video Information 515/N515 Product Video 515/N515 Installation Video...
-
Page 3: Table Of Contents
Table of Contents Table of Contents Product Story .........04 Specifications .........05 Package Contents ........06 Case Structure ........07 Cable Information ........09 Installation Guide ........10 Notices and Warranty ......18... -
Page 4: Product Story
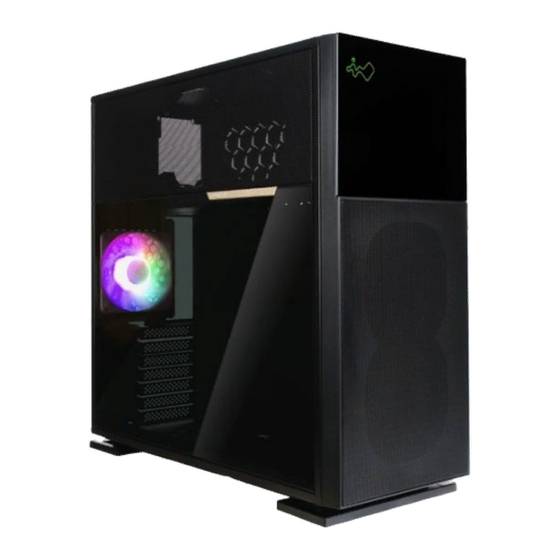
Product Story Product Story The 515 is a stunning computer chassis crafted from 1.2 mm SECC steel and tempered glass. The distinctively clean panels are complemented with mesh to increase ventilation. In addition to the 515, the N515 has a front panel showing an infinite crystal universe where light extends in all directions! Both cases are prebuilt with a LUNA addressable RGB fan that will cool your system in... -
Page 5: Specifications
20.3 x 8.8 x 19.7" Package Dimensions 610 x 572 x 335 mm (L x W x H) 24 x 22.5 x 13.1" Net Weight 11.38 kg 11.65 kg Gross Weight 13.46 kg 13.73 kg * InWin products comply with RoHS regulation. -
Page 6: Package Contents
Package Contents Package Contents 515 Chassis N515 Chassis QR Code Card Accessories Bag 3RAMZF173600 Motherboard Motherboard Stand-offs Hexagon Head Screws Stand-off Socket x 11 x 18 Water-Cooling 2.5" HDD Screws 3.5" HDD Screws System Washers x 18 x 10 Cable Ties Graphics Card Holders ARGB One-Click Controller x 10... -
Page 7: Case Structure
Case Structure Case Structure Tempered Glass Power Button Power/HDD LED Indicator 2 x USB 3.2 Gen 1 Ports Audio Ports (Earphone and Microphone) 1 x USB 3.2 Gen 2x2 Type-C Port... - Page 8 Case Structure Case Structure 3.5" / 2.5" Drive Bay 2.5" Drive Bay Top Fan/Radiator Mounting Area Rear Fan/Radiator Mounting Area Bottom Fan/Radiator Mounting Area Front Fan/Radiator Mounting Area Motherboard Mounting Area PCI-E Expansion Slot Graphics Card Holder Mounting Area Power Supply Mounting Area Fan Dust Filter Shock-Proof Stand...
-
Page 9: Cable Information
Cable Information Cable Information Power Switch Cable HD Audio USB 3.2 Gen 1 USB 3.2 Gen 2x2 Type-C ARGB Cable... -
Page 10: Installation Guide
Installation Guide Installation Guide (Please follow the steps to assemble) Opening the Glass Panel For the Tempered Glass Panel, please remove it by pressing the rear button. Note: You will need to remove the Tempered Glass Panel first in order to remove the Mesh Fan Grill. - Page 11 Motherboard Installation Parts Required: Motherboard Stand-Offs, Motherboard Stand-Off Socket Hexagon Head Screws GPU Installation Parts Required: Hexagon Head Screws, Graphics Card Holder (Holder & Rubber & Bracket)
- Page 12 Note: Use your Graphics Card Holder to support your GPU. It is adjustable to meet your needs. Opening the Front Panel You will need to remove the Front Panel by pressing a tab to the right. Then pull the panel from beneath with your right hand.
- Page 13 Installing Front Fans Secure the Fans with screws from the outside. Parts Required: Fan Screws Closing the Front Panel All crosses need to fit into the corresponding holes to fit neatly back into place.
- Page 14 Connection Cables I/O Wires POWER SW (Depends on Motherboard) RESET SW HD Audio Header PORT2_L BLUE PURPLE PORT2_R YELLOW WHITE PORT1_R PORT1_L BLACK USB 3.2 Gen 1...
- Page 15 USB 3.2 Gen 2x2 Type-C If your motherboard supports Type-C, please connect the Type-C connector with the header directly on the motherboard.
- Page 16 To remove the side Mesh Fan Grill, lift up on the bottom tabs. Note: It is recommended that you choose an AIO with tubes that are around 450 mm or more in length. The InWin BR36 & NR36 AIO are examples that would fit well.
- Page 17 2.5" Drive Bay Installation Parts Required: 2.5" HDD Screws 3.5" Drive Bays Installation Parts Required: 3.5" HDD Screws...
- Page 18 Power Supply Installation Parts Required: Hexagon Head Screws Closing all Panels...
-
Page 19: Notices And Warranty
5. Please remove all internal devices before shipping or moving. (Including power supply, hard drives, CD-ROM, motherboard and CPU, etc) ■ Warranty 1. For more detailed warranty information, please visit the InWin retail website at www.in-win.com 2. The actual product is subject to change without prior notice. - Page 20 Copyright © 2021 In Win Development Inc. All Rights Reserved.
Need help?
Do you have a question about the Nebula 515 and is the answer not in the manual?
Questions and answers