Table of Contents
Advertisement
Printed using VOC (Volatile
Organic Compound)-free
vegetable oil based ink.
Printed in China
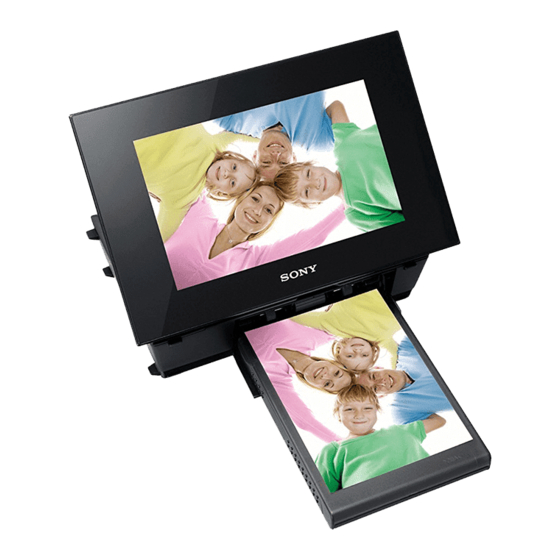
Digital Photo
Printer/Frame
DPP-F800
Operating Instructions
Before operating this unit, please read "Read This First" and
"About the Print Packs" supplied and this manual, "Operating
Instructions," thoroughly and retain them for future reference.
Owner's Record
The model and serial numbers are located at the rear.
Record the serial number in the space provided below. Refer to
these numbers whenever you call upon your Sony dealer
regarding this product.
Model No. DPP-F800
Serial No. ________________________
These models are not available in every country and region.
Please read the supplied "Read This First"
and "About the Print Packs."
© 2010 Sony Corporation
4-208-449-13 (1)
Overview
Using as a photo frame
Using as a printer
Using various functions
Printing in various ways
Using with a computer
Troubleshooting
Additional information
Advertisement
Table of Contents

Related Manuals for Sony S-Frame DPP-F800


Summary of Contents for Sony S-Frame DPP-F800
- Page 1 Owner’s Record The model and serial numbers are located at the rear. Record the serial number in the space provided below. Refer to these numbers whenever you call upon your Sony dealer regarding this product. Model No. DPP-F800 Serial No. ________________________ These models are not available in every country and region.
-
Page 2: Regulatory Information
If you have any questions about this product, you may call: Sony Customer Information Services Center 1-800-222-SONY (7669) The number below is for the FCC related matters only. - Page 3 Notice for the customers in the countries applying EU Directives The manufacturer of this product is Sony Corporation, 1-7-1 Konan Minato-ku Tokyo, 108- 0075 Japan. The Authorized Representative for EMC and product safety is Sony Deutschland GmbH, Hedelfinger Strasse 61, 70327 Stuttgart, Germany.
- Page 4 NATURE, OR LOSSES OR EXPENSES RESULTING FROM ANY DEFECTIVE PRODUCT OR THE USE OF ANY PRODUCT. Sony shall assume no responsibility for any accidental or consequential damages or loss of the recorded content which may be caused by use or malfunction of this unit or memory card.
-
Page 5: Notice For Users
Sony Corporation reserves the right to make any modification to this manual or the information contained herein at any time without notice. -
Page 6: Table Of Contents
Table of Contents Notice for users ...5 Before you start Features ...10 How to use as a photo frame ... 10 How to use as a printer ... 11 You can even do this ... 11 Checking included items ...12 Identifying the parts ...13 About the information display ...16 Single view ... - Page 7 Saving an image ...59 Performing Batch Print (Index Print/ DPOF Print/Print All) ...60 Changing the settings of this unit Changing the settings ...61 Setting procedure ...61 Items to set ...63 Connecting to a computer lets you do even more Using with a computer What you can do when connected to a computer ...68 System requirements ...68...
- Page 8 memo...
-
Page 9: Before You Start
Before you start Overview... -
Page 10: Features
As a photo frame or as a printer, you can use your Digital Photo Printer/Frame in various ways. The Sony digital photo printer/frame DPP-F800 displays your digital camera pictures on its screen and prints your favorites, simply and without using a computer. -
Page 11: How To Use As A Printer
How to use as a printer • Print a photo just as it looks (page 36) • Print in various ways (page 54) Print date Print with/without border • Create a calendar of your favorites, a Layout print or an ID photo (page 55) Calendar You can even do this •... -
Page 12: Checking Included Items
About Sony Print Packs (sold separately) Please use a Sony optional color print pack designed for this unit. You cannot use other print packs. About the supplied power cord... -
Page 13: Identifying The Parts
Identifying the parts For details, see the pages indicated in the parentheses. Front Remote sensor LCD screen Sony logo ( page 23) Continued... - Page 14 Rear PRINT button BACK button ENTER button Memory Card slot page 25) Access lamp USB B connector ( page 70) Ink ribbon compartment door Paper tray compartment door Direction (B/b/v/V) buttons MENU button VIEW MODE button ( (on/standby) button/Standby indicator DC IN 24V jack ( Paper outlet ( page 35)
-
Page 15: Remote Control
Remote control SLIDESHOW ( ) button page 26) CLOCK ( ) button page 26) MENU button Direction (B/b/v/V) buttons BACK button MARKING ( ) button page 48) SORT button page 49) ROTATE ( ) button page 51) PRINT button About descriptions in this manual The operations described in this manual are based on remote control operation. -
Page 16: About The Information Display
About the information display Single view The following information is shown. Items Display type Image no./Total no. of images Device information Ink ribbon type Index view Description The name of the view style is displayed. Single view • Entire image •... - Page 17 Items Description Image information Detailed information of the image is shown. • File format (JPEG (4:4:4), JPEG (4:2:2), JPEG (4:2:0), BMP, • Number of pixels (width × height) • Manufacturer of the image input device • Model name of the image input device •...
- Page 18 memo...
-
Page 19: Let's Get Started (Basic Operations)
Let's get started (basic operations) Using as a photo frame Using as a printer... -
Page 20: Using As A Photo Frame
Remote control may not function properly. In this case, replace the battery with a Sony CR2025 lithium battery. Use of another battery may present a risk of fire or explosion. • Using a battery other than the specified one may... -
Page 21: Rotating This Unit
• Dispose of used batteries as specified by the local authorities. • Do not leave the remote control in a very hot and humid place. • Take care that no foreign objects get inside the remote control when you, for example, replace the battery. -
Page 22: Connecting To The Ac Power Source
• Check whether this unit is stable. If the unit is not set properly, it may fall over. • The Sony logo does not light up when this unit is placed vertically or turned off. • You can also rotate the image manually. (page 51) •... -
Page 23: Turning This Unit On
Turning on the power Press 1 (on/standby) on this unit or remote control to turn on the power. The standby indicator turns to green from red. The Sony logo on the front panel lights up. Turning off the power Hold 1 (on/standby) on this unit or remote control until the power turns off. -
Page 24: Setting The Current Date And Time
Operations in an initial state When this unit is turned on without a memory card inserted, the initial display below appears on the screen. If this unit is not operated for 10 seconds, the demo mode is displayed. If any other button than the power button is pressed, the screen returns to the initial display. -
Page 25: Inserting A Memory Card
Press /V to select a format and then press • Y-M-D • M-D-Y • D-M-Y Set the day to start the week for the calendar. You can set the day that appears on the very left when the calendar is displayed. Press v/V to select [First day of the week] and then press Press v/V to select [Sunday] or... -
Page 26: Changing The Display
For details on compatible memory cards, see pages 100 to 102. For supported file formats, see page 103. When you insert a memory card When you insert a memory card, the images on it are automatically displayed. If you switch off the power while they are being displayed and then switch the power back on, the same images continue to be displayed. - Page 27 • You can also repeatedly press VIEW MODE on this unit, move the cursor within the display selection area and select any view mode. Display selection area Style selection area Select a style with B/b/v/V and press The display changes to the selected view style.
-
Page 28: Slideshow Display
Slideshow display Display Style Slideshow Single view Multi image view Clock view Calendar view Time Machine Random view Tips • You can set the interval, effect, listing order, or color effect when you select the slideshow display. Refer to “Changing the settings of the slideshow” (page 40). •... -
Page 29: Clock And Calendar Display
Clock and calendar display Clock1 Clock2 Clock6 Clock7 Clock11 Calendar1 Calendar2 Lunar Calendar Arabic calendar (when you select (when you select [Simplified [Arabic] in Chinese] in [Language setting]) [Language Setting]) Notes • Only the (Settings) tab is available in the clock and calendar display mode. Clock3 Clock4 Clock8... -
Page 30: Single View Mode (Single Image Display)
Single view mode (single image display) Display Style Entire image Fit to screen Entire image (with Exif) Fit to screen (with Exif) Description Displays an entire image in the screen. You can switch the images to be displayed by pressing B/b. Displays an image over the whole screen. -
Page 31: Index View
Index view Display Style Index Index1 Index2 Index3 Tips • A thumbnail is a small-sized image for index use that is recorded in the pictures taken by a digital camera. • You can select the single view mode when you press display. -
Page 32: Using As A Printer
Using as a printer Preparation To use this unit as a printer, do the following. Prepare the remote control (page 20). Connect the AC power source (page 22). Set this unit in the print position (flat position) (see next topic). Set an ink ribbon (page 33). -
Page 33: Setting The Ink Ribbon
Setting the ink ribbon Pull and open the ink ribbon compartment door. Insert the ink ribbon in the direction of the arrow until it clicks into place. Close the ink ribbon compartment door. Removing the ink ribbon Push up the blue eject lever, and remove the used ink ribbon. -
Page 34: Inserting The Print Paper
Inserting the print paper Open the paper tray cover. Hold the parts on both sides of the paper tray cover (shown with arrows) and open the paper tray cover. Set the print paper in the paper tray with the print surface facing up. Front surface Make sure the print paper is not upside down. - Page 35 • Do not bend the print paper, or cut the print paper from the perforations before printing. • To avoid paper jam or malfunctions of this unit, make sure of the following before printing: – Do not write or type on the print paper. –...
-
Page 36: Basic Printing
Basic printing This section explains how to display the images of a memory card or internal memory on this unit’s LCD screen and print the selected images (direct printing). To print an image from the connected computer, see “Printing an image from your computer”... - Page 37 Press PRINT. Printing starts. The image displayed on the print preview screen is printed. Notes • You cannot print in clock and calendar display. • Never move or turn off this unit while it is printing; the ink ribbon may become stuck or paper jam may occur.
- Page 38 memo...
-
Page 39: Try Using Various Functions (Advanced Operations)
Try using various functions (advanced operations) Using various functions... -
Page 40: Enjoying A Slideshow
Enjoying a slideshow Press (Slideshow). Tips • When using the buttons on this unit, press VIEW MODE on the upper back of the LCD screen, press V to move the cursor to the display selection area and press B/b to select (Slideshow). - Page 41 • The slideshow starts from the first image if you turn off this unit, or if you reset this unit. • When the screen is too bright, it may make you feel nauseous. Be careful that you do not make the Item Setting Slideshow...
-
Page 42: Importing Images From A Memory Card To The Internal Memory
Importing images from a memory card to the internal memory You can use this unit as a digital album, saving important images in the internal memory. Tips • When saving images to the internal memory, you can use [Image import size] in the menu to preset whether to resize images to the optimum size or save them as they are without compressing them (page 64). - Page 43 /b/v/V to select the image from the image list to be imported and press ✔ “ ” is added to the selected image. If you want to import multiple images at a time, repeat this step. If you want to clear the selection, select the image and press .
-
Page 44: Specifying The Playback Device
Specifying the playback device You can specify whether to display a memory card or the internal memory. Press SELECT DEVICE. Tips • When operating from the main unit, press the MENU and use the B/b buttons to select the (Select device) tab. •... -
Page 45: Exporting An Image From The Internal Memory To A Memory Card
Exporting an image from the internal memory to a memory card You can export the images in the internal memory to a memory card. Press MENU when an image stored on the internal memory is displayed on the screen. Press B/b to select the tab. -
Page 46: Deleting An Image
Tips If you select [New folder], a new folder is created automatically . Press v/V to select [Yes] and then press The exporting is finished. Press when the confirmation screen is displayed. The image is copied to the specified memory card. Notes •... - Page 47 Refer to “Sorting images (Filtering)” (page 49). Press MENU. The delete confirmation screen is displayed. Press v/V to select [Yes] and then press The image is deleted. Press when the confirmation screen is displayed. To format the internal memory Press MENU. Press B/b to select the (Settings) tab.
-
Page 48: Registering A Mark
Registering a mark You can produce a slideshow only with images which have been selected beforehand and have been marked. You can easily check for images with marks using the index image display or single view mode (with Exif). Press (Marking) when an image is displayed on the screen. -
Page 49: Sorting Images (Filtering)
Notes • Only marks attached to images on the internal memory are saved. Marks attached to images on a memory card will be removed when you turn the power off or change playback devices. Tips • You can select a mark from among 3 types. •... -
Page 50: Adjusting Image Size And Orientation
To cancel the sort Press MENU while the sorted images are displayed, select [Exit sort (show all photos)] and press To change the sort style Press BACK while the sorted images are displayed. Notes • Do not turn this unit off or remove the memory card during sort. -
Page 51: Rotating An Image
Notes • Enlarging an image may reduce the quality depending on the image size. • You cannot overwrite the image if its data format is other than JPEG (.jpg) Rotating an image You can rotate an image during single view mode. - Page 52 Press v/V to select [Time Setting] and press [Simple] Select an item for which you want to set the time. Press /V to select [Power-ON timer] or [Power-OFF timer] and press Then, press /V to select [Enable] and press Set the time at which you want to activate the Power-ON timer or Power- OFF timer.
-
Page 53: Enjoy Various Printing (Advanced Printing)
Enjoy various printing (advanced printing) Printing in various ways... -
Page 54: Changing Print Settings (Date Print,Borders,Pages Per Sheet)
Changing print settings (Date Print,Borders,Pages Per Sheet) Date Print (Print date) Borders (With border) Pages Per Sheet Press MENU. Press B/b to select the (Settings) tab. Press v/V to select [Print Settings] and press Press v/V to select an item you want to change and press Press v/V to select the setting value and press... -
Page 55: Performing "Creative Print" (Calendar/Layout Print/Id Photo)
Performing “Creative Print” (Calendar/Layout print/ID Photo) What is “CreativePrint”? You can edit images in a memory card or the internal memory and create a calendar, layout print or ID photo. Press MENU. Press B/b to select the tab. Press v/V to select [Creative Print] and press The Creative Print menu is displayed. - Page 56 Set the calendar. On the calendar template preview screen, press /b/v/V to select the calendar area and press The calendar setting window is displayed. Press v/V to select the item that you want to set, and then press Item Description Start Y/M Set the first month and the year starting the calendar.
-
Page 57: Making A Layout Print
Making a Layout print The following layouts are available. • 1/2/4/9/13/16 photos per page From the Creative Print menu, press B/b/v/V to select print), then press The Layout print templates are displayed. Press B/b/v/V to select the desired template, then press The preview of the selected template is displayed Select an image. -
Page 58: Editing An Image
Select an image. For details on how to select an image, see step 3 on page 55. When you select image(s), the adjustment screen appears. Edit the image. For details on how to edit an image, see next topic. Adjust the image. For details on how to adjust an image, see page 59. -
Page 59: Adjusting An Image Quality
Adjusting an image quality On the image edit screen, press B/b to select and press The image quality adjustment menu is displayed. Press v/V to select the desired adjustment tool and press The adjustment screen of the selected tool appears. When [Brightness] is selected. -
Page 60: Performing Batch Print (Index Print/Dpof Print/Print All)
Performing Batch Print (Index Print/DPOF Print/Print All) • Index Print You can print a list (index) of all the images stored in a memory card or this unit’s internal memory which allows you to check the contents of the selected media easily. The number of split panes on a sheet will be calculated automatically. -
Page 61: Changing The Settings Of This Unit
Changing the settings of this unit Changing the settings You can change the following settings. • Slideshow Settings • Auto Power ON/OFF • Date/time Settings • General Settings (Listing Order, Sony logo ON/OFF etc,.) • Print Settings • Language Setting • Initialize Setting procedure Press MENU. - Page 62 To reset to factory default settings Press MENU and then B/b to select (Settings) tab. Press v/V to select [Initialize] and press Press v/V to select [Initialize settings] and then press All settings except for clock time and date are reset to the default settings. Tips You can also use the MENU button on this unit.
-
Page 63: Items To Set
Items to set Item Setting Slideshow See “Changing the settings of the slideshow” (page 40). Settings Auto Power Sets the timer function which turns the power supply of this unit on or off, automatically. ON/OFF You can use this function with the following settings. (page 51) Simple Advanced* Date/time... - Page 64 Saves images to the internal memory without compressing them. There is no deterioration, but you can save fewer images. ON*/OFF: You can set whether this unit’s Sony logo lights or not. You can format the internal memory. Notes • All the images imported to the internal memory will be deleted.
- Page 65 Item Settings Description Print Date Print Date/Time Settings Date OFF* Borders Border 1/ Border 2 Borderless* Prints an image without blank space around the image. Prints an image with the date and time of shooting when the image is recorded according to the DCF (Design rule for Camera File system) format and the date and time of shooting is recorded as part of shooting information.
- Page 66 Item Settings Description Print Auto Fine Settings Print7 Pages Per 4-split/ Sheet 9-split/ 16-split OFF* Adjusts the colors and sharpness of a print. Press B/b to select a color Color Setting element ([R] (red), [G] (green), or [B] (blue)) or [S] (Sharpness), and then press v/V to set the level.
-
Page 67: Connecting To A Computer Lets You Do Even More
Connecting to a computer lets you do even more Using with a computer Using the internal memory of this unit Printing from a computer... -
Page 68: Using With A Computer
Using with a computer What you can do when connected to a computer Connecting this unit to a computer lets you use the following two functions. For details on mode selection, see page 70. Using the internal memory of this unit ([Use internal memory]) You can browse the internal memory of this unit on the computer. -
Page 69: Before Connecting To A Computer
Connector: USB connector Drive: CD-ROM drive (to be used for software installation) Notes • If a hub is used to connect this unit and your computer, or if two or more USB devices, including other printers, are connected to your computer, a problem may occur. -
Page 70: Connecting To A Computer
Connecting to a computer Connect this unit to the AC power source. (page 22) Connect the computer and this unit with a commercially available USB cable. To USB B connector To USB connector Computer Notes • Use a USB cable with a B-type plug (for the USB B connector of this unit) shorter than 3 meters. -
Page 71: Using The Internal Memory Of This Unit
Move the cursor in this window and right click, and then click “New” - “Folder”. Name this new folder. In this manual, the folder name “sony” is used as an example. Double click to open this “sony” folder. Open the folder that contains the... -
Page 72: Disconnecting Your Computer
Disconnecting your computer Disconnect the USB cable or turn this unit off after disconnecting it from your computer. Double-click (Disconnect) on the Task Tray of your computer. Click (USB Mass Storage Device) t “Stop”. Click “OK” after checking the drive you want to remove. -
Page 73: Printing From A Computer
• Printer driver for the DPP-F800: The software describes this unit’s requirements and enables printing from the computer. • PMB (Picture Motion Browser): Sony’s original software application that allows you to handle photographs and moving images—this includes capturing, managing, processing, and printing. Installing the software... - Page 74 If you install the new version of printer driver, you can use the new version of printer driver. Click “Install.” Installation starts. When the “Sony DPP-F800 printer driver has been successfully installed.” dialog is displayed, click “Finish.” Press the 1 (on/standby) button to turn on this unit.
-
Page 75: Installing The Pmb (Picture Motion Browser)
• If the installation fails, remove this unit from your computer, restart your computer, and then follow the installation procedures from step 1 again. • After installation, the “Sony DPP-F800” is not yet set as the default printer. Set the printer you use for each application. -
Page 76: Printing Photos From A Computer
Click “Installing PMB (Picture Motion Browser)” and follow the screen instructions to set your region and language. The license agreement dialog is displayed. Read the agreement thoroughly, and if you agree, check “I accept the terms of the license agreement” and click “Next.”... - Page 77 Select the photos that you want to print and click (print). The Print dialog box is displayed. In the “Printer” drop-down list box, select “Sony DPP-F800.” To set the paper orientation or other print options, go to step 6. To print, skip to step 11. Items...
- Page 78 Sheet per sheet to be printed. Select “1.” Advanced Specifies the paper size or other options. Click “Advanced.” The “Sony DPP-F800 Advanced Options” dialog box is displayed. Items Description Paper/ • Paper Size: From the drop- Output down list box, select the paper...
- Page 79 To print in colors, select “Color.” To print in monochrome, select “Black & White.” Advanced The “Sony DPP-F800 Advanced Options” dialog box is displayed (page 78). For details, see step 9. Click “OK.” The “Print” dialog box is displayed again.
-
Page 80: Registering A Browsing Folder
When using an application other than the PMB, an image might be printed with borders even if you select “ON” for “Borderless Print” in “Printer Features” of the “Sony DPP-F800 Advanced Options” dialog box. When you select the borderless print option, the printing range information for borderless printing will be supplied to the application. - Page 81 When the software application you use has Borders/Borderless setting, we suggest you select “ON” for “Borderless Print” in “Printer Features” of the “Sony DPP-F800 Advanced Options” dialog box as the printer driver setting. No. of prints setting Depending on the software application you are using, the No.
- Page 82 memo...
-
Page 83: Troubleshooting
Troubleshooting Error messages If trouble occurs If the paper jams Cleaning... -
Page 84: Error Messages
Error messages If an error occurs, one of the following error messages may be shown on the LCD screen of this unit. Follow the corresponding solution below to solve the problem. Memory cards and internal memory Error message No Memory Stick. / No SD Memory Card. -
Page 85: Image Data
Error message The Memory Stick is read only. The Memory Stick is protected. Memory card format not supported. • In case of a memory card, use your digital camera or other Image data Error messages Cannot open the image. No DPOF file. Ink ribbon Error messages No ink ribbon. -
Page 86: Print Paper
Print paper Error messages No paper tray. Insert paper tray containing P size print paper and press [PRINT]. No print paper. Set the print paper for the P Size and press [PRINT]. No cleaning sheet. Set the cleaning sheet and press [PRINT]. Wrong print paper. -
Page 87: If Trouble Occurs
If trouble occurs Before submitting this unit for repair, read the following suggestions. If the problem persists, consult with your Sony dealer or Sony service facilities. Power supply Symptom Check item The power cannot • Is the power plug inserted be turned on. - Page 88 Symptom Check item Some images are • Are the images displayed in not displayed or the index view? printed. • Does the mark displayed below appear in the index view? • Were the images created with an application on a computer? •...
- Page 89 Symptom Check item The file name is • Did you rename the file with not displayed a computer or other device? properly. In the Editing • Is the previewed image menu, there are extremely stretched blank areas at the vertically or horizontally? top and bottom of the previewed image.
- Page 90 Symptom Check item Cannot delete an • Is the memory card write- image. protected? • Is the write-protect switch of the memory card in the “LOCK” position? • Are you using a “Memory Stick-ROM”? • Is this image protected? An image was deleted accidentally.
-
Page 91: Printed Results
Printing Symptom Check item Paper does not • Is the print paper properly feed. set in the paper tray? • Are you using print paper that was not designed for this unit? The print paper is • Is the perforation of the print ejected without paper removed? being printed. - Page 92 Symptom Check item The picture quality and colors of the image previewed on the screen differs from those printed. The printed image differs when an image is printed directly from the memory card and the internal memory, and when it is printed via a computer.
-
Page 93: Connecting With A Computer
Symptom Check item Even though • Are you printing in [Borderless] for slideshow mode? [Borders] is selected in the Print Settings, the image is printed with borders on both sides. The whole area of • Did you set [Border 1] in the an image cannot Print Settings? be printed. - Page 94 1. Turn off the 1 (on/standby) button of this unit. 2. Disconnect the power cable, wait for 5 to 10 seconds, and then connect the cable again. 3. Restart your computer. If these do not solve the problem, consult with your Sony dealer or service facilities.
- Page 95 Turn this unit off using the 1 (on/ standby) button and then turn it on again. After the sound of movement inside this unit stops, try to remove the ink ribbon. If this does not solve the problem, contact Sony service facilities or your Sony dealer.
-
Page 96: If The Paper Jams
Check to see if there is jammed paper. If any, remove it. Tips • If you cannot remove the jammed paper, contact your Sony dealer. -
Page 97: Cleaning
Cleaning If white lines or period-like dots are printed on the pictures, the thermal transfer head may be soiled with the dust accumulated inside this unit. Clean inside this unit using the supplied cleaning cartridge and sheet. Before you start cleaning this unit, please remove any memory cards or USB cables from this unit. - Page 98 memo...
-
Page 99: Miscellaneous
Miscellaneous Additional information... -
Page 100: About The Memory Cards
This unit supports FAT32. This unit has been demonstrated as operable with a “Memory Stick” media with a capacity of 32GB or less manufactured by Sony Corporation. However, we do not guarantee the operations of all the “Memory Stick”. This unit is equipped with a slot compatible with both standard-size and Duo-size media. -
Page 101: Sd Memory Card
SD memory card The SD memory card/xD-Picture Card dual- format slot of this unit allows you to use the following: • SD memory card • miniSD memory card, microSD memory card (An adaptor is necessary.) • SDHC memory card • miniSDHC memory card, microSDHC memory card (An adaptor is necessary.) •... -
Page 102: Notes On Using Memory Card
Notes on using memory card • Be sure that the orientation of the card and the slot are correct. Inserting the card incorrectly or in the wrong slot may damage this unit. • Inserting a memory card with unnecessary force may damage the memory card or this unit. -
Page 103: Specifications
Specifications x Digital photo printer/frame Printing method Dye sublimation printing (yellow/ magenta/cyan 3 pass) Print resolution 300 (H) dpi × 300 (V) dpi Image processing per dot 256 Tones (8 bits each for yellow/ magenta/cyan) Printing range 1,800 dots × 1,200 dots Printing size 101.6 mm ×... - Page 104 [Date Print] is set to [OFF], and [Auto Fine Print7] is set to [ON]. : Images shot on a Sony digital still camera with an effective pixel count of approximately 12,100,000 (file size about 4.1 MB) and stored on the internal memory with this unit set to [Resize] (file size about 400 KB).
-
Page 105: On Trademarks And Copyrights
, “Memory Stick PRO-HG Duo,” “Memory Stick Micro,” , “Memory Stick-ROM,” “MagicGate,” and trademarks or registerd trademarks of Sony Corporation. • Microsoft, Windows, Windows Vista and DirectX are either registered trademarks or trademarks of Microsoft Corporation in the United States and/or other countries. -
Page 106: On Installation
• Always unplug this unit by holding the plug and pulling it. If the AC Adaptor is damaged, consult your Sony dealer or Sony customer center. On moisture condensation If this unit is brought directly from a cold location to a warm location or placed in an extremely warm or humid room, moisture may condense inside the unit. -
Page 107: On Cleaning
Notes on disposal of this unit Data stored on the internal memory of this unit may not be deleted completely by [Format internal memory]. Sony recommends that you physically destroy this unit before disposal. -
Page 108: Index
Index Symbols “Memory Stick” media Inserting 25 Types 100 AC Adaptor 22 AC power source 22 Adjusting an image 59 Associated file 17 Auto Fine Print7 66, 79 Auto power ON/OFF 51, 63 Batch Print 60 Borders/Borderless 54, 65, Brightness 59 Calendar 29, 55 Canceling printing 80 Changing the settings 61... - Page 109 Types 101 Sepia 41 Setting the No. of print 36 Sharpness 59 Single view mode 30 Slideshow display 28 Slideshow Settings 41 Color effect 41 Display Mode 41 Effect 41 Interval 41 Shuffle 41 Sorting images 49 Specifications 103 Supplied accessories 12 System requirements Macintosh 68 Windows 68...
- Page 110 memo...
- Page 111 memo...
Need help?
Do you have a question about the S-Frame DPP-F800 and is the answer not in the manual?
Questions and answers