Megger MPQ1000 User Manual
Pq analyzer
Hide thumbs
Also See for MPQ1000:
- User manual (93 pages) ,
- Getting started (24 pages) ,
- User manual (12 pages)

Related Manuals for Megger MPQ1000


Summary of Contents for Megger MPQ1000
- Page 1 MPQ1000-UG-EN Rev 6 April 2020 User Manual Megger MPQ1000 PQ Analyzer 1.800.544.2843 www.calcert.com sales@calcert.com...
- Page 2 Specifications are subject to change without notice. WARRANTY Products supplied by Megger are warranted against defects in material and workmanship for a period of two years following shipment no other warranty. The warranty is void in the event of abuse (failure to follow recommended operating procedures) or failure by the customer to perform specific maintenance as indicated in this manual.
-
Page 3: Table Of Contents
Table of Contents 1 Introduction ..................................1 2 Receiving Information ..............................3 3 Overview of MPQ1000 ..............................5 Applications ..................................6 Definitions ..................................7 Calculations ..................................9 RMS Calculation: ................................9 ... - Page 4 Verify the Input Connections ............................59 Starting a Recording................................ 60 10 Downloading Data from the MPQ1000 ........................63 Transfer data to a PC via SD Card, Ethernet or USB Cable ..................63 Transfer data to a USB Stick ............................63 ...
-
Page 5: Introduction
If you find any discrepancies in the MPQ1000 or its software or have any comments, please send them to Megger via fax, e-mail or phone. MPQ1000-UG-EN Rev 6 April 2020 1.800.544.2843... -
Page 6: Receiving Information
Notify Megger of any shortages. Examine the contents for damage received during transit. If any damage is discovered, file a claim with the carrier at once and notify Megger or it’s nearest authorized sales representative, giving a detailed description of the damage. -
Page 7: Overview Of Mpq1000
This is accomplished by creating a setup on a computer using Power Quality Software and uploading it to the Megger MPQ1000 Power Quality Analyzer. Each unit can store up to 90 user-defined setups. Should you need to change setups on site, you may select any of your programmed setups using the Power Analyzer’s front panel... -
Page 8: Applications
Rapid Voltage Change Measurement Class A Compliance CAT IV Rating Applications The features of the MPQ1000 make the unit very versatile and capable of performing various applications. Some of the applications the MPQ1000 can perform are listed below. Class A Compliance Testing ... -
Page 9: Definitions
Post-Triggers A user selectable value in the setup file that defines the number of cycles the unit will record after a cycle has occurred that has exceeded the user programmed event limits. MPQ1000-UG-EN Rev 6 April 2020 1.800.544.2843 www.calcert.com sales@calcert.com... - Page 10 An electronic file that contains the measurement configuration that shall be used by the PQ Analyzer during its recording. Storage Interval A selection in the MPQ1000 setup file that allows the user to determine how often the unit wakes up from sleep mode and takes measurements. Sub-cycle A power quality event in which the duration is less than a cycle.
-
Page 11: Calculations
Watts A unit of energy equivalent to one joule per second. Waveform A selection in the MPQ1000 setup file that allows the unit to record sample by Capture sample data of each waveform for both Current and Electric Field. A waveform will be captured once every storage interval. -
Page 12: Rapid Voltage Changes: Under-Deviation Assessment And Over-Deviation Assessment
For 3-phase systems, this can be written (with Uij fund = phase i to phase j fundamental voltage): The zero-sequence u0 component is evaluated by the magnitude of the following ratio, expressed as a percentage: MPQ1000-UG-EN Rev 6 April 2020 1.800.544.2843 www.calcert.com sales@calcert.com... -
Page 13: Current Unbalance
50 for the purpose of the compatibility levels in this standard NOTE: THD takes account of harmonics only. Mains Signaling Voltage: Performed per IEC 61000-3-8 IEC Flicker: Performed per IEC 61000-4-15 MPQ1000-UG-EN Rev 6 April 2020 1.800.544.2843 www.calcert.com sales@calcert.com... -
Page 14: Mpq1000 Specifications
DC to 50 Harmonic Frequency Resolution 0.01Hz Frequency Accuracy 0.01Hz at 50Hz and 60Hz Transient Response 1µsec (+/-2697V) Sub-cycle events 64 μsec (Notching, Noise…etc) DEMAND Active Power Range 0 to 6MW without a ratio MPQ1000-UG-EN Rev 6 April 2020 1.800.544.2843 www.calcert.com sales@calcert.com... - Page 15 POWER SUPPLY / CHARGER Input 90-264VAC (47-63Hz), 79VA Max Output 24VDC Maximum Input Power BATTERY Battery Type 10.8 VDC NiMH (Use only Megger Battery) Run Through Time 8 Hours Maximum without CT’s Charge Time 2 Hours MEMORY Memory Type SD Card...
- Page 16 Standards Test EN50160 CE Standard EN50081-1 CE Standard EN50082-1 CSA Standard CAN/CSA-C22.2 No.1010.1-92 IEC Electromagnetic Compatibility IEC61326 IEC Ingress IEC60529 Vibration / Drop MIL-STD-810 G * Full Accuracy Specification guaranteed 0ºC to 50ºC MPQ1000-UG-EN Rev 6 April 2020 1.800.544.2843 www.calcert.com sales@calcert.com...
-
Page 17: Safety
These warnings and safety precautions are to be used where appropriate when following instructions in this manual. CAUTION! The equipment could be impaired from improper use. Read the complete manual before use. MPQ1000-UG-EN Rev 6 April 2020 1.800.544.2843 www.calcert.com sales@calcert.com... - Page 18 The equipment should not be used while its battery door is removed or if there is any visible damage to the case or if the hardware holding the unit together has been loosened. MPQ1000-UG-EN Rev 6 April 2020 1.800.544.2843 www.calcert.com sales@calcert.com...
-
Page 19: Mpq1000 Operation
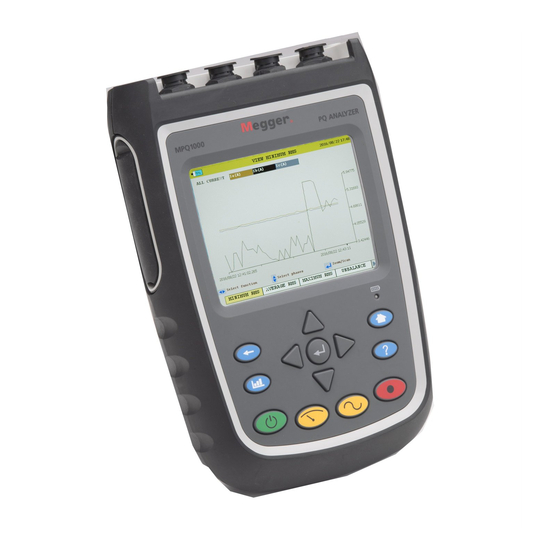
MPQ1000 Operation The following section describes the operation of the MPQ1000 unit. This section will describe in a step by step manner how to setup, program, install and download data from the MPQ1000. Connector Layout / Interconnect Phase AV Phase BV... -
Page 20: Dc Power Jack
DC Power Jack Located on the back of the analyzer. SD Card Located on the side of the analyzer Front Panel Keypad Operation MPQ1000-UG-EN Rev 6 April 2020 1.800.544.2843 www.calcert.com sales@calcert.com... -
Page 21: Menu Keys
MPQ1000 Operation Menu Keys Menu Flow Charts MPQ1000-UG-EN Rev 6 April 2020 1.800.544.2843 www.calcert.com sales@calcert.com... - Page 22 MPQ1000-UG-EN Rev 6 April 2020 1.800.544.2843 www.calcert.com sales@calcert.com...
-
Page 23: Dmm Mode
MPQ1000 Operation DMM Mode The MPQ1000 has a real time multi-meter mode. In this mode the analyzer will display real time voltages, currents, THD, power, phases, unbalance, harmonics and flicker. The DMM screen will open when the analyzer first powers up. - Page 24 This screen will display Real Power, Reactive Power, Apparent Power, Displacement Power Factor and True Power Factor. 3. The UNBALANCE screen. This screen will display the Negative Sequence Unbalance and The Zero Sequence Unbalance. MPQ1000-UG-EN Rev 6 April 2020 1.800.544.2843 www.calcert.com sales@calcert.com...
- Page 25 This screen will display the Instantaneous Flicker and the 1 Minute Flicker Interval. Note: This screen must be left on for at least 1 minute in order to view the flicker 1 minute interval. MPQ1000-UG-EN Rev 6 April 2020 1.800.544.2843 www.calcert.com sales@calcert.com...
-
Page 26: Scope Mode
Scope Mode The MPQ1000 has a real time scope mode. In this mode the analyzer will display voltages and current waveforms, unbalance vectors, harmonics, inter-harmonics and harmonic direction. The SCOPE screen can also be opened by pressing the SCOPE short cut key. - Page 27 3. The HARMONICS screen. This screen will display Harmonics and Inter-Harmonics through the 50 Order. Use the UP / DOWN keys to scroll through the different channels and to view the harmonic direction. MPQ1000-UG-EN Rev 6 April 2020 1.800.544.2843 www.calcert.com sales@calcert.com...
-
Page 28: Configuring The Mpq Unit
If these settings are not made then the date and times in the recordings may be incorrect. Configure Date and Time format 1. From the HOME screen select SETUP then press the ENTER key. MPQ1000-UG-EN Rev 6 April 2020 1.800.544.2843 www.calcert.com sales@calcert.com... - Page 29 6. Use the UP / DOWN keys to scroll down to DAYLIGHT SAVINGS TIME. Press the ENTER key to toggle between ON and OFF. Select desired mode. 7. When complete, press the BACK button to exit this screen and save the selections. MPQ1000-UG-EN Rev 6 April 2020 1.800.544.2843 www.calcert.com sales@calcert.com...
-
Page 30: Configure Unit Preferences
Configure Unit Preferences 1. From the HOME screen select SETUP then press the ENTER key. 2. Select PREFERENCES then press the ENTER key. MPQ1000-UG-EN Rev 6 April 2020 1.800.544.2843 www.calcert.com sales@calcert.com... - Page 31 CT and automatically adjust the setup file to that range. If enabled then the MPQ will read the range of each CT and if it does not match the CT setting in the setup file it will notify you before changing any settings. MPQ1000-UG-EN Rev 6 April 2020 1.800.544.2843 www.calcert.com...
-
Page 32: Importing / Activating A Setup File
A setup file is used to program the unit to perform different types of recording. Multiple setup files can be installed into the unit. These setup files can be activated from the front panel of the unit or using the Megger PQ software. Modifying a Setup File A setup file is used to program the unit to perform different types of recording. - Page 33 The event limit percentage can be selected from this screen. This is the percentage of the declared voltage that the analyzer will use when setting its limits. MPQ1000-UG-EN Rev 6 April 2020 1.800.544.2843 www.calcert.com...
- Page 34 When a setup file is altered it will need to be saved. 5. Using the right arrow key scroll over the SAVE tab. 6. Press the ENTER key. MPQ1000-UG-EN Rev 6 April 2020 1.800.544.2843 www.calcert.com sales@calcert.com...
-
Page 35: Uploading A Setup File From The Pc
1. Verify the batteries in the unit are fully charged or plug the unit into an AC source. 2. Power up the MPQ1000 PQ Analyzer and go to the MAIN Menu. 3. Plug the USB stick into the MPQ1000 type A USB Port. - Page 36 6. Use the UP / DOWN keys to scroll to the desired setup file and press the ENTER key. This will import the setup file to the unit. 7. Press the ENTER key to close the IMPORT SETUP COMPLETE message. MPQ1000-UG-EN Rev 6 April 2020 1.800.544.2843 www.calcert.com sales@calcert.com...
-
Page 37: Uploading A Setup File From The Sd Card
1. Verify the batteries in the unit are fully charged or plug the unit into an AC source. 2. Power up the MPQ1000 PQ Analyzer and go to the MAIN Menu. 3. Plug the SD card into the MPQ1000 SD Card slot. -
Page 38: Activating The Imported Setup File
4. Scroll down to the setup file you wish to activate press the ENTER key. This will activate the setup file. 5. Press the ENTER key to close the activated message. MPQ1000-UG-EN Rev 6 April 2020 1.800.544.2843 www.calcert.com sales@calcert.com... -
Page 39: Renaming A Data Or Setup File
3. Using the UP / DOWN /◄ LEFT /► RIGHT keys navigate to the desired letter / number. 4. Press the ENTER key until the desired letter / number is displayed. MPQ1000-UG-EN Rev 6 April 2020 1.800.544.2843 www.calcert.com sales@calcert.com... - Page 40 To backspace, use the "<" symbol. To enter a dot ".", dash "-", or underscore "_" , use the "1" key No spaces are allowed in the file names. MPQ1000-UG-EN Rev 6 April 2020 1.800.544.2843 www.calcert.com sales@calcert.com...
-
Page 41: Installing The Mpq1000 Analyzer
The installation procedure consists of: 1. Charging the units battery prior to use. 2. Ensure that the MPQ1000 PQ Analyzer is not exposed to water, excessive dust, and other hazardous conditions. The MPQ1000 PQ Analyzer is not meant for outdoor use. -
Page 42: Battery
NiMH batteries within the unit. Plug the AC adapter into the MPQ1000 unit using the DC input jack. Then plug the adapter into a standard AC outlet (110V-240VAC 50Hz/60Hz). The battery should fully charge in approximately 2 hours. -
Page 43: Voltage And Current Connections
NOTE: Current probes not purchased from Megger require Megger adapters. To install the Power Analyzer using current clamps, plug the selected clamps into the current input connectors then clamp around the source to be measured. An arrow on the current clamp indicates the direction of the load. -
Page 44: Wiring Diagrams For Demand Recording
The third voltage and current can be connected to the Power Analyzer but will be recorded as RMS data only, providing you activate the channels. CAUTION Inspect all power cords and wires for proper insulation integrity before connecting to any power source. MPQ1000-UG-EN Rev 6 April 2020 1.800.544.2843 www.calcert.com sales@calcert.com... - Page 45 LOAD 2-WIRE SINGLE PHASE SINGLE WATTMETER ROTATION MPQ1000-UG-EN Rev 6 April 2020 1.800.544.2843 www.calcert.com sales@calcert.com...
- Page 46 WIRING DIAGRAMS for Demand Recording LOAD 3-WIRE SINGLE PHASE RESIDENTIAL METER ROTATION MPQ1000-UG-EN Rev 6 April 2020 1.800.544.2843 www.calcert.com sales@calcert.com...
- Page 47 LOAD 3-WIRE DELTA CONNECTION 2- WATTMETER METHOD MPQ1000-UG-EN Rev 6 April 2020 1.800.544.2843 www.calcert.com sales@calcert.com...
- Page 48 WIRING DIAGRAMS for Demand Recording LOAD 3-WIRE SPLIT PHASE 2- WATTMETER METHOD ROTATION MPQ1000-UG-EN Rev 6 April 2020 1.800.544.2843 www.calcert.com sales@calcert.com...
- Page 49 LOAD 3-WIRE NETWORK METER ROTATION ROTATION MPQ1000-UG-EN Rev 6 April 2020 1.800.544.2843 www.calcert.com sales@calcert.com...
- Page 50 WIRING DIAGRAMS for Demand Recording LOAD 3-WIRE OPEN DELTA 2-WATTMETER METHOD ROTATION ROTATION AC-BA-CB AC-CB-BA MPQ1000-UG-EN Rev 6 April 2020 1.800.544.2843 www.calcert.com sales@calcert.com...
- Page 51 LOAD 3-WIRE WYE CONNECTION 2-WATTMETER METHOD ROTATION ROTATION MPQ1000-UG-EN Rev 6 April 2020 1.800.544.2843 www.calcert.com sales@calcert.com...
- Page 52 WIRING DIAGRAMS for Demand Recording LOAD 4-WIRE RED-LEG OPEN DELTA 3-WATTMETER METHOD ROTATION ROTATION AC-BA-CB AC-CB-BA MPQ1000-UG-EN Rev 6 April 2020 1.800.544.2843 www.calcert.com sales@calcert.com...
- Page 53 LOAD 4-WIRE RED-LEG DELTA 3-WATTMETER METHOD ROTATION ROTATION AC-BA-CB AC-CB-BA MPQ1000-UG-EN Rev 6 April 2020 1.800.544.2843 www.calcert.com sales@calcert.com...
- Page 54 WIRING DIAGRAMS for Demand Recording LOAD 4-WIRE WYE CONNECTION 3-WATTMETER METHOD ROTATION ROTATION MPQ1000-UG-EN Rev 6 April 2020 1.800.544.2843 www.calcert.com sales@calcert.com...
- Page 55 LOAD 4-WIRE WYE CONNECTION 2½- WATTMETER METHOD ROTATION ROTATION MPQ1000-UG-EN Rev 6 April 2020 1.800.544.2843 www.calcert.com sales@calcert.com...
-
Page 56: Floating Wye Neutral Measurement
WIRING DIAGRAMS for Demand Recording Floating Wye Neutral Measurement LOAD FLOATING WYE CONNECTION 4-WIRE WYE CONNECTION 3-WATTMETER METHOD MPQ1000-UG-EN Rev 6 April 2020 1.800.544.2843 www.calcert.com sales@calcert.com... -
Page 57: Verify Active Setup File
1. From the Main Menu scroll down to SETUP and press the ENTER key. 2. This will take you to the SETUP menu. Scroll down to SELECT and press the ENTER key. The active Setup File will have an asterisk in front. MPQ1000-UG-EN Rev 6 April 2020 1.800.544.2843 www.calcert.com sales@calcert.com... -
Page 58: Starting And Stopping A Recording
Use the arrow keys to scroll over to the POWER selection. Verify the KW measurements are positive. If they are not then a current probe may be backwards. Verify the voltage and current phase angles are correct for the active setup file. MPQ1000-UG-EN Rev 6 April 2020 1.800.544.2843 www.calcert.com... -
Page 59: Starting A Recording
CT channel that is set incorrectly. The operator has the option to do the following: Manually change the range on the CT to the correct range. MPQ1000-UG-EN Rev 6 April 2020 1.800.544.2843 www.calcert.com... - Page 60 To stop the recording, press the RECORD key again. If the display on the analyzer is off, pressing the RECORD key will first turn on the display. Press the RECORD key a second time to stop the recording. MPQ1000-UG-EN Rev 6 April 2020 1.800.544.2843 www.calcert.com sales@calcert.com...
- Page 61 A message will appear asking if you are sure. Press the ENTER key and the recording will now be stopped. MPQ1000-UG-EN Rev 6 April 2020 1.800.544.2843 www.calcert.com sales@calcert.com...
-
Page 62: Downloading Data From The Mpq1000
Downloading Data from the MPQ1000 The data from the MPQ1000 can be retrieved in several different manners. The data can be transferred through the type B USB Port directly to the PC. The data can be transferred through the Ethernet Port directly to the PC. - Page 63 The data transfer will now begin. 6. Once the data is transferred a success message will appear. NOTE: See MPQ-SWG-EN manual for transferring data from the USB stick or the SD card to the PC. MPQ1000-UG-EN Rev 6 April 2020 1.800.544.2843 www.calcert.com sales@calcert.com...
-
Page 64: Viewing Data On The Mpq Pq Analyzer
Phase Angle Deviation Mains Signaling Events All charts and traces support a zoom function and a scan line. The following sections show how to view the recorded data on the unit. MPQ1000-UG-EN Rev 6 April 2020 1.800.544.2843 www.calcert.com sales@calcert.com... -
Page 65: Viewing An Rms Chart
2. Press the ENTER key to select an option. Select VIEW DATA Select Data File Select type of RMS chart then View RMS press ENTER to create chart. See next page for RMS chart description. MPQ1000-UG-EN Rev 6 April 2020 1.800.544.2843 www.calcert.com sales@calcert.com... - Page 66 ENTER key to enter zoom SIDE arrows to select different mode and use the scan line. charts. Select Phases: Use UP / DOWN arrows to select different phases 3. To EXIT chart, press the BACK◄ button. MPQ1000-UG-EN Rev 6 April 2020 1.800.544.2843 www.calcert.com sales@calcert.com...
-
Page 67: Viewing A Unbalance Chart
2. Press the ENTER key to select an option. Select Data File Select VIEW DATA Select UNBALANCE then press ENTER View Unbalance Chart to create chart. See next page for unbalance chart description MPQ1000-UG-EN Rev 6 April 2020 1.800.544.2843 www.calcert.com sales@calcert.com... - Page 68 Zoom / Scan: Press the SIDE arrows to select different DOWN arrows to select ENTER key to enter zoom charts. different phases mode and use the scan line. 3. To EXIT chart press the BACK◄ button. MPQ1000-UG-EN Rev 6 April 2020 1.800.544.2843 www.calcert.com sales@calcert.com...
-
Page 69: Viewing A Power Or Energy Chart
Select VIEW DATA Select Data File Select POWER or ENERGY then press View POWER CHART ENTER to create chart. See next page for Power and Energy chart description. MPQ1000-UG-EN Rev 6 April 2020 1.800.544.2843 www.calcert.com sales@calcert.com... - Page 70 Zoom / Scan: Press the SIDE arrows to select different DOWN arrows to select ENTER key to enter zoom charts. different phases mode and use the scan line. 3. To EXIT chart press the BACK◄ button. MPQ1000-UG-EN Rev 6 April 2020 1.800.544.2843 www.calcert.com sales@calcert.com...
-
Page 71: Viewing A Thd Chart
2. Press the ENTER key to select an option. Select VIEW DATA Select Data File Select THD then press ENTER to View THD CHART create chart. See next page for THD chart description. MPQ1000-UG-EN Rev 6 April 2020 1.800.544.2843 www.calcert.com sales@calcert.com... - Page 72 Zoom / Scan: Press the SIDE arrows to select different DOWN arrows to select ENTER key to enter zoom charts. different phases mode and use the scan line. 3. To EXIT chart press the BACK◄ button. MPQ1000-UG-EN Rev 6 April 2020 1.800.544.2843 www.calcert.com sales@calcert.com...
-
Page 73: Viewing A Frequency Chart
2. Press the ENTER key to select an option. Select VIEW DATA Select Data File View FREQUENCY CHART Select Frequency then press ENTER to create chart. See next page for Frequency chart description MPQ1000-UG-EN Rev 6 April 2020 1.800.544.2843 www.calcert.com sales@calcert.com... - Page 74 Zoom / Scan: Press the Select Function: Use SIDE to ENTER key to enter zoom SIDE arrows to select different mode and use the scan line. charts. 3. To EXIT chart press the BACK◄ button. MPQ1000-UG-EN Rev 6 April 2020 1.800.544.2843 www.calcert.com sales@calcert.com...
-
Page 75: Viewing A Harmonics / Inter-Harmonics Chart
Select VIEW DATA Select Data File Select harmonic sequence then press Select Harmonics or Inter-Harm ENTER to create chart. (Inter-Harmonics). See next page for Harmonic chart description MPQ1000-UG-EN Rev 6 April 2020 1.800.544.2843 www.calcert.com sales@calcert.com... - Page 76 3. To EXIT chart press the BACK◄ button. The following screen shall be displayed. 4. Scroll to RETURN and press the ENTER key. MPQ1000-UG-EN Rev 6 April 2020 1.800.544.2843 www.calcert.com sales@calcert.com...
-
Page 77: Viewing A Flicker Chart
Select VIEW DATA Select Data File Select Short Term or Long Term then Select Flicker press ENTER to create chart. See next page for Flicker chart description. MPQ1000-UG-EN Rev 6 April 2020 1.800.544.2843 www.calcert.com sales@calcert.com... - Page 78 3. To EXIT chart press the BACK◄ button. The following screen shall be displayed. 4. Scroll to RETURN and press the ENTER key. MPQ1000-UG-EN Rev 6 April 2020 1.800.544.2843 www.calcert.com sales@calcert.com...
-
Page 79: Viewing An Event Chart
2. Press the ENTER key to select an option. Select VIEW DATA Select Data File Select type of event using the side to side Select Events arrows, then press ENTER to select See next page. MPQ1000-UG-EN Rev 6 April 2020 1.800.544.2843 www.calcert.com sales@calcert.com... - Page 80 Zoom / Scan: Press the ENTER key to enter zoom mode and use the scan line. 3. To EXIT chart press the BACK◄ button and scroll through the options. MPQ1000-UG-EN Rev 6 April 2020 1.800.544.2843 www.calcert.com sales@calcert.com...
-
Page 81: Unit Maintenance
The battery life may vary depending on how the battery is maintained. Battery Replacement The following procedure should be followed when replacing the MPQ1000 battery: 1. If the unit is on, turn the unit off by pressing and releasing the ON/OFF button. - Page 82 6. Grasp the wires between the battery and the connector and pull straight up until the connector unplugs from the MPQ1000. 7. Connect a new battery to the MPQ1000 by aligning the battery connector to the pins and pressing it in place.
- Page 83 9. Put the battery compartment door back in place and tighten the retaining screws. 10. Put the stand back in place. 11. Turn on the MPQ1000 by pressing and releasing the ON/OFF button. The battery status indication should indicate 0%. The battery status indicator must be initialized before it will display the true charge level of the battery.
-
Page 84: Help Screen
This screen will display the firmware versions of the PQ Analyzer, hardware version, serial number, calibration date as well as the IP address of the analyzer if it is connected to a network. MPQ1000-UG-EN Rev 6 April 2020 1.800.544.2843 www.calcert.com... -
Page 85: Spare Parts
Spare Parts Part No. Description 2008-369 Battery Pack JA1009 Current Connector Dust Covers 2006-093 Wire Stand MPQ1000-UG-EN Rev 6 April 2020 1.800.544.2843 www.calcert.com sales@calcert.com...
Need help?
Do you have a question about the MPQ1000 and is the answer not in the manual?
Questions and answers