Subscribe to Our Youtube Channel
Summary of Contents for Orion Grid Connect SMART
- Page 1 SM ART WIRELESS OUTDOOR SECURITY CAMERA SEE & RECORD ACTIVITY AROUND YOUR HOME USING YOUR SMARTPHONE QUICK START GUIDE IMPORTANT! PLEASE READ THESE INSTRUCTIONS CAREFULLY SC077HA...
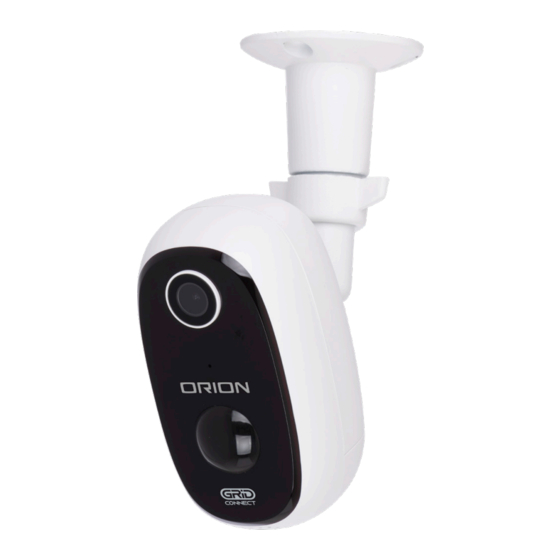
- Page 2 1 INTRODUCTION 3 IDENTIFICATION This SMART wireless outdoor security camera is designed for use in homes, apartments, offices, garages and sheds. It has been developed to be easily set up and operated, Status Light giving you and your family the security and peace of mind that you deserve. Install the Grid Connect mobile app, available for both iPhone and Android devices, to monitor your camera remotely.
-
Page 3: Download The App
4 DOWNLOAD THE APP NEW ACCOUNT LOG IN SETUP Download and install GRID CONNECT from Play store (Android) or App store (iOS). Scan & download the GRID Connect App for free... -
Page 4: Install The App
5 INSTALL THE APP GRID Open the CONNECT App. If you are a new user, tap create new account and follow the prompts to complete account setup. create new account Note: You must agree with the Privacy Policy to be able to use the App. If you already have an existing account, just tap login to account and enter your login details to continue. -
Page 5: Pairing Your Device
6.0 PAIRING YOUR DEVICE Remove the rubber back cover and insert a 16GB Micro SD card (not included) into the SD card slot. (Max. 128GB card support). Press the power button for 5 seconds to turn on the camera . You will hear a welcome sound. - Page 6 6.1 PAIRING YOUR DEVICE confirm Enter the Wi-Fi password and tap confirm to proceed. If needed, you can tap change network to switch to another suitable Wi-Fi network for your camera.
- Page 7 6.2 PAIRING YOUR DEVICE Press continue to scan QR code using your camera. Hold 15cm away from your mobile screen. heard the beep Press after you scan hear a sound from your camera (refer to trouble shooting guide code on page 21 if you don’t hear the on screen prescribed beep).
- Page 8 6.3 PAIRING YOUR DEVICE Once the pairing process is complete a page showing device added successfully will appear. You may choose to edit the device name or assign the device to a dedicated room before tapping done to finish the pairing process. Once your camera is paired to your Wi-Fi network, your camera can be viewed at anytime from your...
-
Page 9: Operating Your Camera
7 OPERATING YOUR CAMERA Once your camera is paired to your Wi-Fi network, you can view your camera at anytime from your smartphone as long as there is internet access. Live Screen Playback Screen Access Settings Back to Device including share Screen device, motion detection... -
Page 10: Installation
8 INSTALLATION PREPARATION Pair your camera inside the house before installation. Before choosing your preferred location, check the Wi-Fi strength/coverage to ensure the camera is fully functional. Note: For ceiling/under eave, ensure you navigate to settings > basic function settings > flip screen to obtain correct orientation. CHARGING DEVICE Wall Plugs 1. -
Page 11: Troubleshooting
8 INSTALLATION 9 TROUBLE SHOOTING POSITIONING THE CAMERA What can I do if 1. Check your mobile device is connected to a 2.4GHz 1. Loosen the lock on mounting base to adjust the camera’s orientation. Make I fail to pair my Wi-Fi network, refer to below question for how to adjustment with the help of the GRID APP until you get the desired live view. -
Page 12: Warranty
• WARRANTY 9 TROUBLE SHOOTING Arlec guarantees this product in accordance with the Australian Consumer Law and all other applicable Australian Do our current No - GRID products currently do not support 5GHz and New Zealand laws that are unable to be excluded. GRID products wireless connection Arlec also warrants to the original first purchaser of this product (“you”) from a retailer with which this... - Page 13 CPIN005105...


Need help?
Do you have a question about the Grid Connect SMART and is the answer not in the manual?
Questions and answers
can i install on a PC ?
No, Orion SMART cannot be installed on a PC. It is a DC-DC battery charger, not software.
This answer is automatically generated
I need to download the footage and save on to a portable hard drive. How do I go about doing that?
I receive a text message on the phone, but no audible alarm. I used to get an audible alarm as well, but this function has stopped. Can you advise?