Advertisement
Advertisement

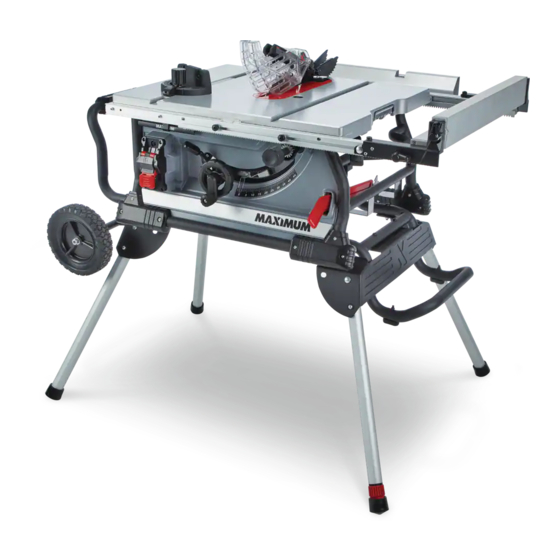
Related Manuals for Maximum 055-9033-8


Summary of Contents for Maximum 055-9033-8
-
Page 2: Table Of Contents
TABLE OF CONTENTS Quick start guide Specifications Safety guidelines Know your table saw Assembly Operation Maintenance Troubleshooting Exploded view Parts list Warranty NOTE: If any parts are missing or damaged, or if you have any questions, please call our toll-free helpline at 1-888-670-6682. SAVE THESE INSTRUCTIONS This manual contains important safety and operating instructions. - Page 3 055-9033-8 | contact us 1-800-689-9928 model no. 055-9033-8 | contact us 1-888-670-6682 SPECIFICATIONS This jobsite table saw is designed to cut wood and wood composition products only. The tool can be used for the cross cut, rip cut, mitre cut, bevel cross cut, bevel rip cut and compound (bevel) mitre cut.
-
Page 4: Safety Guidelines
055-9033-8 | contact us 1-800-689-9928 model no. 055-9033-8 | contact us 1-888-670-6682 SAFETY GUIDELINES Do not operate power tools in explosive atmospheres, such as in the presence of • flammable liquids, gases or dust. Power tools create sparks which may ignite the dust This manual contains information that relates to PROTECTING PERSONAL SAFETY and or fumes. - Page 5 055-9033-8 | contact us 1-800-689-9928 model no. 055-9033-8 | contact us 1-888-670-6682 If devices are provided for the connection of dust extraction and collection facilities, Handling the power cord on this product may expose you to chemicals known to cause •...
- Page 6 055-9033-8 | contact us 1-800-689-9928 model no. 055-9033-8 | contact us 1-888-670-6682 • Remove adjusting keys and wrenches. Form habit of checking to see that keys and • Disconnect tools. All tools should be disconnected when not in use, before servicing, adjusting wrenches are removed from tool before turning it on.
- Page 7 Use only correct blades. Do not use blades with incorrect size holes. Never use blade likelihood of kickback. washers or blade bolts that are defective or incorrect. The maximum blade capacity of your saw is 10" (25.4 cm). Blades that do not match the mounting hardware of the saw...
- Page 8 055-9033-8 | contact us 1-800-689-9928 model no. 055-9033-8 | contact us 1-888-670-6682 • For the riving knife and anti-kickback device to work, they must be engaged in the • Do not remove pieces of cut-off material while the saw is running. The material may workpiece.
- Page 9 055-9033-8 | contact us 1-800-689-9928 model no. 055-9033-8 | contact us 1-888-670-6682 • Keep saw blades clean, sharp, and with sufficient set. Never use warped saw blades or • Use an auxiliary fence in contact with the table top when ripping workpieces less than saw blades with cracked or broken teeth.
- Page 10 055-9033-8 | contact us 1-800-689-9928 model no. 055-9033-8 | contact us 1-888-670-6682 USE DUST MASK: • Provide adequate support to the rear and sides of the saw table for wide or long work pieces. A wide or long workpiece has a tendency to pivot on the table’s edge, causing Some dust created by sawing contains chemicals that are known to cause loss of control, saw blade binding and kickback.
- Page 11 055-9033-8 | contact us 1-800-689-9928 model no. 055-9033-8 | contact us 1-888-670-6682 USE SAFETY GOGGLES AND EAR PROTECTION: Be sure extension cords are properly wired and in good condition. Always replace a damaged extension cord or have it repaired by a qualified technician before using it.
- Page 12 055-9033-8 | contact us 1-800-689-9928 model no. 055-9033-8 | contact us 1-888-670-6682 Description Description Foot Blade wrench Handle I Blade wrench storage Blade guard storage Working table Anti-kickback pawls storage Outfeed support Push stick storage Riving knife Handle II...
- Page 13 BLADE A metal piece, slightly thinner than the saw blade, which helps keep the kerf open and For maximum performance, it is recommended that you use the 40-tooth, 10" (25.4 cm) prevent kickback. carbide-tipped combination blade provided with your saw. The blade is raised and lowered with the height/bevel adjusting handwheel.
- Page 14 055-9033-8 | contact us 1-800-689-9928 model no. 055-9033-8 | contact us 1-888-670-6682 PACKAGE CONTENTS THROUGH-SAWING Any cutting operation where the blade extends completely through the thickness of the Description Qty. Illustration workpiece. DADO CUT Table saw assembly A non-through cut which produces a square-sided notch or trough in the workpiece (requires a special blade).
- Page 15 055-9033-8 | contact us 1-800-689-9928 model no. 055-9033-8 | contact us 1-888-670-6682 Description Qty. Illustration Description Qty. Illustration Stand assembly Locking nut M10 Stand support assembly Locking nut M8 Handle I assembly Big flat washer 10 Wheel 5 mm Hex key...
-
Page 16: Assembly
055-9033-8 | contact us 1-800-689-9928 model no. 055-9033-8 | contact us 1-888-670-6682 TOOLS NEEDED FOR ASSEMBLY WARNING! Do not attempt to modify this tool or create accessories not recommended for use with this tool. Any such alteration or modification is misuse, and could result in a Star-head hazardous condition leading to possible serious personal injury. - Page 17 055-9033-8 | contact us 1-800-689-9928 model no. 055-9033-8 | contact us 1-888-670-6682 • Attach the tubes of the stand support • Attach the tubes of the handle I assembly (14) assembly (5) with the corresponding tubes with the corresponding tubes (located on side...
- Page 18 055-9033-8 | contact us 1-800-689-9928 model no. 055-9033-8 | contact us 1-888-670-6682 TO SECURE/LEVEL THE STAND (Fig. 4) • Grasp the stand support assembly (7) and lift it up until two other stand legs (8) raise With the stand open, resting on a level...
- Page 19 055-9033-8 | contact us 1-800-689-9928 model no. 055-9033-8 | contact us 1-888-670-6682 When the table insert is not level with the saw • Unlock riving knife lock knob (3) by turning it table, using a 2.5 mm hex key (supplied), clockwise.
- Page 20 055-9033-8 | contact us 1-800-689-9928 model no. 055-9033-8 | contact us 1-888-670-6682 REMOVING AND INSTALLING THE BLADE Install the blade: (Fig. 7a-7b) • Place one new blade on arbour (7). Make sure saw blade teeth point down at the front side •...
- Page 21 055-9033-8 | contact us 1-800-689-9928 model no. 055-9033-8 | contact us 1-888-670-6682 ANTI-KICKBACK PAWLS AND BLADE BLADE GUARD INSTALLATION GUARD INSTALLATION (Fig. 8a-8b) (Fig. 9a-9c) Anti-kickback pawls should only be installed • Unplug the saw. for through cuts.
- Page 22 055-9033-8 | contact us 1-800-689-9928 model no. 055-9033-8 | contact us 1-888-670-6682 • Pull blade guard fully back onto riving knife. RIP FENCE INSTALLATION (FIG. 11a-11c) Push pin and release it to lock guard into • Push up the fence rails lever (1) toward the position.
- Page 23 055-9033-8 | contact us 1-800-689-9928 model no. 055-9033-8 | contact us 1-888-670-6682 MITRE GAUGE INSTALLATION TO STORE THE TABLE SAW (FIG. 12a-12b) ACCESSORIES (Fig. 13) The mitre gauge (1) can be installed on each • The table saw has three convenient storage mitre gauge groove (2) on either side of blade.
- Page 24 055-9033-8 | contact us 1-800-689-9928 model no. 055-9033-8 | contact us 1-888-670-6682 FOLDING THE STAND (Fig. 14a-14f) • Grasp the handle I (4) firmly and tilt saw to you. Push the saw to the desired location To fold the stand for moving, return fence rails (Fig.
- Page 25 055-9033-8 | contact us 1-800-689-9928 model no. 055-9033-8 | contact us 1-888-670-6682 CONNECT TO A DUST COLLECTION DANGER! SYSTEM (Fig. 15) Feed the workpiece into the saw blade only against the direction of rotation. The dust extraction port (1) with 2 1/2"...
- Page 26 055-9033-8 | contact us 1-800-689-9928 model no. 055-9033-8 | contact us 1-888-670-6682 • When restarting the saw with the saw blade in the workpiece, centre the saw blade in CAUSES OF KICKBACK the kerf so that the saw teeth are not engaged in the material. If the saw blade binds, it Kickback can occur when the blade stalls or binds, causing the workpiece to be kicked may lift up the workpiece and cause kickback when the saw is restarted.
- Page 27 055-9033-8 | contact us 1-800-689-9928 model no. 055-9033-8 | contact us 1-888-670-6682 CHANGING BLADE DEPTH (FIG. 18) RIP FENCE (FIG. 20a-20g) Blade depth should be set so that outer points FENCE RAILS LOCKING LEVER (Fig. 20a) of blade (1) are higher than workpiece by •...
- Page 28 055-9033-8 | contact us 1-800-689-9928 model no. 055-9033-8 | contact us 1-888-670-6682 ADJUSTMENT KNOB (Fig. 20g) CAUTION: • The adjustment knob allows smaller To lock the narrow fence (2), turn the adjustments when setting the rip fence. locking lever (3) as shown in Fig. 20c until it •...
- Page 29 055-9033-8 | contact us 1-800-689-9928 model no. 055-9033-8 | contact us 1-888-670-6682 PUSH STICK (Fig. 23a-23b) THROUGH CUTS A push stick can be purchased or made to securely hold down the workpiece against the WARNING! table when making non-through cuts or ripping narrow stock. The stick must be Always make sure the blade guard and anti-kickback pawls are in place and narrower than the workpiece, with a 90°...
- Page 30 055-9033-8 | contact us 1-800-689-9928 model no. 055-9033-8 | contact us 1-888-670-6682 CUTTING TIPS MAKING A CROSS CUT • Remove rip fence. • The kerf (the cut made by the blade in the wood) will be wider than the blade to avoid overheating or binding.
- Page 31 055-9033-8 | contact us 1-800-689-9928 model no. 055-9033-8 | contact us 1-888-670-6682 MAKING A MITRE CUT MAKING A COMPOUND (BEVEL) MITRE CUT • Remove rip fence. • Remove rip fence. • Set blade to correct depth for workpiece.
- Page 32 055-9033-8 | contact us 1-800-689-9928 model no. 055-9033-8 | contact us 1-888-670-6682 DUST COLLECTION (Fig. 24) • Lock release lever. • Remove blade guard and anti-kickback pawls. This table saw is equipped with a dust shroud • Place the riving knife in the middle position.
- Page 33 055-9033-8 | contact us 1-800-689-9928 model no. 055-9033-8 | contact us 1-888-670-6682 ALIGNING RIP FENCE TO BLADE TO CHECK/ADJUST: (FIG. 25a-25b) • Place the framing square (1) beside the blade (2), and unlock the fence rails locking lever...
- Page 34 055-9033-8 | contact us 1-800-689-9928 model no. 055-9033-8 | contact us 1-888-670-6682 • If the blade stops bevelling before it gets to ADJUSTING RIP FENCE SCALE INDICATOR 90°, loosen the 90° stop set screw (3) (FIG. 27) (located at the left of the bevel track on the •...
-
Page 35: Maintenance
055-9033-8 | contact us 1-800-689-9928 model no. 055-9033-8 | contact us 1-888-670-6682 TROUBLESHOOTING WARNING! When servicing, use only identical replacement parts. Use of any other part may PROBLEM Possible Causes Solution create a hazard or cause product damage. - Page 36 055-9033-8 | contact us 1-800-689-9928 model no. 055-9033-8 | contact us 1-888-670-6682 PROBLEM Possible Causes Solution Material kicked • Riving knife not aligned • Align riving knife with saw back from blade. correctly with blade. blade. • Feeding stock without rip •...
- Page 37 055-9033-8 | contact us 1-800-689-9928 model no. 055-9033-8 | contact us 1-888-670-6682 153 152 151 150...
- Page 38 055-9033-8 | contact us 1-800-689-9928 model no. 055-9033-8 | contact us 1-888-670-6682...
- Page 39 055-9033-8 | contact us 1-800-689-9928 model no. 055-9033-8 | contact us 1-888-670-6682 205 204 223 222...
-
Page 40: Parts List
055-9033-8 | contact us 1-800-689-9928 model no. 055-9033-8 | contact us 1-888-670-6682 PARTS LIST Description Qty. Description Qty. Compress spring Locking pole Description Qty. Description Qty. Ring Spring pin M14 hexagon socket screw Blade guard bolt Hex nut... - Page 41 055-9033-8 | contact us 1-800-689-9928 model no. 055-9033-8 | contact us 1-888-670-6682 Description Qty. Description Qty. Description Qty. Description Qty. Blade fixing nut Butterfly screw Angle adjustment base Leg friction pad Outside plywood Body small panel Hexagon locking bolt...
- Page 42 Neither the retailer, Maximum Canada, nor the manufacturer shall be liable for any other expense, loss or damage, including, without limitation, any indirect, incidental,...
-
Page 43: Warranty
In addition to the 5-Year Limited Warranty, this MAXIMUM product is covered by our: 1-Year Repair Warranty Maximum Canada will maintain this product and replace critical parts which have worn beyond reasonable use through normal use of such product, any time during the first...
Need help?
Do you have a question about the 055-9033-8 and is the answer not in the manual?
Questions and answers