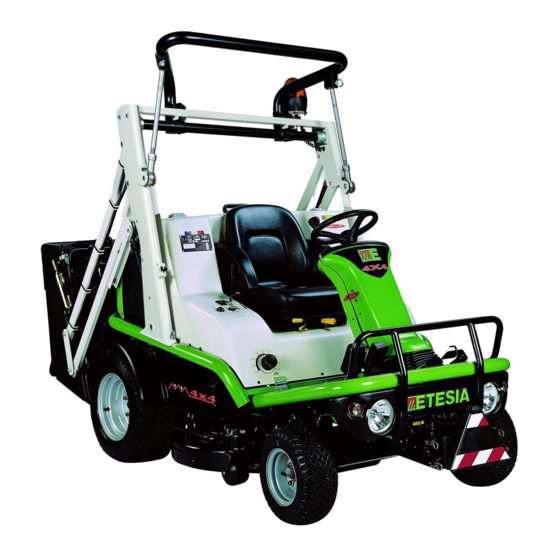
Etesia H124DN Original User Manual

Etesia H124DN Original User Manual

Hide thumbs Also See for H124DN:

Advertisement

Original user
GB
Please read carefully before using your machine
manual
H124DN - H124DX - H124DL

Advertisement

Table of Contents
loading

Summary of Contents for Etesia H124DN

  • Page 1 Original user Please read carefully before using your machine manual H124DN - H124DX - H124DL...
  • Page 2: Table Of Contents

    CONTENTS 1• Your safety and that of others ................................3 2• Key to diagrams ......................................5 3• Description ......................................10 4• Pictures ......................................... 12 5• Technical specifications ..................................17 6• Operating instructions ..................................18 7• Accessories in option ................................... 22 8• Assembly - Disassemble - Access to components ..........................23 9•...
  • Page 3: 1• Your Safety And That Of Others

    HANK YOU! • In accordance with article L.111-3 of the consumer code, ETESIA You are now the proud owner of an Etesia ride-on mower! This undertakes to supply your dealership with spare parts, original extremely reliable and tough machine has been specially designed to or compatible, indispensable for the use of your product over a give many years of service.
  • Page 4 • These precautions are vital to your safety. However, the cool for few minutes before filling. recommendations given are not exhaustive and due care should • To tow loads, use only tow bars bearing the reference of ETESIA: always be exercised when using your mower. MR124.
  • Page 5: 2• Key To Diagrams

    2• KEY TO DIAGRAMS RECTANGLE C LABELS (H124DN - H124DX - H124DL) • Various labels have been affixed to your mower. • a = Risk of toppling over the machine. • Check that they are all present (see list below and pictures 1, 2 and 3).
  • Page 6 2• KEY TO DIAGRAMS - SAFETY H124DN - H124DX - H124DL H124DL H124DN - H124DX H124DN - H124DX - H124DL...
  • Page 7 2• KEY TO DIAGRAMS - SAFETY Rectangle A H124DN - H124DX - H124DL Rectangle B Rectangle B1 H124DN - H124DX H124DL Rectangle D H124DN - H124DX - H124DL Rectangle C H124DN - H124DX - H124DL Hearing Marking of protection accumulators...
  • Page 8 2• KEY TO DIAGRAMS - USE ENGINE SPEED CUTTING HEIGHT Indications for the control of the engine speed Indicates the cutting height in mm (measured on hard and flat ground) MAXI : Engine at full throttle MINI : Engine at idling speed CUTTING HEIGHT ADJUSTMENT STARTING THE ENGINE = Cutting deck goes down...
  • Page 9 Right side : Flashing light and lighting switched on Note : There is no flashing light on the H124DL HYDRAULIC OIL TEMPERATURE INDICATOR AND CLOGGING OF HYDRAULIC FILTER DIPPED HEADLIGHTS ENGINE PRE-HEATING WARNING LIGHT FUEL GAUGE H124DN - H124DX - H124DL 1158 1280 3073...
  • Page 10: 3• Description

    15• Seat back angle adjustment (except on H124DL) 1• Power take-off control switch (except on H124DL) 16• High position emptying lever (on H124DL) 2• Differential lock control switch (on H124DN) 17• Grassbox emptying lever (on H124DL) 3• Hydraulic oil temperature and filter clogging indicator 18•...
  • Page 11 3• DESCRIPTION bonnet locked bonnet unlocked 1• Ignition key 14• Reverse pedal 2• Start switch 15• Accessory-holder triangle (except on H124DL) 3• Engine speed adjusting lever 16• Side lights / headlights 4• Cutting system up / down switch 17• Front indicators (except on H124DL) 5•...
  • Page 12: 4• Pictures

    4• PICTURES α ≤ 10° (17,6%)
  • Page 13 4• PICTURES...
  • Page 14 4• PICTURES...
  • Page 15 4• PICTURES Maxi Mini...
  • Page 16 4• PICTURES H124DL H124DN - H124DL H124DX...
  • Page 17: 5• Technical Specifications

    9 heights / 1 transport position with adjustable stop Blade clutch Electromagnetic with brake incorporated Safety systems Conductor - box switches and for H124DN - H124DX on the deck Ejection Central rear Chassis design 2 tubular welded structures assembled by screws and bolts...
  • Page 18: 6• Operating Instructions

    - the control pedals are in the neutral position - the cutter is not switched on 6•2•1 H124DN - H124DX - the power take-off is switched off (optional) • The mower is fitted with 7 safety switches which are activated by : •...
  • Page 19 WARNING ! Before starting the engine, read the safety instructions (pages 3 and 4). H124DN - H124DX • Sit on the driver’s seat. For a maximum comfort you can adjust the seat position according to • Move the cutter switch and PTO switch to the “off” position transmission pedals location (items 13 and 14 page 11).
  • Page 20 6• OPERATING INSTRUCTIONS 6•8 DIFFERENTIAL LOCK (H124DN) WARNING ! In order to stop the mower rapidly, release the control pedal and put the parking brake on. • The differential lock is a device allowing the drive to be restored to the two rear wheels if one of them starts slipping (item 2 page 10).
  • Page 21 • These are controlled by the switch item 23 page 11 for H124DN - H124DX (only if the side lights are already on) and item 5 page 10 High lift emptying : Act on rear side the exterior switch (item 23 for H124DL.
  • Page 22: 7• Accessories In Option

    7• ACCESSORIES IN OPTION 7•1 USE OF THE MACHINE WITH MT124N (CLEANER), MSC124 (SCARIFIER), MSF124 (BLOWER) ACCESSORIES The connection of these accessories is done by push-pull switches located at machine front (a picture 9). CAUTION! When an accessory is removed from the machine, please do not forget to reconnect the PTO pipe with the male connection on the machine (a picture 10).
  • Page 23: 8• Assembly - Disassemble - Access To Components

    It’s marked with red paint (picture 18). 8•4 ACCESS TO THE SUBSIDIARY FUNCTION 8•10 ACCESS TO THE DIFFERENTIAL LOCK CONTROL VALVE (H124DN - H124DX) (H124DN) • The hydraulic valve for the subsidiary functions (emptying and • Differential locking is performed by a hydraulic flow divider placed...
  • Page 24 8•11•2 CHANGING THE CUTTING PARTS (BLADES) and nuts. • Make sure that you do not tighten the nuts excessively. Use a H124DN - H124DX tightening torque of 8 Nm. IMPORTANT ! • The shearing screws must be replaced each time the blade is Before any work on the cutting system, replaced.
  • Page 25: 9• Maintenance

    • Types of pollutants : After the initial 50-hour service, the oil must be changed every 250 - Detritus in the diesel hours or at least once a year for H124DN, H124DX and H124DL - Exterior pollution (dust, grass, water…) models.
  • Page 26 (picture 16). hexagon key. • Top up with quality oil HV 46. Etesia recommends Shell Tellus T46 - Remove air filter to enable air intake during oil drainage. - Let the oil drain out completely before you put back the plug.
  • Page 27 Our dealer network has been informed about its obligation to few minutes. take back, free of charge, all used pneumatics from ETESIA ride on mowers. H124DL 9•5 MAINTENANCE OF CUTTING PARTS...
  • Page 28: 10• Prolonged Storage - Winter Storage

    11• TROUBLESHOOTING - ANCHORING 11•1 MOVING THE MOWER WITH THE FRONT WHEEL ENGINE OFF H124DN - H124DL • The bypass is used to move the mower without starting up the • Stop the engine and remove the ignition key. engine.
  • Page 29: 12• Possible Breakdowns And Their Remedies

    The engine is running, but stalls when the The retractable parts of the cutting system Put them back in place correctly operator starts the cutting system (H124DN, are absent or incorrectly mounted (H124DN, H124DX) H124DX) The cutting system does not engage (with All the conditions for safe mowing are not met See chapter 6•2...
  • Page 30: 13• Maintenance Schedule

    13• MAINTENANCE SCHEDULE IMPORTANT : The warranty will only apply if your mower has had the service carried out by your dealer, after the first 50 hours. Page Elements Before each After the 50 Every Every Every Every Every mowing first hours 125 hours 250 hours...
  • Page 31 Steering jack 2 grease nipples • Steering knuckles 2 grease nipples PEDAL • Parking brake 1 grease nipple CUTTING UNIT H124DN - H124DX Retractable side part grease with brush Blade coupling By each removing Front roller bracket By each removing GRASSBOX •...
  • Page 32: 14• Warranty

    • Should ETESIA discover that the machine is not used in the use pedal covers, running board cover, anti scalp kit, roll axle... initially declared, ETESIA allows itself to cancel the warranty.
  • Page 34 13, Rue de l’Industrie, 67165 WISSEMBOURG CEDEX declare under our responsibility, that the ride-on lawnmowers, type H124, reference H124DN, H124DX, H124DL to which this declaration refers, fulfil all the relevant terms of directive 2006/42/EC applicable to them as well as to the provisions of all other directives European...
  • Page 35 Stamp here please ETESIA SERVICE GARANTIE 13 rue de l'Industrie 67165 WISSEMBOURG CEDEX France...
  • Page 36 This card has to be returned completed to ETESIA upon the first setting up. MODELL: SERIAL NUMBER: WARRANTY CERTIFICATE USER NAME ___________________________ Forename _________________________ Street ___________________________ Zip code __________________________ Town __________________________ Country____________________________ Tel ______________________________ Date of purchas _____ _____ 20 ___ Tel.

This manual is also suitable for:

H124dxH124dl

Table of Contents