Table of Contents
Advertisement
Quick Links
Advertisement
Table of Contents
Troubleshooting

Subscribe to Our Youtube Channel
Related Manuals for AEG T9DEC866R


Summary of Contents for AEG T9DEC866R
- Page 1 T9DEC866R User Manual Tumble Dryer USER MANUAL...
-
Page 2: Table Of Contents
FOR PERFECT RESULTS Thank you for choosing this AEG product. We have created it to give you impeccable performance for many years, with innovative technologies that help make life simpler – features you might not find on ordinary appliances. Please spend a few minutes reading to get the very best from it. -
Page 3: Safety Information
SAFETY INFORMATION 8.2 Loading the laundry....... 18 10.4 Cleaning the drum....... 26 8.3 Turning on the appliance....18 10.5 Cleaning the control panel and 8.4 Auto Off function......18 housing..........26 8.5 Setting a programme..... 19 10.6 Cleaning the airflow slots.....26 8.6 Options.......... -
Page 4: General Safety
SAFETY INFORMATION the use of the appliance in a safe way and understand the hazards involved. Children between 3 and 8 years of age and persons with • very extensive and complex disabilities shall be kept away from the appliance unless continuously supervised. Children of less than 3 years of age should be kept away •... - Page 5 SAFETY INFORMATION WARNING: The appliance must not be supplied through an • external switching device, such as a timer, or connected to a circuit that is regularly switched on and off by a utility. Connect the mains plug to the mains socket only at the end •...
-
Page 6: Safety Instructions
SAFETY INSTRUCTIONS Before any maintenance operation, deactivate the appliance • and disconnect the mains plug from the socket. 2. SAFETY INSTRUCTIONS 2.1 Installation • Remove all the packaging. • Do not install or use a damaged appliance. • Follow the installation instructions supplied with the appliance. •... -
Page 7: Internal Lighting
SAFETY INSTRUCTIONS • Dry only fabrics that are suitable to dry in the appliance. Follow the cleaning instruction on the item label. • Do not drink or prepare food with the condensed water/distilled water. It can cause health problems to people and pets. •... -
Page 8: Product Description
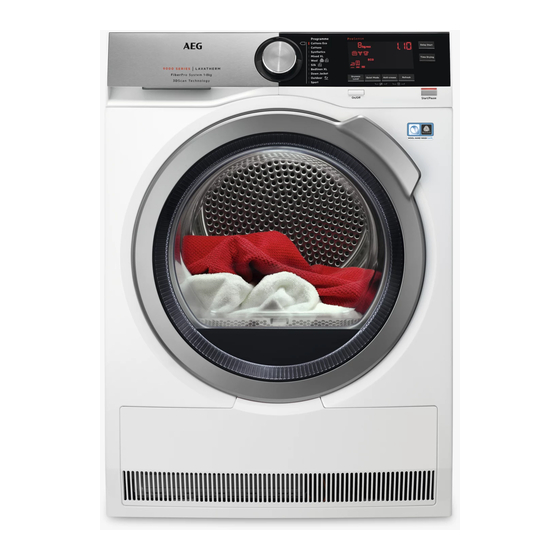
PRODUCT DESCRIPTION 3. PRODUCT DESCRIPTION Water container Control panel Internal lighting Appliance door Filter Rating plate Airflow slots Condenser lid Condenser cover Adjustable feet For ease of loading laundry or ease of installation the door is reversible. (see separate leaflet). 8/36... -
Page 9: Control Panel
CONTROL PANEL 4. CONTROL PANEL Programme dial Display Start/Pause button Options Auto Off function On/Off button with Programmes 4.1 Display Symbol on the display Symbol description laundry maximum load delay start option on delay start selection (30min-20h) 9/36... - Page 10 CONTROL PANEL Symbol on the display Symbol description cycle time indication buzzer off child lock on time drying option on time drying selection (10min-2h) drain the water container indicator: clean the filter indicator: check the condenser indicator: laundry dryness option: iron dry, cupboard dry, cupboard dry +, extra dry ECO option on Quiet Mode option on...
-
Page 11: Programmes
PROGRAMMES 5. PROGRAMMES Programmes Load Properties / Fabric mark Cycle to be used to dry cotton with 8,0 kg "cotton cupboard" dryness level, with Cottons Eco maximum energy saving. Cycle defined to dry cottons items of Cottons 8,0 kg different size / different weaving alto‐ gether. -
Page 12: Programmes And Options Selection Compatibility
PROGRAMMES Programmes Load Properties / Fabric mark Feather and down jackets, also with 2 kg synthetic filling and technical cover fab‐ Down Jacket ric. Dry with zips closed. Outdoor clothing, technical, sports fab‐ rics, waterproof and breathable jack‐ 2 kg ets, shell jackets with a removable Outdoor fleece or inner insulation. -
Page 13: Consumption Data
PROGRAMMES Options Dryness Quiet Anti- Time Refresh Programmes Level Mode crease Drying Bedlinen XL Down Jacket Outdoor Sport 1) Aside from the programme, you can set one or more options at the same time. 2) See chapter OPTIONS: Time Drying on Wool programme 5.2 Consumption data Energy consump‐... -
Page 14: Options
OPTIONS Energy consump‐ Program Spun at / residual humidity Drying time tion Synthetics 3,5 kg 1200 rpm / 40% 57 min 0,47 kWh cupboard dry 800 rpm / 50% 66 min 0,58 kWh 1) For partial loads, the cycle time is shorter and appliance uses less energy. 2) Improper ambient temperature and/or poorly centrifuged laundry can prolong cycle time and increase the energy consumption. -
Page 15: Time Drying On Wool Program
BEFORE FIRST USE The cycle lasts as long as set drying time regardless of the size of a load and its dryness. TIME DRYING RECOMMENDATION 10 - 20 min action of cool air only (no heater). 20 - 40 min additional drying to improve dryness after previous drying cycle. -
Page 16: Unusual Smell
BEFORE FIRST USE At the beginning of the drying cycle (first 3-5 min) there could be a slightly higher sound level. This is due to the compressor starting up. This is normal for compressor powered appliances such as refrigerators and freezers. 7.1 Unusual smell The appliance is tightly packed. -
Page 17: Daily Use
DAILY USE 8. DAILY USE 8.1 Preparing the laundry Very often the clothes after washing cycle are kneaded and tangled altogether. Drying kneaded and tangled clothes is inefficient. To assure proper air flow and even drying it is recommended to shake and load one by one the clothes to the tumble dryer. -
Page 18: Loading The Laundry
DAILY USE 8.2 Loading the laundry CAUTION! Ensure the laundry is not trapped between the appliance door and the rubber seal. 1. Pull open the appliance door. 2. Load the laundry one item at a time. 3. Close the appliance door. 8.3 Turning on the appliance To turn on the appliance: Push the On/Off button. -
Page 19: Setting A Programme
DAILY USE 8.5 Setting a programme Use the programme dial to set the programme. The approximate programme duration appears on the display. Real drying time will depend on type of the load (quantity and composition), the room temperature and the humidity of your laundry after spin drying phase. 8.6 Options Together with the programme you can set 1 or more special options. -
Page 20: Starting A Program
DAILY USE Child lock option activation: 1. Turn the dryer on. 2. Select 1 of the available programs. 3. Touch and hold down 2 buttons at the same time. The symbol appears on the display. 4. To deactivate the child lock, touch the above buttons again until the symbol disappears. 8.8 Starting a program To start the program: Touch the Start/Pause button. -
Page 21: Hints And Tips
HINTS AND TIPS 2. Open the appliance door. 3. Remove the laundry. 4. Close the appliance door. Possible causes of unsatisfactory drying results: Adjustment of default dryness level • Inadequate default dryness level settings. See chapter • Room temperature is too low or too high. Optimal room temperature is between 18°-25°C. 9. -
Page 22: Deactivating The Tank Indicator
CARE AND CLEANING 9.3 Deactivating the tank indicator The water container indicator is activated by default. It illuminates at the end of the drying cycle or during the cycle if the water reservoir is full. If the draining kit is installed the water container is drained automatically and the indicator can be deactivated. - Page 23 CARE AND CLEANING 3. Gather lint with hand from both internal parts of the filter. Throw the lint in the dustbin. 4. If necessary, clean the filter with a vacuum cleaner. Close the filter. 5. If necessary, remove lint from the filter socket and gasket. You can use a vacuum cleaner. Place the filter back inside the filter socket.
-
Page 24: Emptying The Water Container
CARE AND CLEANING 10.2 Emptying the water container Empty the condensed water container after each drying cycle. Tank If the condensed water container is full, the programme stops automatically. The symbol comes on the display and you must empty the water container. To empty the water container: 1. - Page 25 CARE AND CLEANING 2. Open the condenser cover. 3. Turn the lever to unlock the condenser lid. 4. Lower the condenser lid. 5. If necessary, remove the fluff from the condenser and its compartment. You can use a wet cloth and/or a vacuum cleaner with a brush attachment. 25/36...
-
Page 26: Cleaning The Drum
TROUBLESHOOTING 6. Close the condenser lid. 7. Turn the lever until it clicks into position. 8. Put the filter back. 10.4 Cleaning the drum WARNING! Disconnect the appliance before you clean it. Use a standard neutral soap detergent to clean the inner surface of the drum and drum lifters. Dry the cleaned surfaces with a soft cloth. -
Page 27: Troubleshooting
TROUBLESHOOTING Error code Possible cause Remedy Appliance motor overloaded. The programme was not completed. Too much laundry or entrap in the Remove the laundry from the drum, drum. set the programme and restart the cycle. Internal fail. No communication be‐ The programme was not finished tween electronic elements of the ap‐... - Page 28 TROUBLESHOOTING Problem Possible cause Remedy Incorrect programme selection. Select a suitable programme. The filter is clogged. Clean the filter. Change Dryness Level option to a Dryness Level option was set to higher level. iron dry . The load was too large. Do not exceed the maximum load size.
-
Page 29: Possible Causes Of Unsatisfactory Drying Results
TECHNICAL DATA Problem Possible cause Remedy The water container is full. Drain the water container, push the A programme is inactive. Start/Pause button. The load size is small. Select a time programme. The time value must be related to the load. To dry one item or a small amount of laundry we recommend short drying The drying cycle... - Page 30 TECHNICAL DATA Max. depth with the appliance door open 1108 mm Max. width with the appliance door open 958 mm Adjustable height 850 mm (+ 15 mm - feet regulation) Drum volume 118 l Maximum load volume 8,0 kg Voltage 230-240 V Frequency 50 Hz...
-
Page 31: Accessories
TECHNICAL DATA Gas designation R134a Weight 0,30 kg Global-warming potential (GWP) 1430 1) With reference to BS EN 61121. 8,0 kg of cotton centrifuged at 1000 rpm. 2) With reference to BS EN 61121. 4,0 kg of cotton centrifuged at 1000 rpm. 3) Energy consumption per year in kWh, based on 160 drying cycles of the standard cotton programme at full and partial load, and the consumption of the low-power modes. -
Page 32: Draining Kit
PRODUCT INFORMATION SHEET ACCORDING TO UK ECODESIGN 13.2 Draining kit Accessory name: DK11. Available from your authorised vendor (can be attached to some types of tumble dryer) For thorough draining of the condensed water into a basin, siphon, gully, etc. After installation, the water container is drained automatically. - Page 33 PRODUCT INFORMATION SHEET ACCORDING TO UK ECODESIGN Product Information Sheet Trade Mark Model T9DEC866R PNC916098626 Rated capacity in kg Air vented or condenser tumble dryer Condenser Energy efficiency class A+++ Energy consumption in kWh per year, based on 160 drying cycles of 176,5 the standard cotton programme at full and partial load, and the con‐...
-
Page 34: Environmental Concerns
PRODUCT INFORMATION SHEET ACCORDING TO UK ECODESIGN Condensation efficiency class on a scale from G (least efficient) to A (most efficient) Average condensation efficiency of the standard cotton programme at full load as a percentage Average condensation efficiency of the standard cotton programme at partial load as a percentage Weighted condensation efficiency for the 'standard cotton programme at full and partial load'... - Page 35 35/36...
- Page 36 www.aeg.com/shop...
Need help?
Do you have a question about the T9DEC866R and is the answer not in the manual?
Questions and answers