Table of Contents
Advertisement
Quick Links
Advertisement
Table of Contents
Troubleshooting

Related Manuals for AEG T9DEE98PC


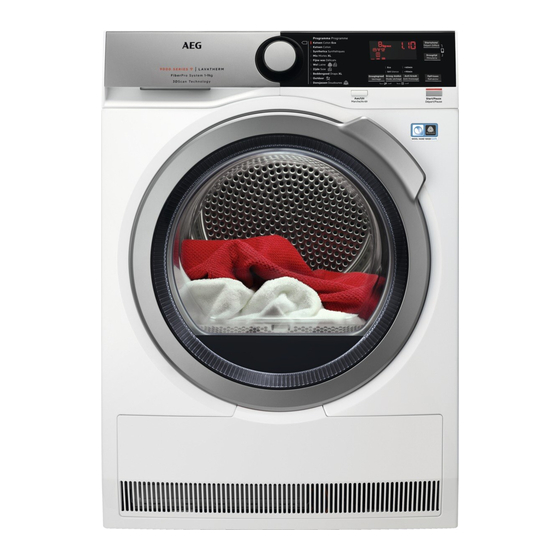
Summary of Contents for AEG T9DEE98PC
- Page 1 T9DEE98PC User Manual Tumble Dryer USER MANUAL...
- Page 2 FOR PERFECT RESULTS Thank you for choosing this AEG product. We have created it to give you impeccable performance for many years, with innovative technologies that help make life simpler – features you might not find on ordinary appliances. Please spend a few minutes reading to get the very best from it.
-
Page 3: Table Of Contents
2.8 Disposal................. 11 3. PRODUCT DESCRIPTION............13 4. CONTROL PANEL..............14 4.1 Display................14 WI-FI - CONNECTIVITY SETUP.........16 5.1 Installing and configuring My AEG......... 16 5.2 Over-the-air update............17 5.3 Wireless connection configuration......... 17 5.4 Remote control from application My AEG ....18 6. - Page 4 CONTENTS 7.8 Delay Start..............28 7.9 Buzzer ............... 28 8. BEFORE FIRST USE.............. 30 8.1 Unusual smell..............30 8.2 Noises................30 9. DAILY USE................32 9.1 Preparing the laundry.............32 9.2 Loading the laundry............33 9.3 Turning on the appliance..........34 9.4 Auto Off function............34 9.5 Setting a programme............34 9.6 Options................35 9.7 Child lock option.............35...
- Page 5 CONTENTS 14. ACCESSORIES..............57 14.1 Stacking kit..............57 14.2 Draining kit..............57 14.3 Pedestal with drawer............58 15. PRODUCT INFORMATION SHEET IN REFERENCE TO E.U. REGULATION 1369/2017............59 My AEG Care app 5/64...
-
Page 6: Safety Information
SAFETY INFORMATION Before beginning the installation and use of this appliance, carefully read the supplied instructions. The manufacturer is not responsible for any injuries or damage that are the result of incorrect installation or usage. Always keep the instructions in a safe and accessible location for future reference. - Read the supplied instructions. -
Page 7: General Safety
SAFETY INFORMATION 1.2 General Safety Do not change the specification of this appliance. • If the tumble dryer is put on top of a washing machine, use • the stacking kit. The stacking kit, available from your authorized vendor, can be used only with the appliance specified in the instructions supplied with the accessory. - Page 8 SAFETY INFORMATION Do not run the appliance without a filter. Clean the lint filter • before or after each use. Do not dry unwashed items in the tumble dryer. • Items that have been soiled with substances such as • cooking oil, acetone, alcohol, petrol, kerosene, spot removers, turpentine, waxes and wax removers should be washed in hot water with an extra amount of detergent...
-
Page 9: Safety Instructions
2. SAFETY INSTRUCTIONS 2.1 Installation • Remove all the packaging. • Do not install or use a damaged appliance. • Follow the installation instructions supplied with the appliance. • Always take care when moving the appliance as it is heavy. Always use safety gloves and enclosed footwear. -
Page 10: Use
SAFETY INSTRUCTIONS • Do not touch the mains cable or the mains plug with wet hands. 2.3 Use WARNING! Risk of injury, electric shock, fire, burns or damage to the appliance. • This appliance is for household use only. • Do not dry damaged (torn, frayed) items that contain padding or fillings. -
Page 11: Care And Cleaning
SAFETY INSTRUCTIONS 2.5 Care and cleaning WARNING! Risk of injury or damage to the appliance. • Do not use water spray and steam to clean the appliance. • Clean the appliance with a moist soft cloth. Use only neutral detergents. Do not use abrasive products, abrasive cleaning pads, solvents or metal objects. - Page 12 SAFETY INSTRUCTIONS • Dispose of the appliance in accordance with local requirements for the disposal of Waste Electrical and Electronic Equipment (WEEE). 12/64...
-
Page 13: Product Description
3. PRODUCT DESCRIPTION Water container Control panel Internal lighting Appliance door Filter Rating plate Airflow slots Condenser lid Condenser cover Adjustable feet For ease of loading laundry or ease of installation the door is reversible. (see separate leaflet). 13/64... -
Page 14: Control Panel
4. CONTROL PANEL Program dial Display Start/Pause button Options Auto Off function On/Off button with Programs 4.1 Display Symbol on the display Symbol description laundry maximum load delay start option on 14/64... - Page 15 CONTROL PANEL Symbol on the display Symbol description wireless connection remote control delay start selection (30min-20h) cycle time indication buzzer off child lock on laundry dryness: iron dry, cupboard dry, cupboard dry +, extra dry drain the water container indicator: clean the filter indicator: check the condenser...
-
Page 16: Wi-Fi - Connectivity Setup
4. Start the application. Select the country and language and login with Your email and password. If you do not have an account, create a new one following the instructions in My AEG. 5. Follow the instructions on the App for the appliance registration and configuration. -
Page 17: Over-The-Air Update
5.3 Wireless connection configuration Before you begin configuration download and install My AEG application on your smart device. 1. Push the On/Off button to switch on the appliance. -
Page 18: Remote Control From Application My Aeg
The symbol: appears on the display. 5.4 Remote control from application My AEG My AEG allows you to control your laundry through a mobile device. It contains a large number of programmes, useful features and product information tailored perfectly to the appliance. - Page 19 1. Check wireless connection between the appliance and smart device. The symbol must be on the display and your appliance must be accessible from My AEG application. 2. Touch and hold down the Time Dry and Delay Start buttons the same time. The symbol must appear on the display.
- Page 20 WI-FI - CONNECTIVITY SETUP Another possibility to disable remote control is to touch Start/Pause button. The symbol must disappear from the display. Remote control is disabled. Remote control is disabled once the appliance door are opened. 20/64...
-
Page 21: Program
6. PROGRAM Program Load Properties / Fabric mark Cycle to be used to dry cotton with "cotton cup‐ 9,0 kg board" dryness level, with Cottons Eco maximum energy saving. Cycle defined to dry cot‐ tons items of different Cottons 9,0 kg size / different weaving al‐... - Page 22 PROGRAM Program Load Properties / Fabric mark Woollen fabrics. Gentle drying for hand-washable woollens. Remove items immediately when the pro‐ gramme is completed. 1 kg Wool The wool drying cycle of this machine has been approved by The Woolmark Company for the drying of wool gar‐ ments labelled as "hand wash"...
-
Page 23: Program And Options Selection Compatibility
PROGRAM Program Load Properties / Fabric mark Outdoor clothing, techni‐ cal, sports fabrics, water‐ proof and breathable 2 kg jackets, shell jackets with Outdoor a removable fleece or in‐ ner insulation. Suitable for drying in tumble dryer. Feather and down jack‐ ets, also with synthetic fill‐... - Page 24 PROGRAM Options Anti‐ Dry‐ Extra Re‐ Time creas Program ness Silent fresh Cottons Synthetics Mixed XL Delicates Wool Silk Bed Linen XL Outdoor Down Jacket 1) Aside from the programme, you can set one or more options at the same time. 2) See chapter OPTIONS: Time Dry on Wool programme 24/64...
-
Page 25: Consumption Data
PROGRAM 6.2 Consumption data Energy Drying con‐ Spun at / residual hu‐ Program sump‐ midity time tion Cottons Eco 9,0 kg cupboard 1,54 1400 rpm / 50% 190 min 1,69 1000 rpm / 60% 208 min Cottons 9,0 kg 1,02 iron dry 1400 rpm / 50% 124 min... - Page 26 PROGRAM Energy Drying con‐ Spun at / residual hu‐ Program sump‐ midity time tion 0,62 800 rpm / 50% 85 min 1) For partial loads, the cycle time is shorter and appliance uses less energy. 2) Improper ambient temperature and/or poorly centrifuged laundry can prolong cycle time and in‐ crease the energy consumption.
-
Page 27: Options
7. OPTIONS 7.1 Dryness This option helps to achieve requested laundry dryness. Possible selections: - ready to iron - iron dry level. - ready to store - cupboard dry level - default selection which is related to the programme. - ready to store - cupboard dry + level. - ready to store - extra dry level. -
Page 28: Time Dry On Wool Program
OPTIONS The cycle lasts as long as set drying time regardless of the size of a load and its dryness. TIME DRYING RECOMMENDATION 10 - 20 min action of cool air only (no heater). additional drying to improve dryness after previ‐ 20 - 40 min ous drying cycle. - Page 29 OPTIONS The buzzer option is by default always on. You can use this option to activate or deactivate the sound. 29/64...
-
Page 30: Before First Use
8. BEFORE FIRST USE Rear drum locks are removed automatically when dryer is activated for the first time. Possible to hear some noise. To unlock the rear drum locks: 1. Switch on the appliance. 2. Set any programme. 3. Press the Start/Pause button. Drum starts to rotate. - Page 31 BEFORE FIRST USE Working compressor. Brrrr Rotating drum. Working fans. Working pump and transferring condensation to the tank. 31/64...
-
Page 32: Daily Use
9. DAILY USE 9.1 Preparing the laundry Very often the clothes after washing cycle are kneaded and tangled altogether. Drying kneaded and tangled clothes is inefficient. To assure proper air flow and even drying it is recommended to shake and load one by one the clothes to the tumble dryer. To assure proper drying process: •... -
Page 33: Loading The Laundry
DAILY USE Fabric la‐ Description Laundry is suitable for tumble drying. Laundry is suitable for tumble drying at higher tem‐ peratures. Laundry is suitable for tumble drying at low temper‐ atures only. Laundry is not suitable for tumble drying. 9.2 Loading the laundry CAUTION! Ensure the laundry is not trapped between the appliance door and the rubber seal. -
Page 34: Turning On The Appliance
DAILY USE 9.3 Turning on the appliance To turn on the appliance: Push the On/Off button. If the appliance is on, some indicators appear on the display. 9.4 Auto Off function To decrease the energy consumption, the Auto Off function turns the appliance off automatically: •... -
Page 35: Options
DAILY USE Real drying time will depend on type of the load (quantity and composition), the room temperature and the humidity of your laundry after spin drying phase. 9.6 Options Together with the programme you can set 1 or more special options. -
Page 36: Starting A Program
DAILY USE Child lock option activation: 1. Turn the dryer on. 2. Select 1 of the available programs. 3. Touch and hold down 2 buttons at the same time. The symbol appears on the display. 4. To deactivate the child lock, touch the above buttons again until the symbol disappears. -
Page 37: Programme End
DAILY USE 9.10 Programme end Clean the filter and drain the water container after each drying cycle. (See chapter CARE AND CLEANING.) If the drying cycle is finished, the symbol appears on the display. If the Buzzer option is activated, the acoustic signal sounds intermittently for 1 minute. -
Page 38: Hints And Tips
10. HINTS AND TIPS 10.1 Ecological hints • Spin the laundry well before drying. • Do not exceed the load sizes which are specified in the programmes chapter. • Clean the filter after each drying cycle. • Do not use fabric softener to wash and then dry. In the tumble dryer laundry becomes soft automatically. -
Page 39: Deactivating The Tank Indicator
HINTS AND TIPS Dryness level Display symbol Extra dryness Standard dryness 6. To memorise the setting touch and hold down the Dryness and Anticrease buttons at the same time for approximately 2 seconds. 10.3 Deactivating the tank indicator The water container indicator is activated by default. It illuminates at the end of the drying cycle or during the cycle if the water reservoir is full. -
Page 40: Care And Cleaning
11. CARE AND CLEANING 11.1 Cleaning the filter Filter symbol comes on the display At the end of each cycle the and you must clean the filter. The filter collects the lint during the drying cycle. To achieve the best drying performances clean the filter regularly , clogged filter lead to longer cycles and energy consumption increase. -
Page 41: Emptying The Water Container
CARE AND CLEANING 3. Gather lint with hand from both internal parts of the filter. Throw the lint in the dustbin. 4. If necessary, clean the filter with a vacuum cleaner. Close the filter. 5. If necessary, remove lint from the filter socket and gasket. You can use a vacuum cleaner. -
Page 42: Cleaning The Condenser
CARE AND CLEANING If the condensed water container is full, the programme stops Tank symbol comes on the display and you automatically. The must empty the water container. To empty the water container: 1. Pull the water container out keeping it in a horizontal position. 2. - Page 43 CARE AND CLEANING 1. Open the door. Pull the filter up. 2. Open the condenser cover. 3. Turn the lever to unlock the condenser lid. 4. Lower the condenser lid. 43/64...
-
Page 44: Cleaning The Drum
CARE AND CLEANING 5. If necessary, remove the fluff from the condenser and its compartment. You can use a wet cloth and/or a vacuum cleaner with a brush attachment. 6. Close the condenser lid. 7. Turn the lever until it clicks into position. 8. -
Page 45: Cleaning The Airflow Slots
CARE AND CLEANING 11.6 Cleaning the airflow slots Use a vacuum cleaner to remove fluff from the airflow slots. 45/64... -
Page 46: Troubleshooting
12. TROUBLESHOOTING WARNING! Refer to Safety chapters. 12.1 Error Codes The appliance does not start or it stops during operation. First try to find a solution to the problem (refer to the table). If the problem persists, contact the Authorised Service Centre. WARNING! Deactivate the appliance before carrying out any check. - Page 47 TROUBLESHOOTING Possible Possible cause Remedy cause The mains supply is un‐ When the appliance is stable. showing EH0, please wait until main supply is stable than press start. If the appliance pause the cycle without any indica‐ tion then press the cycle start.
-
Page 48: Troubleshooting
TROUBLESHOOTING 12.2 Troubleshooting Problem Possible cause Remedy The tumble dryer is not Connect it to the mains connected to the mains socket. Check the fuse supply. in the fuse box (domes‐ tic installation). The door is open. Close the door. The tumble dryer does The On/Off button was... - Page 49 TROUBLESHOOTING Problem Possible cause Remedy Incorrect programme se‐ Select a suitable pro‐ lection. gramme. The filter is clogged. Clean the filter. Dryness option was set Change Dryness option to a higher level. iron dry . The load was too large. Do not exceed the maxi‐...
- Page 50 TROUBLESHOOTING Problem Possible cause Remedy It is not After a cycle starts it is Turn the tumble dryer off possible to not possible to change and on. Change the pro‐ change the the programme or op‐ gramme or option as re‐ pro‐...
- Page 51 TROUBLESHOOTING Problem Possible cause Remedy The load size is small. Select a time pro‐ gramme. The time value must be related to the load. To dry one item or a small amount of laun‐ The drying dry we recommend short cycle is too drying times.
- Page 52 TROUBLESHOOTING Problem Possible cause Remedy All buttons are inactive, The appliance down‐ except the Start/Pause. loads the APP updates. Wait until the update The dis‐ process is complete. If play you deactivate the appli‐ shows: ance during update, it resumes when you acti‐ vate the appliance again.
-
Page 53: Possible Causes Of Unsatisfactory Drying Results
Equip your home net‐ through work with wireless range the My extender. AEG appli‐ Do not use at the same cation time microwave oven does not and remote control. The work fre‐ microwave oven can dis‐... -
Page 54: Technical Data
13. TECHNICAL DATA Height x Width x Depth 850 x 596 x 638 mm (maximal 663 mm) Max. depth with the appliance 1108 mm door open Max. width with the appliance 958 mm door open Adjustable height 850 mm (+ 15 mm - feet regu‐ lation) Drum volume 118 l... - Page 55 TECHNICAL DATA Left-on mode power absorp‐ 0,05 W tion 0,05 W Off mode power absorption Power consumption in net‐ 2,0 W worked standby 15 min. Time to networked standby Type of use Household Allowed ambient temperature + 5°C to + 35°C Level of protection against in‐...
- Page 56 TECHNICAL DATA Global-warming potential 1430 (GWP) 1) With reference to EN 61121. 9,0 kg of cotton centrifuged at 1000 rpm. 2) With reference to EN 61121. 4,5 kg of cotton centrifuged at 1000 rpm. 3) Energy consumption per year in kWh, based on 160 drying cycles of the standard cotton pro‐ gramme at full and partial load, and the consumption of the low-power modes.
-
Page 57: Accessories
14. ACCESSORIES 14.1 Stacking kit Accessory name: SKP11GW, STA9GW Available from your authorised vendor. Stacking kit can be used only between washing machines and tumble dryers specified in the leaflet. See the leaflet attached. Read carefully the instructions supplied with the accessory. 14.2 Draining kit Accessory name: DK11. -
Page 58: Pedestal With Drawer
ACCESSORIES The installed hose must be minimum 50 cm to maximum 100 cm from floor level. The hose cannot be in a loop. Decrease the length of the hose if necessary. Read carefully the instructions supplied with the accessory. 14.3 Pedestal with drawer Accessory name: PDSTP10, E6WHPED2. -
Page 59: Product Information Sheet In Reference To E.u. Regulation 1369/2017
15. PRODUCT INFORMATION SHEET IN REFERENCE TO E.U. REGULATION 1369/2017 Product Information Sheet Trade Mark Model T9DEE98PC PNC916099056 Rated capacity in kg Air vented or condenser tumble dryer Condenser Energy efficiency class A+++ Energy consumption in kWh per year, based... - Page 60 PRODUCT INFORMATION SHEET IN REFERENCE TO E.U. REGULATION 1369/2017 The 'standard cotton programme' used at full and partial load is the standard drying pro‐ gramme to which the information in the label and the fiche relates, this programme is suita‐ ble for drying normal wet cotton laundry and it is the most efficient programme in terms of en‐...
- Page 61 PRODUCT INFORMATION SHEET IN REFERENCE TO E.U. REGULATION 1369/2017 The information given in the chart above is compliant with the EU Commission regulation 392/2012 implementing directive 2009/125/EC. 61/64...
- Page 62 16. ENVIRONMENTAL CONCERNS Recycle materials with the symbol . Put the packaging in relevant containers to recycle it. Help protect the environment and human health by recycling waste of electrical and electronic appliances. Do not dispose of appliances marked with the symbol with the household waste.
- Page 63 63/64...
- Page 64 LGPL-2.0, LGPL-2.1, zLib, MIT, ISC, Apache 2.0 and others. It is possible to display the complete copy of the licenses in the AEG App that can be downloaded from the corresponding App store from the License menu section. It is possible to download the source code of the open source software used in the product by searching for Wi-Fi Module Software version in NIUX subfolder at the following website: http://aeg.opensoftwarerepository.com.
Need help?
Do you have a question about the T9DEE98PC and is the answer not in the manual?
Questions and answers