Table of Contents
Advertisement
Quick Links
This Technical Advisory describes an issue which may or may not affect the customer's product
Technical Advisory
5200 NE Elam Young Parkway
Hillsboro, OR 97124
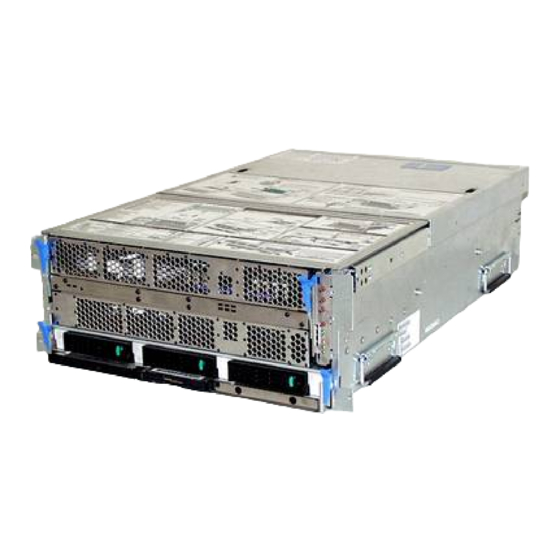
Intel® Server System SR870BN4 Upgrade to Intel® Itanium® 2 Processor 9000
Sequence
Information in this document is provided in connection with Intel products. No license, express or implied, by estoppel
or otherwise, to any intellectual property rights is granted by this document. Except as provided in Intel's Terms and
Conditions of Sale for such products, Intel assumes no liability whatsoever, and Intel disclaims any express or implied
warranty, relating to sale and/or use of Intel products including liability or warranties relating to fitness for a particular
purpose, merchantability, or infringement of any patent, copyright or other intellectual property right. Intel products are
not intended for use in medical, life saving, or life sustaining applications. Intel may make changes to specifications
and product descriptions at any time, without notice. The Intel® Server System SR870BN4 may contain design
defects or errors known as errata which may cause the product to deviate from published specifications. Current
characterized errata are available on request.
Products Affected
Intel® Server System SR870BN4
Description
The Itanium® 2 Processor 9000 Sequence requires a particular BIOS and firmware version. A special process is
needed in order to upgrade from the Intel® Itanium® 2 Processor with up to 9MB or 6MB L3 Cache. This Technical
Advisory documents the process required to perform this upgrade.
NOTE
Upgrading from a system that is configured with the Itanium® 2 processor with up to 3MB of
L3 Cache is not supported.
Upgrade Instructions:
Before you begin, you must have a functional Intel® Server System SR870BN4 configured with Itanium® 2 Processors
with up to 9MB or 6MB L3 Cache. To complete the upgrade, perform the following steps:
1. Record any changes made to the BIOS setup and EFI Boot Manager Settings. The process will reset BIOS
setup options to defaults and erase any Boot Manager options that have been added, including operating
system boot options.
2. Using the S870BN4D.rec file, create an Itanium® 2 Processor 9000 SequenceBasic Input Output System
(BIOS) recovery image on an Extensible Firmware Interface (EFI) viewable El Torito CD-ROM. A recovery .iso
image is also available for download to simplify creation of this CD.
3. Ensure your system has the following BIOS version, depending upon the installed processor:
•
BIOS PR6.2 Build 975 for Itanium(r) 2 Processor with up to 6MB L3 cache or later
•
BIOS PR2.4 Build 976 for Itanium(r) 2 Processor with up to 9MB L3 cache or later
If necessary, update your system using the appropriate SUP package.
4. Ensure your system has the BMC firmware version 34 or later. If necessary, update your system using the
latest SUP package.
5. Insert the Itanium® 2 Processor 9000 Sequence BIOS recovery CD into the CD-ROM drive.
6. Power down the system by pressing and holding the power button on the front panel for several seconds.
7. Unplug both AC power cords to remove the standby power from the server.
Then, complete the following steps:
Copyright © 2005 Intel Corporation.
* Other names and brands may be claimed as the property of others.
TA-788-3
Date:June 27, 2006
Advertisement
Table of Contents

Related Manuals for Intel SR870BN4


Summary of Contents for Intel SR870BN4
- Page 1 The Itanium® 2 Processor 9000 Sequence requires a particular BIOS and firmware version. A special process is needed in order to upgrade from the Intel® Itanium® 2 Processor with up to 9MB or 6MB L3 Cache. This Technical Advisory documents the process required to perform this upgrade.
- Page 2 7. Unlatch the fasteners by pulling them in the direction of the arrow. Copyright © 2005 Intel Corporation. * Other names and brands may be claimed as the property of others.
- Page 3 3. Lift the power pod out of the system. Figure 3. Removing the Power Pods Copyright © 2005 Intel Corporation. * Other names and brands may be claimed as the property of others.
- Page 4 Do not apply force. Once the processor is in the socket, gently press the processor to verify the processor has seated properly. Copyright © 2005 Intel Corporation. * Other names and brands may be claimed as the property of others.
- Page 5 8. Connect one side of the Y-cable to the MVR and verify that the Y-cable connects to all installed MVRs. See letter “E” in the figure below. Copyright © 2005 Intel Corporation. * Other names and brands may be claimed as the property of others.
- Page 6 4. Push in and lift up on the uniform levers to engage the catches (reverse of figure illustrating release of uniform levers). Copyright © 2005 Intel Corporation. * Other names and brands may be claimed as the property of others.
- Page 7 The system will automatically reboot. 4. Remove the CD-ROM. 5. Restore the BIOS setup and the Boot Manager Settings. Please contact your Intel Sales Representative if you require more specific information about this issue. Enterprise Platforms & Services Division Intel Corporation Copyright ©...
Need help?
Do you have a question about the SR870BN4 and is the answer not in the manual?
Questions and answers