Table of Contents
Advertisement
Operating Instructions
Digital Video Camcorder
PV-GS33
Model No.
Before attempting to connect, operate or adjust this product,
please read these instructions thoroughly.
Spanish Quick Use Guide is included.
Guía para rápida consulta en español está incluida.
Mini
For USA assistance, please call: 1-800-211-PANA(7262) or, contact us via the web at: http://www.panasonic.com/contactinfo
LSQT0833 A
Advertisement
Table of Contents

Related Manuals for Panasonic Palmcorder Multicam PV-GS33


Summary of Contents for Panasonic Palmcorder Multicam PV-GS33
-
Page 1: Operating Instructions
Before attempting to connect, operate or adjust this product, please read these instructions thoroughly. Spanish Quick Use Guide is included. Guía para rápida consulta en español está incluida. Mini For USA assistance, please call: 1-800-211-PANA(7262) or, contact us via the web at: http://www.panasonic.com/contactinfo LSQT0833 A... -
Page 2: Safety Precautions
Things You Should Know Thank you for choosing Panasonic! You have purchased one of the most sophisticated and reliable products on the market today. Used properly, we’re sure it will bring you and your family years of enjoyment. Please take time to fill in the information on the right. - Page 3 Panasonic Model No.: PV-GS33 Responsible party: Matsushita Electric Corporation of America One Panasonic Way, Secaucus, NJ 07094 Support Contact: Panasonic Consumer Electronics Company 1-800-211-PANA (7262) This device complies with Part 15 of the FCC Rules. Operation is subject to the following two conditions: (1)This device may not cause harmful interference, and (2) this device must accept any interference received, including interference that may cause undesired operation.
-
Page 4: Important Safety Instructions
IMPORTANT SAFETY INSTRUCTIONS 1) Read these instructions. 2) Keep these instructions. 3) Heed all warnings. 4) Follow all instructions. 5) Do not use this apparatus near water. 6) Clean only with dry cloth. 7) Do not block any ventilation openings. Install in accordance with the manufacturer’s instructions. 8) Do not install near any heat sources such as radiators, heat registers, stoves, or other apparatus (including amplifiers) that produce heat. - Page 5 Precautions USE & LOCATION WARNING ≥TO AVOID SHOCK HAZARD ... Your Camcorder and power supply should not be exposed to rain or moisture. Do not connect the power supply or operate your Camcorder if it gets wet. Your Camcorder has been designed for outdoor use, however it is not designed to sustain direct exposure to water, rain, sleet, snow, sand, dust, or a direct splashing from a...
- Page 6 Before opening the CD-ROM package (optional), please read the following. End User License Agreement (for USB Driver, WebCam Driver and DV STUDIO) You (“Licensee”) are granted a license for the Software defined in this End User Software Agreement (“Agreement”) on condition that you agree to the terms and conditions of this Agreement. If Licensee does not agree to the terms and conditions of this Agreement, promptly return the Software to Matsushita Electric Industrial Co., Ltd.
-
Page 7: Table Of Contents
Contents Before Use Quick Guide... 8 Standard Accessories... 10 Controls and Components... 10 The Remote Controller ... 13 Power Supply ... 14 Charging Time and Available Recording Time ... 14 The One-touch Free Style Grip Belt ... 15 Attaching the Lens Cap ... 15 Attaching the Shoulder Strap... -
Page 8: Before Use
Quick Guide Attach the Battery to the AC Adaptor and charge it. ≥Before use, fully charge the Battery. ≥Since the Battery will not be charged when the DC Cable is connected to the AC Adaptor, disconnect it from the AC Adaptor. ≥The [CHARGE] Lamp lights up, and charging starts. - Page 9 ª Playing Back a Tape Set the [OFF/ON] Switch 1 to [ON]. ≥The [POWER] Lamp 2 lights up. POWER Set the Mode Dial to Tape Playback Mode. Press the [6] Button to rewind the tape. STILL ENTER FADE Press the [1] Button to start playback. STILL ENTER FADE...
-
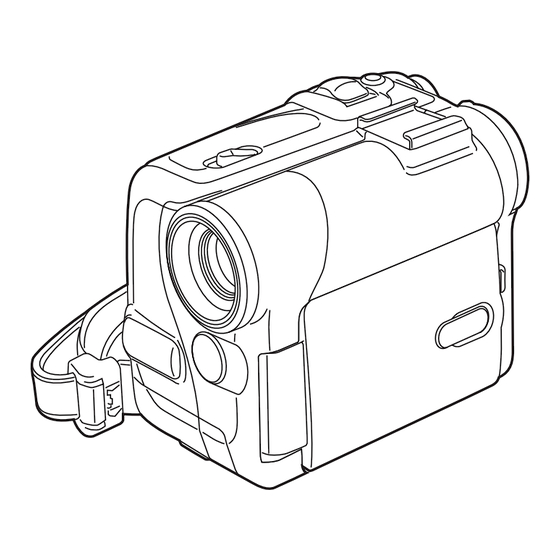
Page 10: Standard Accessories
Before Use Standard Accessories Illustrated are accessories supplied with the Camcorder. PV-DAC14D K2GJ2DZ00017 CR2025 CGA-DU07 VGQ7304 VGQ7697 K2KC4CB00009 VFC3506 AY-DVM60EJ 1) AC Adaptor, DC Cable and AC Cable CAUTION: This unit will operate on 110/120/220/240 V AC. An AC plug adaptor may be required for voltages other than 120 V AC. - Page 11 (22) Eyecup (23) Power LCD Button [POWER LCD] Power LCD Lamp -17- (24) (25) (26) S-VIDEO (27) (28) REMOTE/MIC A/V OUT PHONES (PLUG IN POWER) (30) (31) (32) (24) Cassette Holder (25) Cassette Compartment Cover (26) Speaker -32- (27) USB Jack [ -41- (28) S-Video Output Jack [S-VIDEO OUT]...
-
Page 12: Remote Controller
ª Remote Controller Using the wireless Remote Controller that is supplied with the Camcorder, most of the Camcorder functions can be operated from a distance. (50) START/ DATE/ PHOTO STOP (51) TIME SHOT DISPLAY RESET TITLE ZOOM (52) MULTI/ ¥ A.DUB P-IN-P (53) -
Page 13: The Remote Controller
Never put Button-Type battery in mouth. If swallowed, call your doctor. Before Use Replace battery with Panasonic PART NO. CR2025 only. Use of another battery may present a risk of fire or explosion. Caution: Battery may explode if mistreated. -
Page 14: Power Supply
Camcorder to [OFF] and make sure that [POWER] Lamp is not lit. ª Using the Battery Before use, fully charge the Battery. ≥We recommend using a Panasonic Battery. ≥We cannot guarantee the quality of this Camcorder when batteries from other companies are used. -
Page 15: The One-Touch Free Style Grip Belt
The One-touch Free Style Grip Belt ª To Use as a Grip Belt Adjust the length of the Grip Belt to the size of your hand. Detach the end of the Grip Belt. Adjust the length of the Grip Belt to the size of your hand. -
Page 16: Attaching The Shoulder Strap
Attaching the Shoulder Strap We recommend that you attach the Shoulder Strap before going out to avoid dropping the Camcorder. Pull the end of the Shoulder Strap through the Shoulder Strap Holder Camcorder. Fold the end of the Shoulder Strap, run it through the Shoulder Strap Length Adjuster, and pull it. -
Page 17: Using The Viewfinder/Lcd Monitor
Using the Viewfinder/LCD Monitor ª Using the Viewfinder Before using the Viewfinder, adjust the field of view so that the displays inside the Viewfinder become clear and easy to read. Pull the Viewfinder. Adjust by turning the Eyepiece Corrector (34) Knob (34) To Use the Viewfinder at the Same Time as the... -
Page 18: Using The Menu Screen
Using the Menu Screen To facilitate the selection of a desired function or setup, this Camcorder displays various function setups on Menus. ≥When operating the menu with the Viewfinder, set [LCD/EVF] >> [EVF ON/AUTO] >> [ON] or rotate the LCD monitor by 180o. Press the [MENU] Button STILL ENTER... - Page 19 [C.RESET] Counter Reset -57- ≥It resets the counter to zero. However, it cannot reset the Time Code. 5) [LCD/EVF] LCD/EVF Setup Sub-Menu [LCD/EVF SET] LCD and Viewfinder Adjustment [SELF REC] Recording Yourself -23- [EVF ON/AUTO] Using the Viewfinder -17- 6) [INITIAL] Initial Setup Sub-Menu [BLANK SEARCH] Blank Search...
-
Page 20: Setting Date And Time
Setting Date and Time Since the internal clock of the Camcorder has a slight imprecision make sure to check the time before recording. STILL ENTER FADE (14) MENU Set [TAPE RECORDING MENU] >> [INITIAL] >> [CLOCK SET] >> [YES]. CLOCK SET 1 YEAR :2004 MONTH :JUL... -
Page 21: Recording Mode
Recording Mode About Recording When recording pictures on a tape, set the Mode Dial to Tape Recording Mode [ When recording with the [AUTO/MANUAL/FOCUS] Switch [AUTO], the Camcorder automatically adjusts the focus and white balance. In some cases, they cannot be adjusted automatically and need to be adjusted manually. -
Page 22: Photoshot
ª Finding the End of Recording (Blank Search Function) The Blank Search Function aids you in locating the end of the recording on the Cassette quickly. Set [TAPE RECORDING MENU] or [TAPE PLAYBACK MENU] >> [INITIAL] >> [BLANK SEARCH] >> [YES]. STILL ENTER FADE... -
Page 23: Quick Start
ª Recording Yourself By opening the LCD Monitor and rotating it forward (to the lens side), you can let the subject in front of the Camcorder monitor the shot while recording is in progress. ≥When the LCD Monitor is opened, the Viewfinder is disabled automatically. -
Page 24: Digital Zoom Function
ª To Take Close-up Shots of Small Subjects (Macro Close-up Function) When the zoom magnification is 1k, the Camcorder can focus on a subject that is as close as approximately 1.6 inches (4 cm) from the Lens. Small subjects like insects can be recorded with this function. -
Page 25: Fade In/Out Functions
Press the Recording Start/Stop Button or [PHOTO SHOT] Button recording. (35) PHOTO SHOT (41) To Cancel Image Stabilizer Function Set [TAPE RECORDING MENU] >> [CAMERA] >> [EIS] >> [OFF]. ≥For other notes concerning this item, see Fade In/Out Functions Fade In Fade In brings out images and sounds gradually from a black screen at the beginning of a scene. -
Page 26: Magicpix Functions
MagicPix Functions MagicPix Function This function allows you to record color images brightly in a dark place without using the Video Flash. Press the [MAGICPIX] Button [MAGICPIX] Indication appears. MAGIC 0 Lux MagicPix Function Using the LCD Monitor light, a dark scene of almost 0 lux can be recorded. -
Page 27: Cinema Function
Cinema Function This function is for recording a cinema-like image. Set [TAPE RECORDING MENU] >> [RECORDING] >> [CINEMA] >> [ON]. STILL ENTER FADE (14) MENU ≥Black bars appear at the top and bottom of the screen. CINEMA To Cancel the Cinema Mode Set [TAPE RECORDING MENU] >>... -
Page 28: Adjusting White Balance Manually
1) Automatic White Balance Adjustment [AWB] 2) The white balance setting that was previously set manually [1] 3) Outdoor Mode [z] 4) Indoor Mode (recording under incandescent lamp) [{] To Resume Automatic Adjustment Press the [5] Button (10) or [6] Button until the [AWB] Indication appears. -
Page 29: Manual Shutter Speed Adjustment
Manual Shutter Speed Adjustment Useful for recording fast-moving subjects. Set the [AUTO/MANUAL/FOCUS] Switch (44) to [MANUAL]. (44) AUTO MANUAL FOCUS ≥The [MNL] Indication appears. Press the [ENTER] Button Shutter Speed Indication appears. STILL (11) ENTER FADE (10) Press the [5] Button (13) to adjust the shutter speed. -
Page 30: Digital Effect Functions
Digital Effect Functions This Camcorder is equipped with Digital Effect Functions that add special effects to the scene. Digital Effects 1 [EFFECT1] 1) MULTI 2) P-IN-P 4) MIX 5) STROBE 7) MOSAIC 8) MIRROR 10) SLIM 1) Multi Mode [MULTI] 2) Picture-In-Picture Mode [P-IN-P] 3) Wipe Mode [WIPE] 4) Mix Mode [MIX]... -
Page 31: Picture-In-Picture Mode
Deleting All the Captured Multi-Pictures While 9 multi-pictures are displayed, press the [MULTI] Button. ≥If [MANUAL] has been selected, press the [MULTI] Button after 9 pictures are displayed. To Display the Multi-Pictures Again Press the [MULTI] Button for 1 second or longer. To Delete Multi-Pictures One by One (When pictures were captured in [MANUAL]) When the [MULTI] Button is pressed for 1 second... -
Page 32: Playback Mode
Playback Mode Playing Back a Tape The recorded scene can be played back immediately after the recording. (42) Set the [OFF/ON] Switch ≥The [POWER] Lamp (43) (42) POWER (43) Set the Mode Dial (39) to Tape Playback Mode. (39) Press the [6] Button (13) tape. -
Page 33: Slow Motion Playback
ª Variable Speed Search Function The speed of Cue Playback or Review Playback can be varied. During playback, press the [1] Button ≥The [1k!] Indication appears. (11) STILL ENTER FADE (36) Push the [W/T] Lever search speed. VOL/JOG (36) The following 6 playback speeds are available for the Variable Speed Search Function in both the fast-forwarding and rewinding directions: 1/5k (slow playback in SP Mode only), 1/3k... -
Page 34: Index Search Functions
Index Search Functions To facilitate searching for desired scenes, this Camcorder automatically records index signals during recording, as explained in the following. Photoshot Index Signal These signals are automatically recorded whenever still pictures are taken in Photoshot Mode ( ). Photoshot Index Signals are not -22- recorded on still pictures recorded in Continuous Photoshot Mode. -
Page 35: Playback Digital Effect Functions
To Change the Zoom Magnification Change the magnification by pressing the [W] Button or [T] Button (62) Controller. DATE/ PHOTO TIME SHOT DISPLAY RESET TITLE MULTI/ ¥ A.DUB P-IN-P /REW PLAY To Change the Enlarging Area of an Image Press the Arrow Button (π, ∑, ∏, ∫) on the Remote Controller that points to the area you want to enlarge. -
Page 36: Playing Back On Your Tv
Playing Back on Your TV By connecting your Camcorder with your TV, the recorded scenes can be viewed on your TV screen. ≥Before connecting them, turn off the power of both the Camcorder and TV. Connect the [A/V OUT] Jack of the Camcorder and the Video and Audio Input Jacks of the TV. -
Page 37: Editing Mode
Editing Mode Audio Dubbing You can add music or narration to the recorded Cassette. ≥If the tape recorded in the [16bit] Mode is dubbed with the Audio Dubbing function, the original sound is erased. (If you wish to preserve the original sound, use the [12bit] Mode when recording.) ≥Audio Dubbing cannot be performed on a recording made in LP Mode. -
Page 38: Using The Dv Cable For Recording
Using the DV Cable for Recording (Digital Dubbing) By connecting this Camcorder with other digital video equipment (such as another Camcorder of the same format/model) that has a DV input/output terminal, and using a 4-pin to 4-pin DV Interface cable PV-DDC9 (optional) 1, high quality images and sounds can be dubbed in the digital mode. -
Page 39: With A Pc (Optional)
With a PC (optional) Using the Software with a Computer Following Software is not supplied with the Camcorder; ≥LSFT0577 (DV STUDIO 3.1E-SE) ≥K1HA05CD0005 (USB Cable) An image stored on the DV Cassette can be transferred to your Personal Computer. If you would like to order, please refer to page ª... -
Page 40: Using As A Web Camera
≥A message indicating a conflict between versions may be displayed during the installation. This will not cause a problem. Simply click [Yes] to proceed with the installation. ≥Depending on the OS version, illustrations and icon names may vary. Windows 98SE/Me Users The following messages may be displayed when connecting this Camcorder and your personal computer via USB Cable. -
Page 41: Web Camera
To use the Camcorder as a Web Camera, the following conditions must be met. ≥To upgrade Windows XP to SP1, click [Start] >> [All Programs] >> [Windows Update]. (Requires internet connection.) ≥You have direct dial-up connection capability to the Internet. Also, you and the other person(s) are in the same Network (LAN). - Page 42 [Tools] menu to confirm that equipment is connected correctly. Click [Web Camera Settings...] in the [Tools] menu. Confirm the [Panasonic DVC Web Camera Device] is selected. ≥For other information about MSN Messenger, please refer to Help. ≥When access is finished, close MSN Messenger, then turn off the Camcorder.
-
Page 43: Using The Dv Studio 3.1E-Se (Optional Software)
Please install Adobe Acrobat Reader from the CD-ROM (Optional Software). ≥Before using for the first time, select [Readme] from [Start] >> [All programs (Programs)] >> [Panasonic] >> [DV Studio3], and read any supplementary details or updates. With a PC (optional) ª Installation of DV STUDIO 3.1E-SE... -
Page 44: If You No Longer Need Software Or Driver (Uninstall)
Connect the Camcorder to your personal computer with USB Connection Cable. Select [Start] >> [All Programs (Programs)] >> [Panasonic] >> [DV Studio3] >> [DV Studio3]. ≥If a shortcut icon has been created on the desktop during installation, it is also possible to start by double-clicking on the icon. - Page 45 ≥If you install the USB Driver after the USB Cable is connected, or if you do not follow these Operating Instructions, the Camcorder will not be recognized correctly. In this case, delete the USB Driver from [Device Manager] as described below, uninstall the USB Driver, and re-install it.
-
Page 46: Others
Others Indications Various functions and the Camcorder status are shown on the screen. Remaining Battery Power ≥When the battery power becomes low, the Indication changes. When the battery is discharged completely, the u (v) Indication flashes. R0:45: Remaining Tape Time ≥Remaining tape time is indicated in minutes. -
Page 47: Initializing The Modes
ª To Display Date/Time Indication To display Date/Time Indication, set the appropriate Date/Time in [DATE/TIME] on the [DISPLAY] Sub-Menu. ( -18- You can also press the [DATE/TIME] Button of the Remote Controller repeatedly to display or change the Date/Time Indication. ª... -
Page 48: Recording Check
ª Alarm Sounds When [BEEP SOUND] on the [INITIAL] Sub-Menu on the [TAPE RECORDING MENU] is set to [ON], confirmation/alarm beeps are issued as follows. 1 Beep ≥When you start recording ≥When you switch the [OFF/ON] Switch from [OFF] to [ON] 2 Beeps ≥When you pause recording 2 Beeps for 4 times... -
Page 49: White Balance
ª MagicPix Functions ≥In a bright place, such as outdoors, the recorded picture may become whitish. ≥In a dark place, the recorded picture is presented in a time-lapse-like manner. ≥Adjust the Focus manually. ≥The Progressive Photoshot Function is automatically turned off. ≥White Balance cannot be set. -
Page 50: Playing Back
≥Because the color and brightness of the playback image may become unstable, avoid recording under fluorescent light, mercury light or sodium light. ≥If you are using MagicPix Mode ( Program AE Mode ( ), you cannot adjust the -27- shutter speed. ª... -
Page 51: Cautions For Use
≥If a tape has a non-recorded portion when the tape is dubbed, images and sounds may be disturbed when this portion of the tape is played back. ≥If you set the tape counter back to 0 at the position where you want to stop Audio Dubbing so as to make it possible to use the Memory Stop Function ( ), Audio Dubbing is... - Page 52 When you use your Camcorder on a beach or similar place, do not let sand or fine dust get into the Camcorder. ≥Sand or dust may damage the Camcorder or Cassette. (Care should be taken when inserting and removing the Cassette.) Do not spray insecticides or volatile chemicals onto the Camcorder.
-
Page 53: Optimal Use Of The Battery
ª Video Head Clogging and Care If the heads (the parts that make contact with the tape) are dirty, mosaic-pattern noise may appear on the playback image, or the screen as a whole becomes black. If the heads are extremely dirty, recording performance deteriorates, and, in the worst case, the Camcorder cannot record at all. - Page 54 Battery ≥Extremely high temperatures or low temperatures will shorten the life of the Battery. ≥If the Battery is kept in smoky or dusty places, the terminals may rust and cause malfunctions. ≥Do not allow the Battery terminals to come in contact with metal objects (such as necklaces, hairpins, etc.).
-
Page 55: Before Requesting Service (Problems And Solutions)
Before Requesting Service (Problems and Solutions) Power 1: The Camcorder power cannot be turned on. • Is the power source connected correctly? ( 2: The Camcorder power is turned off automatically. ≥When the Recording Pause Mode continues for more than 5 minutes, the power is turned off automatically for tape protection and power conservation. -
Page 56: Explanation Of Terms
4: Playback picture is not clear. • Are the heads of the Camcorder dirty? If the heads are dirty, playback image cannot be clear. ( -53- 5: Playing back or recording do not function, the screen has frozen or the indication has disappeared. -
Page 57: Time Code
5) Recording a fast-moving subject ≥Because the focus lens-inside moves mechanically, it cannot keep up with the fast-moving subject. 6) Recording a subject with little contrast ≥Because the Camcorder achieves focus based upon the vertical lines of an image, a subject with little contrast, such as a white wall, may become blurry. -
Page 58: Specifications
Specifications Digital Video Camera Information for your safety Power Source: DC 7.9/7.2 V Power Consumption: Recording 5.0 W Recording Format: Mini DV (Consumer-use Digital Video SD Format) Tape Used: 6.35 mm digital video tape Recording/Playback Time: SP: 80 min.; LP: 120 min. (with DVM80) Video Recording System: Digital Component... -
Page 59: Camcorder Accessory System
Camcorder Accessory System Accessory# PV-DAC13 *CGA-DU07 *CGA-DU14 *CGA-DU21 PV-DDC9 PV-DRC10 N2QCBD000030 LSFT0577 K1HA05CD0005 PV-H150 PV-HB002 *Please refer to page , concerning the battery charging time and available recording time. -14- *NOTE: Accessories and/or model numbers may vary by country. Please consult your local dealer. -
Page 60: Camcorder Accessory Order Form
VISIT YOUR LOCAL PANASONIC DEALER CALL PANASONIC’S ACCESSORY ORDER LINE AT 1-800-332-5368 [6 AM-5 PM M-F, 6 AM-10:30 AM SAT, PACIFIC TIME] MAIL THIS ORDER TO: PANASONIC SERVICES COMPANY ACCESSORY ORDER OFFICE Others P rice Each Your State & Local Sales Tax Shipping &... -
Page 61: Request For Service Notice
(Failure to do so will delay your repair.) • To further speed your repair, please provide an explanation of what wrong with the unit and any symptom it is exhibiting. Panasonic Services Company 1705 N. Randall Road Elgin, IL. 60123-7847 Attn: Camcorder Repair... -
Page 62: Limited Warranty
If your product does not work properly because of a defect in materials or workmanship, Panasonic Consumer Electronics Company or Panasonic Sales Company (collectively referred to as “the warrantor”) will, for the length of the period indicated on the chart below, which starts with the date of original purchase (“warranty period”), at its option either (a) repair your product with new or refurbished... -
Page 63: Customer Services Directory
1-800-211-PANA (7262), Monday-Friday 9 am-9 pm; Saturday-Sunday 10 am-7 pm, EST For hearing or speech impaired TTY users, TTY : 1-877-833-8855 Purchase Parts, Accessories and Instruction Books online for all Panasonic Products by visiting our Web Site at: http://www.pasc.panasonic.com or, send your request by E-mail to: npcparts@panasonic.com... -
Page 64: Index
Index ª A AC Adaptor ... 14, 52 Audio Dubbing ... 37 Auto Focus ... 56 ª B Backlight Compensation ... 25 Black & White Mode ... 30 Blank Search ... 22 ª C Camcorder Accessory Order Form ... 60 Camcorder Accessory System ... -
Page 65: Spanish Quick Use Guide/Guía Española Para El Uso Rápido
Spanish Quick Use Guide/ Guía española para el uso rápido Una la batería al adaptador de CA y cárguela. ≥Antes de usar, cargue completamente la batería. ≥Dado que la batería no se cargará cuando el cable de entrada CC está conectado al adaptador de CA, desconéctelo. - Page 66 ª Reproducción de una cinta Ponga el interruptor [OFF/ON] 1 en [ON]. ≥La lámpara [POWER] 2 se enciende. POWER Ajuste el disco del modo al de la reproducción de cinta. Oprima el botón [6] para rebobinar la cinta. STILL ENTER FADE Oprima el botón [1] para comenzar la reproducción.
- Page 67 -67-...
- Page 68 Executive Office: One Panasonic Way, Secaucus, NJ 07094 (201) 348-7000 Panasonic Company East: 6749 Baymeadow Drive, Glen Burnie, MD 21060 Panasonic Company Central: 1707 North Randall Road, Elgin, IL 60123 Panasonic Company West: 6550 Katella Avenue, Cypress, CA 90630 Division of Matsushita Electric Corporation of America Panasonic Sales Company (“PSC”)
Need help?
Do you have a question about the Palmcorder Multicam PV-GS33 and is the answer not in the manual?
Questions and answers