Table of Contents
Advertisement
Quick Links
Advertisement
Table of Contents

Related Manuals for Dennis E Series


Summary of Contents for Dennis E Series
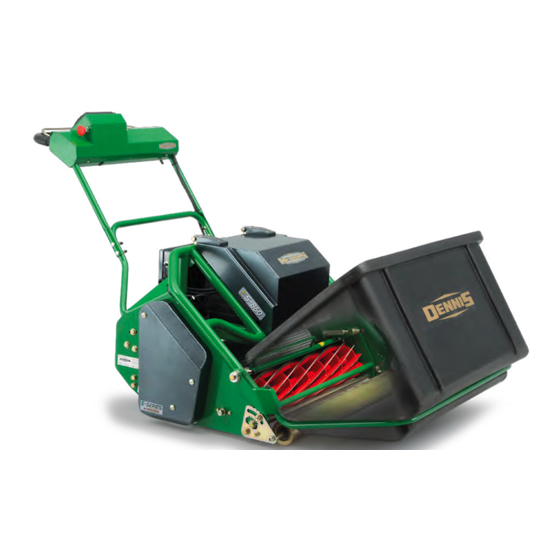
- Page 1 ES-860 / ES-760 ELECTRIC CASSETTE MOWER INSTRUCTION MANUAL SP20057_REV1.0...
-
Page 2: Table Of Contents
GRASS BOX GUARDS DECALS CUTTER CASSETTE VERTICUTTER CASSETTE SCARIFIER CASSETTE BRUSH CASSETTE SORREL ROLLER CASSETTE SPRING TINE CASSETTE NOTICE OF COPYRIGHTS AND PROPERTY RIGHTS ● K eep this operating manual confidential. ● O nly make this operating manual accessible to authorized persons. ● O nly pass this operating manual to third parties after obtaining written permission from DENNIS. ● All documents are protected under the Copyright Act. Passing on and reproducing documents, including excerpts, and exploiting and sharing the contents of documents is prohibited unless expressly approved in writing. ● Violations are punishable and subject to compensation of damages. DENNIS reserves the right to exercise any and all industrial property rights. SP20057_REV1.0... -
Page 3: Certificate Of Conformity
MAKE A NOTE OF THE SERIAL NUMBER OF YOUR MACHINE AND ALWAYS Ashbourne Road, Kirk Langley, Derbyshire, DE6 4NJ, England Tel: +44 (0) 1332 824 777 QUOTE IT IN ANY COMMUNICATION WITH PERSONNEL AT DENNIS. A division of Howardson Ltd – a proudly British company www.dennisuk.com www.sisis.com... -
Page 4: Important Safety Instructions
IMPORTANT SAFETY INSTRUCTIONS CAUTION:- READ THE INSTRUCTIONS. We want you to obtain the best performance from this machine. If you have any difficulty in carrying out the following instructions please contact your local DENNIS dealer. TRAINING ● Be familiar with the controls and the proper use of the equipment. ● Never allow children or people unfamiliar with these instructions to use the mower. Local regulations or insurance may restrict the age of the operator. ● Never mow while people, especially children, or pets are near by. ● Keep in mind that the operator or user is responsible for accidents or hazards occurring to the other people or their property. PREPARATION ● Thoroughly inspect where the equipment is to be used and remove all stones, sticks, wire, bones and other foreign objects. ● Before using the machine always inspect the safety devices, including the emergency cut-off switch, as well as checking the blades for excessive wear or damage. Replace if necessary. ● While mowing always wear substantial footwear and long trousers. Do not operate the mower barefoot or in open sandals. ● In dry, dusty or windy conditions it may be necessary to wear eye protection to protect your eyes from flying debris. OPERATION ● Mow only in daylight or good artificial light. ● Avoid operating the machine in wet grass where feasible. ● Always be sure of your footing on slopes. -
Page 5: Introduction
INTRODUCTION This operating manual is an essential tool to ensure the proper and safe operation of the ES-860 Electric Cassette Mower. This user manual contains important information regarding the safe, proper and efficient operation of the ES-860. Adherence to this manual will help to avoid risk, lower repair costs and reduce downtimes while simultaneously increasing the service life of the ES-860 itself. The operating manual must always be available, and every person tasked with working on or with the ES-860 must read and follow the instructions. In the case of any difficulty, or if further information or advice is required, our Service Department is always at your call. In the interests of speed and accuracy of information please quote the serial numbers of the machine when making enquiries. For the machine, this is to be found on a plate attached to the side of the chassis. We suggest you write the numbers on the front page of this book. MACHINE DESCRIPTION Manufactured with 34” (86cm) cutting width this machine is run by a pair of 48V high efficiency brushless permanent magnet AC motors powered from an 111 Ah lithium ion battery. The rear roller and cutter are controlled independently via belt drives operated from the display screen on the upper handle bar. A mechanical parking brake is fitted for added safety when working around uneven ground, when applied this disengage drive to both motors for added safety. In the design of the machine, special attention has been given to the importance of easy service and maintenance with the construction based on a sectional assembly system. These are the Electrical Drive system, the Rear Roller Unit and the Front Roller Unit, each of which can be readily removed individually from the main Frame Chassis Unit. The interchangeable cassette system allows a variety of cassettes to be used for varying applications. Dennis 860 cassette are interchangeable between the ES-860 & G-860 (petrol machine). SP20057_REV1.0... -
Page 6: Technical Data
TECHNICAL DATA ES-860 DIMENSIONS 1010 1110 - WIDTH (mm) 1860 - LENGTH with Grass Box (mm) 1340 - LENGTH without Grass Box (mm) 1100 - HEIGHT (mm) WEIGHT with Cutting Cassette (Kg) WEIGHT without Cassette (Kg) Cutting Width 760MM / 30” 860mm / 34” DRIVE SYSTEM Roller Motor (W) Roller Drive System Timing Belt Cylinder Motor (W) 1200 Cylinder Drive System Multi V belt ELECTRICAL SYSTEM Battery Type Lithium Ion System Voltage Battery Capacity (Ah) Self Discharge @ 25 °C < 2% per month SP20057_REV1.0... - Page 7 NUMBER PART NUMBER PART Electrical Box Belt Guards Battery Cover Mechanical Hand Brake Roller Motor Cutting Height Adjuster Cylinder Motor Cassette Retaining Bolt Cassette Grass Box Bottom Blade Adjustment Knob Handle Bar Adjusters NUMBER PART NUMBER PART Key Switch Deadman’s Handle Display Screen Start Button Emergency Stop SP20057_REV1.0...
-
Page 8: Controls
CONTROLS FOR THE LOCATION OF CONTROLS AND COMPONENTS REF “MACHINE DESCRIPTION” & ‘TECHNICAL DATA’ PAGES. BE FAMILIAR WITH THE CONTROLS AND THE PROPER USE OF THE EQUIPMENT BEFORE STARTING. KEY SWITCH & START BUTTON (ITEM 13 & 17) This switch cuts power to the electrical components and can be used to do so at any time during the operation of the machine. See basic operations page for more information DEADMANS CONTROLS (ITEM 16) This is an operator presence control. This must be depressed before the drive and cylinder motors will engage. Releasing the handle during operation will cut power to both motors. -
Page 9: Basic Screen Controls
When in DRIVE or REVERSE TRIP DISTANCE TRIP TIME SELECTED CLIP RATE or RPM 09:33 23 SEPT 2020 5.5 KM KM/H 135 MIN DENNIS NO.1 KM/H MENU Enter MENU BATTERY LEVEL KM/H KM/H DRIVE - To operate mower Turning Speed Turn ON / OFF... -
Page 10: Screen Menu
SCREEN MENU SP20057_REV1.0... - Page 11 ROLLER SPEED DRIVE SELECT 5.5 KM DRIVE / NEUTRAL / PARK / REVERSE KM/H 135 MIN SPEED DOWN (0.1) SELECTION DOWN DENNIS NO.1 KM/H MENU ACTIVATE TURNING SPEED TRIP STATISTICS MAIN MENU (DISTANCE COVERED / TIME RUN) & RATE SELECTED...
- Page 12 EDIT CLIPS PER METRE / VIEW AND RESET LOGS NAME / ADD NOTES ES-860 DISTANCE / TIME / CHARGE Serial No. - ES8600001 DENNIS NO.1 RESETTABLE TRIP & LIFETIME EDIT RPM RATES READOUTS EDIT RPM RATES FOR BRUSHES & CUTTERS BATTERY &...
- Page 13 BUTTON SELECTION MAINTENANCE SCREEN SCREEN INFO MAINTENANCE SCREEN. SELECT AND SIGN OFF DAILY / WEEKLY & YEARLY CHECKS. BACKLAPPING (REVERSE CYLINDER) IN MONTHLY CHECKS. RETURN TO HOME RETURN TO MAIN SCREEN MENU SCREEN DAILY CHECKS Last Completed GIVES LIST OF CHECKS. 24/10/2019 LOG AS COMPLETE LAST DATE COMPLETED.
- Page 14 BUTTON SELECTION INFORMATION SCREEN SCREEN INFO INFORMATION SCREEN. VIEW SELECT MANUAL PAGES, FREQUENTLY ASKED QUESTIONS AND DENNIS CONTACT DETAILS. RETURN TO HOME RETURN TO MAIN SCREEN MENU SCREEN MANUAL INFO KEY MANUAL PAGES / INFO Machine type - ES-860 Program No. - SP27002_REV2.21...
-
Page 15: Wiring
E-SERIES MACHINE WIRING 10. WIRING HYPERDRIVE - HYP-00-2890 CONNECTED TO - HANDLE CONTROLLER HANDLE WIRING HARNESS HARNESS (SP12108) (SP12107) PARKING BRAKE MICROSWITCH ELECTRICAL BOX TOP 800253A 106 MOTOR - GEARBOXED CYLINDER 103 MOTOR - DRIVE ROLLER DRIVE (SP15104) (SP15102) NODE 1 BATTERY (SP12126) SP19031_REV2 - 09/09/2021 SP20057_REV1.0... - Page 16 E-SERIES MACHINE WIRING HYPERDRIVE - HYP-00-2890 ELECTRICAL BOX TOP 800253A ATTENTION: Refer to Manual ATTENZIONE: Riferirsi al Manuale ATTENTION: Se référer au Manuel VORSICHT: Siehe Handbuch ATENCIÓN: Referirse al Manual OPGELET: Naar het Handboek PARKING BRAKE MICROSWITCH HANDLE WIRING HARNESS E-STOP (SP12107) DISPLAY PV450...
-
Page 17: Charging
11. CHARGING E-SERIES CHARGING INFO Follow charging instruction shown below - PLUG CHARGER (D153) INTO WALL/POWER SUPPLY. MAKE SURE DISPLAY/LIGHTS ARE ILLUMINATED TO BE SURE OPEN CHARGING COVER ON ELECTRICAL BOX AND POWER IS LIVE TO CHARGER CONNECT CHARGER INTO MOWER Hyperdrive Cell START BUTTON CHARGER SOLID LARGE RED LIGHT TO INDICATE CHARGING. -
Page 18: Frequently Asked Questions
Contact Dennis or your dealer if you have changed and forgotten your password. They can talk you through resetting your password. FAQ section also available within the ‘Information’ section ->... -
Page 19: General Adjustments
13. GENERAL ADJUSTMENTS SETTING FOR HEIGHT OF CUT Item 1 Always stop the engine before adjusting the height of cut. Failure to do this may result in serious injury. The length of grass after cutting and the depth of SCARIFICATION / DETHATCHING / BRUSHING, depends on the setting of the front roller in relation to the main frame of the machine. To set: ● Slacken the clamp nuts on the front roller quadrants (see image opposite) [19mm spanner] - Item 1 ● Rotate the quadrants using the toothed gear [19mm spanner], raising and lowering the machine. As a Item 2 guide, there are notches in the quadrant and holes in the side plate. Align these on both sides to level the machine. - Item 2 NOTE:- DO NOT ATTEMPT TO USE THE DETHATCHING CASSETTES OR BRUSH CASSETTES ON TOO LOW A SETTING AS THIS WILL RESULT IN DAMAGE TO... - Page 20 SETTING THE CYLINDER Item 1 Item 2 The Cylinder cassette can be set either in or out of the machine. To remove the cassette see following page. To set: ● Slacken 2-off lock nuts (Item 1) [19mm spanner] ● Rotate nut (Item 2) anti-clockwise to bring the blade towards the cylinder. ● Check the setting using thin paper along the length of the cylinder. ● Adjust until it cuts across the whole length. ● When set, tighten the lock nut (Item 1) ● Recheck adjustment. ● DO NOT set the cylinder hard to the bottom blade. ● This will cause excessive wear of both components and increase power consumption. HANDLEBAR ADJUSTMENT The “Handle Bars” are adjustable to achieve the correct working height for the operator. To set: ● Slacken off 6-off nuts (Item 1) ¼” turn [17mm spanner] ● Raise / lower the “Handle Bar” to the desired Item 1 position.
-
Page 21: Removing The Cassette Unit
14. REMOVING THE CASSETTE UNIT To remove the cassette unit for maintenance or to exchange cassettes the following procedure should be followed:- Item 1 1. Unscrew the bolt (Item 1) [24mm Spanner] for about half-an- inch (13mm) until the pip end is inside the nut on the side frame. 2. Slide the cassette unit along the tie bars as far as it will go until the cutter nut and coupling is clear of the three pins in the driving coupling. 3. Remove the unit from the chassis by lifting in a swinging motion from the back. -
Page 22: Routine Maintenance
ELECTRICAL HARNESSES Check cables are not split or damaged and plug connections are all fitted correctly. Damaged cables should be replaced before the machine is next operated. NOTE:- NEVER USE A MOWER WITH A DAMAGED BATTERY OR ELECTRICAL BOX. IF IN ANY DOUBT CONTACT YOUR DEALER OR DENNIS DIRECT. NOTE:- NEVER ATTEMPT ANY ELECTRICAL WORK. ANY ATTEMPT WILL VOID THE WARRANTY! 15. GENERAL LUBRICATION... -
Page 23: Storage
(Deep Discharge state). Regular monitoring and maintenance is essen�al for long storage or idle periods. Dennis will not be held responsible for damage due to neglect. Recommenda�ons to ensure maximum ba�ery life:... -
Page 24: Battery Care Information
E-SERIES BATTERY CARE 18. BATTERY CARE INFORMATION No hazards occur during the normal opera�on of a Ba�ery as it is described in the instruc�ons for use that are provided with the Ba�ery. Ba�ery modules are electrical devices that must be handled and used with care. - Page 25 E-SERIES BATTERY CARE LIMITED WARRANTY >85% capacity for minimum 2000 cycles when cycled to 100% DoD at50A at a cell temperature of 25°C. Devia�on from these condi�ons will be assessed on a case by case basis. See Hyperdrive website for further details. www.hyperdriveinnovation.com/ RETURN OF BATTERIES AT END OF LIFE Hyperdrive Innova�on as a producer of Industrial ba�eries can take back ba�eries free of charge at...
-
Page 26: Cassettes And Their Uses
19. CASSETTES AND THEIR USES ES-860 / G-860 Order reference number: D860 – D054-1 6 BLADE CYLINDER High quality British steel blades in a single spiral format. Incorporating easy to set cutter adjustment. Order reference number: D860 – D054-7 8 BLADE CYLINDER High quality British steel blades in a single spiral format. - Page 27 Order reference number: D860 – D054-2 VERTI-CUTTER 1mm thick 10 ngered replaceable discs. Regular use controls, thatch, lateral growth and the ingress of unwanted species such as annual meadow grass. Order reference number: D860 – D054-2TT VERTI-CUTTER TUNGSTEN TIPPED Gives extra durability for heavy usage. Order reference number: D860 –...
-
Page 28: Trouble Shooting
Check the ba�ery has not been fully drained. Plug the mower into the charger and power the machine on to see if the display starts up with the ‘On Charge Screen’ If the problem persists please contact your dealer or Dennis directly My screen powers on briefly then switches off... - Page 29 E-SERIES ELECTRICAL TROUBLE SHOOTING Check the mechanical brake has been disengaged (handle on the lower le�-hand side of the machine) Check the parking brake microswitch is being disengaged from the brake hammer under the le�-hand side guard My mower won’t operate and displays a ‘PLEASE HOLD DEADMAN HANDLE’ message My mower doesn’t disengage when I release the bail bar Check the bail bar is being held or fully released when a�emp�ng to operate Listen if you can hear the quiet ‘click’...
- Page 30 Check all three power cables to each motor are connected and the le�ers on the wires match those on the motor (U, V and U) If your problem isn’t referenced on this document or you are still having problems please contact your dealer or Dennis Mowers directly.
-
Page 31: 860 / Es-760 - Parts Book
21. ES-860 / ES-760 - PARTS BOOK SP20057_REV1.0... -
Page 32: Chassis Main Assembly
22. CHASSIS MAIN ASSEMBLY 17 26 21 4 3 28 17 28 26 SP20057_REV1.0... - Page 33 BA0067_REV1 TUBE BUNG (C3137) E1-1061_REV0 WASHER M6 SPRING E1-1065_REV0 WASHER M12 SPRING LOCK J20297_REV2 SERIAL NO PLATE (DENNIS) SP01008_REV0 HEX SET SCREW M6 X 16 SP01009_REV0 HEX SET SCREW M8 X 20 SP01035_REV0 HEX SET SCREW M10 X 25 SP01047_REV0...
-
Page 34: Electrical
23. ELECTRICAL SEE HANDLE WIRING FOR CONNECTIONS 2 18 18 REAR VIEW 5 9 7 ITEM NO. PART NUMBER DESCRIPTION QTY. 370154_REV0 HYPERDRIVE BATTERY RETAINER 800253_REV5 ES-34 CONFIGURATION F20384_REV1 CAP HEAD M8 X 25 SP01009_REV0 HEX SET SCREW M8 X 20 SP01045_REV0 HEX SET SCREW M8 X 25 SP02004_REV0... -
Page 35: Rear Roller
24. REAR ROLLER 6 7 8 ES-860 ITEM NO. PART NUMBER DESCRIPTION QTY. 800577_REV0 ES-860 REAR ROLLER ASSEMBLY 062662_REV1 BEARING 6205-2RS 3 229104_REV1 LANDROLL BEARING HOUSING 340034_REV0 ROLLER END SPACER F21884_REV0 KEY 8 X 7 X 35 SP01045_REV0 HEX SET SCREW M8 X 25 SP03008_REV0 WASHER M8 FORM A SP03029_REV0... - Page 36 CENTRE ROLLER INTERNAL DETAIL 14 15 SP20057_REV1.0...
- Page 37 ES-860 ITEM NO. PART NUMBER DESCRIPTION QTY. 016386_REV0 KEY WOODRUFF 3/16" X 7/8" 073445_REV0 KEY 3/16" X 3/16" X 1 1/2" RD END 195077_REV1 OIL SEAL HOUSING 195078_REV1 DIFFERENTIAL WHEEL 195079_REV1 DIFFERENTIAL PINION 195080_REV1 DOUBLE DIFFERENTIAL PINION 195094_REV1 PIVOT PIN 229451_REV2 DIFF SHAFT G860 229484_REV1...
-
Page 38: Roller Drive
25. ROLLER DRIVE 5 10 12 2 6 14 12 MOTOR ORIENTATION 10 11 13 8 SCREW TERMINALS ITEM NO. PART NUMBER DESCRIPTION QTY. 340037_REV0 PULLEY RETAINER 370096_REV0 TENSIONER BLOCK E1-1065_REV0 WASHER M12 SPRING LOCK F21884_REV0 KEY 8 X 7 X 35 SP01005_REV0 HEX SET SCREW M8 X 30 SP01023_REV0... -
Page 39: Mechanical Parking Brake
26. MECHANICAL PARKING BRAKE 18 13 2 11 10 31 ITEM NO. PART NUMBER DESCRIPTION QTY. 340135_REV0 MICROSWITCH MOUNT PLATE 340185_REV1 BRAKE DISC 340189_REV1 BRAKE SENSOR BRACKET 340195_REV2 BRAKE HAMMER W.A. 340197_REV0 BRAKE BUSH 340200_REV2 BRAKE CLAMP 370140_REV0 PARKING BRAKE PLATE 370141_REV0 BRAKE BAR 370142_REV0... -
Page 40: Cylinder Drive
27. CYLINDER DRIVE 14 18 21 13 11 28 12 MOTOR ORIENTATION 7 15 23 SCREW 18 20 22 17 TERMINALS 6 19 22 ITEM NO. PART NUMBER DESCRIPTION QTY. 062662_REV1 BEARING 6205-2RS 3 229302_REV1 DRIVE MALE COUPLING 229335_REV1 DRIVE GASKET 370031_REV0 PULLEY SHAFT 370037_REV0... -
Page 41: Front Roller
28. FRONT ROLLER 2 17 ES-860 ITEM NO. PART NUMBER DESCRIPTION QTY. 229233_REV1 FRONT ROLLER 34" 229310_REV1 QUADRANT SPACER 230741_REV0 QUADRANT GEAR 370014_REV0 FRONT ROLLER SCRAPER 34" 370017_REV0 SCRAPER BRACKET 370130_REV0 FRONT ROLLER SPACER 370170_REV0 ES QUADRANT W/A E1-1065_REV0 WASHER M12 SPRING LOCK SP01035_REV0 HEX SET SCREW M10 X 25 SP01059_REV0... -
Page 42: Handle Bars
29. HANDLE BARS 9 10 ES-860 ITEM NO. PART NUMBER DESCRIPTION QTY. 228093_REV0 BOLT SADDLE M8 X 43 228094_REV0 END TIP 5/16" 370160_REV1 ES-860 LOWER HANDLE SP01035_REV0 HEX SET SCREW M10 X 25 SP02005_REV0 NUT M8 STD SP02008_REV0 NUT M10 NYLOC (T) SP03011_REV0 WASHER M10 FORM A SP03016_REV0... -
Page 43: Handle Console
30. HANDLE CONSOLE 4 22 13 19 13 17 24 28 29 29 28 30 25 23 3 16 26 19 SP20057_REV1.0... - Page 44 ITEM NO. PART NUMBER DESCRIPTION QTY. 228020_REV1 CLEVIS GM5 (5MM) 229167_REV1 CLUTCH SPRING 229585_REV1 PIVOT BLOCK 229590_REV1 SAFETY SWITCH BRACKET 229595_REV2 SAFETY LEVER PLUNGER W.A. 229620_REV2 BOLT FOR SPRING 230180_REV0 SAFETY BAR W.A. 260138_REV1 GROMMET PV270A 370110_REV2 CONSOLE COVER ES860 W/A 370113_REV0 HANDLE BAR COVER PLATE 403589_REV0...
-
Page 45: Grass Box Cradle
31. GRASS BOX CRADLE ES-860 ITEM NO. PART NUMBER DESCRIPTION QTY. 370040_REV1 34" ELECTRIC CRADLE W.A. 370180_REV0 GRASSBOX ARM PIVOT 370181_REV0 1MM ID21 SHIM 604761_REV1 THACKERY WASHER E1-1065_REV0 WASHER M12 SPRING LOCK E1-1081_REV0 WASHER M20 FORM B SP01078_REV0 HEX SET SCREW M12 X 40 SP03048_REV0 WASHER M12 FORM G SP14049_REV0... -
Page 46: Grass Box
32. GRASS BOX ES-860 ITEM NO. PART NUMBER DESCRIPTION QTY. 229243_REV1 GRASS BOX 860 ES-760 ITEM NO. PART NUMBER DESCRIPTION QTY. 229242_REV1 GRASS BOX 760 SP20057_REV1.0... -
Page 47: Guards
33. GUARDS 6 11 9 8 13 11 ITEM NO. PART NUMBER DESCRIPTION QTY. 340150_REV0 BATTERY COVER W.A. 340155_REV0 BATTERY COVER HINGE 370065_REV1 R.H. GUARD W.A. 370066_REV1 L.H. GUARD W.A. E1-1133_REV0 HEX BOLT M10 X 75 F20384_REV1 CAP HEAD M8 X 25 J209074_REV1 BRAKE BAND COVER SCREW SP01006_REV0... -
Page 48: Decals
34. DECALS ES-860 ITEM NO. PART NUMBER DESCRIPTION QTY. B32902_REV2 DECAL DENNIS 200 X 50 (LARGE) B32903_REV0 DECAL UNION JACK J20362_REV2 DECAL DENNIS 120 X 30 (SMALL) SP18025_REV0 ANTI SCRATCH DECAL SP18026-1_REV0 ELECTRICAL WARNING DECAL SP18026-2_REV0 WARNING DECAL SP18026-3_REV0 E-SERIES DECAL... -
Page 49: Cutter Cassette
35. CUTTER CASSETTE 37 33 30 39 16 33 27 35 39 8 39 35 4 16 33 26 27 2 39 39 40 31 39 30 39 32 34 34 34 38 38 MODEL DIFFERENCES ITEM No. MODEL PART NUMBER DESCRIPTION G660 229662... - Page 50 ITEM NO. PART NUMBER DESCRIPTION Default/QTY. 185379_REV1 5/8" UNF HEX SCREW 228022_REV4 CLEVIS PIN 228029_REV1 BEARING 2205 2RS 228070_REV1 BLACK CAP 228074_REV1 D315163175 BELLEVILLE WASHER 228092_REV1 SHIM ID 25.8 X 1 THK 229049_REV2 ADJUSTER ROD 229051_REV1 ADJUSTER STOP 229215_REV1 CASSETTE SIDE PLATE W.A. L.H. 229216_REV2 CASSETTE SIDE PLATE W.A.
-
Page 51: Verticutter Cassette
36. VERTICUTTER CASSETTE 22 27 28 31 MODEL DIFFERENCES ITEM No. MODEL PART NUMBER DESCRIPTION G660 229657 26" TIE BAR G760 / ES-760 229295 30" TIIE BAR G860 / ES-860 229296 34" TIE BAR G660 229658 26" HANDLE TIE BAR G760 / ES-760 229297 30"... - Page 52 ITEM NO. PART NUMBER DESCRIPTION Default/QTY. 062662_REV1 BEARING 6205-2RS 3 228042_REV0 CIRCLIP D1300 0520 228092_REV1 SHIM ID 25.8 X 1 THK 229220_REV2 L.H. NON-CUT CASSETTE S'PLATE W.A. 229221_REV2 R.H. NON-CUT CASSETTE S'PLATE W.A. 229289_REV1 BEARING HOUSING NON-CUTTER 229290_REV1 VERTICUT BLADE 229296_REV1 34"...
-
Page 53: Scarifier Cassette
37. SCARIFIER CASSETTE 26 34 32 27 22 27 22 27 16 34 26 34 28 31 33 MODEL DIFFERENCES ITEM No. MODEL PART NUMBER DESCRIPTION D055/3,D053/3, D054/3 229291 1mm SCARIFIER BLADE AS REQUIRED D055/4,D053/4, D054/4 229418 2mm SCARIFIER BLADE AS REQUIRED D055/4TT,D053/4TT, D054/4TT 230106... - Page 54 ITEM NO. PART NUMBER DESCRIPTION Default/QTY. 062662_REV1 BEARING 6205-2RS 3 228042_REV0 CIRCLIP D1300 0520 228092_REV1 SHIM ID 25.8 X 1 THK 229220_REV2 L.H. NON-CUT CASSETTE S'PLATE W.A. 229221_REV2 R.H. NON-CUT CASSETTE S'PLATE W.A. 229289_REV1 BEARING HOUSING NON-CUTTER 229291_REV1 1MM SCARIFIER BLADE 229296_REV1 34"...
-
Page 55: Brush Cassette
38. BRUSH CASSETTE 18 23 18 23 14 29 22 29 24 26 28 MODEL DIFFERENCES ITEM No. MODEL PART NUMBER DESCRIPTION G660 229657 26" TIE BAR G760 / ES-760 229295 30" TIIE BAR G860 / ES-860 229296 34" TIE BAR G660 229658 26"... - Page 56 ITEM NO. PART NUMBER DESCRIPTION QTY. 062662_REV1 BEARING 6205-2RS 3 228042_REV0 CIRCLIP D1300 0520 228092_REV1 SHIM ID 25.8 X 1 THK 229220_REV2 L.H. NON-CUT CASSETTE S'PLATE W.A. 229221_REV2 R.H. NON-CUT CASSETTE S'PLATE W.A. 229289_REV1 BEARING HOUSING NON-CUTTER 229296_REV1 34" TIE BAR 229298_REV1 34"...
-
Page 57: Sorrel Roller Cassette
39. SORREL ROLLER CASSETTE 16 18 16 18 7 18 16 16 18 16 18 MODEL DIFFERENCES ITEM No. MODEL PART NUMBER DESCRIPTION G660 229657 26" TIE BAR G760 / ES-760 229295 30" TIIE BAR G860 / ES-860 229296 34" TIE BAR G660 229658 26"... - Page 58 ITEM NO. PART NUMBER DESCRIPTION QTY. 228042_REV0 CIRCLIP D1300 0520 228079_REV1 BEARING 6304 2RS 229289_REV1 BEARING HOUSING NON-CUTTER 229296_REV1 34" TIE BAR 229298_REV1 34" HANDLE TIE BAR 229317_REV1 BEARING COVER SORREL R.H. 229385_REV2 STOP BOLT 229502_REV1 SORREL SIDE PLATE W.A. 229504_REV1 SORREL ROLLER 34"...
-
Page 59: Spring Tine Cassette
40. SPRING TINE CASSETTE 21 26 31 29 MODEL DIFFERENCES ITEM No. MODEL PART NUMBER DESCRIPTION G660 229657 26" TIE BAR G760 / ES-760 229295 30" TIE BAR G860 / ES-860 229296 34" TIE BAR G660 229658 26" HANDLE TIE BAR G760 / ES-760 229297 30"... - Page 60 ITEM NO. PART NUMBER DESCRIPTION QTY. 062662_REV1 BEARING 6205-2RS 3 228042_REV0 CIRCLIP D1300 0520 228092_REV1 SHIM ID 25.8 X 1 THK 229220_REV2 L.H. NON-CUT CASSETTE S'PLATE W.A. 229221_REV2 R.H. NON-CUT CASSETTE S'PLATE W.A. 229289_REV1 BEARING HOUSING NON-CUTTER 229296_REV1 34" TIE BAR 229298_REV1 34"...
- Page 61 ITEM NO. PART NUMBER DESCRIPTION QTY. 230654_REV0 BLADE SPRING TINE 230659_REV0 SPRING NUT SP13008_REV1 SPRING TORSION 1.4 SP01164_REV0 GRUB SCREW M8 X 30 SS SP20057_REV1.0...
- Page 62 DENNIS, Ashbourne Road, Kirk Langley, Derbyshire, DE6 4NJ, England Tel: +44 (0) 1332 824 777 Fax: +44 (0) 1332 824 525 Email: sales@dennisuk.com Email: spares@dennisuk.com www.dennisuk.com A division of Howardson Ltd – a proudly British company Company reg No: 641526 – Vat No GB 345 9918 12 SP20057_REV1.0...
Need help?
Do you have a question about the E Series and is the answer not in the manual?
Questions and answers