Axis P1368-E Installation Manual
Hide thumbs
Also See for P1368-E:
- User manual (21 pages) ,
- Installation manual (168 pages) ,
- User manual (28 pages)
Table of Contents
Advertisement
Available languages
Available languages
Quick Links
Advertisement
Table of Contents

Subscribe to Our Youtube Channel
Related Manuals for Axis P1368-E


Summary of Contents for Axis P1368-E
- Page 1 AXIS P1368-E Network Camera Installation Guide...
- Page 3 English France: Français Deutschland: Deutsch Italia: Italiano España: Español 日本: 日本語 中文: 简体中文...
- Page 4 • Immunity to electrical and electromagnetic additional patents or pending patent applications in phenomena when installed according to the the US and other countries.
- Page 5 Sourcing Equipment (PSE) shall comply with IEEE 802.3af and Limited Power Source (LPS) according to clause 2.5 of IEC/EN/UL 60950-1 or annex Q of IEC/EN/UL 62368-1. We recommend the use of Axis midspans or Axis PoE Contact information switches. Axis Communications AB Gränden 1...
- Page 6 Support Should you require any technical assistance, please contact your Axis reseller. If your questions cannot be answered immediately, your reseller will forward your queries through the appropriate channels to ensure a rapid response. If you are connected to the Internet, you can: •...
-
Page 7: Table Of Contents
AXIS P1368-E Network Camera Package contents .......... - Page 8 AXIS P1368-E Network Camera Tasten ............
- Page 9 AXIS P1368-E Network Camera Batería ............104 パ...
-
Page 11: Package Contents
AXIS P1368-E Network Camera Package contents • AXIS P1368-E Network Camera • 4–pin I/O connector block for connecting external devices • 2–pin RS485/422 connector block (x2) • Wall mount • Torx screwdriver T20 • Torx screwbit T30 • Mounting tool for RJ45 •... -
Page 12: Product Overview
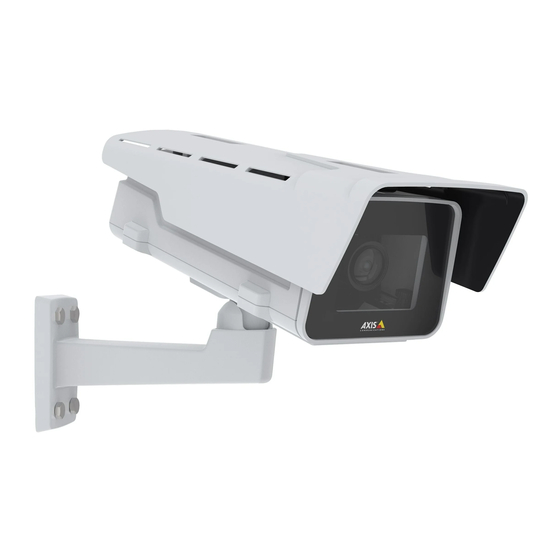
AXIS P1368-E Network Camera Product overview Weather shield Top cover Window Intrusion alarm magnet Safety wire Cable tie anchor IK10 tool Intrusion alarm sensor Cable cover 10 Spring loaded thumb screw (4x) 11 Optic unit 12 Lens NO TICE TICE TICE Do not lift the product in the cable cover. - Page 13 AXIS P1368-E Network Camera 13 Status LED 14 Network LED 15 Power LED 16 microSD card slot 17 I/O connector 18 RS485/422 connector 19 Control button 20 Network connector (PoE) 21 Audio out 22 Audio in 23 Cable gasket M20 (2x)
-
Page 14: How To Install The Product
• Be careful not to scratch, damage or leave fingerprints on the window because this could decrease image quality. The Axis product can be installed with the cables routed through or along the wall. Read all the instructions before installing the product. - Page 15 AXIS P1368-E Network Camera • Use cables with a diameter of 4–9 mm (0.16–0.35 in). 2. Select which cable gasket to use and pull the tab to open a hole for the network cable. Bottom cover Bottom cover screw T20 (4x) Cable gasket M20 (2x) 3.
- Page 16 AXIS P1368-E Network Camera NO TICE TICE TICE Not pulling the cable back could cause water to seep in and damage the product. 5. Make sure that the cable gasket is fitted properly. 6. If connecting an auxiliary device, for example an I/O, audio, or external power device, to the camera, repeat the steps above as applicable to the specific device.
- Page 17 AXIS P1368-E Network Camera 8. If applicable, connect external I/O devices or audio devices to the camera. 9. If using an SD card for local storage, insert the card into the camera’s SD card slot. 10. Connect the network cable.
- Page 18 AXIS P1368-E Network Camera Safety hook Desiccant bag 14. Remove the plastic wrapper from the desiccant bag. 15. Remove the protective strip from the adhesive and attach the desiccant bag to the top cover. 16. Close the housing. Alternately tighten the bottom cover screws a few turns at a time until they are tight (torque 1.5 Nm).
- Page 19 AXIS P1368-E Network Camera How to set up corridor format Lock screw (2x) Optic unit 1. Loosen the two lock screws. 2. Rotate the optic unit. 3. Tighten the lock screws. 4. Go to the Stream tab on the product’s webpage and rotate the view 90°.
-
Page 20: Find The Device On The Network
5. Tighten the thumb screws. Find the device on the network To find Axis devices on the network and assign them IP addresses in Windows®, use AXIS IP Utility or AXIS Device Manager. Both applications are free and can be downloaded from axis.com/support. - Page 21 AXIS P1368-E Network Camera Important Reset to factory default should be used with caution. A reset to factory default resets all settings, including the IP address, to the factory default values. To reset the product to the factory default settings: 1.
-
Page 22: Further Information
For the latest version of this document, see axis.com • The user manual is available at axis.com • To check if there is updated firmware available for your device, see axis.com/support • For useful online trainings and webinars, see axis.com/academy Optional accessories For a complete list of available accessories for this product, go to the product’s page on... -
Page 23: Specifications
• Risk of data loss and corrupted recordings. Do not remove the SD card while the product is running. Unmount the SD card from the product’s webpage before removal. This product supports microSD/microSDHC/microSDXC cards. For SD card recommendations, see axis.com. Buttons Control button The control button is used for: •... -
Page 24: Connectors
Network connector RJ45 Ethernet connector with Power over Ethernet (PoE). Audio connector The Axis product has the following audio connectors: • Audio in – 3.5 mm input for a mono microphone, or a line-in mono signal (left channel is used from a stereo signal). - Page 25 AXIS P1368-E Network Camera Example DC ground DC output 12 V, max 50mA I/O configured as input I/O configured as output RS485/RS422 connector Two 2-pin terminal blocks for RS485/RS422 serial interface used to control auxiliary equipment such as pan-tilt devices.
-
Page 26: Operating Conditions
AXIS P1368-E Network Camera Function Notes RS485B alt RX pair for all modes (combined RX/TX for 2-wire RS485) RS485/422 RX(B) RS485A alt RS485/422 RX(A) TX pair for RS422 and 4-wire RS485 RS485/RS422 TX(B) RS485/RS422 TX(A) Important The maximum cable length is 30 m (98 ft). -
Page 27: Safety Information
AXIS P1368-E Network Camera Safety information Hazard levels DANGER Indicates a hazardous situation which, if not avoided, will result in death or serious injury. WARNING Indicates a hazardous situation which, if not avoided, could result in death or serious injury. -
Page 28: Safety Instructions
• When transporting the Axis product, use the original packaging or equivalent to prevent damage to the product. Battery The Axis product uses a 3.0 V CR2032 lithium battery as the power supply for its internal real-time clock (RTC). Under normal conditions this battery will last for a minimum of five years. CAUTION Do not replace the battery yourself. -
Page 29: Contenu De L'emballage
AXIS P1368-E Network Camera Contenu de l’emballage • Caméra réseau AXIS P1368-E • Bloc de connexion à 4 broches pour le raccordement de dispositifs externes au connecteur pour terminaux E/S • Bloc de connexion RS485/422 à 2 broches (x2) •... -
Page 30: Vue D'ensemble Du Produit
AXIS P1368-E Network Camera Vue d'ensemble du produit Protection étanche Couvercle supérieur Fenêtre Aimant d’alarme d’intrusion Câble de sécurité Point d'attache de câbles Outil IK10 Capteur d’alarme d’intrusion Couvercle de câble 10 Vis papillon de pression (x4) 11 Unité optique... - Page 31 AXIS P1368-E Network Camera 13 Voyant d’état 14 Voyant réseau 15 Voyant d’alimentation 16 Emplacement pour carte microSD 17 Connecteur d’E/S 18 Connecteur RS485/422 19 Bouton de commande 20 Connecteur réseau (PoE) 21 Sortie audio 22 Entrée audio 23 Joint de câble M20 (x2)
-
Page 32: Comment Installer Le Produit
• Veillez à ne pas rayer, endommager ou laisser d'empreintes sur la vitre, car cela pourrait altérer la qualité d'image. Le produit Axis peut être installé avec des câbles acheminés à travers ou le long du mur. Lisez toutes les instructions avant l’installation de l’appareil. - Page 33 AXIS P1368-E Network Camera • Ouvrez uniquement un trou dans les joints de câble qui seront utilisés. Si un joint de câble est endommagé, remplacez-le par un nouveau. L’utilisation d’un joint de câble ouvert ou endommagé risque d’entraîner une infiltration d’eau et d’endommager le produit.
- Page 34 AXIS P1368-E Network Camera 4. Tirez légèrement sur le câble réseau pour que le joint s'ajuste dessus. A A A VIS Si vous ne tirez pas sur le câble, il existe un risque d'infiltration d’eau et d’endommagement du produit. 5. Assurez-vous que le joint de câble est correctement installé.
- Page 35 AXIS P1368-E Network Camera 7. Placez le couvercle inférieur sur la fixation murale et serrez les vis (couple 2 Nm). 8. Le cas échéant, connectez les dispositifs d’E/S ou les appareils audio externes à la caméra. 9. Si vous utilisez une carte SD en tant qu’espace de stockage local, insérez la carte dans le logement prévu à...
- Page 36 AXIS P1368-E Network Camera Crochet de sécurité Sachet dessiccatif 14. Retirez la protection en plastique du sachet dessiccatif. 15. Retirez la bande de protection de l’adhésif et fixez le sachet dessiccatif au couvercle supérieur. 16. Fermez le boîtier. Vous pouvez également serrer les vis du couvercle inférieur de quelques tours à...
- Page 37 AXIS P1368-E Network Camera Configuration du format corridor Vis de verrouillage (x2) Unité optique 1. Desserrez les deux vis de verrouillage. 2. Faites pivoter l’unité optique. 3. Serrez les vis de verrouillage. 4. Accédez à l’onglet Stream (Flux) de la page Web du produit et faites pivoter la vue à 90 °.
-
Page 38: Trouver Le Périphérique Sur Le Réseau
5. Serrez les vis papillon. Trouver le périphérique sur le réseau Pour trouver les périphériques Axis présents sur le réseau et leur attribuer des adresses IP sous Windows®, utilisez AXIS IP Utility ou AXIS Device Manager. Ces applications sont gratuites et peuvent être téléchargées via axis.com/support. - Page 39 AXIS P1368-E Network Camera Important La réinitialisation aux paramètres par défaut doit être utilisée avec prudence. Cette opération restaure tous les paramètres par défaut, y compris l'adresse IP. Pour réinitialiser l’appareil aux paramètres d’usine par défaut : 1. Déconnectez l’alimentation de l’appareil.
-
Page 40: Informations Complémentaires
• Le manuel d'utilisateur est disponible sur le site axis.com • Pour vérifier s'il existe un firmware mis à jour pour votre appareil, voir axis.com/support • Pour accéder à des formations et webinaires en ligne utiles, voir axis.com/academy Accessoires en option Pour une liste complète des accessoires disponibles pour ce produit, accédez à... -
Page 41: Caractéristiques
• Risque de perte de données et d'enregistrements corrompus. Ne retirez pas la carte SD pendant que le produit fonctionne. Démontez la carte SD de la page Web du produit avant le retrait. Ce produit est compatible avec les cartes microSD/microSDHC/microSDXC. Pour des recommandations sur les cartes SD, rendez-vous sur axis.com. -
Page 42: Boutons
Connecteur réseau Connecteur Ethernet RJ45 avec l'alimentation par Ethernet (PoE). Connecteur audio Le produit Axis dispose des connecteurs audio suivants : • Entrée audio – entrée de 3,5 mm pour microphone mono ou signal d’entrée mono (le canal de gauche est utilisé pour le signal stéréo). - Page 43 AXIS P1368-E Network Camera Sortie numérique - Permet de connecter des dispositifs externes, comme des relais ou des voyants. Les appareils connectés peuvent être activés par l'interface de programmation VAPIX®, via un événement ou à partir de la page Web du produit.
-
Page 44: Conditions D'utilisation
AXIS P1368-E Network Camera • RS422 duplex intégral sur quatre fils pour communication point à point Fonction Bro- Notes RS485B alt Paire RX pour tous les modes (RX/TX combiné pour RS485 à RS485/422 RX(B) 2 fils) RS485A alt RS485/422 RX(A) Paire TX pour RS422 et RS485 à... -
Page 45: Informations Sur La Sécurité
AXIS P1368-E Network Camera Informations sur la sécurité Niveaux de risques DANGER Indique une situation dangereuse qui, si elle n'est pas évitée, entraînera le décès ou des blessures graves. AVERTISSEMENT Indique une situation dangereuse qui, si elle n'est pas évitée, pourrait entraîner le décès ou des blessures graves. -
Page 46: Consignes De Sécurité
éviter d'endommager le produit. Batterie Le produit Axis utilise une batterie au lithium CR2032 3,0 V comme alimentation de son horloge en temps réel interne (RTC). Dans des conditions normales, cette batterie a une durée de vie minimale de cinq ans. -
Page 47: Lieferumfang
AXIS P1368-E Network Camera Lieferumfang • AXIS P1368-E Netzwerk-Kamera • 4-poliger E/A-Anschlussblock für den Anschluss externer Geräte • 2-poliger RS485/422-Anschlussblock (2x) • Wandhalterung • Torx T20-Schraubendreher • Torx T30-Schraubenset • RJ-45-Montagewerkzeug • IK10-Werkzeug • Antikondensationsbeutel • Gedruckte Dokumente Installationsanleitung (dieses Dokument) Zusätzliche Etiketten mit der Seriennummer (2x) -
Page 48: Produktübersicht
AXIS P1368-E Network Camera Produktübersicht Wetterschutz Obere Abdeckung Fenster Einbruchalarmmagnet Sicherheitsdraht Kabelbinderverankerung IK10-Werkzeug Einbruchalarmsensor Kabelabdeckung 10 Gefederte Rändelschrauben (4x) 11 Optisches Gerät 12 Objektiv HINWEIS HINWEIS HINWEIS Heben Sie das Produkt nicht in die Kabelabdeckung hinein. - Page 49 AXIS P1368-E Network Camera 13 Status LED 14 Netzwerk LED 15 Netz-LED 16 microSD-Kartensteckplatz 17 E/A-Anschluss 18 RS485/422-Anschluss 19 Steuertaste 20 Netzwerkanschluss (PoE) 21 Audioausgang 22 Audioeingang 23 Kabeldichtung M20 (2x) 24 Blendenanschluss...
-
Page 50: Installieren Des Produkts
• Vermeiden Sie Kratzer, Beschädigungen oder Fingerabdrücke am Fenster, da dies die Bildqualität beeinträchtigen kann. Bei der Installation des Axis Produkts können die Kabel durch die Wand oder an der Wand entlang geführt werden. Lesen Sie die Anweisungen, bevor Sie das Produkt installieren. - Page 51 AXIS P1368-E Network Camera HINWEIS HINWEIS HINWEIS • Wird mehr als ein Kabel verwendet, muss jedes Kabel durch eine separate Kabeldichtung geführt werden. • Öffnen Sie bei den verwendeten Kabeldichtungen nur ein Loch. Wenn eine Kabeldichtung eingerissen ist, ersetzen Sie diese durch eine neue. Wenn eine Kabeldichtung geöffnet bleibt oder eine eingerissene Kabeldichtung verwendet wird, kann Wasser eindringen und das Produkt beschädigen.
- Page 52 AXIS P1368-E Network Camera 4. Ziehen Sie das Netzwerkkabel ein wenig zurück, bis die Kabeldichtung bündig um das Kabel sitzt. HINWEIS HINWEIS HINWEIS Wird das Kabel nicht zurückgezogen, kann Wasser eindringen und das Produkt beschädigen. 5. Vergewissern Sie sich, dass die Kabeldichtung ordnungsgemäß sitzt.
- Page 53 AXIS P1368-E Network Camera Untere Abdeckung Schraube T20 (4x) Wandhalterung Einstellschraube T30 für Halterung 7. Setzen Sie die untere Abdeckung auf die Wandhalterung und ziehen Sie die Schrauben an (Drehmoment 2 Nm). 8. Schließen Sie ggf. externe Eingabe-/Ausgabegeräte oder Audiogeräte an die Kamera an.
- Page 54 AXIS P1368-E Network Camera 9. Wenn Sie eine SD-Karte als lokalen Speicher verwenden, schieben Sie die Karte in den SD-Karteneinschub der Kamera. 10. Schließen Sie das Netzwerkkabel an. 11. Vergewissern Sie sich, dass die Kamera LEDs den richtigen Betriebszustand anzeigen.
- Page 55 AXIS P1368-E Network Camera Sicherheitshaken Antikondensationsbeutel 14. Entfernen Sie die Plastikschutzhülle des Antikondensationsbeutels. 15. Entfernen Sie den Schutzstreifen von der Klebefläche und bringen Sie den Antikondensationsbeutel an der oberen Abdeckung an. 16. Schließen Sie das Gehäuse. Ziehen Sie die Schrauben der unteren Abdeckung im Wechsel jeweils wenige Umdrehungen an, bis sie fest sitzen (Drehmoment 1,5 Nm).
- Page 56 AXIS P1368-E Network Camera Einrichten des Corridor Formats Feststellschraube (2x) Optisches Gerät 1. Lösen Sie beide Feststellschrauben. 2. Drehen Sie das optische Gerät. 3. Ziehen Sie die Feststellschrauben an. 4. Rufen Sie auf der Produktwebseite die Registerkarte Stream auf und drehen Sie die...
-
Page 57: Das Gerät Im Netzwerk Ermitteln
5. Ziehen Sie die Rändelschrauben an. Das Gerät im Netzwerk ermitteln Mit AXIS IP Utility und AXIS Device Manager die Axis Geräte im Netzwerk ermitteln und ihnen unter Windows® IP-Adressen zuweisen. Beide Anwendungen sind kostenlos und können von axis.com/support heruntergeladen werden. - Page 58 AXIS P1368-E Network Camera Wichtig Das Zurücksetzen auf die Werkseinstellungen sollte mit Vorsicht erfolgen. Beim Zurücksetzen auf die Werkseinstellungen werden alle Einstellungen einschließlich der IP-Adresse zurückgesetzt. So wird das Produkt auf die werksseitigen Standardeinstellungen zurückgesetzt: 1. Trennen Sie das Produkt von der Stromversorgung.
-
Page 59: Weitere Informationen
Das Benutzerhandbuch steht auf axis.com zur Verfügung. • Unter axis.com/support finden Sie die aktuellen Firmwareversionen für Ihr Gerät. • Nützliches Onlinetraining und Webinare finden Sie unter axis.com/academy. Optionales Zubehör Eine vollständige Liste lieferbaren Zubehörs für dieses Produkt finden Sie auf axis.com unter Produkt, Software und Zubehör. -
Page 60: Technische Daten
• Gefahr von Datenverlust und Beschädigung von Aufzeichnungen. Die SD-Karte darf nicht entfernt werden, während das Produkt in Betrieb ist. Erst die SD-Karte über die Produktwebseite trennen, dann ausbauen. Dieses Axis Produkt unterstützt Karten des Typs microSD/microSDHC/microSDXC. Für Empfehlungen zu SD-Karten siehe axis.com. Tasten... -
Page 61: Anschlüsse
Zurücksetzen des Produkts auf die Werkseinstellungen. Siehe . Anschlüsse Netzwerkanschluss RJ45-Ethernetanschluss mit Power over Ethernet (PoE). Audioanschlüsse Das Axis-Produkt ist mit den folgenden Audioanschlüssen ausgestattet: • Audioeingang – 3,5 mm, für ein Monomikrofon oder ein Monosignal (der linke Kanal wird von einem Stereosignal benutzt). •... - Page 62 AXIS P1368-E Network Camera Beispiel Erdung Gleichstrom Gleichstromausgang 12 V, max. 50mA E/A als Eingang konfiguriert E/A als Ausgang konfiguriert RS485-/RS422-Anschluss Zwei 2-polige Anschlussblöcke für serielle Schnittstellen vom Typ RS485/RS422 zur Steuerung von Zusatzgeräten, beispielsweise zum Schwenken und Neigen. Der serielle Anschluss kann in den folgenden Anschlussmodi konfiguriert werden: •...
-
Page 63: Betriebsbedingungen
AXIS P1368-E Network Camera Funktion Kon- Hinweise takt RS485B alt RX-Paar für alle Modi (kombinierter RX/TX für RS485 mit 2 RS485/422 RX(B) Leitern) RS485A alt RS485/422 RX(A) TX-Paar für RS-422 und RS-485 mit vier Leitern RS-485/RS-422 TX(B) RS-485/RS-422 TX(A) Wichtig Die maximale Kabellänge beträgt 30 m. -
Page 65: Sicherheitsinformationen
AXIS P1368-E Network Camera Sicherheitsinformationen Gefährdungsstufen GEFAHR Weist auf eine gefährliche Situation hin, welche, falls nicht verhindert, zu Tod oder schweren Verletzungen führen kann. WARNUNG Weist auf eine gefährliche Situation hin, welche, falls nicht verhindert, zu Tod oder schweren Verletzungen führen kann. -
Page 66: Sicherheitsanweisungen
Echtzeituhr (RTC) versorgt wird. Unter normalen Bedingungen hat die Batterie eine Lebensdauer von mindestens fünf Jahren. VORSICHT Tauschen Sie die Batterie nicht selbst aus. Wenden Sie sich an den Axis Support, wenn die Protokollnachricht einen Batterietausch anfordert. Lithium-Knopfzellen (3,0 V) enthalten 1,2-Dimethoxyethan; Ethylenglycoldimethylether (EGDME),... -
Page 67: Contenuto Della Confezione
AXIS P1368-E Network Camera Contenuto della confezione • Telecamera di rete AXIS P1368-E • Morsettiera I/O a 4 pin per collegare dispositivi esterni • Morsettiera RS485/422 a 2 pin (2) • Montaggio a parete • Cacciavite Torx T20 • Punta da cacciavite Torx T30 •... -
Page 68: Panoramica Del Dispositivo
AXIS P1368-E Network Camera Panoramica del dispositivo Schermo di protezione dagli agenti atmosferici Protezione superiore Finestra Calamita allarme anti intrusione Cavo di sicurezza Ancoraggio fascetta Strumento IK10 Sensore allarme anti intrusione Coperchio dei cavi 10 Vite ad alette a molla (4) 11 Unità... - Page 69 AXIS P1368-E Network Camera 13 LED di stato 14 LED di rete 15 Power LED 16 Slot per scheda di memoria microSD 17 Connettore I/O 18 Connettore RS485/422 19 Pulsante di comando 20 Connettore di rete (PoE) 21 Uscita audio...
-
Page 70: Come Installare Il Dispositivo
• Non graffiare, danneggiare o lasciare impronte digitali sulla finestra per preservare la qualità dell'immagine. È possibile installare il dispositivo Axis instradando i cavi attraverso o lungo la parete. Leggere attentamente tutte le istruzioni prima di installare il dispositivo. Installazione del supporto per il montaggio a parete ATTENZIONE Verificare che le viti e i tasselli siano adatti al materiale della parete (es. - Page 71 AXIS P1368-E Network Camera • Aprire un foro solo nelle guarnizioni utilizzate e sostituirle in caso di danno. Una guarnizione per cavi aperta o danneggiata potrebbe causare infiltrazioni d'acqua nel dispositivo e danneggiarlo. 2. Scegliere la guarnizione per cavi da usare e tirare la linguetta per aprire il foro per il cavo di rete.
- Page 72 AXIS P1368-E Network Camera 4. Tirare delicatamente il cavo di rete in modo da adattare la guarnizione al cavo. A A A VVISO VVISO VVISO Se il cavo non viene tirato potrebbero verificarsi infiltrazioni d'acqua e danni al prodotto. 5. Verificare il corretto montaggio della guarnizione del cavo.
- Page 73 AXIS P1368-E Network Camera 7. Posizionare il coperchio inferiore sul supporto per il montaggio a parete e serrare le viti (con una coppia di 2 Nm). 8. Se necessario, collegare alla telecamera dispositivi I/O esterni o dispositivi audio. 9. Se si utilizza una scheda di memoria per l'archiviazione locale, inserirla nell'apposito slot della telecamera.
- Page 74 AXIS P1368-E Network Camera Gancio di sicurezza Sacchetto dell'essiccante 14. Rimuovere la busta di plastica dal sacchetto dell'essicante. 15. Rimuovere la striscia di protezione dall'adesivo e fissare il sacchetto dell'essicante al coperchio superiore. 16. Chiudere la custodia. Girare le viti del coperchio inferiore in maniera alternata finché...
- Page 75 AXIS P1368-E Network Camera Modalità di configurazione del formato corridoio Vite di arresto (2) Unità ottica 1. Allentare le due viti di arresto. 2. Ruotare l'unità ottica. 3. Stringere le viti di arresto. 4. Andare alla scheda Stream (Flusso) sulla pagina Web del dispositivo e ruotare la vista di...
-
Page 76: Individuazione Del Dispositivo Sulla Rete
5. Stringere le viti ad alette. Individuazione del dispositivo sulla rete Per trovare i dispositivi Axis sulla rete e assegnare loro un indirizzo IP in Windows®, utilizzare AXIS IP Utility o AXIS Device Manager. Queste applicazioni sono entrambe gratuite e possono essere scaricate dal sito Web axis.com/support. - Page 77 IP, impostare la password e accedere al flusso video. Gli strumenti per l'installazione e la gestione del software sono disponibili nelle pagine dedicate all'assistenza sul sito Web axis.com/support. È anche possibile reimpostare i valori predefiniti di fabbrica dei parametri mediante l'interfaccia Web.
-
Page 78: Ulteriori Informazioni
AXIS P1368-E Network Camera Ulteriori Informazioni • Per la versione più recente di questo documento, visitare il sito all'indirizzo axis.com • Il manuale per l'utente è disponibile all'indirizzo axis.com • Per verificare se sono stati pubblicati aggiornamenti del firmware per il proprio dispositivo, vedere axis.com/support... -
Page 79: Specifiche
• Rischio di perdita di dati e danneggiamento delle registrazioni. Non rimuovere la scheda di memoria mentre il dispositivo è in funzione. Scollegare la scheda di memoria dalle pagine Web del dispositivo prima di rimuoverla. Questo dispositivo supporta schede microSD/microSDHC/microSDXC. Visitare axis.com per i consigli sulla scheda di memoria. -
Page 80: Pulsanti
Connettore di rete Connettore Ethernet RJ45 con Power over Ethernet (PoE+). Connettore audio Il dispositivo Axis dispone dei seguenti connettori audio: • Ingresso audio: input da 3,5 mm per microfono mono o segnale ingresso linea mono (il canale sinistro viene utilizzato da un segnale stereo). - Page 81 AXIS P1368-E Network Camera Uscita digitale - Per il collegamento di dispositivi esterni come relè e LED. I dispositivi collegati possono essere attivati tramite l'API (interfaccia per la programmazione di applicazioni) VAPIX® attraverso un evento oppure dalla pagina Web del dispositivo.
-
Page 82: Condizioni Di Funzionamento
AXIS P1368-E Network Camera • Comunicazione full-duplex punto a punto con RS422 a quattro fili Funzione Note RS485B alt Coppia RX per tutte le modalità (RX/TX combinata per RS485 RS485/422 RX(B) con due cavi) RS485A alt RS485/422 RX(A) Coppia TX per RS422 e RS485 con quattro cavi ... -
Page 83: Informazioni Di Sicurezza
AXIS P1368-E Network Camera Informazioni di sicurezza Livelli di pericolo PERICOLO Indica una situazione pericolosa che, se non evitata, provoca morte o lesioni gravi. AVVERTENZA Indica una situazione pericolosa che, se non evitata, potrebbe provocare la morte o lesioni gravi. -
Page 84: Informazioni Di Sicurezza
Batteria Il dispositivo Axis utilizza una batteria al litio da 3 V CR2032 come alimentazione per il suo orologio in tempo reale (RTC) interno. In condizioni normali questa batteria avrà una durata minima di cinque anni. -
Page 85: Contenido Del Paquete
AXIS P1368-E Network Camera Contenido del paquete • Cámara de red AXIS P1368-E • Bloque de conectores de E/S de cuatro pines para conectar dispositivos externos • Bloque de conectores de dos pines RS485/422 (2) • Montaje en pared •... -
Page 86: Información General Del Producto
AXIS P1368-E Network Camera Información general del producto Parasol Cubierta superior Ventana Imán de alarma contra intrusiones Cable de seguridad Anclaje para abrazaderas de cable Herramienta IK10 Sensor de alarma contra intrusiones Cubierta de cable 10 Tornillo de mariposa con resorte (4) 11 Unidad óptica... - Page 87 AXIS P1368-E Network Camera 13 LED de estado 14 LED de red 15 LED de alimentación 16 Ranura para tarjeta microSD 17 Conector de E/S 18 Conector RS485/422 19 Botón de control 20 Conector de red (PoE) 21 Salida de audio...
-
Page 88: Cómo Instalar El Producto
• Preste atención para no arañar, dañar ni dejar las huellas en la ventana de la carcasa, puesto que esto puede provocar una disminución de la calidad de imagen. El producto de Axis puede instalarse guiando los cables a través de la pared o sobre esta. Lea todas las instrucciones antes de instalar el producto. - Page 89 AXIS P1368-E Network Camera • Solo abra un orificio en las juntas de cable que se vayan a utilizar y si alguna junta está desgastada, reemplácela con una nueva. Si deja la junta de cable abierta o utiliza una desgastada, el agua podría filtrarse y dañar el producto.
- Page 90 AXIS P1368-E Network Camera 4. Tire del cable de red hacia atrás suavemente de manera que la junta de cable se ajuste en el cable. A A A VISO VISO VISO Si no se tira del cable hacia atrás, podría filtrarse agua y dañar el producto.
- Page 91 AXIS P1368-E Network Camera 7. Coloque la cubierta inferior sobre el montaje en pared y apriete los tornillos (par de torsión de 2 Nm). 8. Si procede, conecte dispositivos de E/S externos o de audio a la cámara. 9. En caso de utilizar una tarjeta SD como unidad de almacenamiento local, inserte la tarjeta en la ranura para tarjetas SD de la cámara.
- Page 92 AXIS P1368-E Network Camera Gancho de seguridad Bolsa desecante 14. Retire el envoltorio de plástico de la bolsa desecante. 15. Retire la tira protectora del adhesivo y coloque la bolsa desecante en la cubierta superior. 16. Cierre la carcasa. Asimismo, puede apretar los tornillos de la cubierta inferior poco a poco, de forma alterna, hasta que estén bien apretados (par de torsión de 1,5 Nm).
- Page 93 AXIS P1368-E Network Camera Cómo configurar el formato pasillo Tornillo de bloqueo (2) Unidad óptica 1. Afloje los dos tornillos de bloqueo. 2. Gire la unidad óptica. 3. Apriete los tornillos de bloqueo. 4. Vaya a la pestaña Stream (Flujo) en la página web del producto y gire la vista 90°.
-
Page 94: Localice El Dispositivo En La Red
5. Apriete los tornillos de mariposa. Localice el dispositivo en la red Para localizar dispositivos Axis en la red y asignarles direcciones IP en Windows®, utilice AXIS IP Utility o AXIS Device Manager. Ambas aplicaciones son gratuitas y pueden descargarse... - Page 95 AXIS P1368-E Network Camera Para obtener más información acerca de cómo encontrar y asignar direcciones IP, consulte el documento How to assign an IP address and access your device (Cómo asignar una dirección IP y acceder al dispositivo).
- Page 96 AXIS P1368-E Network Camera Importante Es preciso tener cuidado si se va a restablecer la configuración predeterminada de fábrica. Todos los valores, incluida la dirección IP, se restablecerán a la configuración predeterminada de fábrica. Para restablecer el producto a la configuración predeterminada de fábrica: 1.
-
Page 97: Más Información
AXIS P1368-E Network Camera Más información • Para consultar la versión más reciente de este documento, vaya a axis.com. • El manual de usuario se encuentra disponible en axis.com. • Para comprobar si existe un firmware actualizado disponible para su dispositivo, vaya a axis.com/support. -
Page 98: Especificaciones
Desinstale la tarjeta SD desde la página web de producto antes de retirarla. Este producto admite tarjetas microSD/microSDHC/microSDXC. Para conocer las recomendaciones sobre tarjetas SD, consulte axis.com. Botones Botón de control El botón de control se utiliza para lo siguiente:... -
Page 99: Conectores
Conector Ethernet RJ45 con alimentación a través de Ethernet (PoE). Conector de audio El producto de Axis integra los siguientes conectores de audio: • Entrada de audio: Entrada de 3,5 mm para micrófono mono, o entrada de línea de señal mono (se usa el canal izquierdo de una señal estéreo). - Page 100 AXIS P1368-E Network Camera Bloque de terminales de 4 pines Ejemplo Tierra CC Salida de CC 12 V, 50 mA máx. E/S configurada como entrada E/S configurada como salida Conector RS485/RS422 Dos bloques de terminales de 2 pines para la interfaz serie RS485/RS422 usada para controlar equipos auxiliares, como dispositivos de movimiento horizontal/vertical.
-
Page 101: Condiciones De Funcionamiento
AXIS P1368-E Network Camera Notas Función RS485B alt Par RX para todos los modos (RX/TX combinados para RS485 RS485/422 RX(B) de dos cables) RS485A alt RS485/422 RX(A) Par TX para RS422 y RS485 de cuatro cables RS485/RS422 TX(B) RS485/RS422 TX(A) Importante La longitud de cable máxima es 30 m. -
Page 103: Información De Seguridad
AXIS P1368-E Network Camera Información de seguridad Niveles de peligro PELIGRO Indica una situación peligrosa que, si no se evita, provocará lesiones graves o la muerte. ADVERTENCIA Indica una situación peligrosa que, si no se evita, puede provocar lesiones graves o la muerte. -
Page 104: Instrucciones De Seguridad
Batería Este producto de Axis utiliza una batería de litio CR2032 de 3,0 V como fuente de alimentación del reloj interno en tiempo real. En condiciones normales, esta batería durará un mínimo de cinco años. -
Page 105: パ パ パ ッ ッ ッ ケ ケ ケ ー ー ー ジ ジ ジ の の の 内 内 内 容 容 容
AXIS P1368-E Network Camera パ パ パ ッ ッ ッ ケ ケ ケ ー ー ー ジ ジ ジ の の の 内 内 内 容 容 容 AXIS P1368-E ネットワークカメラ • 外部デバイス接続⽤4ピンI/Oコネクタブロック • 2ピン RS485/422 コネクタブロック (×2) • 壁⾯取付ブラケット... -
Page 106: 製 製 製 品 品 品 の の の 概 概 概 要 要 要
AXIS P1368-E Network Camera 製 製 製 品 品 品 の の の 概 概 概 要 要 要 ウェザーシールド 上蓋 ウィンドウ 侵⼊アラームマグネット 安全ワイヤー ケーブルタイアンカー IK10ツール 侵⼊アラームセンサー ケーブルカバー 10 バネ付きつまみネジ (×4) 11 光学ユニット 12 レンズ 注記 ケーブルカバーを付けたまま本製品を持ち上げないでください。... - Page 107 AXIS P1368-E Network Camera 13 ステータスLED 14 ネットワークLED 15 電源LED 16 microSDカードスロット 17 I/Oコネクタ 18 RS485/422コネクタ 19 コントロールボタン 20 ネットワークコネクタ (PoE) 21 ⾳声出⼒ 22 ⾳声⼊⼒ 23 ケーブルガスケットM20 (×2) 24 アイリスコネクタ...
-
Page 108: 製 製 製 品 品 品 の の の 取 取 取 り り り 付 付 付 け け け 方 方 方 法 法 法
AXIS P1368-E Network Camera 製 製 製 品 品 品 の の の 取 取 取 り り り 付 付 付 け け け ⽅ ⽅ ⽅ 法 法 法 ハ ハ ハ ー ー ー ド ド ド ウ ウ ウ ェ ェ ェ ア ア ア の の の イ イ イ ン ン ン ス ス ス ト ト ト ー ー ー ル ル ル... - Page 109 AXIS P1368-E Network Camera • 使⽤するケーブルガスケットのみ⽳を開けます。ケーブルガスケットが破損 した場合には、新品のケーブルガスケットに交換してください。ケーブルガ スケットに⽳を開けたままにしたり、破損したケーブルガスケットを使⽤し たりすると、浸⽔し、製品が破損するおそれがあります。 2. 使⽤するケーブルガスケットを選び、タブを引いてネットワークケーブル ⽤の⽳を開けます。 裏蓋 裏蓋ネジT20 (x4) ケーブルガスケットM20 (x2) タブ 3. ネットワークケーブルをケーブルガスケットに通します。 注記 ネットワークケーブルにネットワークコネクタが付いている場合、ケーブ ルガスケットを取り外し、コネクタガードを使⽤して、ケーブルガスケッ トの破損を防⽌します。キャップ付きネットワークコネクタの付いたネッ トワークケーブルは使⽤しないでください。コネクタガードを使⽤しても ケーブルガスケットが破損するおそれがあります。...
- Page 110 AXIS P1368-E Network Camera 4. ネットワークケーブルを少し⼿前に引き、ケーブルガスケットをケーブル にぴったりと合わせます。 注記 ケーブルを引いて⼿前に戻さないと、浸⽔して製品が損傷するおそれが あります。 5. ケーブルガスケットが正しく取り付けられていることを確認します。 6. I/O、⾳声、外部電源デバイスなどの補助デバイスをカメラに接続する場 合、それぞれのデバイスについて同じ⼿順を繰り返します。 注記 ケーブルをケーブルガスケットに通した後にコネクタを取り付けます。...
- Page 111 AXIS P1368-E Network Camera 裏蓋 ネジT20 (×4) 壁⾯ブラケット ブラケット調節ネジT30 7. 裏蓋を壁⾯取付ブラケットに取り付け、ネジを締めます (トルク2 Nm)。 8. 必要に応じて、外部I/Oデバイスまたは⾳声デバイスをカメラに接続します。...
- Page 112 AXIS P1368-E Network Camera 9. SDカードをローカルストレージとして使⽤する場合は、カメラのSDカード スロットにSDカードを挿⼊します。 10. ネットワークケーブルを接続します。 118ページの、 11. カメラのLEDが正しい状態を⽰しているかを確認します。 LEDインジケーター を参照してください。 12. ブラケット調整ネジを緩め、カメラを撮影⽅向に向けます。ビデオスト 115ページの、ネットワーク上のデバイ リームを表⽰する⽅法については、 スを検索する を参照してください 13. 納⼊時に、レンズはIK10⽤に対応するよう正しく配置されています。レンズ を移動または交換する場合は、光学部をIK10に合うように再配置する必要 115ページの、IK10のレンズの配置⽅法 があります。詳細については、 を 参照してください。...
- Page 113 AXIS P1368-E Network Camera 安全フック 乾燥剤 14. 乾燥剤のビニール包装を取り外します。 15. 接着保護ストリップを剥がして乾燥剤を上蓋に取り付けます。 16. ハウジングを閉じます。裏蓋ネジを数回ずつ回して、すべてのネジが締 まるまでこれを繰り返します (トルク1.5 Nm)。これにより、裏蓋のガス ケットに均等に⼒が掛かります。 注記 ハウジングを閉じるときに、ケーブルを挟まないようにしてください。 17. 必要に応じて、ウェザーシールドのネジを緩め、位置を調節してネジを 締めます。...
- Page 114 AXIS P1368-E Network Camera Corridor Format Format の の の 設 設 設 定 定 定 ⽅ ⽅ ⽅ 法 法 法 Corridor Corridor Format 固定ネジ (×2) 光学ユニット 1. 固定ネジを緩めます。 2. 光学ユニットを回転させます。 3. 固定ネジを締めます。 4. 本製品のWebページで [Stream Stream ( ( ( ス ス ス ト ト ト リ リ リ ー ー ー ム ム ム ) ) ) ] タブに移動し、視野を90°...
-
Page 115: ネットワーク上のデバイスを検索する
ネ ネ ネ ッ ッ ッ ト ト ト ワ ワ ワ ー ー ー ク ク ク 上 上 上 の の の デ デ デ バ バ バ イ イ イ ス ス ス を を を 検 検 検 索 索 索 す す す る る る Windows®でAxisデバイスを探してIPアドレスの割り当てを⾏う⽅法については、 AXIS IP UtilityまたはAXIS Device Managerを使⽤してください。 いずれのアプリケー axis.com/support ションも無料で、... - Page 116 AXIS P1368-E Network Camera 重要 ⼯場出荷時の設定へのリセットは慎重に⾏ってください。 ⼯場出荷時の 設定へのリセットを⾏うと、IPアドレスを含むすべての設定が⼯場出荷時 の値にリセットされます。 本製品を⼯場出荷時の設定にリセットするには、以下の⼿順を実⾏します。 1. 本製品の電源を切ります。 106ページの、 2. コントロールボタンを押した状態で電源を再接続します。 製品の概要 を参照してください。 3. ステータスLEDインジケーターがオレンジ⾊に点滅するまで、コントロール ボタンを15〜30秒間押し続けます。 4. コントロールボタンを離します。 プロセスが完了すると、ステータスLEDが 緑⾊に変わります。 これで本製品は⼯場出荷時の設定にリセットされまし た。 ネットワーク上に利⽤可能なDHCPサーバーがない場合、デフォルトの IPアドレスは192.168.0.90になります。 5. インストールおよび管理ソフトウェアツールを使⽤して、IPアドレスの割り 当て、パスワードの設定、ビデオストリームへのアクセスを⾏います。 axis.com/support のサポートページに、インストールおよび管理ソフト ウェアツールが⽤意されています。 Webインターフェースを使⽤して、各種パラメーターを⼯場出荷時の設定に戻すこ Settings > > > System System >...
-
Page 117: 関 関 関 連 連 連 情 情 情 報 報 報
AXIS P1368-E Network Camera 関 関 関 連 連 連 情 情 情 報 報 報 axis.com 本書の最新バージョンについては、 にアクセスしてください。 • axis.com ユーザーズマニュアルは、 で⼊⼿できます。 • ご使⽤のデバイスの新しいファームウェアがリリースされていないかを確 • axis.com/support 認するには、 にアクセスしてください。 役に⽴つオンライントレーニングおよびWebセミナーをご⽤意しておりま • axis.com/academy す。 をご覧ください。 オ オ オ プ プ プ シ シ シ ョ ョ ョ ン ン ン ア ア ア ク ク ク セ セ セ サ サ サ リ リ リ ー ー ー... -
Page 118: 仕 仕 仕 様 様 様
AXIS P1368-E Network Camera 仕 仕 仕 様 様 様 LED イ イ イ ン ン ン ジ ジ ジ ケ ケ ケ ー ー ー タ タ タ ー ー ー ス ス ス テ テ テ ー ー ー タ タ タ ス ス ス LED 説... -
Page 119: ボタン
AXIS P1368-E Network Camera ボ ボ ボ タ タ タ ン ン ン コ コ コ ン ン ン ト ト ト ロ ロ ロ ー ー ー ル ル ル ボ ボ ボ タ タ タ ン ン ン... - Page 120 AXIS P1368-E Network Camera デ デ デ ジ ジ ジ タ タ タ ル ル ル 出 出 出 ⼒ ⼒ ⼒ - - - リレーやLEDなどの外部デバイスを接続します。 接続されたデバイス は、VAPIX®アプリケーションプログラミングインターフェースを通じたイベントま たは製品のWebページからアクティブにすることができます。 4ピンターミナルブロック 例 例 例 DCグランド DC出⼒ 12 V、最⼤50 mA I/O (⼊⼒として設定) I/O (出⼒として設定)
-
Page 121: 動作条件
AXIS P1368-E Network Camera 4ワイヤーRS422全⼆重ポイントツーポイント通信 • 機 機 機 能 能 能 ピ ピ ピ ン ン ン 備 備 備 考 考 考 RS485Bまたは すべてのモードのRXペア (2ワイヤーRS485のRX/TXペ RS485/422 RX(B) ア) RS485A5Bまたは RS485/422 RX(A) RS485/RS422 TX(B) RS422および4ワイヤーRS485のTXペア RS485/RS422 TX(A) 重要 ケーブルの最⼤⻑は30 mです。... -
Page 123: 安 安 安 全 全 全 情 情 情 報 報 報
AXIS P1368-E Network Camera 安 安 安 全 全 全 情 情 情 報 報 報 危 危 危 険 険 険 レ レ レ ベ ベ ベ ル ル ル 危険 回避しない場合、死亡または重傷につながる危険な状態を⽰します。 警告 回避しない場合、死亡または重傷につながるおそれのある危険な状態を ⽰します。 注意 回避しない場合、軽傷または中程度の怪我につながるおそれのある危険 な状態を⽰します。 注記... -
Page 124: 安 安 安 全 全 全 手 手 手 順 順 順
AXIS P1368-E Network Camera 安 安 安 全 全 全 ⼿ ⼿ ⼿ 順 順 順 注記 • 本製品は、お使いになる地域の法律や規制に準拠して使⽤してください。 • Axisは、カテゴリーCAT5e以上のネットワークケーブルの使⽤を推奨します。 • 本製品は乾燥した換気のよい環境に保管してください。 • 本製品に衝撃または強い圧⼒を加えないでください。 • 本製品を不安定なポール、ブラケット、表⾯、または壁に設置しないで ください。 • 本製品を設置する際には、適切な⼯具のみを使⽤してください。 電動⼯具を 使⽤して過剰な⼒をかけると、製品が損傷することがあります。 • 化学薬品、腐⾷剤、噴霧式クリーナーは使⽤しないでください。 • 清掃には、きれいな⽔に浸した清潔な布を使⽤してください。 • 製品の技術仕様に準拠したアクセサリーのみを使⽤してください。 これらの アクセサリーは、Axisまたはサードパーティから⼊⼿できます。 Axisは、ご使... -
Page 125: 包 包 包 装 装 装 内 内 内 容 容 容
AXIS P1368-E Network Camera 包 包 包 装 装 装 内 内 内 容 容 容 AXIS P1368-E 网络摄像机 • 用于连接外部设备的 4 针 I/O 连接器块 • 2 针 RS485/422 连接器块(2 个) • 墙壁式安装 • Torx 螺丝刀 T20 • Torx 螺丝批头 T30 •... -
Page 126: 产 产 产 品 品 品 概 概 概 述 述 述
AXIS P1368-E Network Camera 产 产 产 品 品 品 概 概 概 述 述 述 耐候保护罩 顶盖 窗片 入侵报警磁铁 安全线 扎线带固定点 IK10 工具 入侵报警传感器 电缆盖板 10 带弹簧的拇指螺丝(4 颗) 11 光学单元 12 镜头 注意 请勿使用电缆盖板提起该产品。... - Page 127 AXIS P1368-E Network Camera 13 状态 LED 14 网络 LED 15 电源 LED 16 microSD 卡插槽 17 I/O 连接器 18 RS485/422 连接器 19 控制按钮 20 网络连接器 (PoE) 21 音频输出 22 音频输入 23 电缆垫片 M20(2 个) 24 光圈连接器...
-
Page 128: 如 如 如 何 何 何 安 安 安 装 装 装 产 产 产 品 品 品
AXIS P1368-E Network Camera 如 如 如 何 何 何 安 安 安 装 装 装 产 产 产 品 品 品 安 安 安 装 装 装 硬 硬 硬 件 件 件 注意 • 由于当地法规或产品使用场所的环境和电气条件,可能需要使用屏蔽网络电缆 (STP)。将产品连接到网络的电缆以及在室外或恶劣电气环境中布放的电缆应专 用于其特定用途。确保根据制造商的说明安装网络设备。 Regulatory information on page 4 有关法规要求的信息,请参见... - Page 129 AXIS P1368-E Network Camera 底盖 底盖螺丝 T20(4 颗) 电缆垫片 M20(2 个) 卡舌 3. 将网络电缆穿过电缆垫片。 注意 如果网络电缆具有预装网络连接器,请移除电缆垫片并使用连接器防护件防止 电缆垫片破损。避免使用具有带帽网络连接器的网络电缆,因为即使使用连接 器防护件,它们也可能导致电缆垫片破损。 4. 轻轻回拉网络电缆,以便调整电缆垫片在电缆上的位置。 注意 不回拉电缆可能会导致水渗入而损坏产品。 5. 确保电缆垫片正确安装。...
- Page 130 AXIS P1368-E Network Camera 6. 如果将辅助设备(例如,I/O、音频或外部电源设备)连接到摄像机,请 重复上述适用于特定设备的步骤。 注意 将电缆穿过电缆垫片,然后安装连接器。 底盖 螺丝 T20(4 颗) 墙挂支架 支架调整螺丝 T30 7. 将底盖放在墙挂支架上,然后拧紧螺丝(扭矩 2 Nm)。 8. 如果适用,将外部 I/O 设备或音频设备连接到摄像机。...
- Page 131 AXIS P1368-E Network Camera 9. 如果使用 SD 卡进行本地存储,请将卡插入摄像机的 SD 卡插槽。 10. 连接网线。 LED 指示灯 在第137页 11. 确保摄像机 LED 指示正确的情况。请参见 。 12. 松开支架调整螺丝,将摄像机朝向感兴趣的地方。有关如何查看视频流的信 在网络上查找设备 在第134页 息,请参见 13. 在交货时,镜头已正确定位,满足 IK10 防护等级。如果移动或更换镜头,您 如何定位镜头以满足 需要重新定位光学总成以确保 IK10 防护等级,请参见 IK10 防护等级 在第134页 。...
- Page 132 AXIS P1368-E Network Camera 安全挂钩 干燥剂袋 14. 从干燥剂袋中取出塑料包装。 15. 移除粘合剂上的保护条,然后将干燥剂袋粘贴在顶盖上。 16. 关上护罩。交替拧几次底盖螺丝,直到将其拧紧为止(扭矩 1.5 Nm)。这将 均匀压缩底盖垫片。 注意 关闭护罩时,请勿夹住电缆。 17. 如果需要,请松开耐候保护罩上的螺丝,调整其位置,然后拧紧螺丝。...
- Page 133 AXIS P1368-E Network Camera 如 如 如 何 何 何 设 设 设 置 置 置 走 走 走 廊 廊 廊 模 模 模 式 式 式 锁定螺丝(2 颗) 光学单元 1. 松开两颗锁定螺丝。 2. 旋转光学单元。 3. 拧紧锁定螺丝。 Stream ( ( ( 流 流 流 ) ) ) 选项卡,然后将视图旋转 90°。...
-
Page 134: 在网络上查找设备
5. 拧紧拇指螺丝。 在 在 在 网 网 网 络 络 络 上 上 上 查 查 查 找 找 找 设 设 设 备 备 备 若要在网络中查找 Axis 设备并为它们分配 Windows® 中的 IP 地址,请使用 AXIS IP Utility 或 AXIS 设备管理器。 这两种应用程序都是免费的,可以从... - Page 135 AXIS P1368-E Network Camera 重要 重置为出厂默认设置时应谨慎。 重置为出厂默认设置会将全部设置(包括 IP 地址)重置为出厂默认值。 将产品重置为出厂默认设置: 1. 断开产品电源。 产品概述 在第126页 2. 按住控制按钮,同时重新连接电源。 请参见 。 3. 按住控制按钮 15–30 秒,直到 LED 状态指示灯呈橙色闪烁。 4. 松开控制按钮。 当 LED 状态指示灯变绿时,此过程完成。 产品已重置为 出厂默认设置。 如果网络上没有可用的 DHCP 服务器,则默认 IP 地址为 192.168.0.90。 5. 使用安装和管理软件工具分配 IP 地址、设置密码和访问视频流。...
-
Page 136: 更 更 更 多 多 多 信 信 信 息 息 息
AXIS P1368-E Network Camera 更 更 更 多 多 多 信 信 信 息 息 息 axis.com 若要获取本文档的新版本,请参见 • axis.com 用户手册可从 获取 • axis.com/support 要检查是否有设备的可用更新固件,请参见 • axis.com/academy 如需有用的在线培训和在线研讨会,请参见 • 可 可 可 选 选 选 附 附 附 件 件 件... -
Page 137: 规 规 规 格 格 格
AXIS P1368-E Network Camera 规 规 规 格 格 格 LED 指 指 指 示 示 示 灯 灯 灯 LED 状 状 状 态 态 态 指 指 指 示 示 示 灯 灯 灯 指 指 指 示 示 示... - Page 138 AXIS P1368-E Network Camera 接 接 接 口 口 口 网 网 网 络 络 络 连 连 连 接 接 接 器 器 器 采用以太网供电 (PoE) 的 RJ45 以太网连接器。 音 音 音 频 频 频 连 连 连 接 接 接 器 器 器...
- Page 139 AXIS P1368-E Network Camera 示 示 示 例 例 例 DC 接地 DC 输出 12 V,最大 50mA I/O 配置为输入 I/O 配置为输出 RS485/RS422 连 连 连 接 接 接 器 器 器 RS485/RS422 RS485/RS422 两个用于 RS485/RS422 串行接口的 2 针接线端子,用于控制辅助设备(如水平转 动-垂直转动设备)。 串行端口可配置为支持:...
-
Page 140: 工作条件
AXIS P1368-E Network Camera 功 功 功 能 能 能 针 针 针 备 备 备 注 注 注 RS485B alt 适用于各种不同模式的 RX 对(适用于双线 RS485 的 RS485/422 RX(B) 组合 RX/TX) RS485A alt RS485/422 RX(A) RS485/RS422 用于 RS422 和 4 线 RS485 的 TX 线对... -
Page 141: 安 安 安 全 全 全 信 信 信 息 息 息
AXIS P1368-E Network Camera 安 安 安 全 全 全 信 信 信 息 息 息 危 危 危 险 险 险 等 等 等 级 级 级 危险 表示如果不避免则会导致死亡或严重伤害的危险情况。 警告 表示如果不避免则可能导致死亡或严重伤害的危险情况。 小心 表示如果不避免则可能导致轻微或中度伤害的危险情况。 注意 表示如果不避免则可能导致财产损失的情况。 其 其 其 他 他 他 消 消 消 息 息 息 等 等 等 级 级 级... -
Page 142: 安 安 安 全 全 全 说 说 说 明 明 明
• 请勿将产品安装在不稳固的立杆、支架、表面或墙壁上。 • 安装 Axis 产品时,仅使用适用的工具。 使用电动工具过度施力可能导致 产品损坏。 • 请勿使用化学品、腐蚀剂或气雾剂。 • 使用蘸纯净水的干净布进行清洁。 • 仅使用符合产品技术规格的附件。 这些附件可由 Axis 或第三方提供。 Axis 推 荐使用与产品兼容的 Axis 电源设备。 • 仅使用 Axis 提供或推荐的备件。 • 请勿尝试自行维修产品。 有关服务事项,请联系 Axis 支持部门或 Axis 经销商。 运 运 运 输 输 输 注意... - Page 144 Installation Guide Ver. M3.2 AXIS P1368-E Network Camera Date: April 2021 © 2017 - 2021 Axis Communications AB Part No. 1741440...
Need help?
Do you have a question about the P1368-E and is the answer not in the manual?
Questions and answers