Table of Contents
Advertisement
Quick Links
Item # 1005 440 866
Model # FRS81146-2PKB
USE AND CARE GUIDE
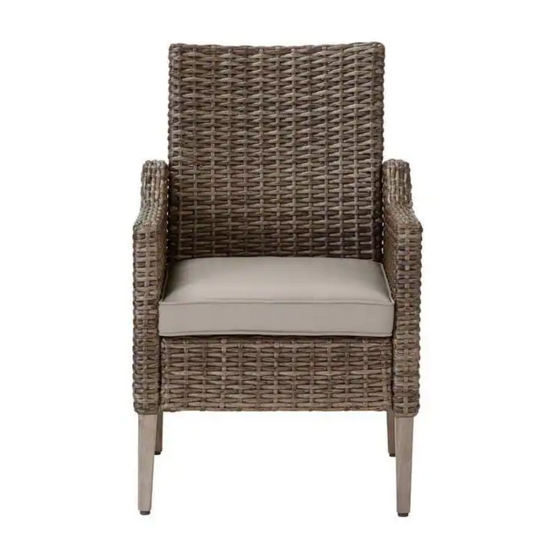
ROCK CLIFF STEEL WICKER 2PK CAPTAIN DINING CHAIR - BARE
Questions, problems, missing parts? Before returning to the store,
call Hampton Bay Customer Service
8 a.m. - 7 p.m., EST, Monday – Friday, 9 a.m. – 6 p.m., EST, Saturday
1-855-HD-HAMPTON
HAMPTONBAY.COM
THANK YOU
ly
create quality products designed to enhance your home. Visit us online to see our full line of products available for your home improvement needs.
Thank you for choosing Hampton Bay!
Advertisement
Table of Contents

Subscribe to Our Youtube Channel
Summary of Contents for HAMPTON BAY ROCK CLIFF STEEL WICKER FRS81146-2PKB
- Page 1 8 a.m. - 7 p.m., EST, Monday – Friday, 9 a.m. – 6 p.m., EST, Saturday 1-855-HD-HAMPTON HAMPTONBAY.COM THANK YOU create quality products designed to enhance your home. Visit us online to see our full line of products available for your home improvement needs. Thank you for choosing Hampton Bay!
- Page 2 Table of Contents Table of Contents........2 Pre-Assembly.
- Page 3 Warranty 3 YEAR FRAME LIMITED WARRANTY WHAT IS COVERED We warrant the frames to be free of manufacturing defects to the original purchaser for three years. WHAT IS NOT COVERED It remains the customer’s responsibility for freight and packaging charges to and from our service center. This warranty does not cover s warranty.
- Page 4 Pre-assembly (continued) HARDWARE INCLUDED NOTE: Hardware not shown to actual size. Part Description Quantity M6x20 Combination Bolt M6x40 Combination Bolt 12+1 Hex Wrench PACKAGE CONTENTS Part Description Quantity Chair Back Left Arm Right Arm Chair Seat Seat Cushion...
- Page 5 Assembly Connecting The Chair Back To The Left Arm NOTE: Loosely tighten all bolts using the hex wrench (CC). Place the left arm (B) on a soft surface. Insert the chair back (A) into the left arm (B). Tighten using an M6x20 combination bolt (AA). Attaching The Chair Seat To The Left Arm NOTE: Loosely tighten all bolts using the hex wrench (CC).
- Page 6 Assembly (continued) Attaching The Chair Seat To The Chair Back NOTE: Loosely tighten all bolts using the hex wrench (CC). Place the chair back (A) on the soft surface. Attach the chair seat (D) to the chair back (A) using M6x40 combination bolts (BB). Attaching The Right Arm To The Chair Back NOTE: Loosely tighten all bolts using the hex wrench (CC).
- Page 7 Assembly (continued) Attaching The Right Arm To The Chair Seat Attach the chair seat (D) to the right arm (C) using M6x40 combination bolts (BB) and an M6x20 combination bolt (AA). Once all of the bolts are in place, fully tighten all the bolts using the hex wrench (CC).
- Page 8 Questions, problems, missing parts? Before returning to the store, call Hampton Bay Customer Service 8 a.m. – 7 p.m., EST, Monday – Friday, 9 a.m. – 6 p.m., EST, Saturday 1-855-HD-HAMPTON HAMPTONBAY.COM Retain this manual for future use. For certification use only...


Need help?
Do you have a question about the ROCK CLIFF STEEL WICKER FRS81146-2PKB and is the answer not in the manual?
Questions and answers