
Related Manuals for Saunier Duval SDH 31-026 NW


Summary of Contents for Saunier Duval SDH 31-026 NW
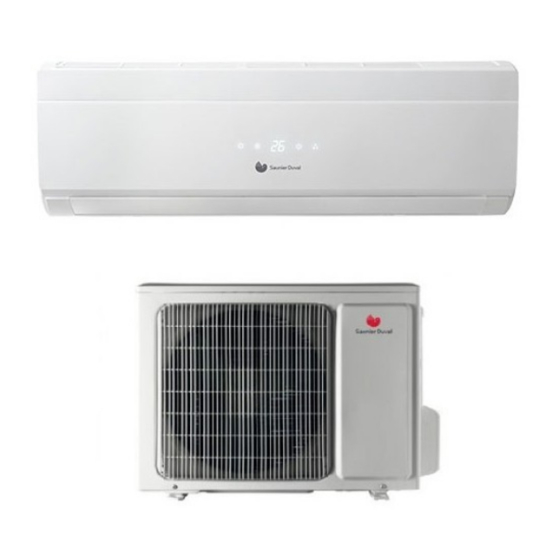
- Page 1 WALL-MOUNTED UNITS Installation Manual WALL-MOUNTED UNITS SDH 31-026 NW SDH 31-036 NW SDH 31-050 NW SDH 31-065 NW 2008...
-
Page 2: Table Of Contents
8.4- Connection warnings ......................15 9- Start up: purging and checking for leaks .................. 17 10- Technical specifi cations ......................19 11- Error codes ..........................20 11.1- SDH 31-026 NW / SDH 31-036 NW ..................20 11.2- SDH 31-050 NW / SDH 31-065 NW ..................21... -
Page 3: 2- Warnings
As part of its policy for ongoing improvements of its there would be a risk of electrocution. products, Saunier Duval reserves the right to modify these specifi cations without prior notice. Only use the right fuses for each model. Do not use... -
Page 4: 3- Operating Limitations
This service can to ensure that the product is taken by an authorised be rendered by Saunier Duval's Customer Services waste agent by local authorities, at the end of its Department, which will offer you a contract tailored service life, for transport to a suitable treatment to your needs. -
Page 5: 4- Dimensions
4- DIMENSIONS 4.1- INDOOR UNIT DIMENSIONS MODEL SDH 31-026 NHWI SDH 31-036 NHWI SDH 31-050 NHWI 1.070 1.020 SDH 31-065 NHWI Dimensions in mm 4.2- OUTDOOR UNIT DIMENSIONS MODEL SDH 31-026 NHWO SDH 31-036 NHWO SDH 31-050 NHWO SDH 31-065 NHWO Dimensions in mm Air inlet Air outlet... -
Page 6: Installation Layout
4- DIMENSIONS 4.3- INSTALLATION LAYOUT Over 10 cm Over 10 cm * The indoor unit should not be more than 2m from the fl oor. Over 60 cm Over 15 cm Figure 4.3... -
Page 7: 5- Installation Of The Indoor Unit
5- INSTALLATION OF THE INDOOR UNIT 5.1- PLANNING THE MOUNTING SITE FOR THE INDOOR UNIT As a general rule the indoor unit should be Choose a mounting site that will allow installed close to the ceiling. air to reach all parts of the room evenly. Bear in mind the minimum distances with Airfl... -
Page 8: Connecting The Refrigerant And Condensed Water Pipes
5- INSTALLATION OF THE INDOOR UNIT 5.4- CONNECTING THE REFRIGERANT AND CONDENSED WATER PIPES 5.4.1- Laying the rear piping Lay the pipes and condensed water hose and then secure them with heat-resistant insulator. 5.4.2- Laying the piping on the left / at the rear left In the case of left side piping, carefully Figure 5.4.2... -
Page 9: 4- Installation Of The Indoor Unit Body
5- INSTALLATION OF THE INDOOR UNIT Drill the refrigerant pipe when installed. Ref. Description fi gure 5.4.4 Carefully remove the insulation of the fl ared Heat-resistant material connection in the indoor unit. Hang the indoor unit on the top edge of Drain hose the mounting plate. - Page 10 5- INSTALLATION OF THE INDOOR UNIT The unit can be tilted to allow the Curved upward condensed water to drain out naturally and downward. from the indoor unit to a container (toilet, sink, etc.). Different invisible installation solutions also exist. When the condensed water cannot be drained out by fl...
-
Page 11: 6- Installation Of The Outdoor Unit
Las unidades exteriores deben ubicarse en guarantee the optimum performance of lugares accesibles para su mantenimiento y the unit. reparación. Saunier Duval no se hará cargo Make sure that air draughts or running de cualquier coste derivado de un incorrecto noises do not disturb neighbours. -
Page 12: Connecting The Condensed Water In The Outdoor Unit
6- INSTALLATION OF THE OUTDOOR UNIT 6.4- CONNECTING THE CONDENSED WATER IN THE OUTDOOR UNIT NOTE! Insert the splice elbow supplied into the Only in those units that have built-in heat corresponding hole. This hole is located pumps. on the bottom of the outdoor unit. Turn the elbow 90°... -
Page 13: 7- Connecting The Refrigerant Pipes
Try to keep the radius as nut can damage the thread and cause wide as possible. a reduction in the water tightness of the unit. 7.2- COOLING CONNECTIONS SDH 31-026 NW SDH 31-036 NW SDH 31-050 NW SDH 31-065 NW Refrigerant R410A (5m) 1.100 1.100... -
Page 14: 8- Power Connection Between The Indoor And Outdoor Units
8- POWER CONNECTION BETWEEN THE INDOOR AND OUTDOOR UNITS Throw the electrical cable from the rear 8.1- POWER CONNECTION OF THE INDOOR UNIT of the indoor unit through the specifi c hole in the front. Connect the line in the 8.1.1- Removing the wiring cover indoor unit terminal space according to the corresponding connection layout. -
Page 15: Power Connection
8- POWER CONNECTION BETWEEN THE INDOOR AND OUTDOOR UNITS 8.3- POWER CONNECTION INDOOR UNIT OUTDOOR UNIT INDOOR UNIT OUTDOOR UNIT SDH 31-026 NW SDH 31-050 NW SDH 31-036 NW OUTDOOR UNIT INDOOR UNIT SDH 31-065 NW 8.3.1- Power supply SDH 31-026 NW... -
Page 16: Connection Warnings
8- POWER CONNECTION BETWEEN THE INDOOR AND OUTDOOR UNITS 8.4- CONNECTION WARNINGS If the mains cable is damaged, it must Remark on be replaced by the manufacturer or an 89/336/EEC Directive approved dealer or a similarly qualifi ed person. order prevent electromagnetic If the fuse on the PC board is blown please... -
Page 17: 9- Start Up: Purging And Checking For Leaks
9- START UP: PURGING AND CHECKING FOR LEAKS CHECKING FOR LEAKS Connect a manometer bridge (faucets) to the gas pipe service valve. Connect a nitrogen pump to the low-pressure end of the manometer bridge. Carefully open the valves corresponding to the service keys and set the system to the pressure setting recommended on the table on the right, depending on the cooling agent in use. - Page 18 9- START UP: PURGING AND CHECKING FOR LEAKS START UP Open the 2-way valve (gas) by twisting the rod 90° Service hole anticlockwise. The installation will be fi lled with refrigerant. 90º for 60 seconds Close the two-way valve (gas) after approximately 6 seconds. Check the unit once again for water tightness.
-
Page 19: 10- Technical Specifications
R410A Refrigerant charge 1100 1230 1450 1.550 Dimensions H x L x D 540x795x255 540x795x255 605x850x295 605x850x295 Net Weight ¡Note! In application of its continuous product improvement policy, Saunier Duval reserves the right to change any specifications without prior notice. -
Page 20: 11- Error Codes
11- ERROR CODES 11.1- SDH 31-026 NW / SDH 31-036 NW Fault condition display Fault name Digital tube The communication faults in the indoor and outdoor units Internal temperature sensor faults Internal coil sensor faults PG motor faults IPM protection... -
Page 21: Sdh 31-050 Nw / Sdh 31-065 Nw
11- ERROR CODES 11.2- SDH 31-050 NW / SDH 31-065 NW Fault Indoor Display Indoor Communication failure between indoor and outdoor The indoor environment room temperature sensor failure The indoor coil temperature sensor failure The indoor fan failure Outdoor The outdoor module failure The outdoor environment temperature sensor failure The outdoor coil temperature sensor failure The compressor gas intake temperature sensor failure... - Page 22 NOTES...
- Page 23 NOTES...
- Page 24 Jose Luis Goyoaga, 36 48950 Erandio (Vizcaya) España Tel: +34 94 489 62 00 Fax: +34 94 489 62 53 www.saunierduval.es info@saunierduval.es Italy: Vaillant Saunier Duval Italia S.p.A. Via Benigno Crespi 70 20159 Milano Tel. 02.60.74.901 Fax 02.69.71.25.59 www.saunierduval.it webmaster@saunierduval.it Belgium: BULEX Chaussée de Mons 1425 Bergensesteenweg...
Need help?
Do you have a question about the SDH 31-026 NW and is the answer not in the manual?
Questions and answers