
Related Manuals for Hioki IR3455-01


Summary of Contents for Hioki IR3455-01
- Page 1 IR3455 Instruction Manual HIGH VOLTAGE INSULATION TESTER Revised edition Sept. 2018 IR3455A961-01 18-09H...
-
Page 3: Table Of Contents
Contents Introduction ............1 Verifying Package Contents / Open the case .. 1 Safety Information ........... 5 Operating Precautions ........9 1 Overview Product Overview ......... 19 Features ..........21 Measurement Overview ....... 23 Names and Functions of Parts ..... 29 Screen Setup ........ - Page 4 3 Measurement Pre-Operation Inspection .....59 Measuring Insulation Resistance ..62 3.2.1 Starting Measurement......64 3.2.2 Ending Measurement......70 3.2.3 Checking and Deleting Held Data..72 3.2.4 Automatic Discharge Function .... 73 3.2.5 Switching to Leakage Current Indication .............74 3.2.6 Insulation Resistance Measurement Basis ............75 3.2.7 Use of GUARD Terminal.....
- Page 5 5 Recording Measurement Data (Memory Function) Recording Measurement Data ... 107 5.1.1 Manual Recording (Recording result of one measurement session) ....107 5.1.2 Logging Recording (Recording at regular intervals) ..110 Checking Recorded Data ....118 Deleting Recorded Data ..... 123 5.3.1 Deleting Data of Chosen No.....
- Page 6 7 Specifications General Specifications .......141 Measurement Specifications ....147 7.2.1 Insulation Resistance Measurement. 147 7.2.2 Leakage Current Measurement ..150 7.2.3 Voltage Measurement....... 151 7.2.4 Temperature Measurement ....152 9750-01/-02/-03/-11/-12/-13 and 9751-01/-02/-03 ALLIGATOR CLIPs Specifications ........153 8 Maintenance and Service Troubleshooting .........156 Cleaning ..........158 Error Display ........158 Performing System Reset ....160...
-
Page 7: Introduction
Introduction Introduction Thank you for purchasing the Hioki IR3455 High Voltage Insulation Tester. To obtain maximum performance from the instru- ment, please read this manual first, and keep it handy for future reference. Trademarks • Microsoft and Windows are either regis-... - Page 8 Verifying Package Contents / Open the case Procedure Draw the latch outwards with your fin- ger. While raising the entire latch, place a finger on the top of the latch and pull it out.
- Page 9 Verifying Package Contents / Open the case Main Unit IR3455 HIGH VOLTAGE INSULATION TESTER × Accessories 9750-01,-02,-03 TEST LEAD (Red, Black, Blue) Lead length Approx. 3 m 1 each × 9751-01,-02,-03 ALLIGATOR CLIP (Red, Black, Blue) 1 each × Instruction Manual LR6 alkaline battery ×...
- Page 10 Verifying Package Contents / Open the case Options 9750-11,-12,-13 TEST LEAD (Red, Black, Blue Lead length Approx. 10 m) The specifications for the 9750-11 and 9750-12 models differ from the standard specifications in regards to temperature characteristics. See 7.2"Measurement Specifications" (page ...
-
Page 11: Safety Information
Safety Information Safety Information This instrument is designed to conform to IEC 61010 Safety Standards, and has been thoroughly tested for safety prior to shipment. However, using the instrument in a way not described in this manual may negate the provided safety features. - Page 12 Safety Information Symbols on the instrument Indicates cautions and hazards. When the symbol is printed on the instrument, refer to a corresponding topic in the Instruction Manual. Indicates that dangerous voltage may be present at this terminal. Indicates a double-insulated device. Indicates DC (Direct Current).
- Page 13 Safety Information Notation In this document, the risk seriousness and the hazard levels are classified as follows. Indicates an imminently hazardous situation that will result in death or serious injury to the operator. Indicates a potentially hazardous situation that may re- sult in death or serious injury to the operator.
- Page 14 Safety Information Measurement categories To ensure safe operation of measuring instruments, IEC 61010 establishes safety standards for various electrical environments, categorized as CAT II to CAT IV, and called measurement categories. • Using a measuring instrument in an environment designated with a higher- numbered category than that for which the instrument is rated could result in a severe accident, and must be carefully...
-
Page 15: Operating Precautions
If you find any damage, contact your autho- rized Hioki distributor or reseller. If the test lead or the instrument is dam- aged, there is a risk of electric shock. - Page 16 Operating Precautions Placement Operating temperature and humidity range: P.141 Temperature and humidity range for guaranteed accuracy: P.149 to P.151 Installing the instrument in inappropriate locations may cause a malfunction of instrument or may give rise to an acci- dent. Avoid the following locations: •...
- Page 17 If you have lost a screw or find that a screw is damaged, please contact your Hioki distributor for a replacement.
- Page 18 Operating Precautions • This instrument is designed for use indoors. operated temperatures between -10 to 50°C (14 to 122°F) without degrading safety. • To avoid damage to the instrument, protect it from physical shock when transporting and handling. Be especially careful to avoid physical shock from dropping.
- Page 19 Operating Precautions • After use, always turn off the power. • Standby State The use of "standby state" in this manual means that measurement is not being performed and that no parameters are set. This includes the state in which is on.
- Page 20 Operating Precautions Measurement • It is recommend to make measurements on the secondary side of distribution panels. Measuring the primary side, where the current capacity is much larger, could cause damage to the instrument or panel in the event of a short-circuit.
- Page 21 • Keep discs inside a protective case and do not expose to direct sunlight, high tem- perature, or high humidity. • Hioki is not liable for any issues your computer system experiences in the course of using this disc. Handling the Battery Pack Be sure to observe the following precau- tions.
- Page 22 • If the battery pack fails to finish charging within the stipulated time, disconnect the AC adapter to stop charging and contact your dealer or Hioki representative. • Consult your dealer or nearest service sta- tion should liquid leaks, strange odor, heat,...
- Page 23 Operating Precautions • The battery pack is a consumable. If you are able to use the instrument for only a limited period of time despite the battery pack being properly charged, the battery pack's service life is at an end, and it should be replaced.
- Page 24 Operating Precautions...
-
Page 25: Overview
1.1 Product Overview Overview 1.1 Product Overview The IR3455 is an insulation resistance tester with a wide measurement range, for use in such environments involving low to high voltage. The instrument has the functions and purposes given below. Reference Function Purpose page (Basic) - Page 26 1.1 Product Overview Reference Function Purpose page Step voltage To determine whether the insula- 4.4 (P.97) test tion resistance of an object chang- es according to test voltage applied. Memory To save the measurement data. 5 (P.105) To create tables or graphs of the 6.4 (P.136) ...
-
Page 27: Features
1.2 Features 1.2 Features Wide test voltage range Generates a wide range of test voltages, from 250 V to 5 kV The voltage may be chosen from the com- monly used presets of 250 V, 500 V, 1 kV, 2.5 kV, and 5 kV;... - Page 28 1.2 Features PC software with report creation/ printing feature The instrument has a USB interface. Data stored in the memory may be downloaded to PC using the data download software. The same software also enables reports to be created and printed with ease. 6.4 "Communicating with PC"...
-
Page 29: Measurement Overview
1.3 Measurement Overview 1.3 Measurement Overview This instrument is designed for measurement of the follow- ing: Purpose : Inspection of high-voltage electrical facilities Location : High-voltage receiving station or trans- forming station Test object : Large motors, transformers, cables, etc. •... - Page 30 1.3 Measurement Overview Start measurement. Insulation Resistance Measurement 3.2 "Measuring Insulation Resistance" (page 62) Make sure that power supply to the object under test is turned off. Press the key to turn on 2.2 (page 50) the instrument.
- Page 31 1.3 Measurement Overview Press the key and set 3.2.1 (page 64) the test voltage. Press the key to gener- 3.2.1 (page 64) ate a voltage and start measure- ment. Read the indication. 3.2.1 (page 64) ...
- Page 32 1.3 Measurement Overview Press the key to stop 3.2.2 (page 70) voltage generation and measure- ment. The automatic discharge function 3.2.4 (page 73) is activated. Measurement is terminated when the voltage falls below 10 V.
- Page 33 1.3 Measurement Overview Voltage Measurement 3.3 "Measuring Voltage" (page 79) Connect the test leads into the "+" and "-" termi- nals of the instrument and to the object to be tested. Test lead (Red) Test lead (Black) + terminal GUARD terminal - terminal...
- Page 34 1.3 Measurement Overview Temperature Measurement 3.4 "Measuring Temperature" (page 82) Insert the temperature sensor into the tempera- ture sensor terminal of the instrument. Read the indication. Press the key to stop temperature mea- surement. Record measurement data ...
-
Page 35: Names And Functions Of Parts
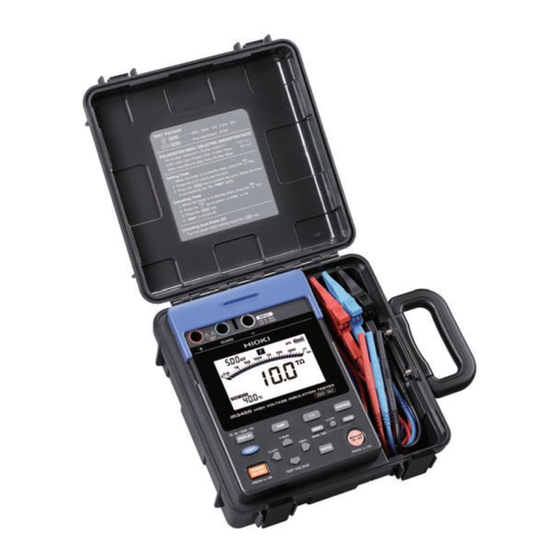
1.4 Names and Functions of Parts 1.4 Names and Functions of Parts Front (page 9, page 45) Slide the shutter. (page 9, page 56) Operating panel (page 31) ... - Page 36 1.4 Names and Functions of Parts Name Function Connect the AC adapter to this terminal. AC adapter 2.1.3 "Connecting the AC Adapter" (page terminal Connect the USB Cable to this terminal. 2 USB terminal 6.4.3 "Downloading Data to Save to PC/ ...
- Page 37 1.4 Names and Functions of Parts Operating panel Function Used to turn power on/off. Used to set parameters. Used to toggle between set voltage and monitor voltage after resistance measurement. Used to set parameters. Used to set test voltage. • Used to make fine adjustments to test voltage. •...
- Page 38 1.4 Names and Functions of Parts Function • Used to start and stop of resistance measure- ment. • Blinks when a voltage is generated. • Blinks when a voltage of 50 V or more is input (Warning lamp) or when discharging is performed. •...
-
Page 39: Screen Setup
1.5 Screen Setup 1.5 Screen Setup All On Measuring Voltage Blinking Measured voltage 3.3 "Measuring Voltage" (page 79) Measuring Temperature 3.4 "Measuring Temperature" (page 82) ... - Page 40 1.5 Screen Setup Measuring Insulation Resistance Blinking Actual output voltage > blinks if the input exceeds the measure- ment range. Elapsed time Insulation resistance 3.2 "Measuring Insulation Resistance" (page 62) The screen is switched over with the key. Leakage Current Display Blinking Actual output voltage...
-
Page 41: Measurement Preparations
2.1 Supplying Power Measurement Preparations 2.1 Supplying Power This instrument can be powered by the following: • AA alkaline batteries (LR6) See 2.1.1 "Installing or Replacing the Battery" (page 36). • 9459 BATTERY PACK (Option) See 2.1.2 "Installing the Battery Pack (Rechargeable nickel-hydro- ... -
Page 42: Installing Or Replacing The Battery
2.1 Supplying Power 2.1.1 Installing or Replacing the Battery • To avoid electric shock, turn off the power switch and disconnect the test leads before replacing the batteries. • Do not mix old and new batteries, or dif- ferent types of batteries. Also, be care- ful to observe battery polarity during installation. - Page 43 2.1 Supplying Power Procedure Turn off power and disconnect all the test leads from the instrument. See 2.2 "Turning Power On and Off" (page 50). Loosen the set screw on the rear of the instrument and remove the battery cover.
- Page 44 2.1 Supplying Power Turn the battery selector switch to LR6. When the power is turned on, “ ” appears on the top left of the screen. See 2.2 "Turning Power On and Off" (page 50). To LR6 Replace the battery cover and tighten the set screw.
-
Page 45: Installing The Battery Pack (Rechargeable Nickel-Hydrogen Battery)
ProcedureSee 2.1.4 "Charging the Battery Pack" (page 47). • For battery operation, use only the Hioki Model 9459 BATTERY PACK. We do not take any responsibility for accidents or damage related to the use of any other batteries. - Page 46 2.1 Supplying Power • If the battery pack is not used for an extended period of time, remove it from the instrument and store at a temperature between 30°C, prevent deterioration. Charge the battery at least every 2 months. If the battery pack is left for a long period of time in a low state of charge, its performance will be degraded.
- Page 47 2.1 Supplying Power Loosen the set screw on the rear of the instrument and remove the battery cover. Set screw Remove Battery cover Connect the battery pack to the instru- ment. (Align the protrusions.)
- Page 48 2.1 Supplying Power Place the battery pack in the battery pack compartment. Turn the battery selector switch to 9459. When the power is turned on, “ ” appears on the top left of the screen. See 2.2 "Turning Power On and Off" (page 50). To 9459 Replace the battery cover and tighten the set screw.
- Page 49 2.1 Supplying Power Replacement Tools: Phillips screwdriver Procedure Turn off power and disconnect the test leads, AC adapter, and USB cable from the instrument. See 2.2 "Turning Power On and Off" (page 50). Loosen the set screw on the rear of the instrument and remove the battery cover.
- Page 50 2.1 Supplying Power Connect the new battery pack to the instru- ment. (Align the protrusions.) Place the battery pack in the battery pack compartment. Turn the battery selector switch to 9459. When the power is turned on, “ ” appears on the top left of the screen.
-
Page 51: Connecting The Ac Adapter
2.1 Supplying Power 2.1.3 Connecting the AC Adapter • Optional AC adapter can be used. • When the AC adapter is connected to the instrument, you can charge the battery pack, communicate with a PC, per- form temperature measurement, and edit the settings. However, you cannot measure insulation resistance, leak- age current or voltage. - Page 52 2.1 Supplying Power Insert the power cord into the AC adapter. Move the shutter of the instrument to reveal the AC adapter terminal. Insert the output cable of the AC adapter into the AC adapter terminal. Make sure that the commercial power source voltage matches the rated supply voltage of the AC adapter.
-
Page 53: Charging The Battery Pack
2.1 Supplying Power Charging the Battery Pack 2.1.4 The 9459 BATTERY PACK can be charged while installed in the instrument, using the optional AC adapter. Short charge time: Approx. 3 hours (at 23°C room tempera- ture) • Carry out battery charging at an ambient temperature between 0°C... - Page 54 2.1 Supplying Power Procedure Install the battery pack. See 2.1.2 "Installing the Battery Pack (Rechargeable nickel-hydrogen battery)" (page 39). Move the shutter to reveal the AC adapter terminal. Move the shutter. Connect the AC adapter to the AC adapter terminal. Rapid charging begins.
- Page 55 2.1 Supplying Power If the AC adapter is connected to the instrument when the instrument is off, the instrument is automatically turned on and rapid charging begins. When rapid charging is completed, the battery status indictor changes from blinking to continuously lit. After rapid charging finishes, the battery is trickle- charged (maintained in a fully-charged state).
-
Page 56: Turning Power On And Off
2.2 Turning Power On and Off 2.2 Turning Power On and Off Turning power On Press and hold the key for around one second. After all the screen indications light, the version and the position of the battery selector switch appear and then the instrument enters the standby state. -
Page 57: Auto Power Off
2.2 Turning Power On and Off 2.2.1 Auto Power Off • Power is automatically turned off around 10 minutes after the last operation. This function, however, is not available during insulation resistance measurement. • [ ] will start blinking around 30 sec- onds before power is turned off. -
Page 58: Setting And Checking Date And Time
2.3 Setting and Checking Date and Time 2.3 Setting and Checking Date and Time Set the time and date before use of the instrument. Use the Gregorian calendar. 2.3.1 Setting Date and Time Procedure When the instrument is in a standby state, press the key. - Page 59 2.3 Setting and Checking Date and Time Pressing moves the blinking cursor. Place the cursor at the digit, value, etc., you wish to change. Year, month, day, hour, and minutes can be changed. The year-month-day screen and the hour- minute-second screen are switched to and from each other in the procedure below.
- Page 60 2.3 Setting and Checking Date and Time Date and time can be set on a PC. • The date and time can be set on a PC using the data analysis software for model 3455. • The data analysis software for model 3455 must be installed on the PC.
-
Page 61: Checking Date And Time
2.3 Setting and Checking Date and Time 2.3.2 Checking Date and Time Procedure When the instrument is in the standby state, press the key. Year, month, and day appear. Press the key. Hours, minutes, and seconds appear. Pressing key returns to the standby screen. -
Page 62: Connecting Test Lead
• To avoid electric shock, never use the instrument if the shutter is broken. Only use Hioki-specified test leads with the instrument. Safe measurement is not possible with other cords. Test leads cannot be connected to the instrument if the AC adapter, a temperature sensor, or USB cable is connected. - Page 63 2.4 Connecting Test Lead Move the shutter to reveal the + and - terminals. Connect the red test lead to the + terminal and the black test lead to the - terminal. For insulation resistance measurement, connect the blue test lead to the GUARD terminal if necessary.
-
Page 64: Connecting Temperature Sensor
2.5 Connecting Temperature Sensor 2.5 Connecting Temperature Sensor Temperature sensors may be damaged by high voltage or static electricity. Do not expose the temperature sensor to excessive impact, or allow the cable to be bent, since malfunction or faulty connection may result. Temperature sensors cannot be used simultaneously with test leads. -
Page 65: Measurement
Before using the instrument, verify that it oper- ates normally to ensure that no damage occurred during storage or shipping. If you find any damage, contact your authorized Hioki dis- tributor or reseller. Before using the instrument, make sure that the insulation on the test leads and... - Page 66 3.1 Pre-Operation Inspection Inspection Procedure Clip the resistor with the red and black test leads connected to the instrument. Also, clip the resistor with the test lead of the high-voltage meter. Set the test voltage of the instrument to [5.00 kV].
- Page 67 3.1 Pre-Operation Inspection Check to see if the insulation resistance reading of the instrument is 20 M. Voltage Insulation resistance Stop insulation resistance measurement. See 3.2.2 "Ending Measurement" (page 70). Short-circuit the tips of the clips of the red and black test leads of the instru- ment.
-
Page 68: Measuring Insulation Resistance
3.2 Measuring Insulation Resistance 3.2 Measuring Insulation Resistance Observe the following to avoid electric shock and short circuits. A. Do not use the instrument if the shutter is broken. Shutter B. Check Table 1 before connecting test leads to the instrument. - Page 69 3.2 Measuring Insulation Resistance • When measuring insulation resistance, dangerous voltage is applied to the measurement terminals. To avoid elec- tric shock, do not touch the terminals and test leads. • Do not touch the object under test or disconnect the test leads after measure- ment has been completed until the auto- matic discharge function is completed.
-
Page 70: Starting Measurement
3.2 Measuring Insulation Resistance 3.2.1 Starting Measurement Procedure Connect the alligator clip to the end of each test lead. Insert it fully. Move the shutter to reveal the + and - terminals. - Page 71 3.2 Measuring Insulation Resistance Connect the red test lead to the + terminal and the black test lead to the - terminal. Connect the blue test lead to the GUARD terminal if necessary. Fully insert the test leads. See 3.2.7 "Use of GUARD Terminal" (page 77). ...
- Page 72 3.2 Measuring Insulation Resistance Press the key, after which the voltage display starts blinking. The test voltage is chosen from 250 V, 500 V, 1.00 kV, 2.50 kV, and 5.00 kV using the keys. Pressing keys, you can make fine adjustment of the test voltage setting. For step voltage testing, hold down key, which will display ].
- Page 73 3.2 Measuring Insulation Resistance Hold down the key for more than one second. A voltage is generated and measurement begins. mark and key lamp starts blinking. Blinking Actual output voltage >blinks if the input exceeds the measurement range. Elapsed time Insulation resistance >...
- Page 74 3.2 Measuring Insulation Resistance Read the indication. • If the indication is unstable, press the key. The average of the mea- surements is shown. See "Average function" (page 69). • Resistance indication is switched to leakage current indication by pressing key.
- Page 75 3.2 Measuring Insulation Resistance The state not to be started the measure- ment When the display reflects the following state, insulation resistance measurement cannot be started. • The setting value is blinking to indicate that the instrument being set up •...
-
Page 76: Ending Measurement
3.2 Measuring Insulation Resistance 3.2.2 Ending Measurement Procedure Press the key with the test leads connected to the object under test. The last measurement is held. lights up.) Immediately after measurement has been completed, the discharge circuit in the instrument automatically discharges the electric charge remaining in the object under test. - Page 77 3.2 Measuring Insulation Resistance When the voltage falls to about 10 V, the instrument stops discharging and the mark and key lamp are turned off. Actual output voltage (last measurement) Elapsed time of the Last end of measurement measurement value •...
-
Page 78: Checking And Deleting Held Data
3.2 Measuring Insulation Resistance 3.2.3 Checking and Deleting Held Data Checking Held Data The following data are held and displayed after insulation resistance measurement has been completed. • Insulation resistance (digital value and bar graph) • Test voltage • Actual output voltage •... -
Page 79: Automatic Discharge Function
3.2 Measuring Insulation Resistance 3.2.4 Automatic Discharge Function • When insulation resistance with a capacitance component is measured, this component remains charged with a high-voltage equivalent to the test voltage, which is dan- gerous. • This instrument automatically discharges remaining elec- tric charge using the internal circuit after measurement. -
Page 80: Switching To Leakage Current Indication
3.2 Measuring Insulation Resistance 3.2.5 Switching to Leakage Current Indi- cation Insulation resistance indication may be switched to leakage current indication. During measurement Blinking Actual output voltage The bar graph shows the resistance measurement. < blinks at below 1 nA. Elapsed time Current measurement Before measuring insulation resistance... -
Page 81: Insulation Resistance Measurement Basis
3.2 Measuring Insulation Resistance Holding data after measurement Every time key is pressed, the indi- cation changes in the order: resistance current DAR 1 min/15s DAR 1 min/30s resistance current etc. PI/DAR See 4.2 "Displaying PI and DAR" ... - Page 82 3.2 Measuring Insulation Resistance Reproducibility of insulation resistance measurement When measuring the same object repeat- edly, the insulation resistance or leakage current indications may differ. This is caused by polarization*, which occurs when a volt- age is applied to an insulating material. An insulating material is represented by an equivalent circuit as shown by the diagram on the previous page.
-
Page 83: Use Of Guard Terminal
3.2 Measuring Insulation Resistance 3.2.7 Use of GUARD Terminal Measurement unaffected by surface electrical resistance A GUARD terminal is used to prevent the surface electrical resistance of an insulating material affecting measurement, enabling correct measurement of the entire volume resistivity of the material. Bare conductor Metallic shielding layer Insulating material... - Page 84 3.2 Measuring Insulation Resistance Measurement using G (GUARD) terminal grounding G terminal grounding is used for measuring the insulation resistance between the core and the metallic shielding layer of a high- voltage cable with the cable connected to other high-voltage equipment. The diagram below shows an example of measurement.
-
Page 85: Measuring Voltage
3.3 Measuring Voltage 3.3 Measuring Voltage The instrument measures the voltage of an external circuit, e.g., commercial power supply. AC and DC are distinguished automatically. To prevent damage to the instrument and personal injury, observe the precautions below. • Maximum rated voltage to ground: 1,000 V AC (CAT III), 600 V AC (CAT IV) •... - Page 86 3.3 Measuring Voltage Procedure Connect alligator clips to the ends of test leads. Insert it fully. Move the shutter to reveal the + and - terminals. Connect the red test lead to the + termi- nal and the black test lead to the - termi- nal.
- Page 87 3.3 Measuring Voltage Clip the ends of the test leads to the cir- cuit to be tested. When the voltage exceeds 50 V, the mark and key lamp blink. Read the voltage indication. key is not used. Blinking Measured voltage...
-
Page 88: Measuring Temperature
3.4 Measuring Temperature 3.4 Measuring Temperature 3.4.1 Measurement Procedure Do not attempt to measure the tempera- ture of objects carrying a voltage. Doing so will result in a short-circuit accident or an electrocution accident. Temperature sensors may be damaged by high voltage or static electricity. - Page 89 3.4 Measuring Temperature Temperature measurement begins auto- matically. Read the temperature indication. Press key or disconnect the tem- perature sensor to stop measurement. lights up and the last mea- surement is held. After measuring temperature (When the resistance is not measured.) Detailing the above displaySee 6.3.2 "Clearing ...
- Page 90 3.4 Measuring Temperature • If temperature measurement is stopped using the key, measurement may be resumed by pressing key. • When an insulation resistance measurement is held, if the temperature sensor is disconnected, the tempera- ture indication switches to the elapsed time indication at the time of insulation resistance measurement.
-
Page 91: Advanced Measurement
4.1 Using Timer Advanced Measurement 4.1 Using Timer Used to set the instrument to auto- What is it used for? matically stop at a specified time. If the timer is set during insulation resistance measurement, the measurement automatically ends at the set time. Selectable time: 30 sec. - Page 92 4.1 Using Timer Press the key to confirm the entry. If the key is pressed without pressing key, the instrument returns to a standby state with the time unchanged. When the timer is successfully set, the [TIMER] indicator lights. Holding down the key for longer than one second generates a test voltage, and measurement begins.
- Page 93 4.1 Using Timer Timer not used Procedure When the instrument is in a standby state, press the key. The time indication will blink. Press the key to select - - min - - s. - - min - - s is also selected by pressing key.
- Page 94 4.1 Using Timer Checking set time Procedure When the instrument is in a standby state, press the key. The currently set time blinks. Check the time. Press the key to return to the previous screen.
-
Page 95: Displaying Pi And Dar
4.2 Displaying PI and DAR 4.2 Displaying PI and DAR Used to check whether insulation re- sistance increases with time after a voltage is applied. What is it used for? (When the PI value or the DAR val- ue is close to 1, the instrument de- termines that the insulation of the object under test is deteriorated.) •... - Page 96 4.2 Displaying PI and DAR Procedure Measure insulation resistance. To determine PI, continue measurement for 10 minutes (for a default time setting). To determine DAR, continue measurement for one minute. Stop measurement. Press the key several times to display PI, DAR 1 min/15 s, or DAR 1 min/30 s.
- Page 97 4.2 Displaying PI and DAR Measurement Interval Right: 1st Left : 2nd Resistance Right: 1st measurement Left : 2nd measurement Measurement Interval 1st : 1 min. 2nd : 10 min. Resistance Right : 1st 30 G Left : 2nd 60 G Substitute into the formula;...
- Page 98 4.2 Displaying PI and DAR Blinking resistance indication on PI or DAR display screen When the resistance indication blinks, the displayed reading may be incorrect. (Insu- lation resistance changed rapidly before end of set specified time, affecting mea- surement range so that the internal circuit failure to respond) When the resistance reading blinks, regard the PI or DAR value as a reference.
-
Page 99: Temperature Compensation (Tc)
4.3 Temperature Compensation (TC) 4.3 Temperature Compensation (TC) Used to acquire insulation resis- tance at a temperature differing from What is it used for? the actual temperature at which measurement is performed. • The instrument converts measured resistance to the resistance at a reference temperature and displays the result. - Page 100 4.3 Temperature Compensation (TC) Press the key. [TABLE No.] blinks. Choose a table No. from 0 to 9 using the key. Press the key to confirm the choice of table No. The reference temperature blinks. Adjust the reference temperature using key.
- Page 101 4.3 Temperature Compensation (TC) Press the key to confirm the ref- erence temperature. [TC] lights up and the instrument enters temperature compensation mode. The LCD displays the resistance at the reference temperature converted from the measurement. Bar graph (Value before compensation) Digital value (Value after...
-
Page 102: Exiting Temperature Compensation Mode
4.3 Temperature Compensation (TC) • Resistance measured by the step voltage test cannot converted using temperature compensation. • In temperature compensation mode, leakage current may be displayed by pressing the key but it cannot be corrected for. Press the keys shown in the table below to switch the indi- cation. -
Page 103: Step Voltage Test
4.4 Step Voltage Test 4.4 Step Voltage Test Used to determine the effect of the What is it used for? test voltage level on insulation resis- tance of an object. What is a step voltage test? • The instrument increases the test voltage gradually and monitors the resultant insu- lation resistance and leakage current. -
Page 104: Setting And Conducting A Step Voltage Test
4.4 Step Voltage Test • The voltage is increased when one minute has passed at each voltage step. When 5 minutes has passed in total, measurement automatically stops. STEP5.00 kV Measurement Measurement End of 5 kV Measurement Measurement 4 kV Measurement 3 kV Measurement... - Page 105 4.4 Step Voltage Test Press the key. The voltage indication will stop blinking and the instrument enters the step volt- age test mode. Lighting Interval for 1 step To start the step voltage test, hold down the key for more than one second. mark and the start blinking, and insulation resistance or leakage current appears on the...
- Page 106 4.4 Step Voltage Test The test voltage rises at regular intervals and the test stops automatically. The last data is held and displayed. lights up.) Actual output voltage Last resistance Elapsed time at completion measurement • While [ ] is on (temperature compensa- tion mode), STEP cannot be selected.
-
Page 107: Viewing Detailed Data Of Each Step After Step Voltage Test
4.4 Step Voltage Test 4.4.2 Viewing Detailed Data of Each Step after Step Voltage Test Procedure When the instrument is in standby state after step voltage test, press the key. will blink and the LCD displays the details of the step voltage test data. The first page shows the data at the test voltage for step 1. - Page 108 4.4 Step Voltage Test To display other detailed data, use the following keys. Indications to be switched Keys used Voltages and data at 5 steps Insulation resistance leakage current Temperature/ Elapsed time to the Humidity step currently displayed (Temperature and humidity are measured imme- diately before or after the test.) Test voltage (setting) and actual output voltage are toggled automatically.
-
Page 109: Exiting Step Voltage Test Mode
4.4 Step Voltage Test 4.4.3 Exiting Step Voltage Test Mode Procedure Press the key in standby state, and the voltage indication will blink. To turn off the [STEP] indicator, press key several times. Press the key. The voltage indication changes from blinking to constantly lit. - Page 110 4.4 Step Voltage Test...
-
Page 111: Recording Measurement Data (Memory Function)
Recording Measurement Data (Memory Function) The instrument stores measurement data, settings, date and time in the internal memory. Data is not erased when the power is shut off. There are two recording methods. (Combinable) Manual Stores held data recording: Logging Stores insulation resistance data at regular intervals. - Page 112 • The table below shows storable data. Recording Data stored in one record: Type of data method record 1 Data No., year/month/day/hour/ minute/second (at the end of resistance measurement), elapsed time, temperature, Standard mea- humidity, test voltage (setting), surement data actual output voltage, resis- (Data when tance (last) / (after 15 sec.) /...
-
Page 113: Recording Measurement Data
5.1 Recording Measurement Data 5.1 Recording Measurement Data 5.1.1 Manual Recording (Recording result of one measurement session) After measurement has been completed, store the data. • The data numbers available for manual recording are divided into 10 groups (10 records per group), thus up to 100 records can be stored. - Page 114 5.1 Recording Measurement Data Procedure Measure insulation resistance or tem- perature and stop measurement. (Tem- perature and humidity can also be entered by key operation.) Temperature only temperature humidity may be stored as a manual record. The instrument, however, has to be in the standard measurement mode (both [ STEP and [...
- Page 115 5.1 Recording Measurement Data Press the key. [MEMO No.] blinks and data is recorded. If a number with indicator is cho- sen, existing data will be overwritten with new data. • Temperature may be measured either before or after insulation resistance measurement.
-
Page 116: Logging Recording (Recording At Regular Intervals)
5.1 Recording Measurement Data 5.1.2 Logging Recording (Recording at regular intervals) The instrument stores insulation resistance data at set inter- vals. • A total of 10 data numbers are used for logging records; Lr0 to Lr9. • Each record contains up to 360 loggings. Selectable recording intervals: 15 sec., 30 sec., 1 min., 2 min., 5 min. - Page 117 5.1 Recording Measurement Data Operation Flow Set data No. See "Setting Data No." (page 112). Set Recording interval. See "Setting Recording Interval" (page 114). Set timer. See "Setting Timer" (page 114). Start measurement See "Measuring" (page 115). ...
- Page 118 5.1 Recording Measurement Data Exiting Setup Screen or Logging Recording Mode • To exit the setup screen, press the key. No changes will be made to the set- tings. • To exit the logging recording mode, press key. Setting Data No. When held data is displayed, logging recording cannot be selected.
- Page 119 5.1 Recording Measurement Data Press the key to display a data No., choosing from [Lr0 - Lr9]. When temperature and/or humidity are already held, if the key is pressed, the data number of another group appears. Example:. . . n0 P0 Lr0 A0 b0 . . . is indicated for a data No., data is already recorded under that number.
- Page 120 5.1 Recording Measurement Data Setting Recording Interval Procedure Press the key to display a desired recording interval. Press the key. The time changes from blinking to con- tinuous and the instrument enters the logging recording mode. Setting Timer Set the timer. (Selectable time: 30 sec.
- Page 121 5.1 Recording Measurement Data Press the key to set the time. If not using the timer, press the key. - - min - - s appears. Press the key. The instrument returns to the standby state, in which logging recording is avail- able.
- Page 122 5.1 Recording Measurement Data Insulation resistance measurement stops under one of the three conditions below. 1. Time equal to recording interval x maximum number of loggings has elapsed. 2. The set time of the timer has elapsed. 3. The key is pressed. After measurement has been completed, the data No.
- Page 123 5.1 Recording Measurement Data Recording the Data in Memory Procedure Press the key, after which [MEMO No.] will blink, then extinguish. The logging data has been stored in the memory. Temperature, voltage, and leakage current are not stored as logging records.
-
Page 124: Checking Recorded Data
5.2 Checking Recorded Data 5.2 Checking Recorded Data • The content of a manual record is viewed on the LCD of the instrument. • For logging records, only the last value is viewed on the LCD of the instrument. The entire record is viewed on a PC using PC software. - Page 125 5.2 Checking Recorded Data The type of manual record is identified as follows. When neither Standard measurement [STEP] or [TC] is data off. When [TC] is on. Temperature compensa- tion data When [STEP] is on. Step voltage test data For logging records, only the last data is displayed.
- Page 126 5.2 Checking Recorded Data Temperature Compensation Data Indications to be switched Keys used Insulation resistance Leakage current (after compensation) (no compensation) Actual measurement temperature/ Elapsed time Reference temperature Date of measurement Measurement time Data Return to the standby screen. Automatic Test voltage setting ...
- Page 127 5.2 Checking Recorded Data Step Voltage Test Data There are two screens showing step voltage test data; Rep- resentative data screen and detailed data screen. Identification of Screen Content of screen screen Representative Data of last step is off. data Detailed data Data of every step blinks...
- Page 128 5.2 Checking Recorded Data Detailed Data Screen Press the key on the representative data screen, after which will blink and reveal the detailed data screen. The LCD shows the data from the first step. Press the keys shown in the table below to switch the indica- tion.
-
Page 129: Deleting Recorded Data
5.3 Deleting Recorded Data 5.3 Deleting Recorded Data 5.3.1 Deleting Data of Chosen No. Select the data to be deleted, and delete only this selection. Procedure Press the key in standby state. Press the key to display the num- ber of the data to delete. Press the key. -
Page 130: Deleting All Data
5.3 Deleting Recorded Data 5.3.2 Deleting all Data Delete all the manual records and logging records simulta- neously. Procedure Press the key in a standby state. Press the key twice. [ALL CLr] appears. Press the key, and [ALL CLr] blinks and all the data are deleted. If the key is pressed without the key being pressed, the LCD... -
Page 131: Other Functions
6.1 Changing and Checking Interval Setting for PI Calcu- lation Other Functions 6.1 Changing and Checking Inter- val Setting for PI Calculation Two intervals required to display the PI value may be changed to user-set intervals. Selectable range: 1 min. to 30 min. (Default t1=1 min., t2=10 min.) 6.1.1 Changing Interval Setting Procedure... - Page 132 6.1 Changing and Checking Interval Setting for PI Calcu- lation Press the key. The first interval is confirmed and the second interval will blink. ([t2] lights up.) Set the timer using the key. The 2nd interval must be longer than the 1st interval.
-
Page 133: Checking Interval Setting
6.1 Changing and Checking Interval Setting for PI Calcu- lation 6.1.2 Checking Interval Setting Procedure Press the key several times while in standby state to display PI. Press the key. The setting of the first interval [t1] will blink. Check the setting. Press the key. -
Page 134: Changing And Checking Voltage Application Time For Step Voltage Test
6.2 Changing and Checking Voltage Application Time for Step Voltage Test 6.2 Changing and Checking Voltage Application Time for Step Voltage Test • Change the voltage application time for step voltage test. Selectable presets: 30 sec., 1 min., 2 min. , 5 min. (Default is 1 min.) •... - Page 135 6.2 Changing and Checking Voltage Application Time for Step Voltage Test Press the key. The voltage indication changes from blinking to continuously lit, and the instrument enters the step voltage test mode. STEP is lighting. Interval for 1 step Press the key.
-
Page 136: Checking Time Setting
6.2 Changing and Checking Voltage Application Time for Step Voltage Test Press the key. The time changes from blinking to con- tinuously lit. Setting of the time has been completed. The time can also be set up on a PC •... -
Page 137: Entering Temperature And Humidity Measured With External Thermometer And Hygrometer
6.3 Entering Temperature and Humidity Measured with External Thermometer and Hygrometer 6.3 Entering Temperature and Humidity Measured with External Thermometer and Hygrometer Enter temperature and humidity measured with external thermometer and hygrometer instead of the temperature measuring function of the instrument. •... -
Page 138: Entering And Saving
6.3 Entering Temperature and Humidity Measured with External Thermometer and Hygrometer 6.3.1 Entering and Saving Entering Temperature and Humidity Procedure Press the key in standby state. The temperature will blink. Enter temperature using the keys. keys: Move the cursor. keys: Raise and lower. Press the key. - Page 139 6.3 Entering Temperature and Humidity Measured with External Thermometer and Hygrometer Enter humidity using the keys. keys: Move the cursor. keys: Raise and lower. Press the key. The instrument holds the entered tem- perature and humidity values. • Even if humidity is held, when the temperature sensor is connected, the humidity is not displayed •...
- Page 140 6.3 Entering Temperature and Humidity Measured with External Thermometer and Hygrometer Saving Temperature and Humidity Data Save the temperature and humidity data in the memory. Procedure Press the key. Press the keys to choose a data No. Press the key. [MEMO No.] will blink and the data is recorded.
-
Page 141: Clearing Indications Of Temperature And Humidity Stored Data
6.3 Entering Temperature and Humidity Measured with External Thermometer and Hygrometer 6.3.2 Clearing Indications of Temperature and Humidity Stored Data To turn off the indicator and clear stored tem- perature and humidity data, follow the procedure below. Procedure If a temperature sensor is connected to the instrument, disconnect the sensor. -
Page 142: Communicating With Pc
6.4 Communicating with PC 6.4 Communicating with PC Used to make a table or graph of the What is it used for? data stored in the memory or create a report. Data saved in the memory may be downloaded to a PC and the instrument settings may be changed using a PC. -
Page 143: Installing Data Analysis Software For 3455
Install the software by following the on- screen instructions. Refer to the user’s manual which is included in CD. "Data Analysis Software for 3455" can be dowloaded from the HIOKI website http://www.hioki.com/... -
Page 144: Installing Driver
6.4 Communicating with PC 6.4.2 Installing Driver Installation procedure Log in as "administrator" or as other such administrative authority. Before installing, close all applications currently running on the computer. Execute the [driverSetup_English.msi] file inside the [/USB Driver] on the CD, and follow the instructions as shown on the screen to start the installa- tion. -
Page 145: Downloading Data To Save To Pc/ Setting Up Instrument On Pc
6.4 Communicating with PC 6.4.3 Downloading Data to Save to PC/ Setting up Instrument on PC Use a 2-m or shorter USB cable to avoid noise. Do not connect to the instrument if test leads are still connected. Procedure Move the shutter to reveal the USB ter- minal. - Page 146 About the "Data Analysis Software for 3455 User's Manual" • To open the user's manual, click [Start] and then select [Programs] - [HIOKI] - [3455] - [Data Analysis Software For 3455 User's Manual]. • The user's manual is stored in the ] folder on the supplied CD.
-
Page 147: Specifications
7.1 General Specifications Specifications 7.1 General Specifications -10°C to 40°C (14°F to 104°F), less than Operating temperature 80% RH (no condensation) and humidity 40°C to 50°C (104°F to 122°F), at 50°C and below relative with linear decrease up to 50% RH (Battery pack charge: 0°C to 40°C, less than 80% RH) Storage... - Page 148 7.1 General Specifications (1) Insulation resistance/voltage mea- Terminals surement: +, -, GUARD (GUARD ter- minal is used for insulation resistance/ leakage current measurement only.) (2) Other: Temperature sensor, USB, and AC adapter (1) and (2) are mutually exclusive. • AA alkaline battery (LR6) 6, Rated Power supply ×...
- Page 149 7.1 General Specifications Approx. 260W × 251H × 120D mm Dimensions (Approx. 10.2"W×9.9"H×4.7"D) (Not including handle and protrusions) Approx. 2.8 kg (Approx. 98.8 oz.) Mass (Including the accessories; test leads, alli- gator clips and alkaline battery) Standards Safety EN61010 EN61326 Product war- 3 years ranty period...
- Page 150 7.1 General Specifications • USB ver. 2.0 (full speed) Interface • Used for communications using PC application software (Data Analysis Software for 3455) • Transmits data in memory from the PC application instrument to PC. software • Edits the instrument settings on PC. •...
- Page 151 7.1 General Specifications • Temperature compensation function Additional • PI/DAR display function Functions • Step voltage test function • Data memory function Manual recording (100 records), logging recording (10 records), recording, recall display, single record deletion, records deletion, data transfer to PC using software •...
- Page 152 7.1 General Specifications • LCD backlight function Additional Functions • Auto power off function • Buzzer function • Communications function • Battery pack charge function Charges the 9459 BATTERY PACK using the AC adapter. Rapid charging time: Approx. 3 hours (at 23°C) •...
-
Page 153: Measurement Specifications
7.2 Measurement Specifications 7.2 Measurement Specifications Values measured: Insulation resistance, leakage current, voltage, and temperature 7.2.1 Insulation Resistance Measurement Selectable range: 250 V DC to 5.00 kV Measurement test voltage Setting method: • Choose from test voltage presets (250 V, 500 V, 1 kV, 2.5 kV, 5 kV) •... - Page 154 7.2 Measurement Specifications Preset Test Voltage Measuring Range Preset test voltage Measuring range (setting) 0.00 M to 500 G 250 V 0.00 M to 1.00 T 500 V 0.00 M to 2.00 T 1 kV 0.00 M to 5.00 T 2.5 kV 0.00 M...
- Page 155 7.2 Measurement Specifications Measurement Accuracy Temperature and humidity range for guaranteed accuracy: 0°C to 28°C, less than 80% RH (no condensation) Measurement Measuring range accuracy Equal to or less than the resistance ±5%rdg.±5dgt. obtained by dividing the test voltage (set value) by 100 nA. Greater than the resistance calculated by dividing the test voltage (setting value) by 100 nA, less than or equal to...
-
Page 156: Leakage Current Measurement
7.2 Measurement Specifications Measurement accuracy × 1 is added to Temperature the accuracy. characteristics When the 9750-11, 9750-12 TEST LEAD (10 m) is used, a resistance of 501 G or more is not guaranteed. (with an ambient temperature outside the range of 0°C to 28°C) Within 15 sec. -
Page 157: Voltage Measurement
7.2 Measurement Specifications Measurement accuracy × 1 is added to Temperature the accuracy. characteristics When the 9750-11, 9750-12 TEST LEAD (10 m) is used, the accuracy is not guar- anteed if the current is below the value obtained by dividing the test voltage (set value) by 500 G. -
Page 158: Temperature Measurement
7.2 Measurement Specifications 7.2.4 Temperature Measurement Temperature and humidity range for guaranteed accuracy: 23±5°C less than 80% RH (no condensation) Measurement Range, Accuracy Accuracy when using with the 9631 TEMPERATURE SEN- Measuring range Measurement accuracy ±1.5°C -10.0°C to -0.1°C ±1.0°C 0.0°C to 40.0°C ±1.5°C 40.1°C to 70.0°C... -
Page 159: 9751-01/-02/-03 Alligator Clips Specifications
7.3 9750-01/-02/-03/-11/-12/-13 and 9751-01/-02/-03 ALLI- 7.3 9750-01/-02/-03/-11/-12/-13 and 9751-01/-02/-03 ALLIGA- TOR CLIPs Specifications Operating -10°C to 50°C (14°F to 122°F), less than temperature 80% RH (no condensation) and humidity Indoors, Pollution degree 2, Operating Up to 2000 m (6562 ft.) ASL environment Storage -10°C to 50°C (14°F to 122°F), less than... - Page 160 7.3 9750-01/-02/-03/-11/-12/-13 and 9751-01/-02/-03 ALLI- GATOR CLIPs Specifications...
-
Page 161: Maintenance And Service
The calibration period varies depending on the status of the instrument or installation environment. We recommend that the calibration period be determined in accordance with the status of the instrument or installation environment. Please contact your Hioki distributor to have your instrument peri- odically calibrated. -
Page 162: Troubleshooting
8.1 Troubleshooting 8.1 Troubleshooting If the instrument is not working correctly, check the trouble- shooting table below first before contacting authorized Hioki distributor or reseller. Reference Problem Check Item Action Section •Is the battery installed? Install new 2.1.1 •Is battery battery (P.36) - Page 163 8.1 Troubleshooting Reference Problem Check Item Action Section The output Monitored voltage is low- voltage during Is the resis- ered for mea- Appendix 1 resistance tance small? surement of (P .165) measurement low resistance is low. values. Temperature Is the sensor Insert the sen- is not 2.5 (P.58)
-
Page 164: Cleaning
8.2 Cleaning 8.2 Cleaning To clean the instrument, wipe it gently with a soft cloth moistened with water or mild detergent. Wipe the instrument with a dry cloth for finishing. Wipe the LCD gently with a soft, dry cloth. 8.3 Error Display Error Details Action... - Page 165 8.3 Error Display Error Details Action display When power is turned on for Reinstall the the first time after the backup battery. battery is replaced, Err02 appears. If Err02 appears even after This Err02 the battery has been rein- requires stalled, the life of the backup repair.
-
Page 166: Performing System Reset
8.4 Performing System Reset 8.4 Performing System Reset System reset returns the settings of the instrument to their defaults (excluding date and time), but this will not clear the memory data. Procedure While holding down the key in standby state, press the key. -
Page 167: Discarding The Instrument
8.5 Discarding the Instrument 8.5 Discarding the Instrument When disposing of this instrument, remove the lithium bat- tery and dispose of battery and instrument in accordance with local regulations. • To avoid electric shock or malfunction of the instrument, do not attempt to use the instrument again by installing a new lithium battery. - Page 168 8.5 Discarding the Instrument Removal of Lithium Battery Phillips screwdriver, hexagonal wrench, Tools: and tweezers Turn off power to the instrument and remove the AA batteries and battery pack. See 2.1.1 "Installing or Replacing the Battery" (page 36), and 2.1.2 "Installing the Battery Pack (Rechargeable nickel-hydrogen battery)"...
- Page 169 8.5 Discarding the Instrument Remove the screw and pin holding the two printed circuit boards, and remove them. The PCB nearest the LCD should not be removed. Remove Lithium Battery...
- Page 170 8.5 Discarding the Instrument The battery is located on the remaining PCB as shown in the illustration on the previous page. Insert tweezers or other similar pointed tool between the battery and the battery holder. Raise the battery to remove.
-
Page 171: Appendix
Appendix 1 Test Voltage Characteristic Graph Appendix Appendix 1 Test Voltage Characteristic Graph Measurement resistance [ Measurement resistance [... -
Page 172: Appendix 2Example Of Insulation Resistance Criteria
Appendix 2 Example of Insulation Resistance Criteria Appendix 2 Example of Insulation Resistance Criteria Primary criteria for insulation resistance of high-voltage cable (as a rough guide) Insulation Measurement Part of cable resistance Judgment voltage [V] [M] Non- 5,000 or more defective 5,000 500 to below... -
Page 173: Appendix 4Temperature Compensation Table
Appendix 4 Temperature Compensation Table Appendix 4 Temperature Compen- sation Table The temperature compensation function uses the tables below. • Tables No.0 to 8 are based on Chinese standards. • Table No.9 is based on the US IEEE standards. Table No.0 Oil-impregnated power transformer Object under test Selectable reference... - Page 174 Appendix 4 Temperature Compensation Table Table No.1 Motor stator winding: thermoplas- Object under test tic insulating material 5 to 75°C, (default 20°C) Selectable reference temperature range 5.0 to 70.0°C Convertible range of actual temperature used for measurement Converted to a resistance value at Compensation the reference temperature using formula...
- Page 175 Appendix 4 Temperature Compensation Table Table No.2 Motor stator winding: Class B ther- Object under test mosetting insulating material 5 to 100°C, (default 20°C) Selectable reference temperature range 5.0 to 70.0°C Convertible range of actual temperature used for measurement Converted to a resistance value at Compensation the reference temperature using formula...
- Page 176 Appendix 4 Temperature Compensation Table Table No.3 to 8 Power cable (Classified in one of Object under test the tables No.3 to 8 depending on material and operating voltage.) Selectable range of each table is Selectable reference as follows. Set to 20°C by default. temperature range Table No.3: -5 to 40°C Table No.4: -5 to 36°C...
- Page 177 Appendix 4 Temperature Compensation Table Temperature Conversion Coefficient for Power Cables Coefficient A Polyvinyl chloride Oil filled Natural Temp Natural Butyl insulated cable insulated butadiene eratu rubber rubber cable styrene 1 to 3 kV 6 kV [°C] Table Table Table Table Table Table...
- Page 178 Appendix 4 Temperature Compensation Table Temperature Conversion Coefficient for Power Cables Coefficient A Polyvinyl chloride Oil filled Natural Temp Natural Butyl insulated cable insulated butadiene eratu rubber rubber cable styrene 1 to 3 kV 6 kV [°C] Table Table Table Table Table Table...
- Page 179 Appendix 4 Temperature Compensation Table Table No.9 Rotating machinery Object under test 20 to 60°C, (Default 40°C) Selectable reference temperature range 20 to 60°C Convertible range of actual temperature used for measurement Converted to a resistance value at Compensation the reference temperature using formula the formula below and result dis- played.
- Page 180 Appendix 4 Temperature Compensation Table...
Need help?
Do you have a question about the IR3455-01 and is the answer not in the manual?
Questions and answers