Table of Contents
Advertisement
Quick Links
PRECAUTIONS
Please follow these precautions:
To prevent fire or sh ock hazard, do n ot expose the unit to rain or
moisture.
To prevent electrical shock, do no t open the unit. Refer to qualified
personnel for service only.
Do not use the unit continuously for more than 24 hours with camera
auto focus on. It may cause damage to the camera lens.
Be careful not to spill water or other liquid s onto the unit, or allow
combustible or metallic objects to get inside the base.
Unplug the visualiser from the wall outlet when it is not
being
used for a long period of time.
Clean the unit with a sof t cloth lightly moistened w ith a mild
detergent solution.
Clean the lens carefully with an a ir spray or soft dry cloth to avoid
scratching it.
Rotate the camera lens cap before power the unit on.
1
Advertisement
Table of Contents

Subscribe to Our Youtube Channel
Related Manuals for Qomo QPC30M


Summary of Contents for Qomo QPC30M
- Page 1 PRECAUTIONS Please follow these precautions: To prevent fire or sh ock hazard, do n ot expose the unit to rain or moisture. To prevent electrical shock, do no t open the unit. Refer to qualified personnel for service only. Do not use the unit continuously for more than 24 hours with camera auto focus on.
-
Page 2: Table Of Contents
Contents Product Introduction ..........3 Parts Identification .............3 Making Adjustments...........4 Control Panel ..............7 Remote Control Instruction ........8 Installing Visualizer Software ........9 USB Port..............10 USB Image Capture ..........10 Specification .............12... -
Page 3: Product Introduction
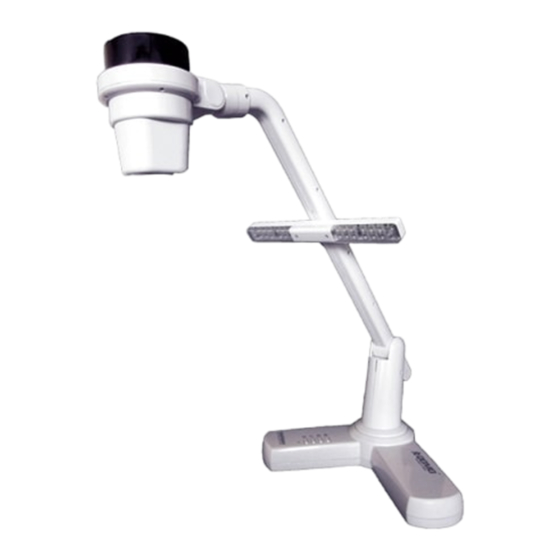
Product Introduction Thank you for purchasing the visualiser. This visualiser comes w ith a new design which is more sim ple, flexible, portable and with a high resolution. The visualiser can be used to pr esent 3D o bjects, texts, graphs, transparencies and nega tive films. -
Page 4: Making Adjustments
Making Adjustments On the visualiser, t here are six places can be adjusted. 1. Adjust Mechanical Arm This adjustment can in crease and decrease image. Hold the visualiser base with o ne hand, carry the mechanical arm with another hand an d adjust it up and down. - Page 5 3. Adjust Camera Box Hole the camera bo x and rotate it up and dow n. The camera box can b e rotated 45 degrees. (as blow illustration) Hold the camera bo x and rotate it left and right. The camera box can b e rotated 90 degrees.
- Page 6 4. Adjust Camera Head Hold the c amera connector with one h and, rotate the camera b ox connector with another hand. The camera head can be rotated 90 degrees. (as blow illustration) 5. Adjust Base Bracket Hole the vislualizer base with one hand, rotate the base bracket with another hand.
-
Page 7: Control Panel
Control Panel There are four touch buttons located on the top of visualiser base: T : Enlarge image · : Reduce image · ·Light:Turn the LED light on/of f. Press and hol d for three seconds to delete all the stored files under recall status.. ·Power/Input: Turn the visualiser on/off and switch input source betwee n CAM and PC ·Pilot Light: In standby mode the co lor of the light will be red ,in CAM... -
Page 8: Remote Control Instruction
Remote Control Instruction POWER (Control the visualiser On/Off) LAMP (Control the arm lights. Press and hold for three seconds to delete all the stored files under recall status) FREEZE (Freeze the image) NEG (Display film negatives) MIRROR (V-Reverse the image) SPLIT (Image Split function) ROTATE (Rotate the image) XGA (Switch among XGA , SXGA , 720P and WXGA) -
Page 9: Installing Visualizer Software
B&W (Switch between Color mode and Black & White mode) TITLE (Freeze the top 1/8 of the screen) TEXT (Switch between image/text mode. Delete the selected file under recall status) VOL+/- (Increase or decrease the volume)(Option) TELE/WIDE (Increase and decrease magnification) FAR/NEAR (Focus near or far) AUTO (To auto adjust brightness, auto white balance and auto focus) CAM/PC (CAM or PC signal output selection) -
Page 10: Usb Port
Shut down your computer when pr ompted in order for the changes to take effect. C. Use the USB2.0 cable provided to connect you r computer to the visualiser before your computer is restarted. USB Port The USB port can be used to store still images from the visualiser in a computer. - Page 11 Click [Start] -> [Progra m] -> [V ideoCap] -> “ VideoCapx.xx” (x.xx is software’s version) to open the software. A. Static Images Snap Click “Capture” -> “Capt ure Frame”, i nput the file name in dia log box, or you can click icon on the toolbar, then input file name in dialog window.
-
Page 12: Specification
Specification Pickup Device CMOS color sensor with 2.0 Mega Pixels Output Resolution XGA, SXGA, 720P, WXGA Zoom 8x optical, 10x digital Focus Auto/manual White Balance Auto/manual Camera Head Rotation Horizontally 180° Lens Rotation Vertically 180° Negative/positive conversion Black/white and color selection Image Split Image Title... - Page 13 Lighting 3W LED lamps Operating Temperature: 0ºC~40ºC Power AC 100~240V,50/60Hz Setup: 341x262x492mm Dimensions (mm) Folded:528x208x159mm Weight 1.6kg * Design and specifications are subject to change without notice.
Need help?
Do you have a question about the QPC30M and is the answer not in the manual?
Questions and answers